Archive for May 18, 2015

Don’t Forget to Drink Your Vitamins

This may not seem like the most likely post for mid-May in South Texas.

But, with the rainy weather, May being an impossibly busy month, and my recent cough due to sleep deprivation and too much stress, I grabbed from my stash of Bone Broth in the freezer to start this crazy work week off on the right foot.


So many more people are going the all-natural route in trying to head off the sickies, and one of the easiest and most comforting ways to do so is with a large cup of salted bone broth. I can tell you, this stuff is MAGIC in a cup.
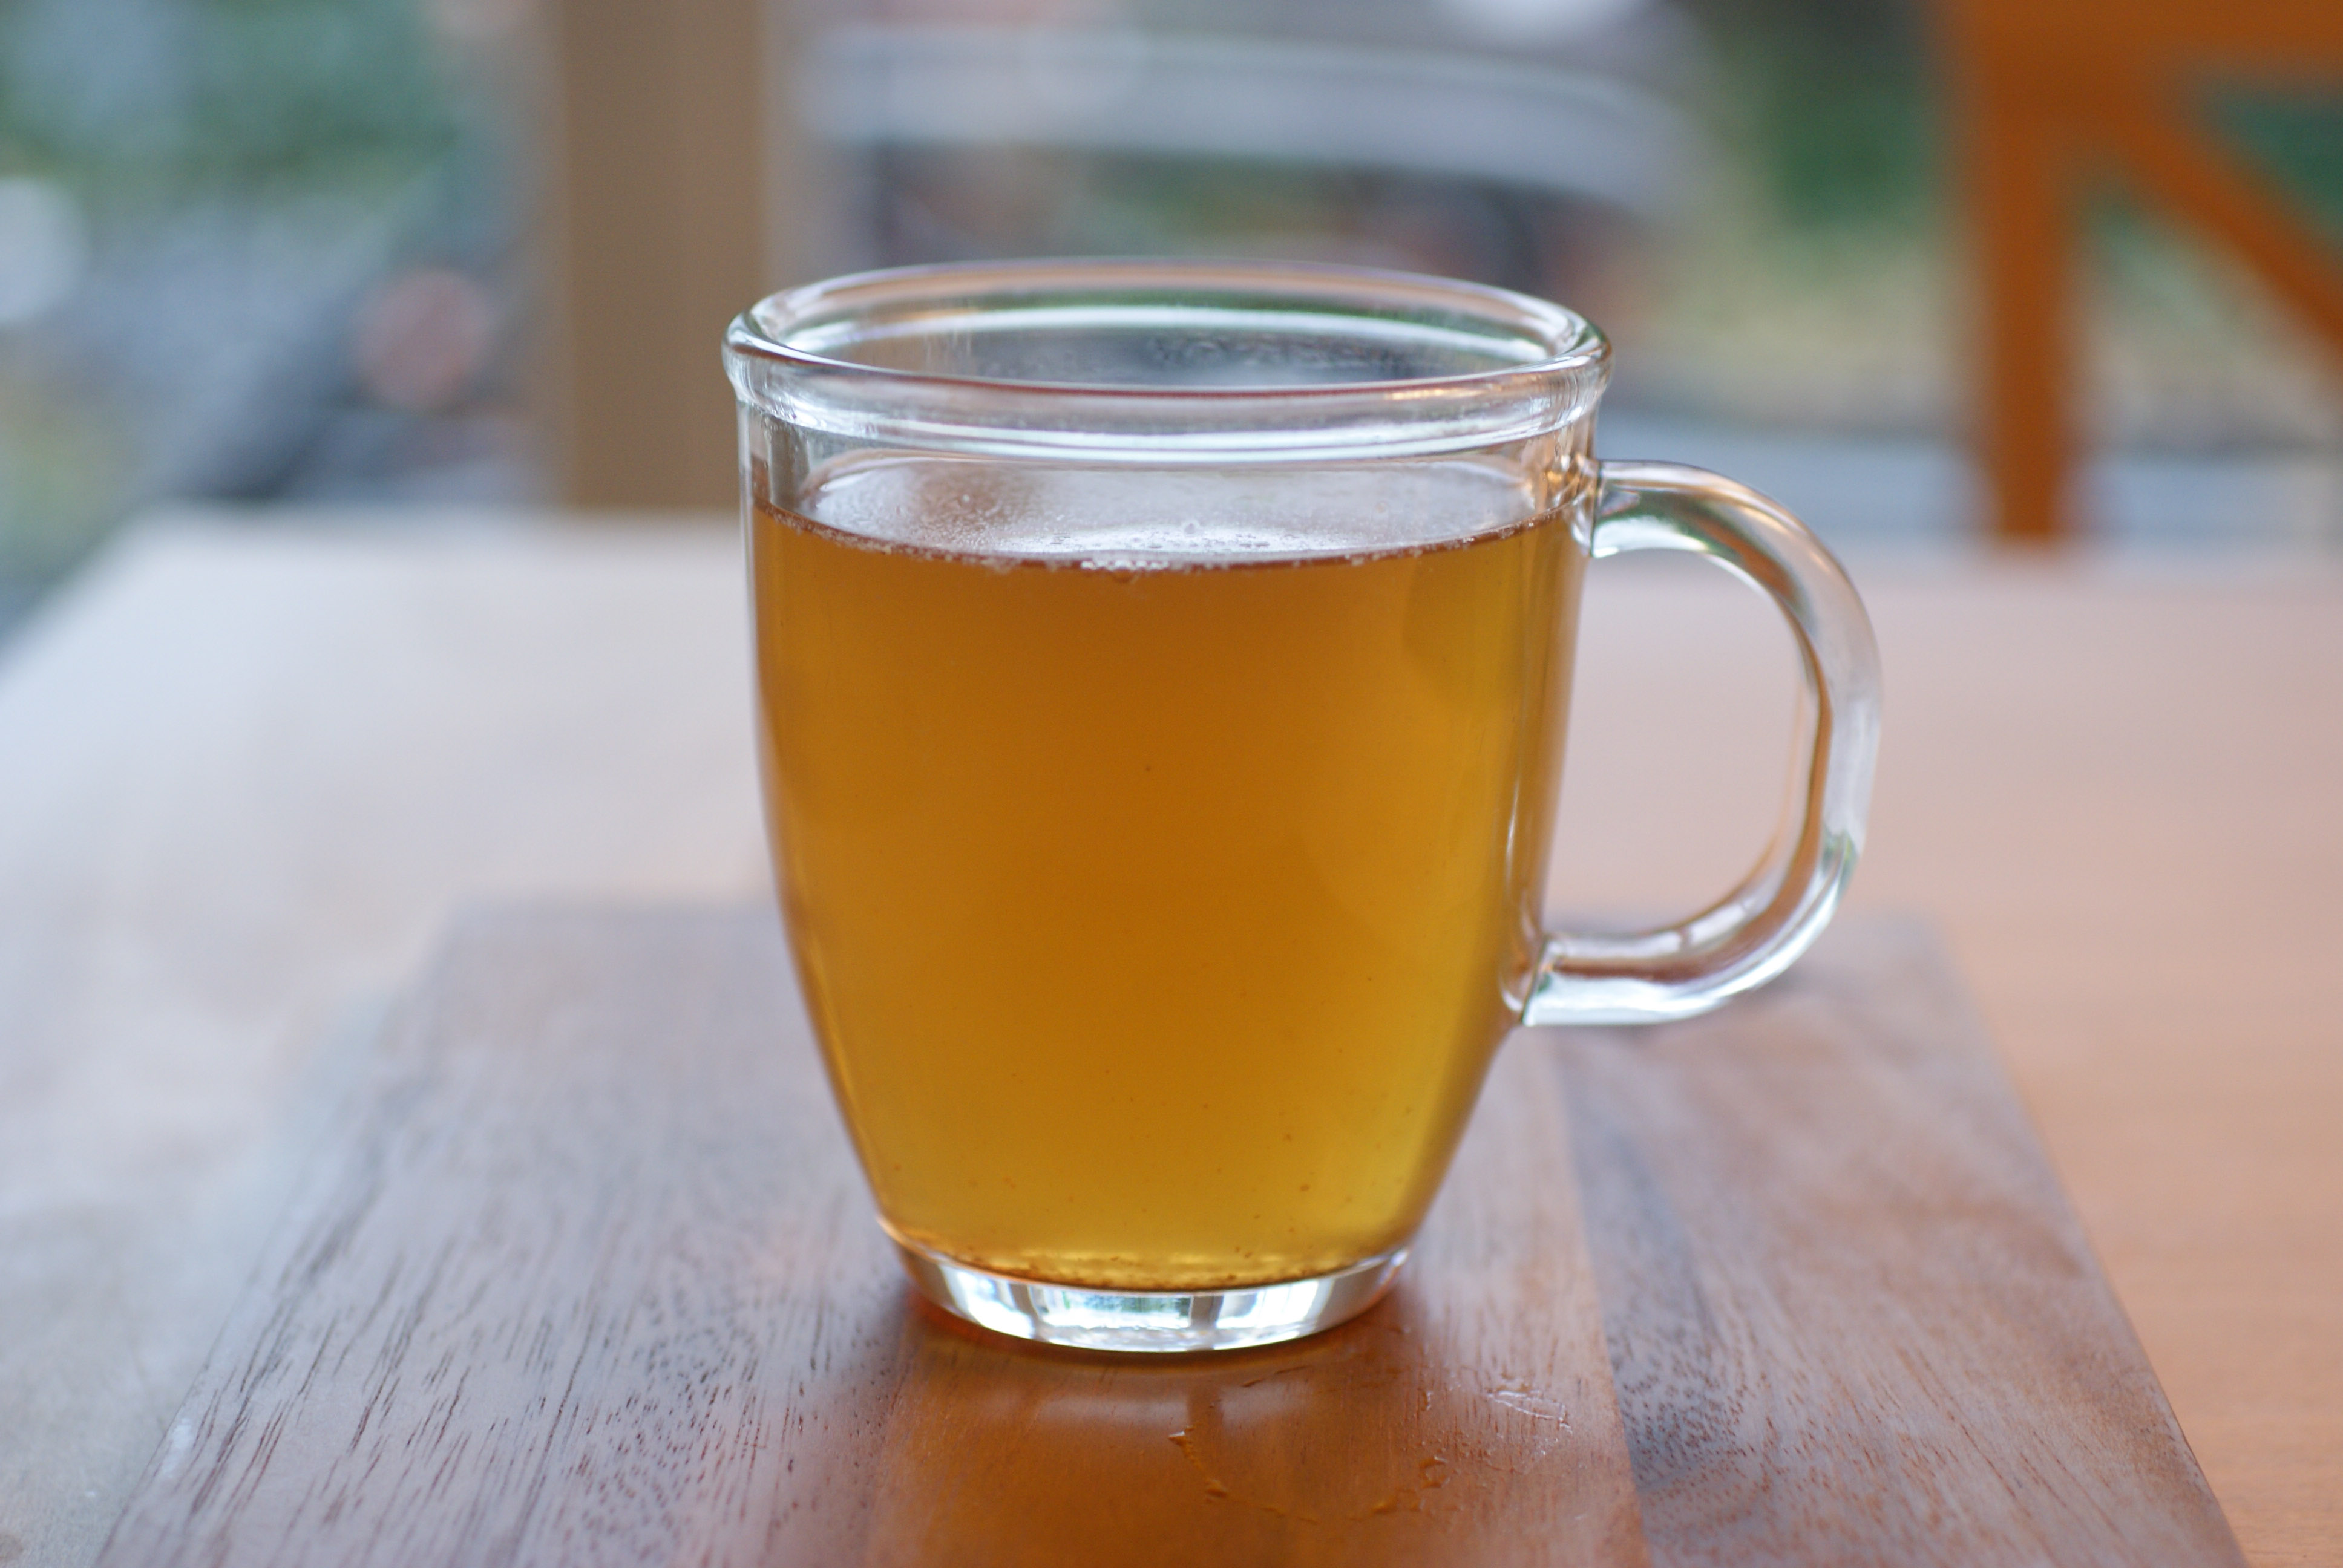
https://cdn0.vox-cdn.com/uploads/chorus_asset/file/3358286/Bone-Broth.0.jpg

I got the idea in my head that I wanted to make broth right after getting back from Colorado last year and reading about this amazing stuff. I called around to several grass-fed ranchers to inquire about purchasing bones. You would have thought I was asking to buy a white unicorn!

Finally, I spoke with a simply lovely woman who informed me that she would be having a one-year-old calf butchered for her family in the next month and would happily sell me the bones. No one had ever asked them for bones before.

During this month, while I waited for my calf bones, I went to Whole Foods and purchased a bison femur bone (They did not have any beef bones in stock). So happy I made that first batch!  After that, we were completely hooked on broth.

Mrs. GrassFedCattleRancher called me back when the calf was ready, and we chatted for a while on the phone.  She was curious about what I was doing with the bones, and we set up a time for me to collect my stash.

That Saturday, we set off on the bone gathering pilgrimage.  When I got there, Mrs. GrassFedCattleRancher was working on her very first batch of Bone Broth. She told me after our conversation she decided to give it a whirl. When we chatted I mentioned the benefits that I had directly experienced, which included happier tummy, happier husband’s tummy, more energy, and improved skin. My skin looked like I had aged 25 years after 6 rounds of chemo.

Those bones made the best broth! After a few batches of broth, I wanted to make sure that we did not run out. I called Mrs. GrassFedCattleRancher and set up another pickup. This time her daughter would meet me in town. When I met her daughter, she literally thanked me. She told me her parents are totally amazed at what the broth has done for them. In fact ,her father, who had suffered from arthritis for decades is no longer taking his daily handful of Advil. He drinks bone broth every day, and believes it has completely changed him.

It was the best feeling to know that I had turned this couple onto bone broth, and that he was no longer putting a handful of Advil through his body every day!

Just type in “Benefits of Bone Broth” into Google and you will get:

About 469,000 results (0.27 seconds) 

Here is my super simple Bone Broth recipe:


Image result for bone broth


Bone Broth

Ingredients:

  • 3 to 5 pounds grass-fed beef bones (soup bones) and/or knuckle bone
  • ½ cup raw apple cider vinegar (ACV)
  • filtered water
  • 3 celery stalks,
  • 3 carrots, halved
  • 3 onions, quartered
  • Sachet of herbs (parsley, peppercorns, thyme, rosemary, Bay leaf, etc)

Method:

  1. Roast Bones at 400 for 30 minutes to 1 hour until fragrant
  2. In a large stock or crock pot place roasted bones, and pour in cool filtered water to cover,  Add your apple cider vinegar.  Do not heat yet.
  3. Allow mixture to rest for 30 minutes to an hour.  This will allow the vinegar to pull the nutrients from bones.
  4. Bring the pot to a boil, and add more water if needed
  5. Reduce to a low simmer, cover, and cook for 24-72 hours – just leave it going!
  6. With about four hours remaining, add the vegetables
  7. During the last 30 minutes of cooking, toss in the herb sachet
  8. Remove bones, veggie, and herb sachet (knock out any remaining marrow back into broth)
  9. Pour broth through a strainer or cheese cloth into a glass container

Drink with generous amounts of quality Himalayan or Celtic salt, or use in any recipe calling for broth, stock, or added water.

The broth can be consumed immediately and stored in the fridge up to 5 to 7 days.  You can also store in the freezer up to 6 months.  We like to freeze into ice cubes so we can pop them in a mug to reheat when needed.

When reheating, bring broth back up to boiling for one minute.  Enjoy!
 

How Can Keto Help You?

Happy Alive

As a follow up from Erin’s emotional post on her Cancer survival, I thought this article apropos to post.  Erin gives so much credit to her survival of Cancer and continued remission to the Ketogenic diet.  Erin also did traditional therapy, but the results were much faster because of Keto.  So fast, in fact, that her doctor asked her what she was doing in addition to traditional therapy!  We often wonder if Keto could have cured it all, but at 31, she needed to do everything humanly possible to get that disease as far away as possible – forever!  So, we are definitely not saying to avoid traditional therapy, but we are saying that you can help yourself move towards faster healing by eliminating sugar from your diet because sugar feeds Cancer!  As you will read in the article, a majority of Cancers have been proven to be metabolic diseases.  All are not simply genetic, or a case of bad luck, as so many of us have been told and believed for quite some time.

How are metabolic diseases treated?  Answer: Diet

If you have not already read our page entitled, “What is a Ketogenic Diet?” I encourage you to do so.  While we often speak to Cancer, the Ketogenic Diet can be used to treat many other diseases and illnesses, and help you live a stronger, healthier and more fulfilled life.  For instance, it reversed my pre-diabetic status, put my PolyCystic Ovarian Syndrome symptoms at bay, and alleviated every bit of lower back pain I had from an injury I sustained while training for a marathon several years ago when I ruptured a disk.

This article is excellent in explaining how great the Keto diet is for most Cancers, and why we don’t hear more about it (hint…$$$).

I also encourage you to do your own research or talk to your doctor about how this type of lifestyle might be able to help you with your own ailments or even just living a healthier lifestyle.  I will tell you; I have never felt better, been stronger, or had clearer skin in my entire life!  I just wish I had learned about it sooner than a year and a half ago.  I hope that it can help you too!  Let us know how we can help you!

Posted with Love,

Cindy

From examiner.com:

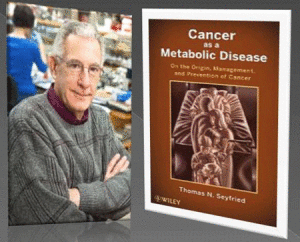
In an exclusive interview, Dr. Seyfried discussed why the ketogenic diet has not been embraced by the medical community to treat cancer despite its proven track record both clinically and anecdotally.

“The reason why the ketogenic diet is not being prescribed to treat cancer is purely economical,” said Dr. Seyfried, author of Cancer as a Metabolic Disease. “Cancer is big business. There are more people making a living off cancer than there are dying of it.”

http://www.examiner.com/article/low-carb-ketogenic-diet-beats-chemo-for-most-cancers-says-dr-thomas-seyfried

cancer-as-metabolic-disease

Thank you, Cancer

I learned that I am still cancer free today!


I endured that lovely PET/CT scan that I talked a little about in my last cancer post. The results are in and got the all clear. Ahhhhhhhh…

Door of the tiny room, guess what's radiating-me

Door of the tiny room, guess what’s radiating-me

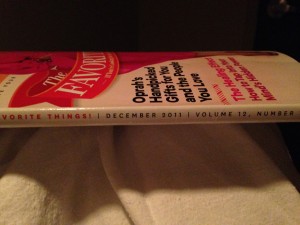
Really?! Inside the tiny room, an O Magazine from 2011 and is the Christmas edition its either this or AARP. sheesh

Really?! Inside the tiny room, an O Magazine from 2011, the Christmas edition. It’s either this or an AARP mag.


I am still learning so many things about myself and about this disease. I have grown and learned so much in the last almost two years. This is why I have decided to tell cancer:

Thank you.

I have to say, you are one Hell of a teacher.


Here are a few things you have done for me:

Giving me the nerve to quit a job I hated.

Making me truly healthier than I ever have been before or even cared about being. (Yay Keto!)

Teaching me to appreciate my daughter’s shoes on the wrong feet. And how, no matter what I try, her hair is going to look like she is in the middle of a tornado.

To hug as much as possible.

That all birthdays are kinda a big deal.

Laughter can get you through pretty much anything.

To be okay with tears, both the happy and sad.

How great it is to have super short hair.

To try to never say again, “If it were me I would…” especially if I have never experienced what the person is going through.

How breast implants have their pros and cons.

For moving me to Colorado, and allowing me to experience a “real” winter complete with negative temperatures and regular snow.

Now knowing that I have the best family, both blood and chosen, on this planet.

Deepening my faith.

Solidifying the fact that through thick or thin, sickness and in health, richer or poorer, long curls or bald, my husband loves me.

This list could go for miles…


Today, I am more confident than I have ever been. I now know what it takes to get through something like cancer. More often than not, I have to rely on the fact that I decided to live, and if that meant certain things had to be done, then I had one choice: do them.


Anyway, while this post may sound all sunshiney and rainbows, I can definitively state, Cancer, is not. There have been buckets of tears, pleas to God, decisions made that can never be changed, time stolen, and countless scars added.


I think the largest sucker punch I ever received was when I was told my diagnosis; Breast Cancer. But then to hear stage 4, there are no words. I remember looking at the little girl that was sitting on the couch, and prayed that she would remember me. Somehow telling people I had cancer, often felt almost as hard as the treatment. I literally had to tell my dad that I had the same disease that took his mother.


But, I am still here to celebrate the light on the other side of that tunnel, and that is what I am choosing to do today.


Everything happens and is given to us for a reason. (Sorry for the cliche.) I honestly believe that what I have gone through was something placed in my path for a purpose. Today, I have no idea what that reason is or was, but hopefully one day I will.  There is no trial or person that crosses your path from whom you cannot learn. I guess cancer taught me that too…


lastchemo.jpg

Our selfie after my last round of chemo on Christmas Eve 2013


Thank you cancer for the lessons.  Just one last thing, you are not welcome to come back.

Let’s Talk Costco!

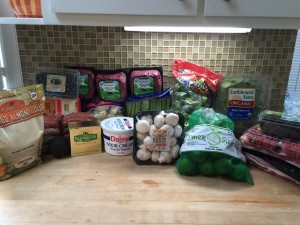
IMG_0814Let’s face it…being on a Ketogenic diet with REAL food is not inexpensive!  We are trying to be as healthy as possible, which comes at an expense to our wallets.  In fact, today, while listening to a Livin’ La Vida podcast, a nutrition expert and author was discussing the fact that higher income countries are actually consuming less grains now than low net income countries because those packaged foods and grains cost pennies compared to “real food” which is actually nourishing.  Very sad!  I totally believe it is worth every penny to feed my family well, but at the same time, I try to save where I can!  This is where buying in bulk can help, especially when feeding a hungry family of five.  I have two growing boys that eat constantly.

Now, I do have to say, a high fat, real food diet, keeps you full much longer that the recommended, low fat Standard American Diet (SAD), so in terms of food, you are not eating the same quantity.  There are certain foods that we consume more often than others, so using a store like Costco or Sam’s can help you.  One of the more frequent questions we receive is where we buy our groceries.  The answer is…everywhere, but I don’t shop at every store every week.  I probably make a Costco run every two weeks, so I thought I would share the basics I keep on hand in bulk.

From left to right:

1. Almond Flour:  I have said this before, but do not even try the other brands…Honeyville is far superior to any of the others.  I have tried all of them, and hands down, Honeyville bakes the best with the least amount of heavy texture.  Costco saves you a ton…you can’t find a lower price even on Honeyville’s own website!

2. Berries: (On both sides – All organic!)  While we do not recommend a large amount of fruit on a Keto diet, berries are by far the best choice.  They are the lowest in fructose and have a high amount of anti-oxidants.  These are primarily for the children, but every once in a while, I will have a small handful in a bowl of sugar-free whipped cream (homemade) with Swerve and vanilla for a sweet treat.  Remember to always eat protein and carbs with lots of fat so you stay a fat burner!

3. Avocados: Costco usually has bags of five or six avocados.  I use these for lunch filled with shrimp salad or plain with salt and lime or on salads.  We ALWAYS have guacamole in the house.  We use it on eggs in the morning and meat in the evenings.  You can never have too many avocados.

4.  Cheese: One of the biggest differences between the Ketogenic diet and the Paleo diet is the allowance of dairy.  We love cheese!  I bought the blocks of cheese because many of the shredded cheeses use potato starch to keep the cheese from clumping.  I use my food processor attachment to shred the cheese for large quantities.  I DO cheat, and buy shredded cheese on occasion to keep in the fridge for morning eggs and a quick grab, but the blocks are better as well as cheese sticks.  All are a great buy at Costco or Sam’s.

5.  Organic Ground Meat:  I keep these in the freezer for an easy throw together dinner.  You know we prefer the Grass-fed beef, but in a pinch these are great to have stored.  While not as great as Grass-fed, it is a better alternative than your antibiotic and hormone ridden meats.

6.  Kerrygold Butter:  Need I say more?  I think you all know how we feel about Kerrygold.  It is delicious Grass-fed butter from Irish cows!  It comes in packs of 3 at Costco, so I always pick up a couple when I am there!

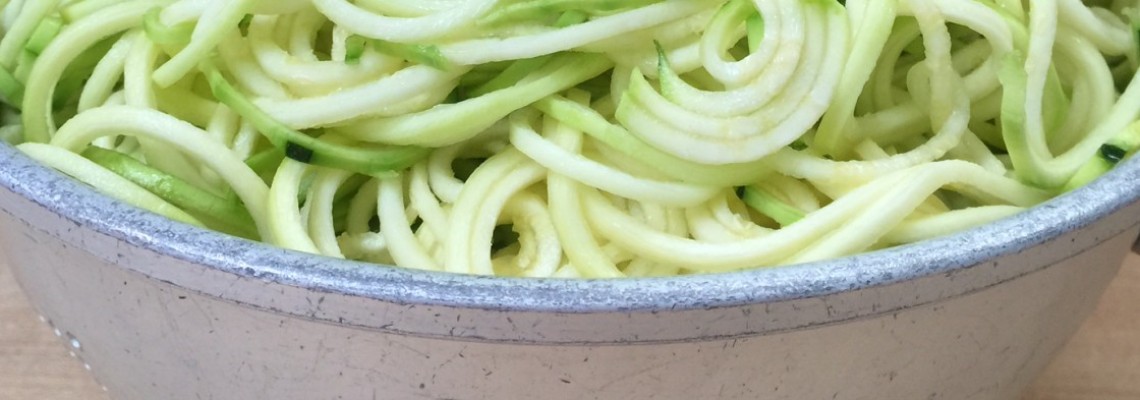
7.  Sausage: My kiddos love sausage.  My husband grills it, and we serve it over zucchini noodles or eat it plain.  Kiolbassa is also made in San Antonio so you are supporting a local business if you live here!

8.  Daisy Sour Cream:  I always have sour cream and cream cheese (I buy cream cheese at Sam’s) on hand for sides to add more fat.  Remember, you want full fat.  The low fat and fat free versions are NOT REAL FOOD!  They are filled with chemicals and additives.  Stick with the good ingredients our great-grandparents used, and their ancestors before them!

9.  Veggies:  We LOVE veggies…We are fortunate that Costco has many organic vegetable options.  Not all of them are organic, however, so please wash well!  A friend was over recently, and I was washing fruit with soap and water when she questioned me about it.  Water alone will not wash off the chemicals.  You really need to wash in a fruit and veggie wash or use a soap.  I make a bath of soapy water and soak them in the wash and then rinse in a colander with cold water.  This still does not guarantee the removal of all chemicals, but it is a better bet.  I love the cauliflower, spinach, and mushrooms at Costco.  These are always on my list.  I also stock up on limes in the summer to make infused water and iced tea.  I must admit, that I also like a cocktail on the weekends made with a lot of fresh lime juice mixed with vodka and soda, or dare I say, tequila, for a homemade sugar-free margarita!  One drink usually takes 4 to 5 limes (or more) so that explains the bulk on these.  Broccoli and celery were also on the list this week.  Please make sure you wash your celery VERY well.  It can be a really dirty one!

10.  BACON:  Who can have too much bacon?  Always on the list.  Try to buy bacon as naturally as possible without a lot of curing ingredients.  Each Costco carries different bacon I’ve noticed, so look at your labels.

11.  Coconut Oil:  It is not in the picture, but another staple that we all buy at Costco is Coconut Oil.  This makes great Bulletproof Coffee for all of us each morning!  A definite staple, and a much better buy at Costco or Sam’s.

Any questions or comments?  Leave us feedback.  We would love to hear what Low-Carb High-Fat foods you like to buy at Costco or Sam’s!

Happy Shopping!


A Meal to Make a Family Happy!

So, I was ruled out on my dinner choice this evening!  My husband wanted steak, and the kiddos wanted potatoes.  “Hmmm,” I thought to myself.  Let’s see if I can slide those cauli-mashers by them without notice.

Worked like a charm!  My super picky four-year old said this was the “best dinner in the world!”  She also told me that “these are the best potatoes ever!”

IMG_0812

If you missed Erin’s post on Cauli-mashers, they are a breeze to make, even when you get outnumbered at the last minute in the kitchen.

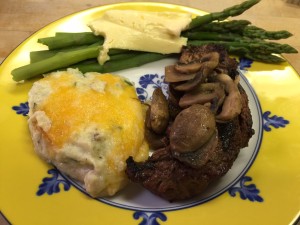
I steamed one bag of Costco fresh Cauliflower florets until fairly soft.  I don’t have the emersion mixer like Erin, so I just used my KitchenAid hand mixer, and beat them until they were the consistency of mashed potatoes.  I added a half block of Kerrygold, a half block of cream cheese, and a handful of chopped parsley.  I then added a generous amount of salt and pepper.  Mixed it all together with the mixer, poured into an 8×8 pyrex, and topped with some Colby Jack cheese.  I popped it in the oven at 350 degrees for about 20 minutes, and to the delight of everyone, it was devoured.

Served with grass-fed New York Strips topped with sautéed mushrooms (in Kerrygold no less), and a side of asparagus topped with Kerrygold!

Every plate was clean, and every face had a smile!

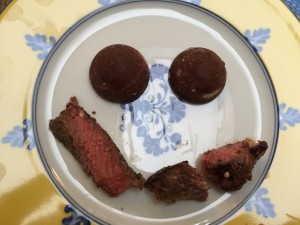
So my sweet 8 year boy (the middle child) wanted me to share his dessert with you tonight!  He was very proud of his extra helping of steak and his two dark chocolate-coconut fat bombs (posted last week) that he used to make a smiley face!  He said, “This will show your viewers how happy I am right now!”  So, how could I refuse?  Here is Colton’s sugar-free dessert!

IMG_0813

I hope you all have a happy dinner tonight!

Stuffed Low-Carb Yellow Squash

A Savory Summer Side!

IMG_0743


Perfect for the summer time veggie season!

This is super easy, and so delicious anyone in your family will love it!  Even my picky 4 year old will at least eat out the stuffing!

Ingredients:

5 yellow (summer) squash

1 zucchini squash, steamed, cooked and diced

2 eggs

3/4 cup Parmesan cheese + additional to top squash

1/3 cup melted butter + 2 Tbsp (not melted)

1 bunch green onion

4 Tbsp almond flour

1 tsp oregano

1 tsp garlic powder

Salt & pepper to taste

Instructions:

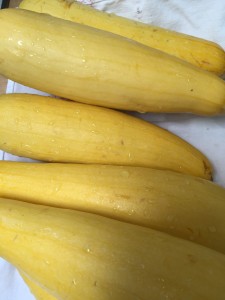
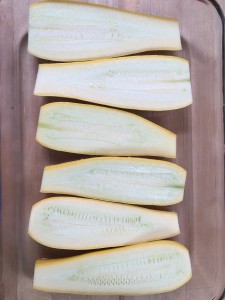
Start with your yellow squash by washing and cutting off the ends.  Then cut in half lengthwise.

IMG_0735

One squash = two servings.

Lay them cut-side up in a glass pyrex baking dish.  Fill the bottom of the dish with water so you can steam the squash until softened.

IMG_0736Microwave on high for 4 minutes.  Check them after this time…if they are still hard in the middle, then keep cooking them on high in 2 minute increments until they are soft enough to scoop, but not mushy.

When they are tender, remove them and let them cool a bit or you will burn off the tips of your fingers. Maybe not, but it will hurt!

IMG_0738 IMG_0739

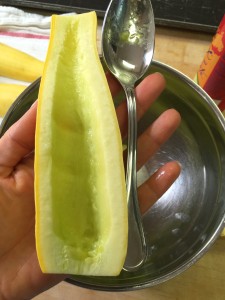
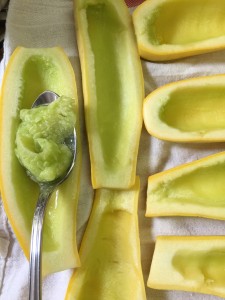
When they are cool enough to handle, use a soup spoon, and start hulling out the inside of the squash. Hull all but one half – leaving this one to chop finely.  Be careful not to poke all the way through.  Place the squash you have removed into a mixing bowl, and your now empty “boats” onto a cookie sheet.

Finely chop one half of one yellow squash into small bits, along with one zucchini squash that you have also steamed and finely diced.  Now, you will see a lot of water in the bottom of the bowl.  Try to drain as much of this as possible or it will be too runny.  I press and drain 3 or 4 times.  You could use a mesh colander for this also.  It is okay to be moist, but you don’t want standing water at the bottom of the bowl.

Once most of the water is removed, I use a sharp knife and run it through the squash in the bowl to break up the membranes in the squash.  This is not an exact science.  Just break up the larger pieces that you scooped out.

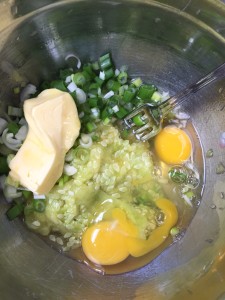
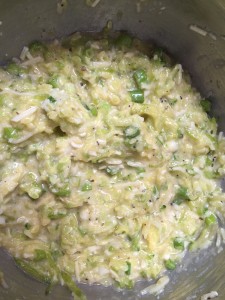
Add your eggs, 3/4 cup Parmesan cheese, 1/3 cup melted butter, finely chopped green onion with some of the green tops included.  Then add 2 Tbsp of almond flour and your seasonings.  Mix well!

IMG_0740 IMG_0741

Use the mixture to fill your squash “boats” so it is slightly heaping.

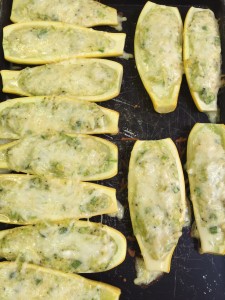
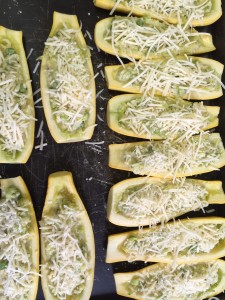
IMG_0742Lightly sprinkle with the additional 2 Tbsp of almond flour, put a pat of additional butter on top and finish with as much Parmesan cheese as you desire.  I have also topped with mozzarella cheese as well.  Both are delicious!

Bake in the oven for 25 minutes at 350 degrees, and you have an amazing side dish!

IMG_0743

Enjoy!
 

Mars, Inc. Makes a Big Announcement!

Mars Logo

Yes!  You are reading correctly!  We are talking about the candy company!  You know..the one that makes M&M’s, Snickers, Twix and Skittles, along with numerous others?

m&Ms

They announced on May 7th that they are going to recommend to consumers to lower their added sugar intake to 10% or less of their daily caloric intake.

Check out this link:

http://www.opposingviews.com/i/health/maker-mms-supports-government-recommendation-people-limit-sugar-intake

Now, don’t get me wrong, we are not advising you to go out and buy a bunch of candy, or any candy for that matter!

We are, however, very excited that someone is listening!  Sugar is bad!  Very bad!  It is responsible for many diseases, and we learn about more each day through more research and reading.

I am sure there are some ulterior motives to this announcement, but companies are realizing that they need to stay ahead of the game as more and more research and evidence is coming out about nutrition, health, and disease.  Every company that makes it into the media urging consumers to consume less sugar is doing a public service!

Thanks, Mars, Inc. for making more noise about the need for consumers to consume less sugar!  Every little bit helps!

Actual Mars Announcement:

http://www.mars.com/global/press-center/press-list/news-releases.aspx?SiteId=94&Id=6576

Coffee on the Go-Starbucks

I am a serious coffee drinker!  To me it’s a comfort food; the smell alone makes me happy. Growing up, my mother would brew her pot of coffee, and then proceed to fill her old giant Bill Miller mug with the whole pot, and drink it black. I could be exaggerating, but this is honestly how I remember my childhood mornings.


I brew my own a lot of the time, but I do drink my fair share of Starbucks too. There are two stores in my building at work!


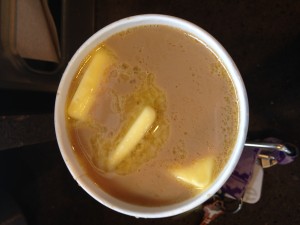
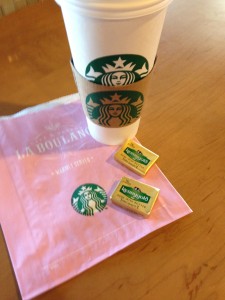
My typical order is a Venti dark roast with heavy cream and three butters.


IMG_4940

That’s right folks, Starbucks has Kerrygold hiding behind their counter.  I know I am not the only one that orders this, but I do get funny looks on occasion.


IMG_4835


Whatever!  Half these people sound like they are speaking a foreign language when they are ordering.  Plus, the amount of sugar in some of these drinks would make even Willy Wonka blush.

https://s-media-cache-ak0.pinimg.com/236x/0b/d9/74/0bd974419f58da113a164076c12de595.jpg


I copied the chart below from the official Starbucks website.

Starbucks Nutrition Link

This is for the 16oz Grande:

Chocolate Beverages

Calories Fat (g) Carb. (g) Fiber (g) Protein Sodium
Hot Chocolate 320 9 47 4 14 160
Peppermint Hot Chocolate 390 9 65 4 13 150
Salted Caramel Hot Chocolate 390 9 66 4 13 300


So go get your Starbucks coffee (not hot chocolate) and your butter too, and DON’T be ashamed or blush:)!  Enjoy every ounce!

Rich and Delicious Creamed Spinach

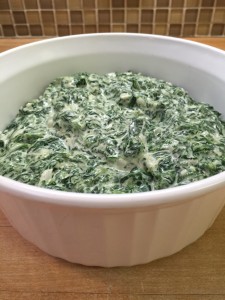
I don’t know about you, but when we go to a nice steak restaurant, one of our sides is always creamed spinach.  Well, I was determined to duplicate this rich satisfying side dish, and mission accomplished!  Behind my fat bombs, this is my second most requested recipe, and is delicious alongside any meal, but it is our favorite with grass-fed beef!  This dish is good enough for company!


IMG_0790

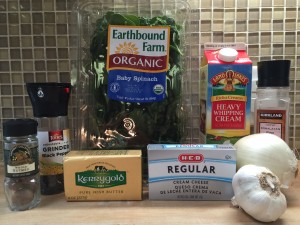
Ingredients:

Organic Baby Spinach (I used two large containers)

Kerrygold Grass Fed Butter (1/4 to 1/2 stick)

Full Fat Cream Cheese (I package)

Heavy Whipping Cream (1/4 to 1/2 cup)

White Onion (Quartered)

Garlic (4-5 cloves)

Salt and Pepper

Whole Nutmeg


Preparation:

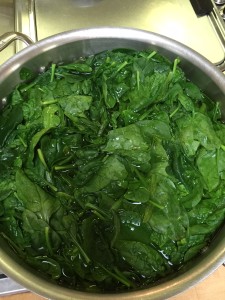
Bring a full pot of water to a boil.  Add spinach and cook for 3 to 5 minutes.  You want it cooked down, but not completely wilted.

IMG_0791

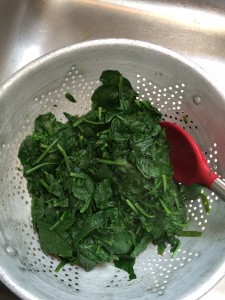
Drain in a colander, and let it sit while you prepare the rest of the ingredients.

IMG_0792


Back in the same pot, melt your butter over medium heat.  I used a half of a Kerrygold brick.  If you are using a regular stick of butter, you will need 1 whole stick.

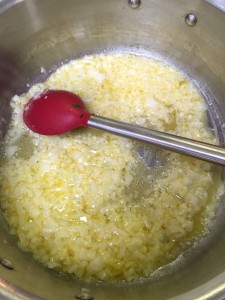
Add a quarter to a half of a white onion, finely chopped with 4-5 minced garlic cloves, and sauté until translucent.  (We like a bit more onion and garlic which is higher in carbs so take that into account.)

IMG_0793


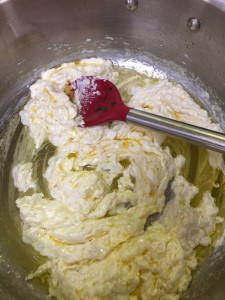
Turn your heat down to low.  Add your cream cheese cubed and stir well until incorporated with the butter. It may separate slightly and this is okay.  When you add your spinach it will combine well.

IMG_0794

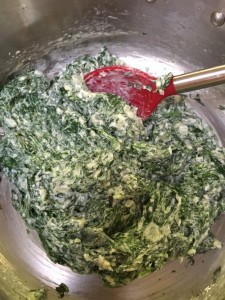
Press all the remaining water out of your spinach.  Dump it out on a cutting board and chop roughly.  Then add it to your butter mixture on the stove.

IMG_0795


Next, add your heavy cream.  This is up to you.  Start with 1/4 cup, and if you want it creamier, add a little at a time.  It will thicken slightly after about 5 minutes over low heat.

IMG_0798


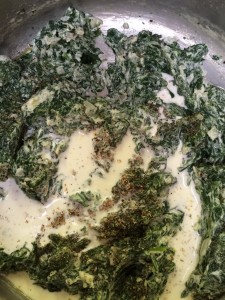
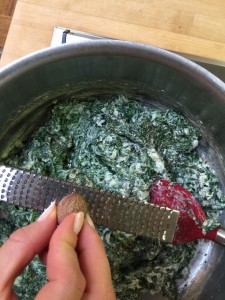
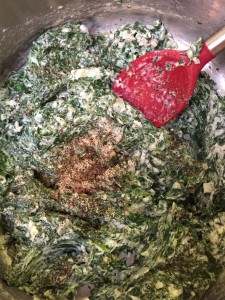
Now, all you have left is your seasoning!  Spinach is amazing with nutmeg, especially freshly grated.  I also add freshly ground Himalayan salt and black pepper.

IMG_0796 IMG_0797

Mix all your seasonings in and let it simmer over low heat for about 5 minutes.  Then serve and enjoy!  It is just as good left over for lunch too!
IMG_0799

An “Almond Joy” Kind of Day

My most requested recipe at your fingertips!

Just because you go low-carb doesn’t mean you can’t ever have sweets again!  You just have to think differently!
These “Fat Bombs” are the bomb!  They are so easy to make, you get your intake of healthy fats, and take care of that little need for a sweet treat every once in a while.
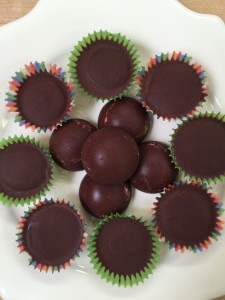
You can keep them in the fridge, and pop them as you need them.


Fat Bombs

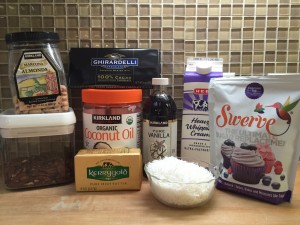
4 oz 100% Cacao

8 Tbsp Grass-Fed Butter (Kerrygold)

3 TBSP Coconut Oil

1 tsp Vanilla

1/3 cup Swerve Confectioners

2 Tbsp Cream

Shredded Unsweetened Coconut

Almonds, Pistachios, Macadamia Nuts

IMG_0657


Gather all of your ingredients along with a double boiler, a whisk, and either mini-muffin pans or candy molds.

Directions:

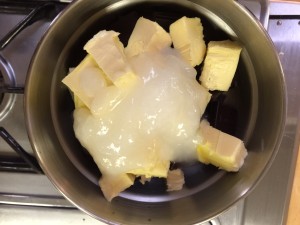
Melt your chocolate, butter, and coconut oil in a double boiler over simmering water, stirring often so it does not burn.  (This is a double batch.)

IMG_0655


Add the Swerve and whisk together until well combined.

After it is completely melted and smooth, remove from heat and add vanilla and cream.

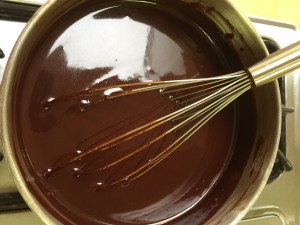
Whisk until it looks like you have smooth chocolate sauce.

Set aside.

IMG_0654


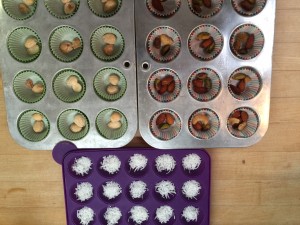
You can either use a mini-muffin pan with paper cups or a silicon candy mold.  I use both.  If you want a variety of candies, you can tell them apart by using different colored paper cups.  For instance, my husband doesn’t like the texture of coconut in his desserts so I always do his candy without coconut in green paper cups because that is his favorite color, and he knows which ones are his.  In short, you can color code your candy!

I love the smooth texture of the candy molds though, so of course, I use those for mine!

Be creative!  I love mine with coconut and almonds!  Can you say, “Almond Joy!?!”

The kids like theirs with either macadamia nuts and coconut or plain coconut, and my husband loves his with pistachios.  Just have fun with your add-ins!

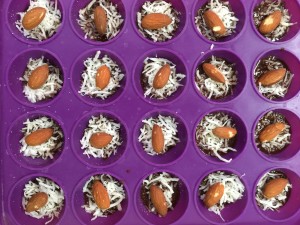
This is what it looks like when you add your fillings:

IMG_0652 IMG_0656


On the purple molds, I placed a dab of chocolate right in the center bottom of the circle so it would have a smooth chocolate finish when I popped them out.  Then, put the coconut and almonds on top.

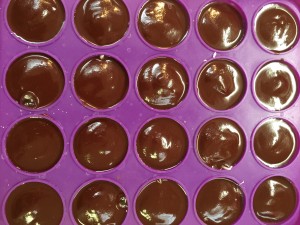
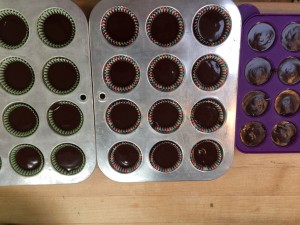
Next, add your chocolate by the spoonful:

IMG_0651 IMG_0653


After your molds are full, place them in the refrigerator to set.  This does not take long.  Give them about 45 minutes to an hour to set before you try to remove them.

IMG_0646

Once they are hard to the touch, you can invert the molds to pop out your candies and remove the paper cups from your muffin pans.  I throw them in a ziplock bag, and they are ready to grab when you need a bite!

Enjoy!!!


« Older Entries Recent Entries »