There is a golden sauce so delicious, it is worth the price of gold!
It was just yesterday that I mentioned the amazingly delectable Hollandaise Sauce as a favorite of mine on poached eggs. The best part – it is easier than you can ever imagine!
One of the things we have to be mindful of while living in a state of nutritional ketosis is our intake of protein. We all know that carbs will take us down, but did you know that protein can as well?
When there is a significant intake of protein, the body converts the protein into sugars during a process called Gluconeogenesis. This is a metabolic process that makes glucose, a simple sugar, that provides the body with energy from non-carbohydrate sources when you are a carb burner.
This is why it is super important to make sure you are getting ample healthy fats when you are consuming meats and vegetables in order to stay a fat burning machine. We don’t want those proteins turning into carbs in our body so make sure you have the fat to counteract the carbs and proteins.
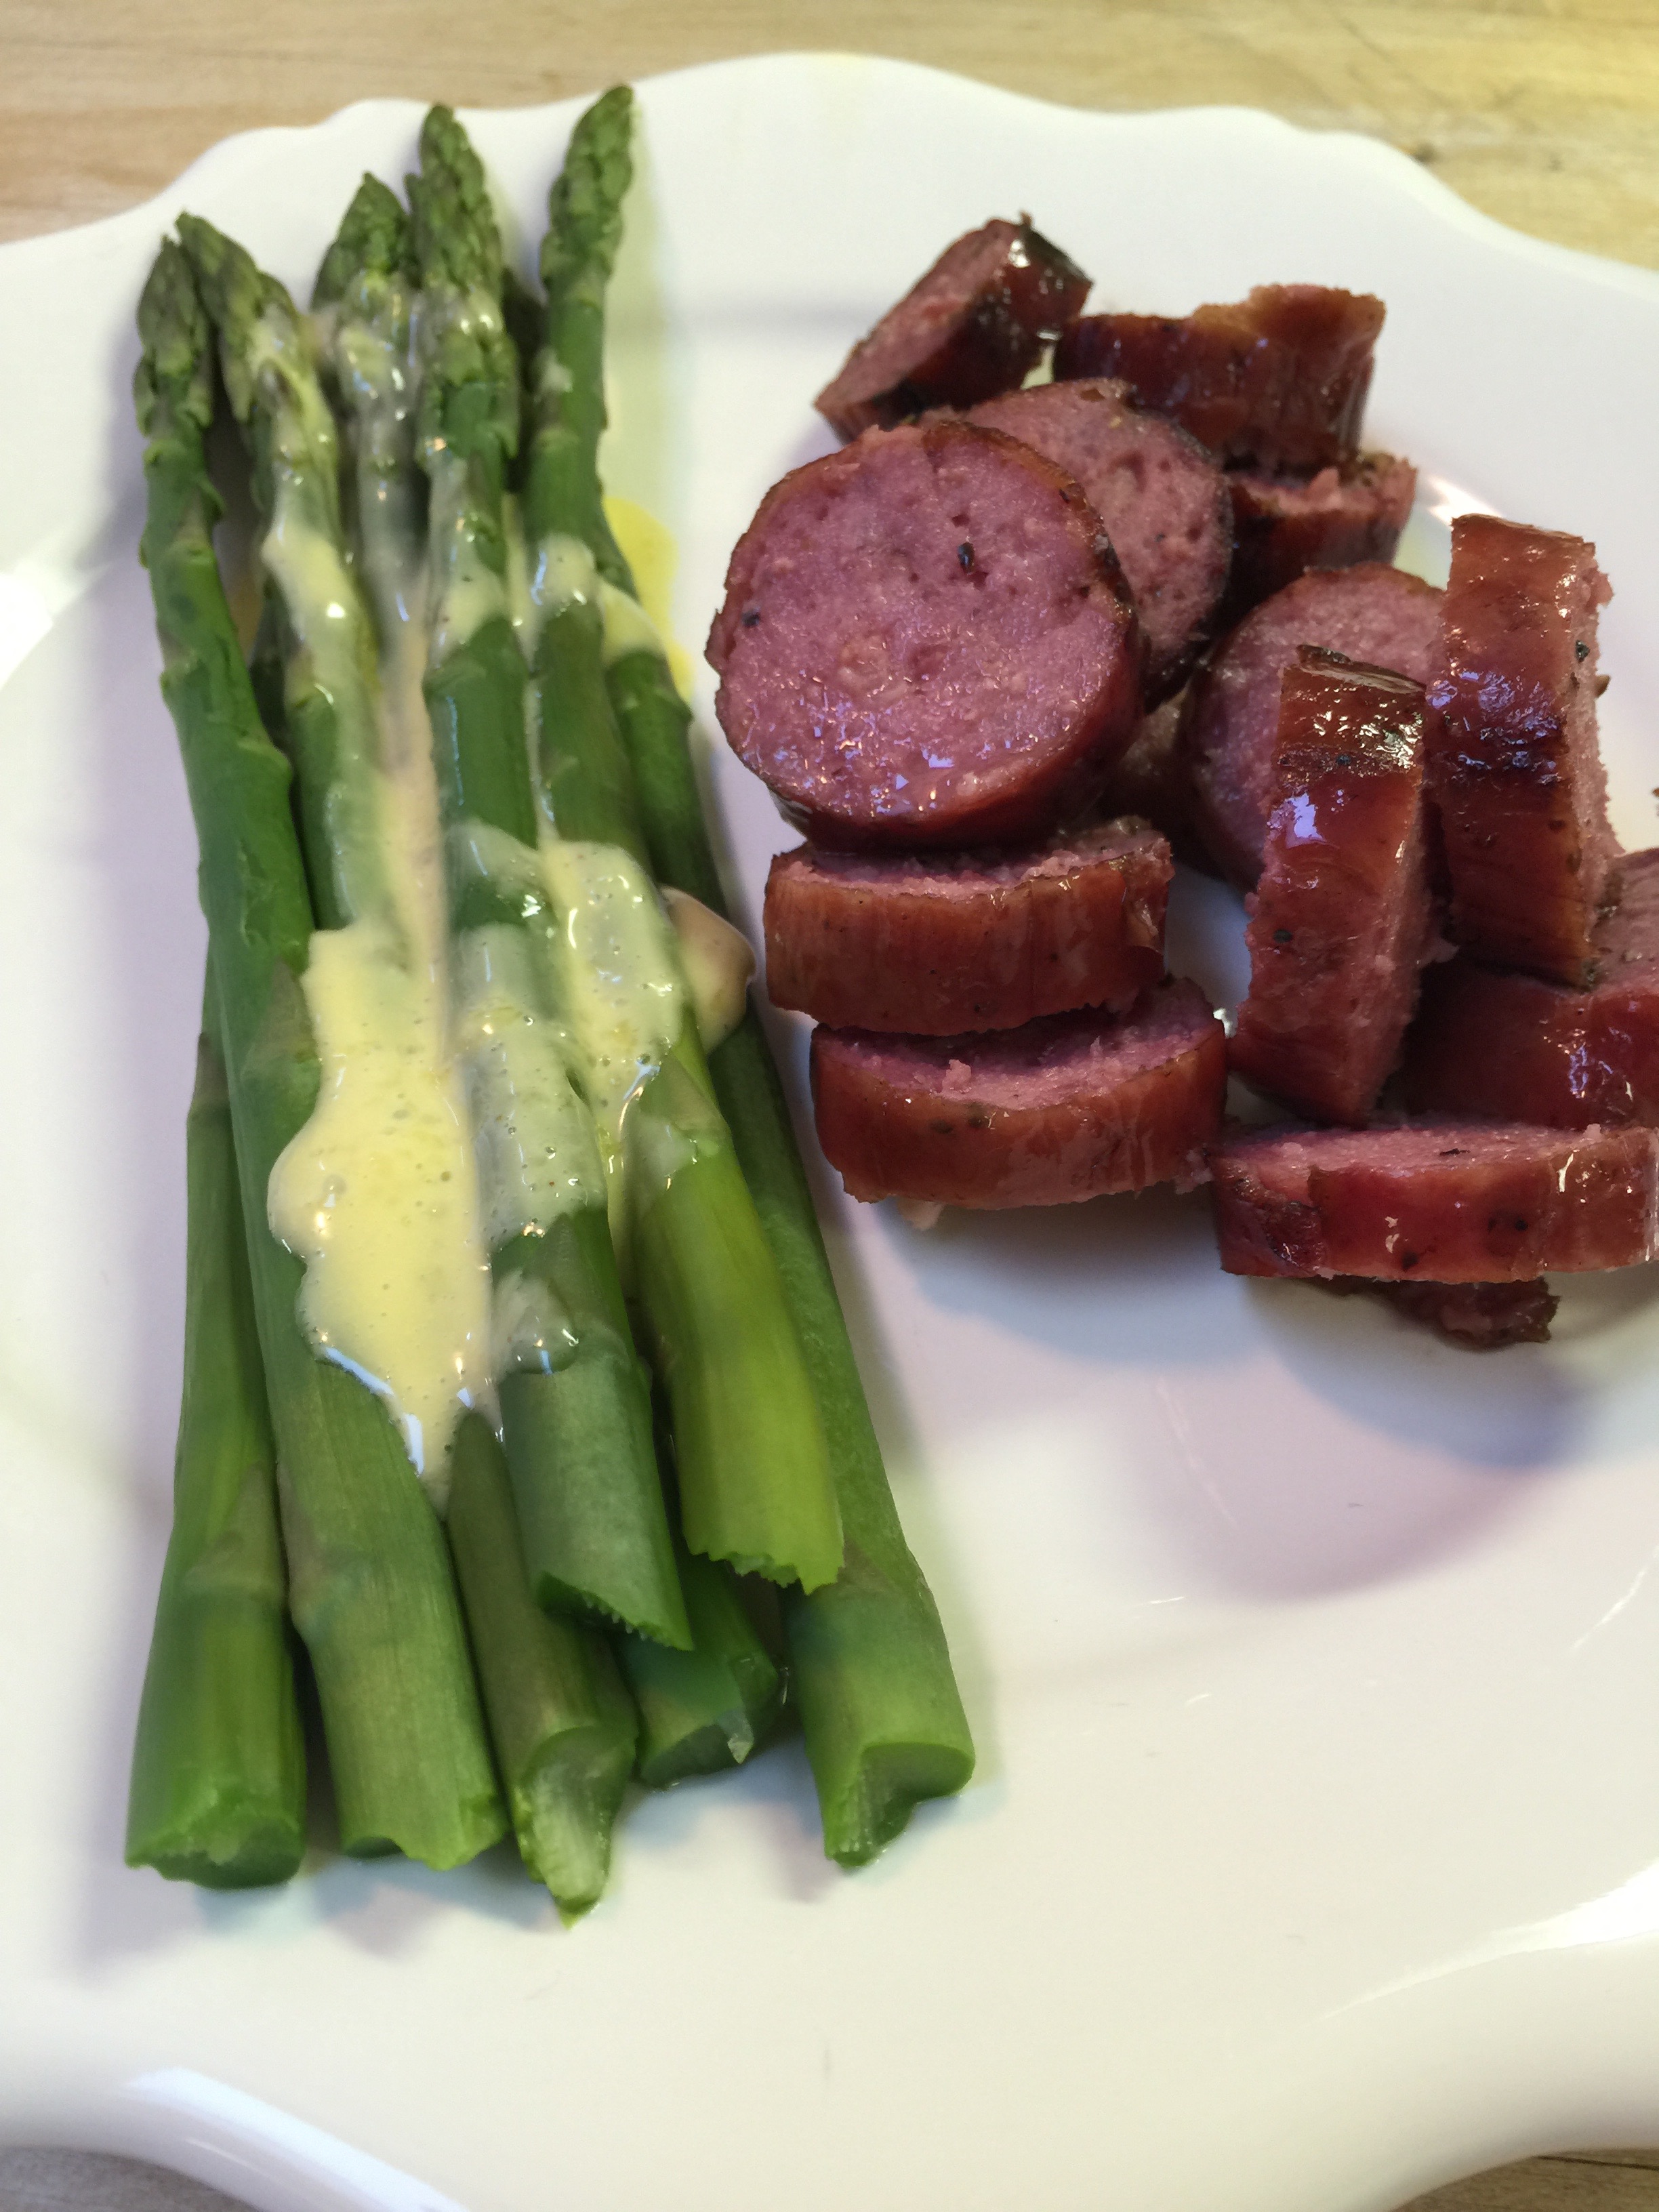
And…this is why I love Hollandaise! You can put it on your veggies, your meat, your eggs – pretty much anything your heart desires! My favorites are eggs, spinach and asparagus. It is wonderful tasting, and as long as you are using our favorite grass-fed butter, it is a great source of fat! You can also ask for it at many restaurants that will gladly bring you a side of this delicious sauce.
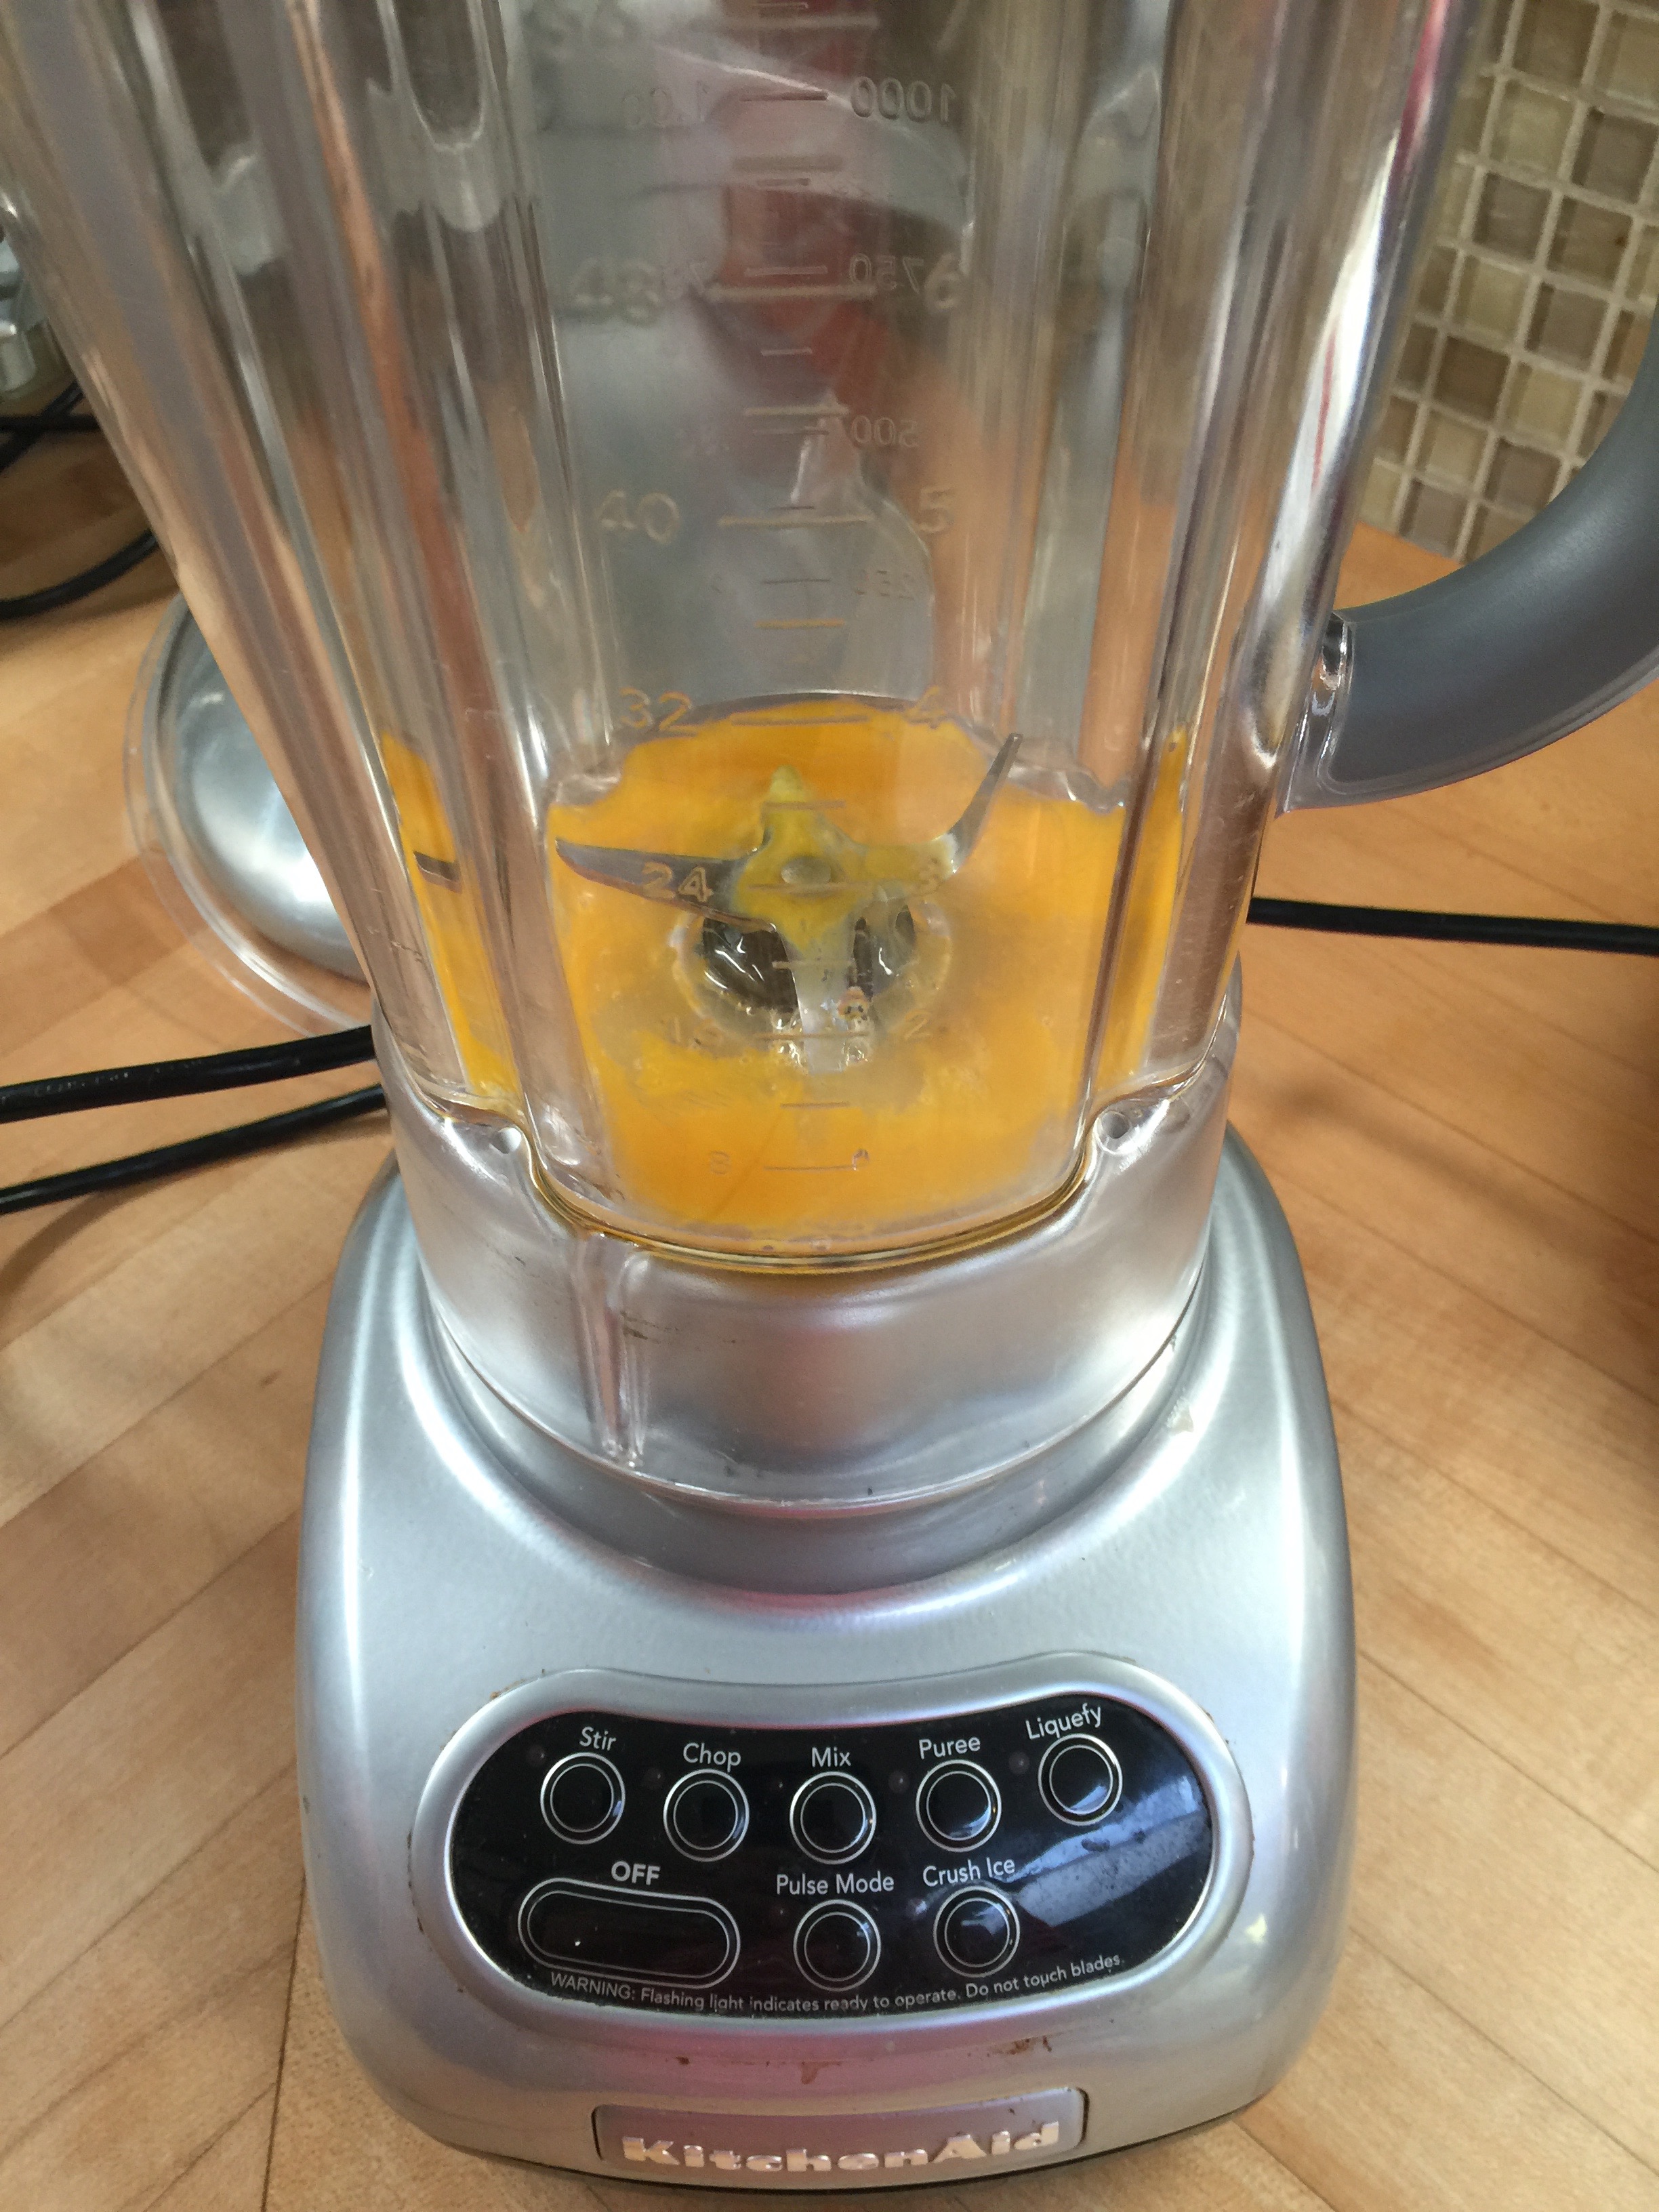
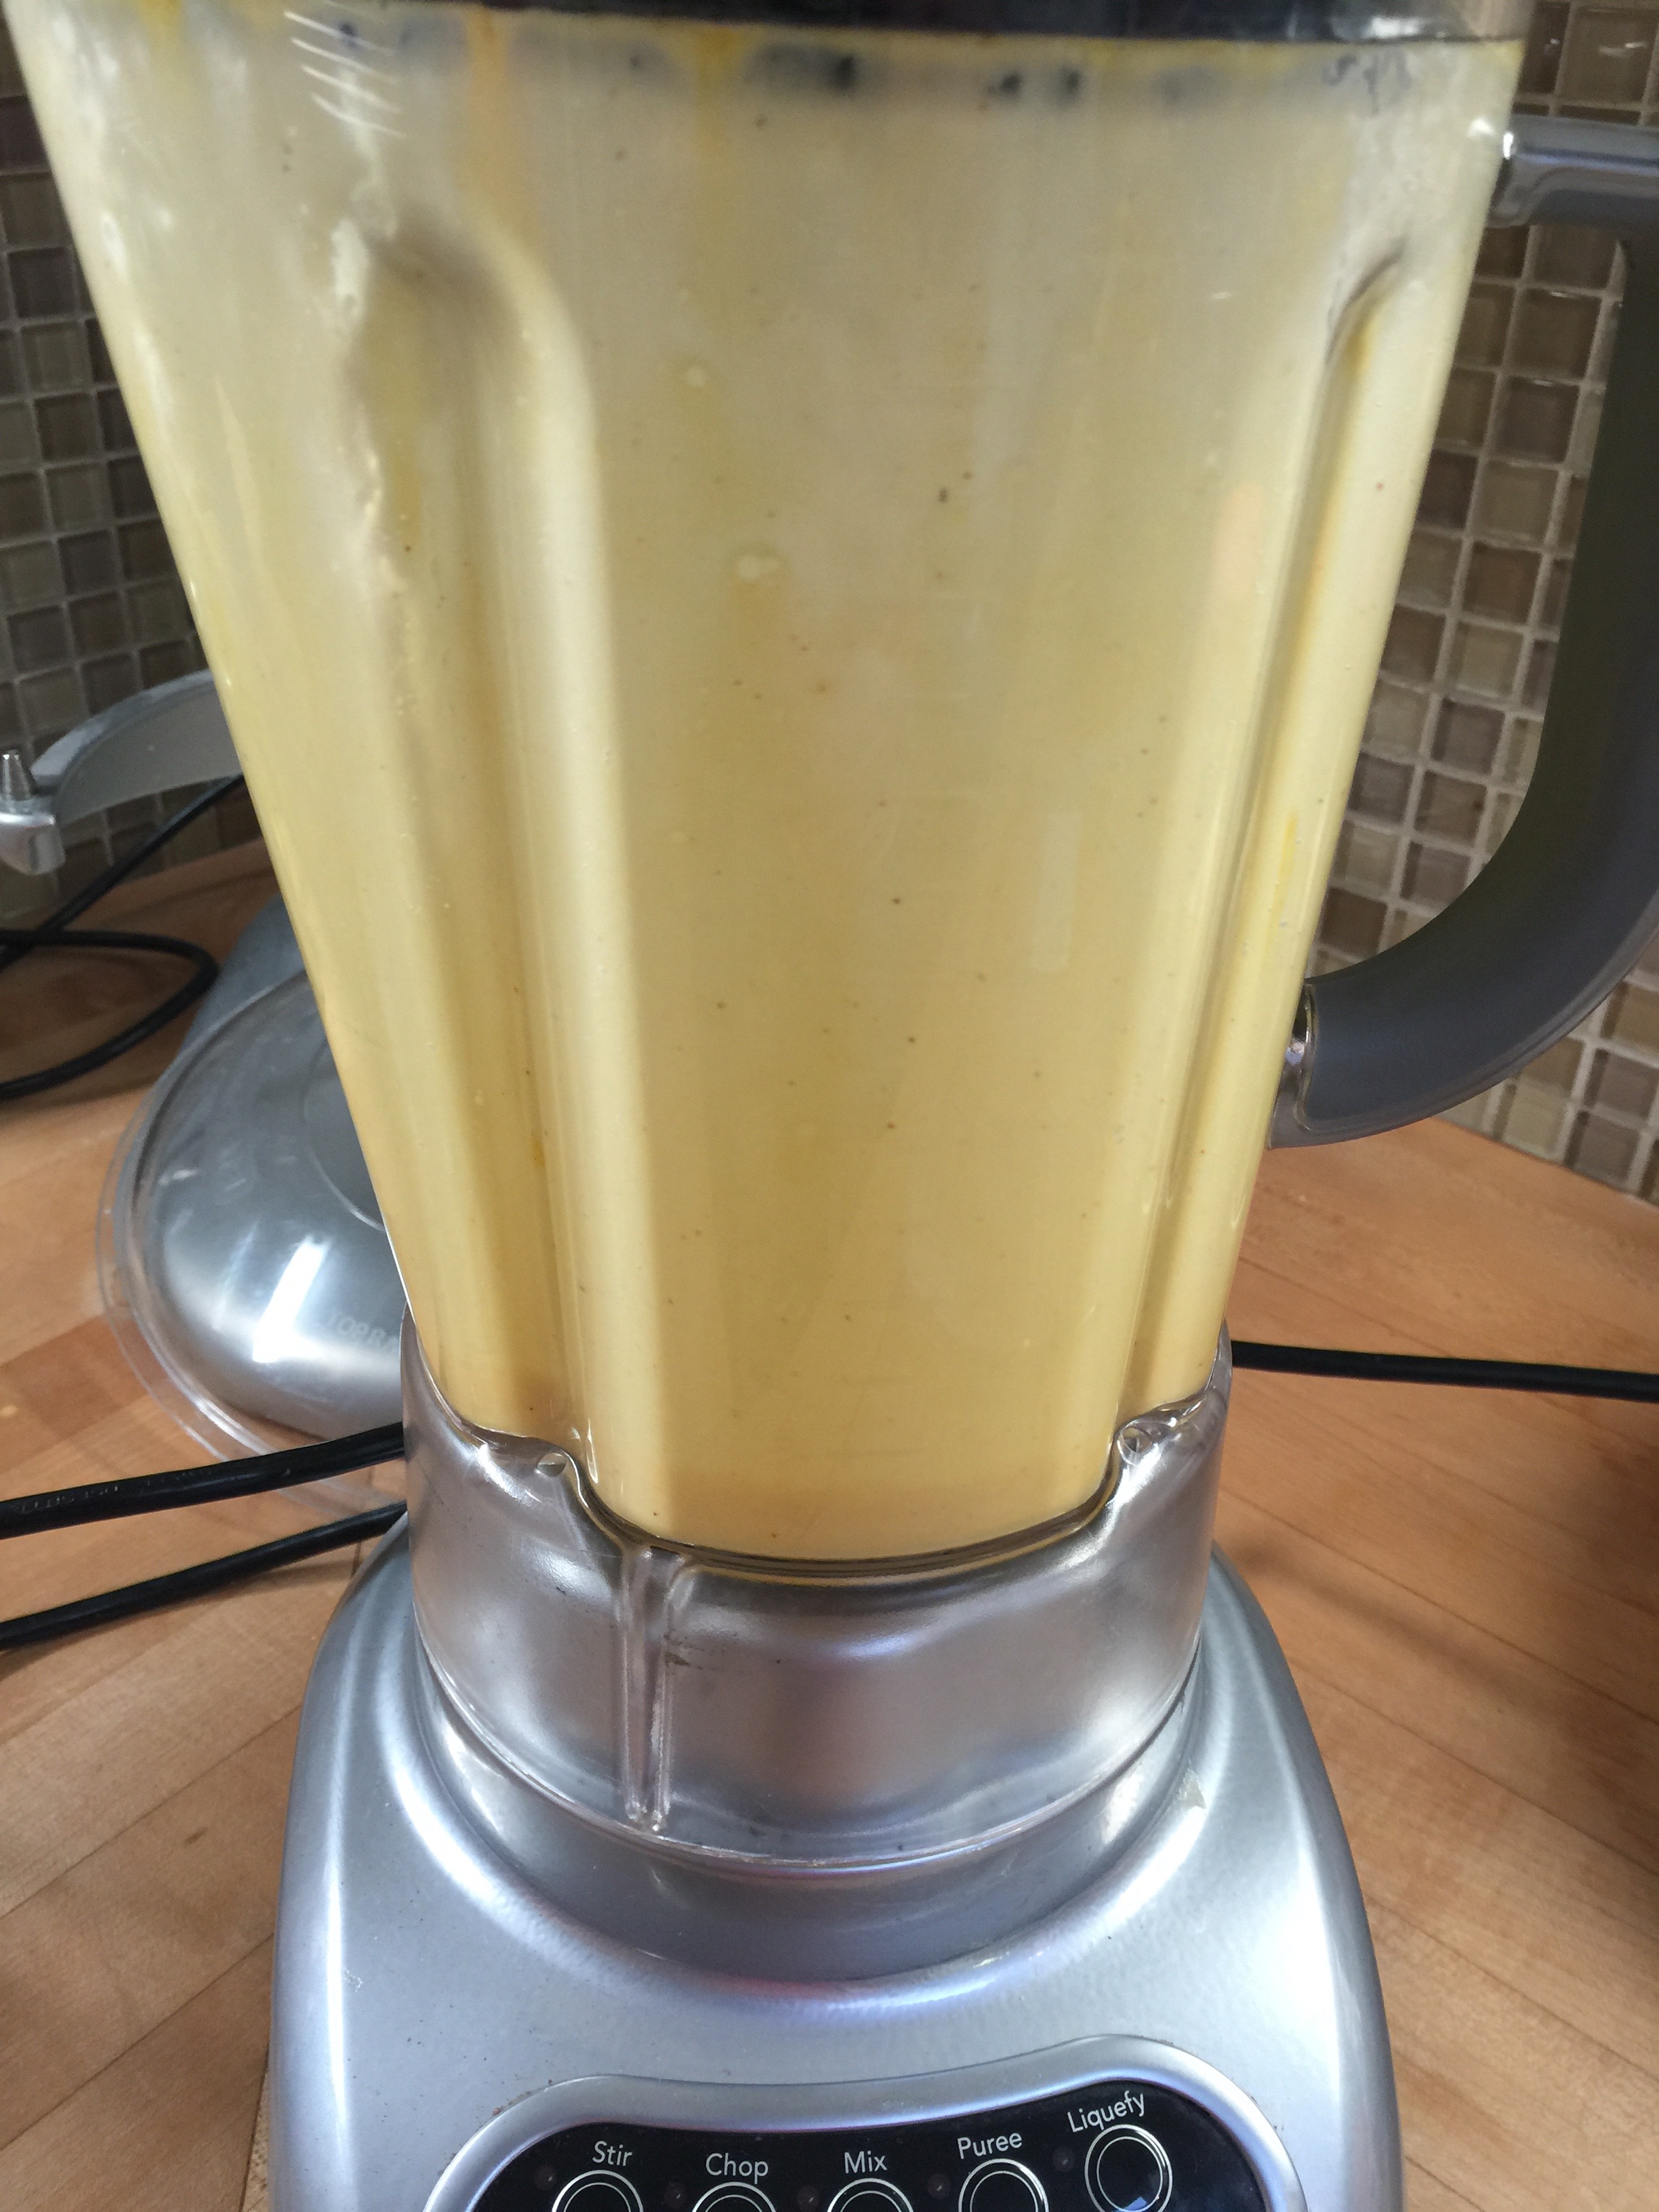
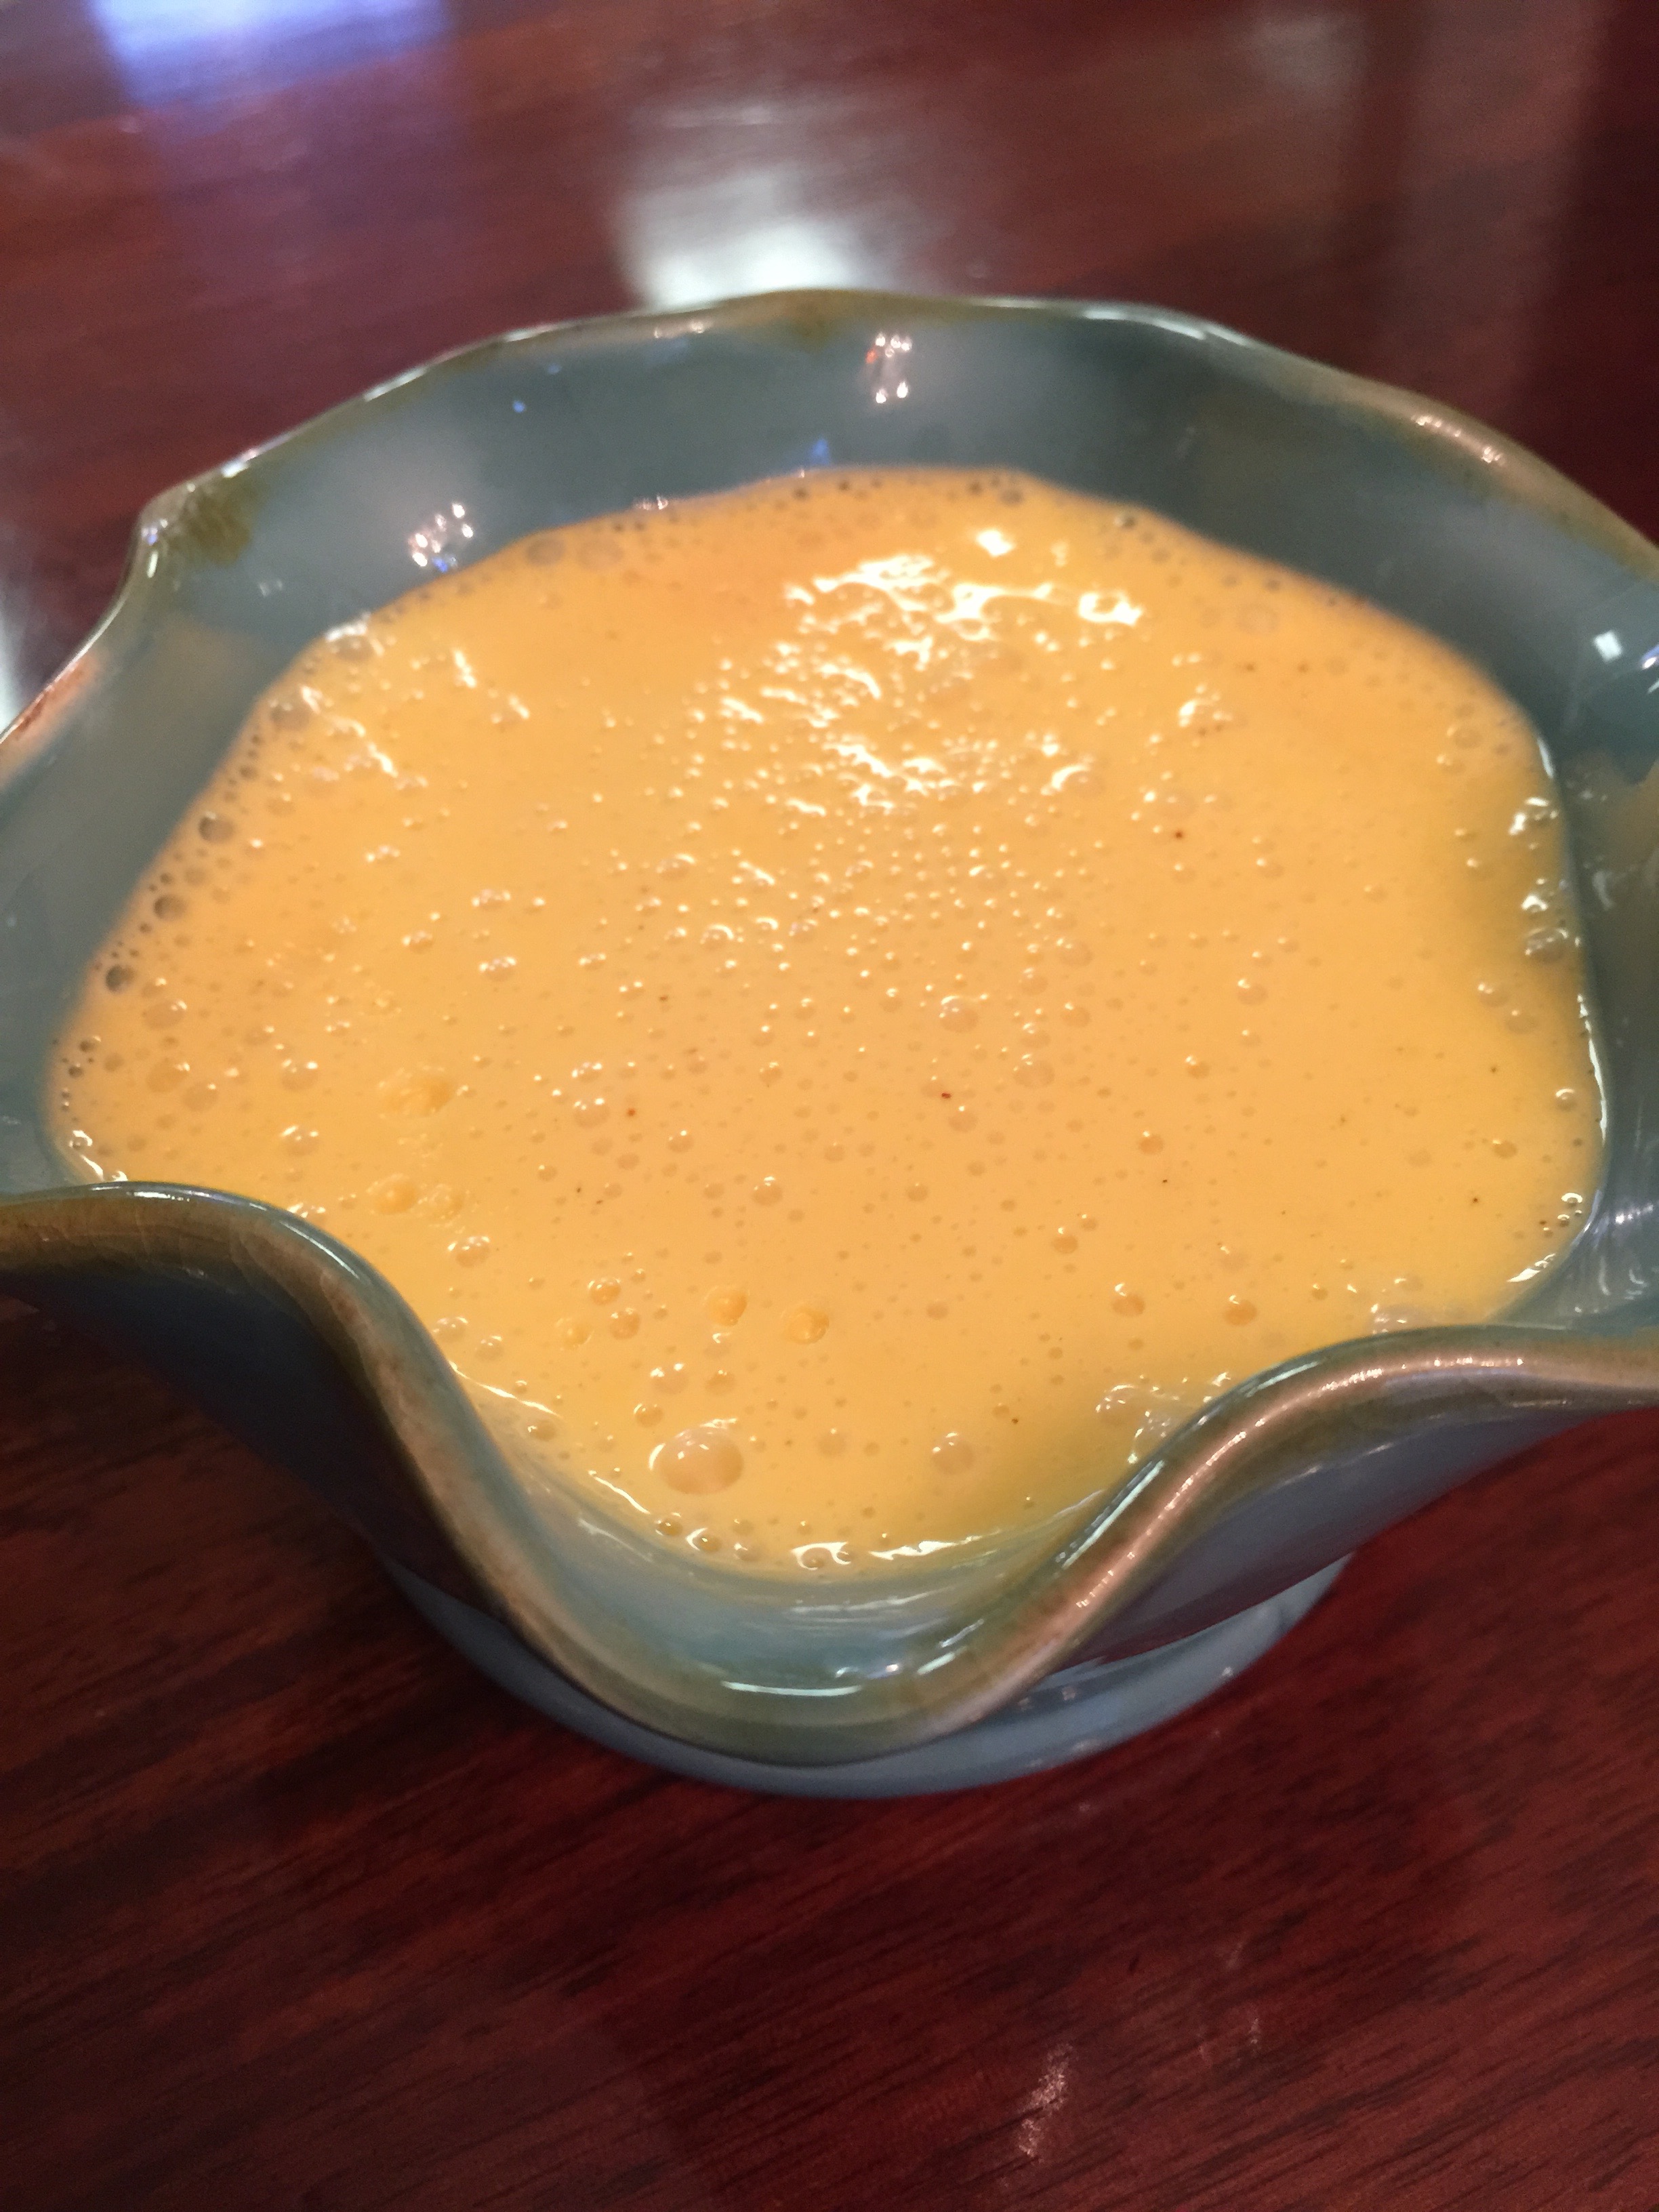
Blender Hollandaise
Place in your blender:
2 Egg Yolks
1 TBSP Lemon Juice
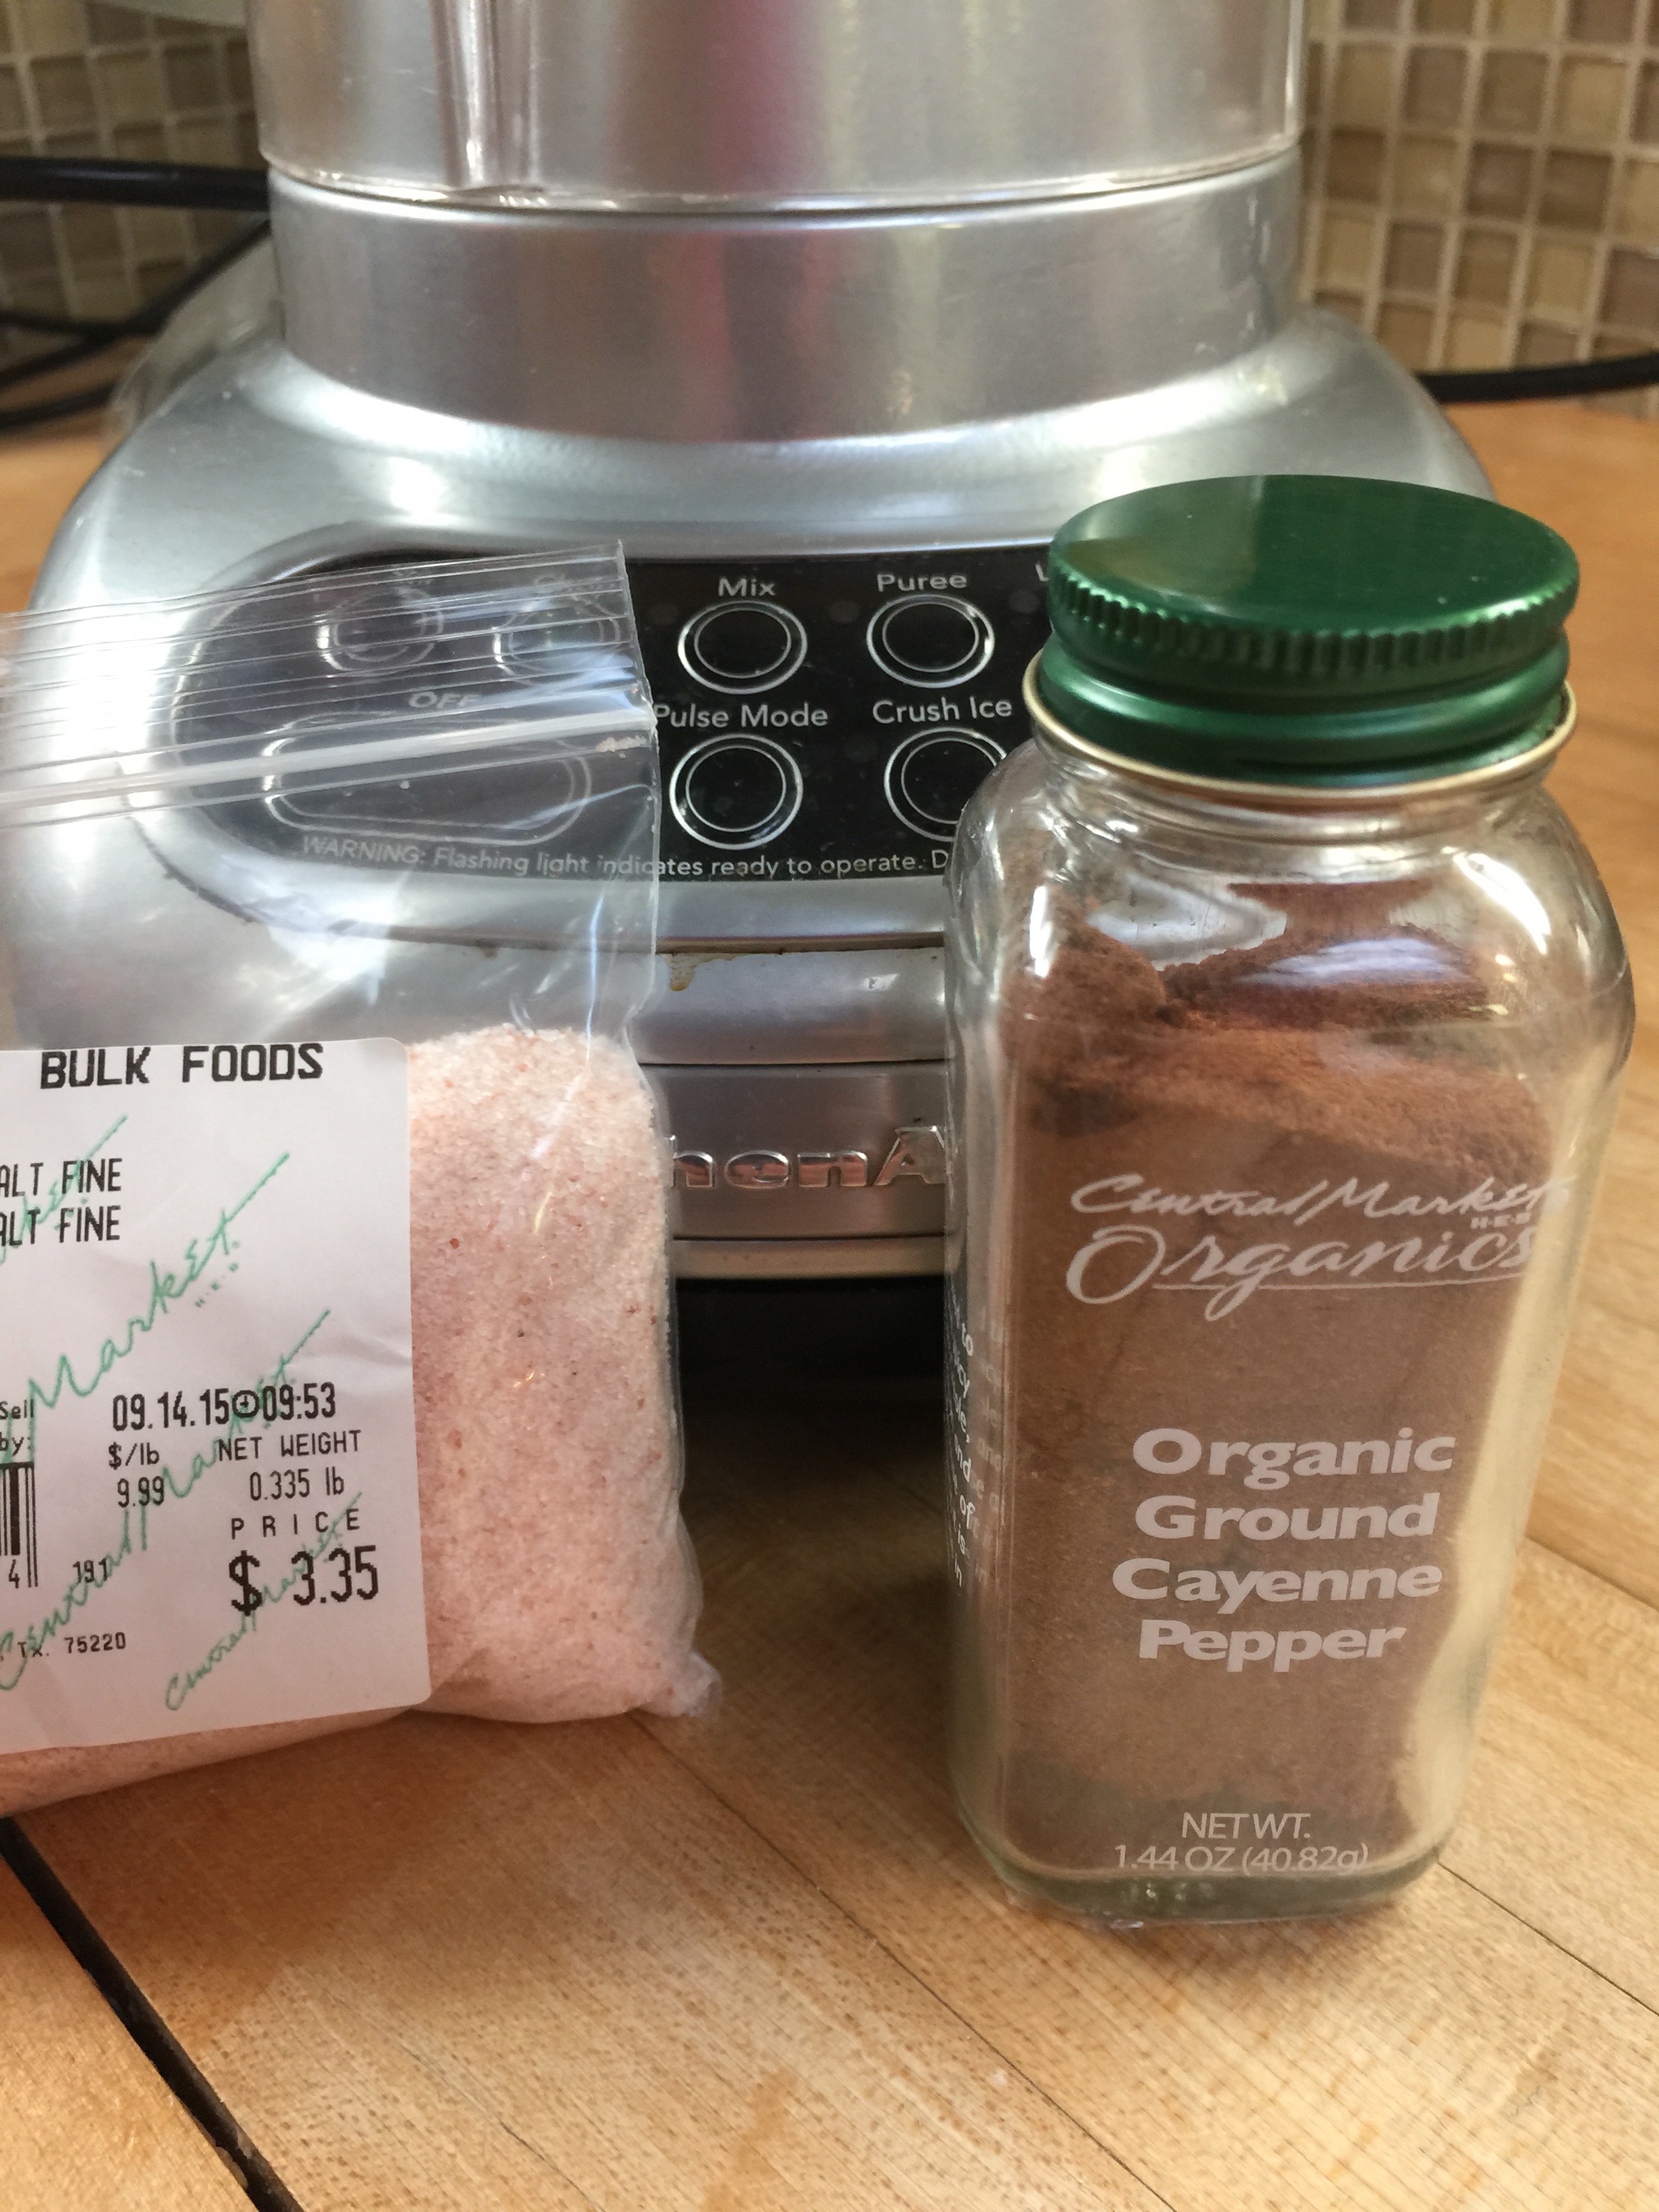
Salt and Cayenne to taste
Turn your blender on low for 5 seconds.
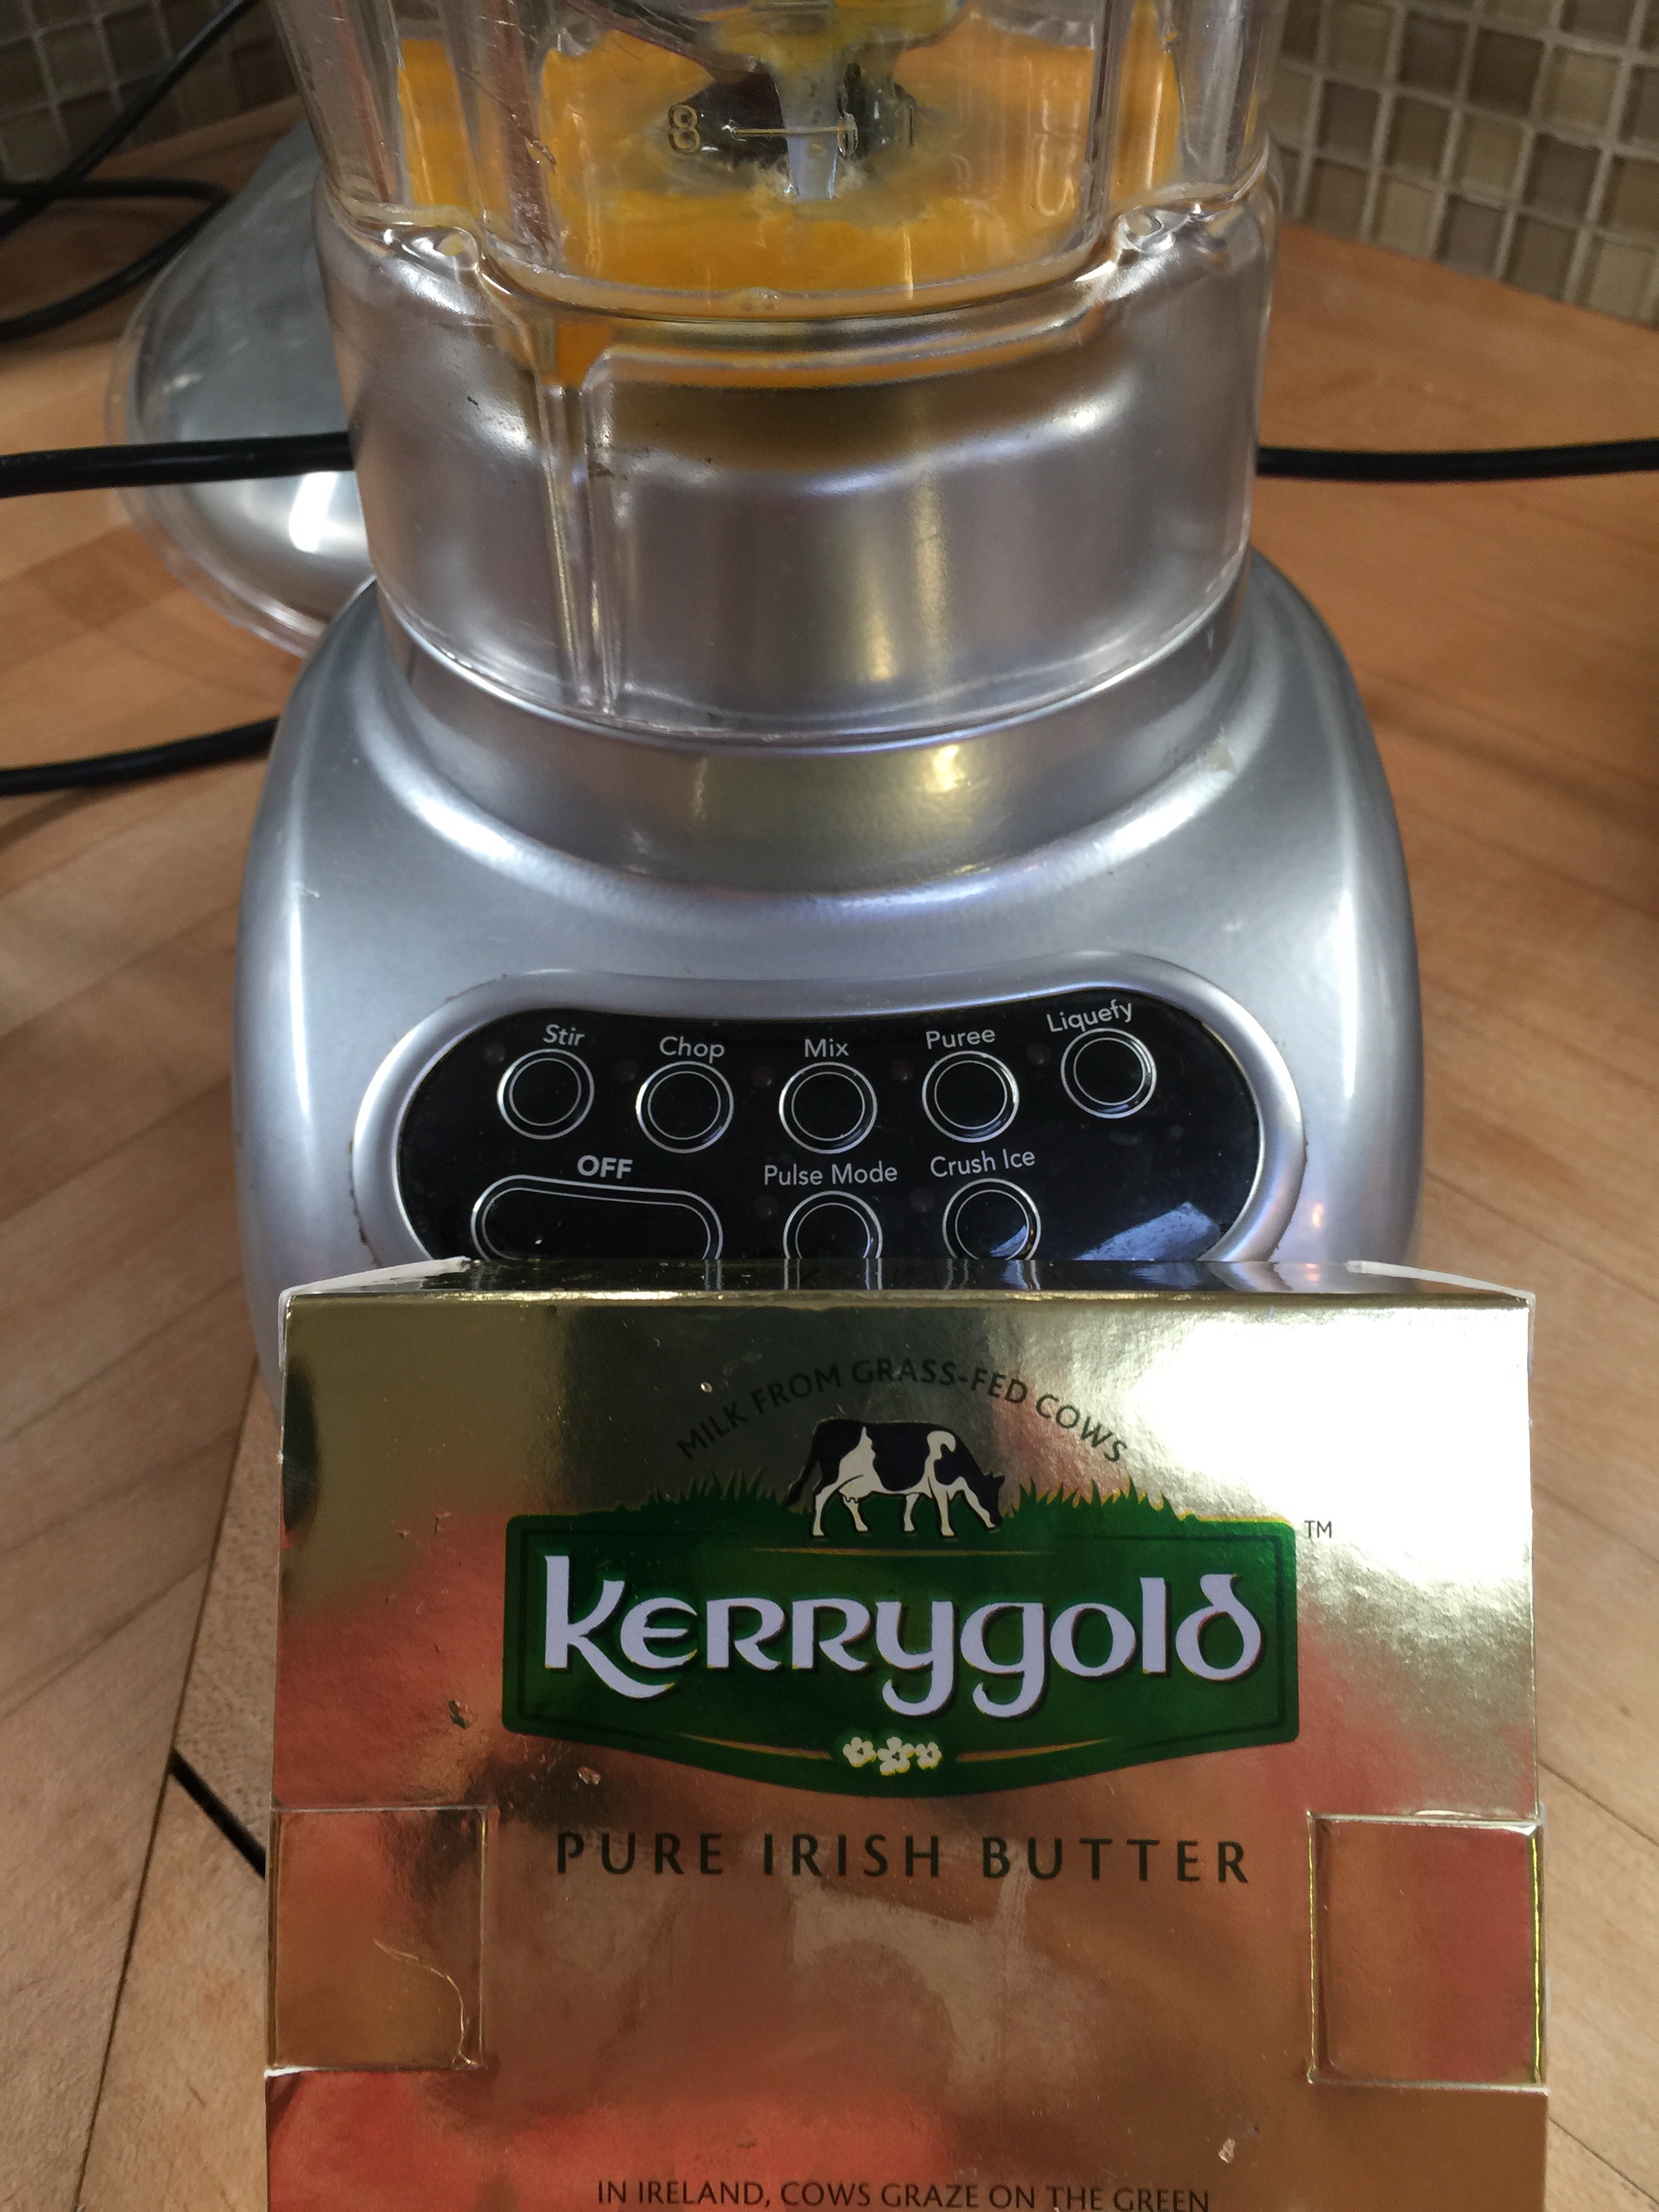
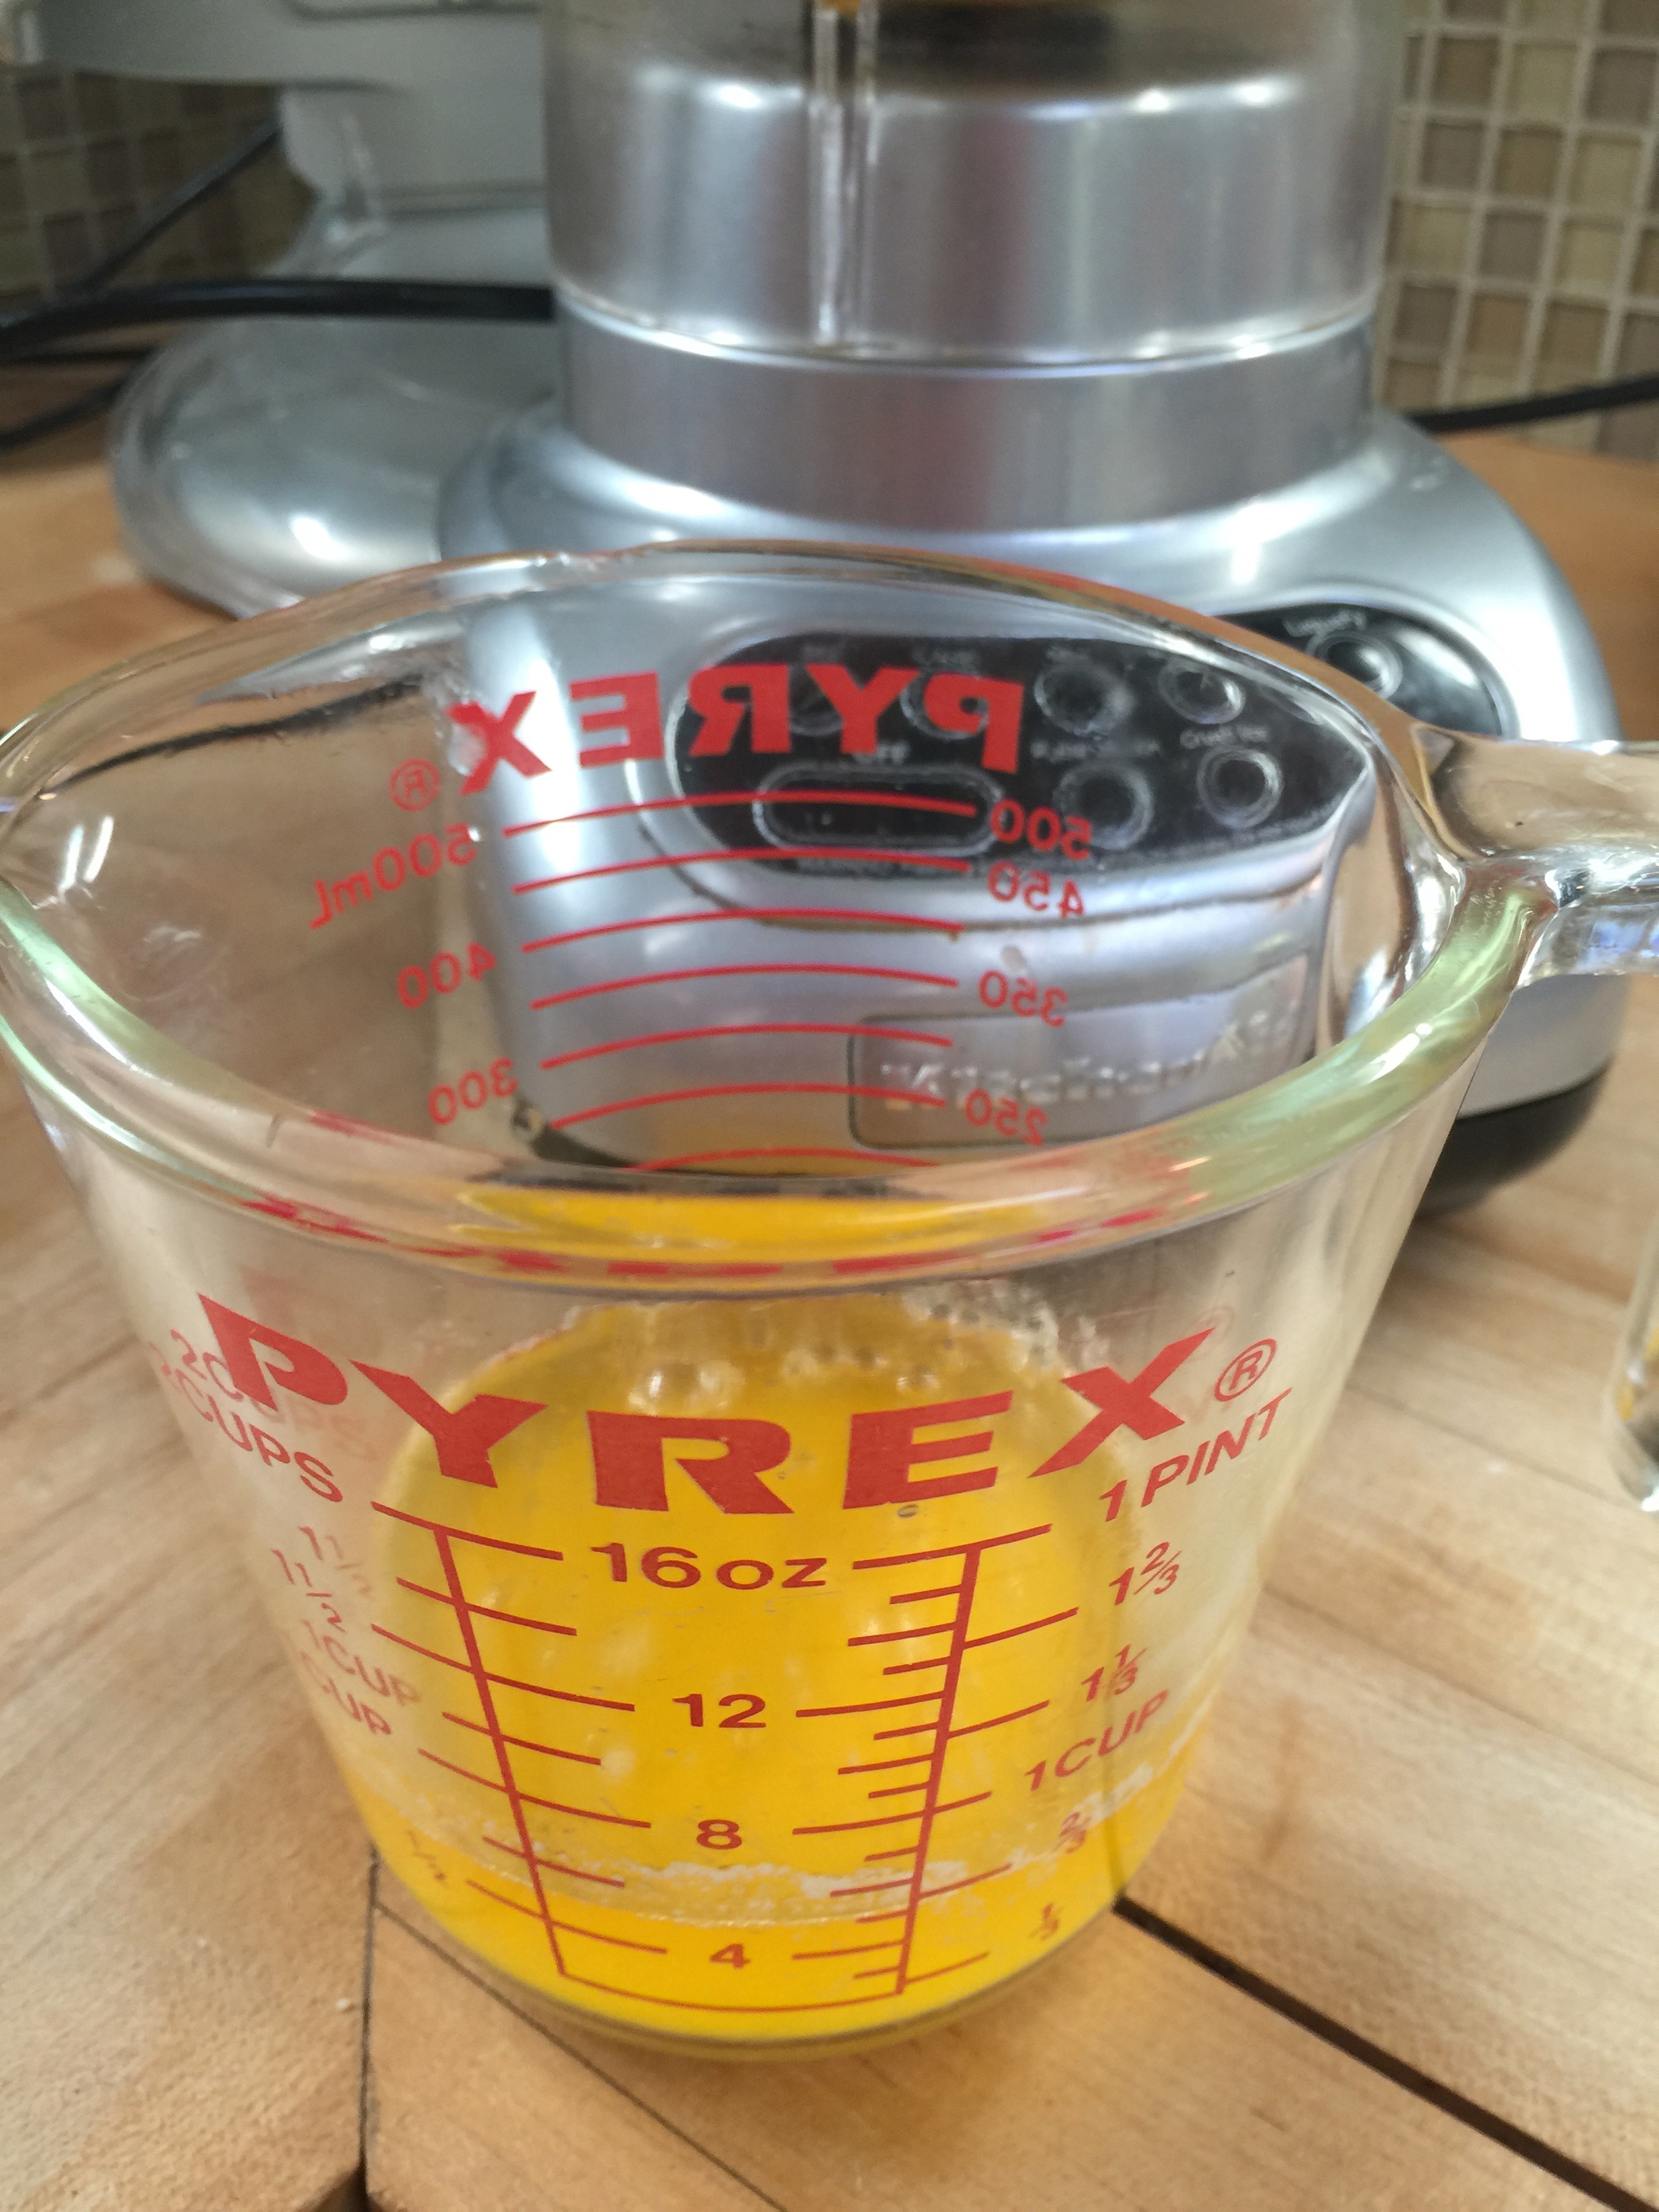
Melt 1/2 cup butter (Kerrygold) in a pyrex glass measuring dish.
In a very low stream on the lowest speed, gently pour your butter into your egg yolk mixture.
As soon as it is combined – you have hollandaise.
I have never had it curdle, but if it does, add two egg yolks on high speed with whipping cream one TBSP at a time.
Happy Fourth of July!!! Wave that Red, White, and Blue! Show off your stars and stripes! Enjoy your day, and celebrate with friends and family! We love our Independence Day in the Lutz and Stavros households!
We have been over several recipe ideas to keep your day healthy and low carb! Here are a few ideas from the past and the ones we have posted the last few weeks to help you compile your menu into one concise spot…right here! All of these recipes can be found on this webpage on our blog:
Main Courses:
Brisket (You can even pick up or buy a precooked one to bake to make it easy!)
Ribs – Yum!!!
With our sugar-free sauce…
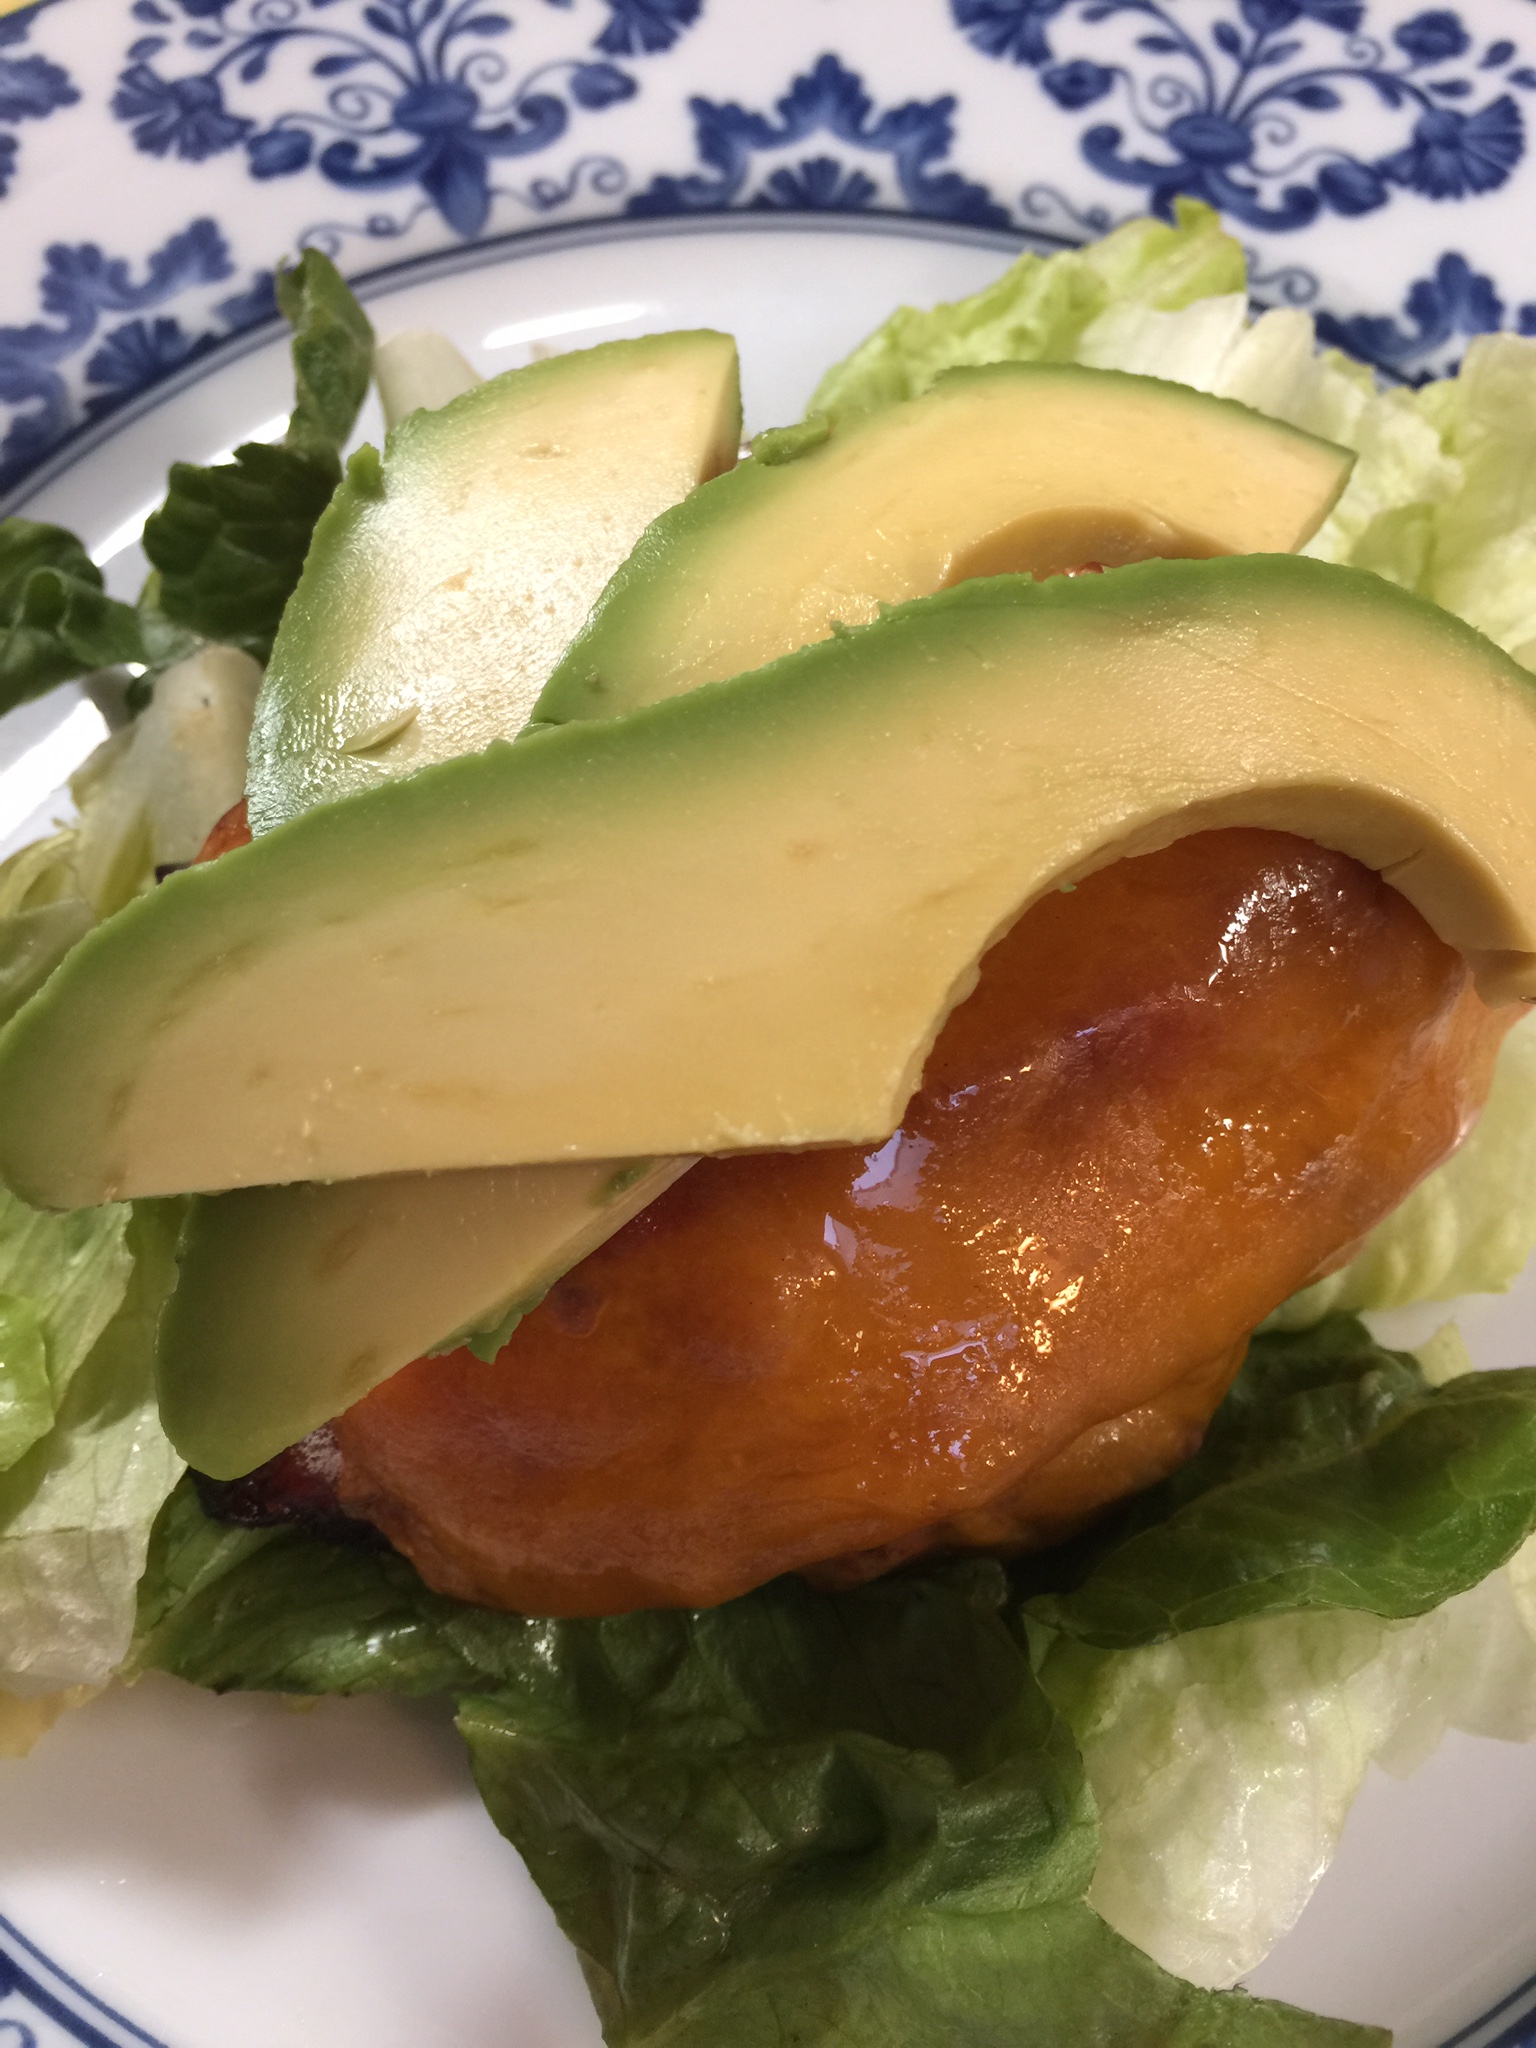
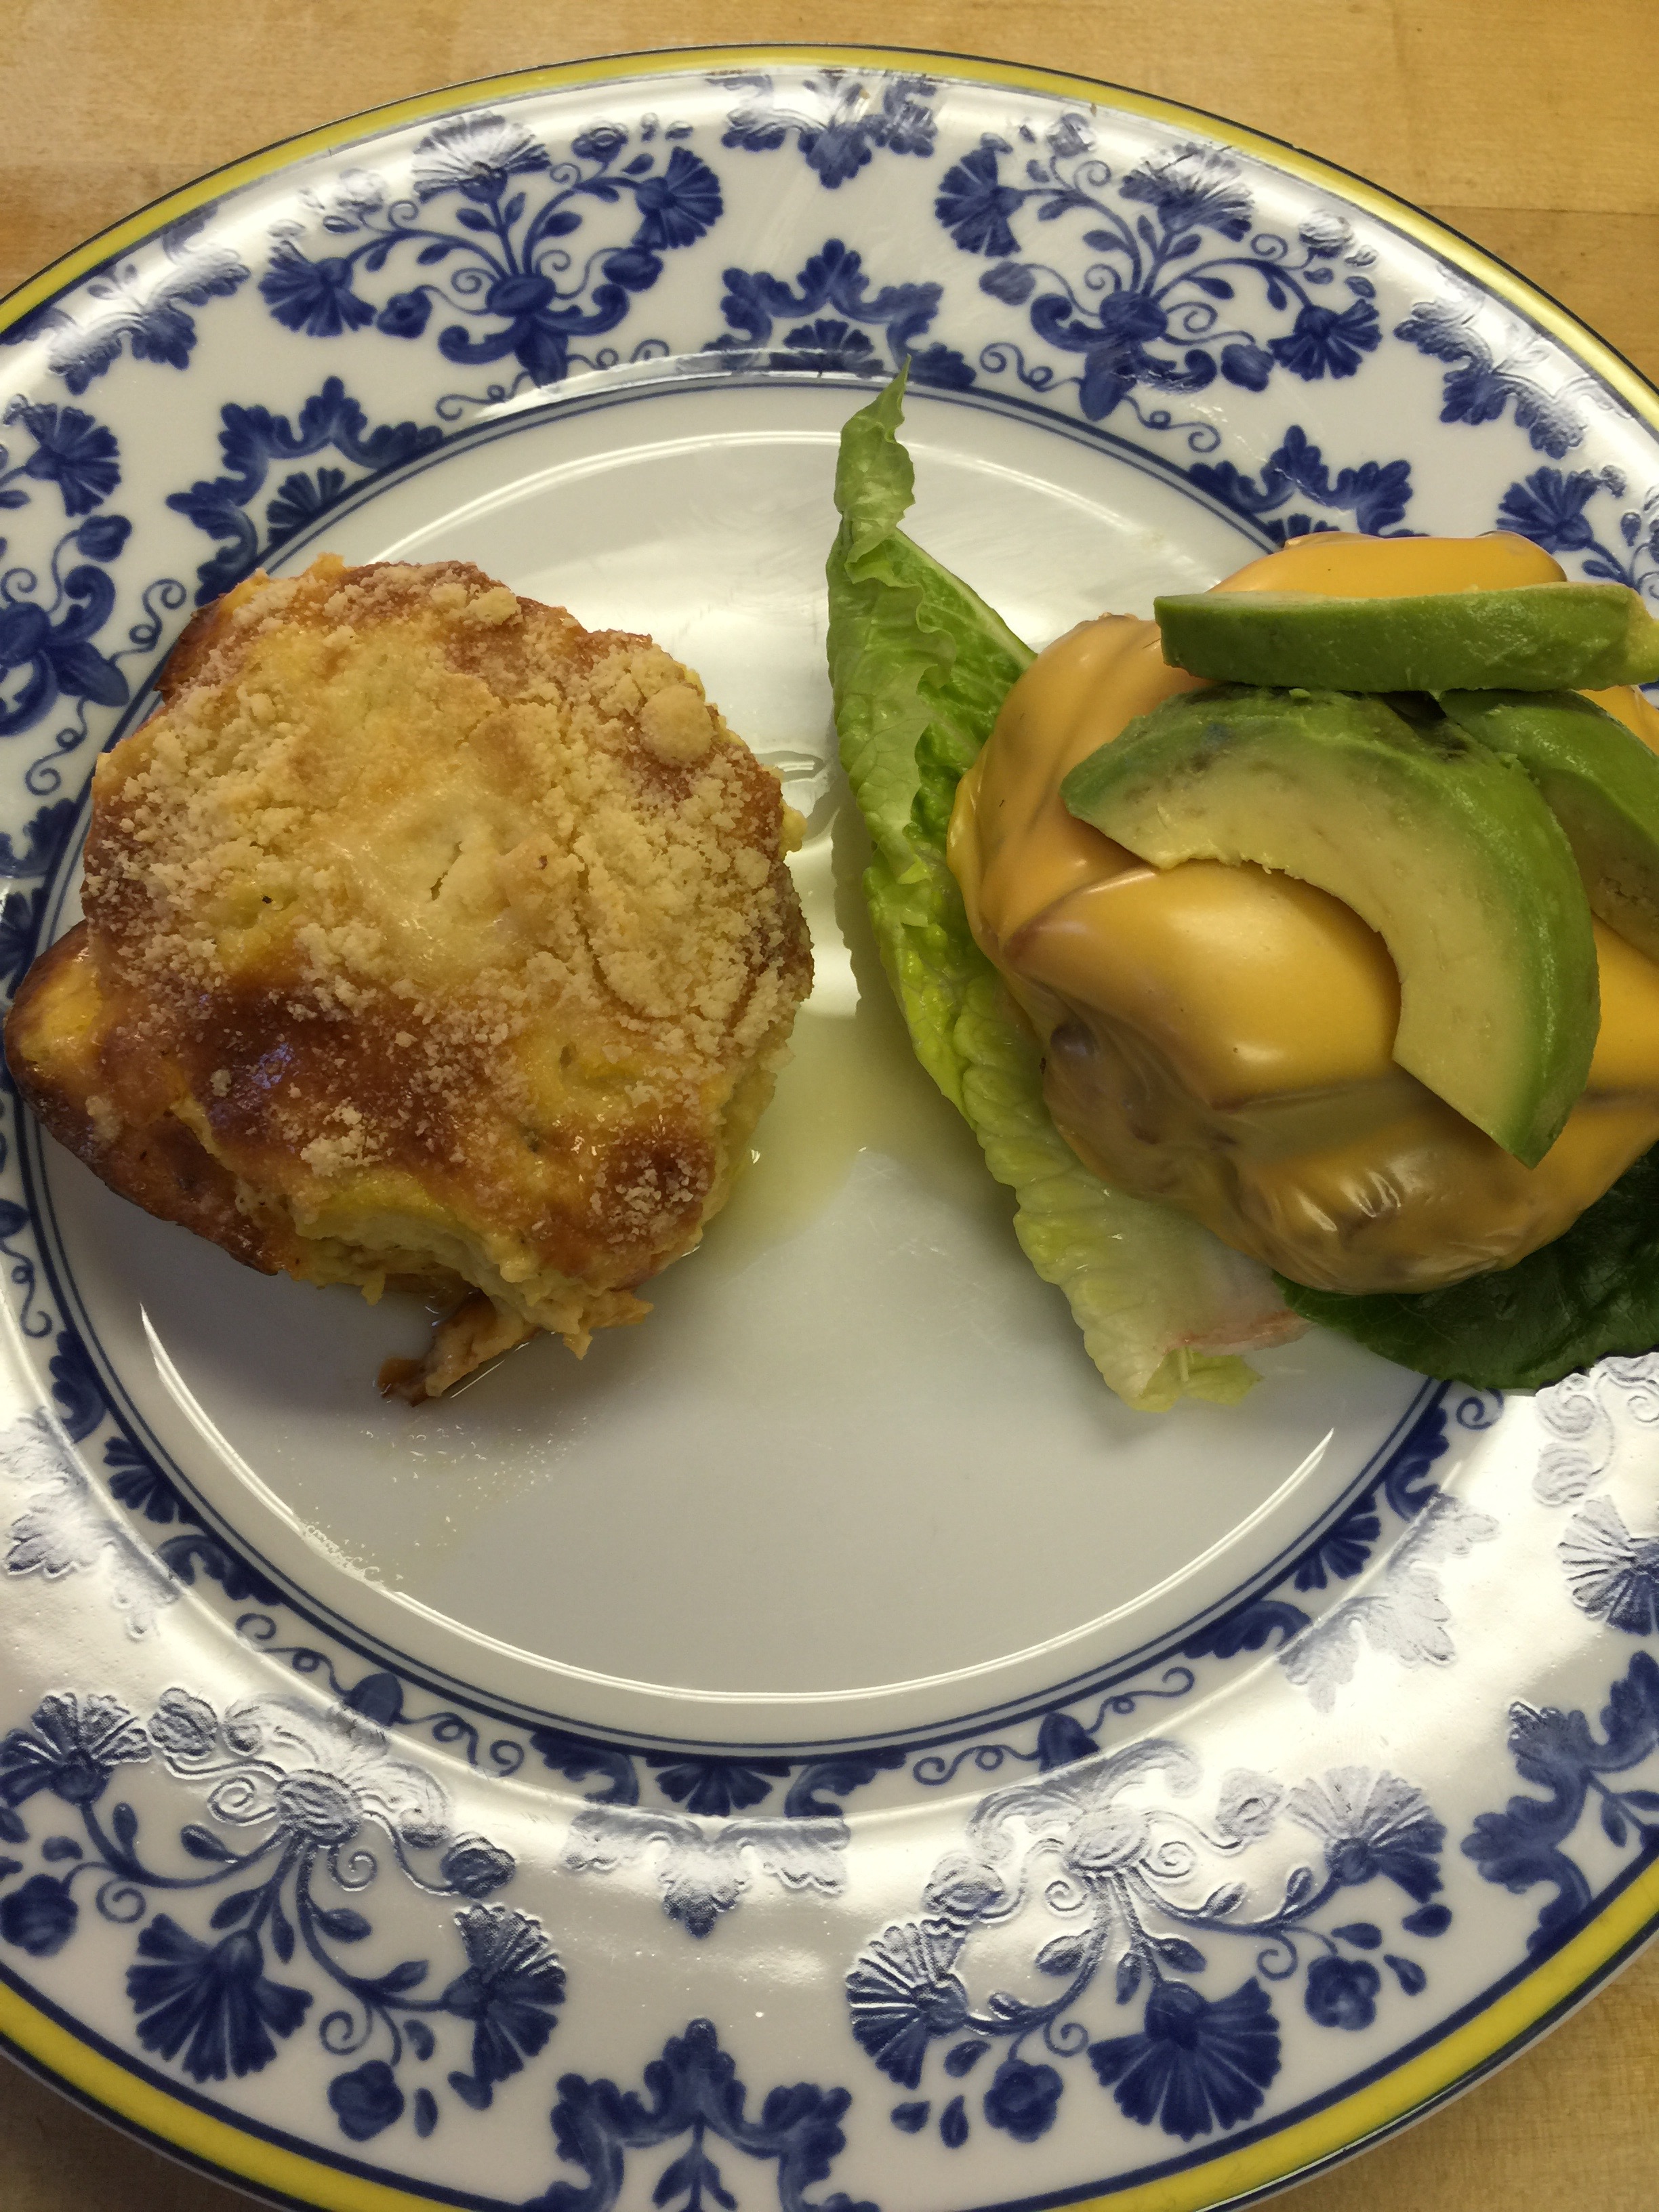
Bunless Burgers (We love our ABC burger – Avocado, Bacon, and Cheddar)
Bunless Hot Dogs or Sausage Links
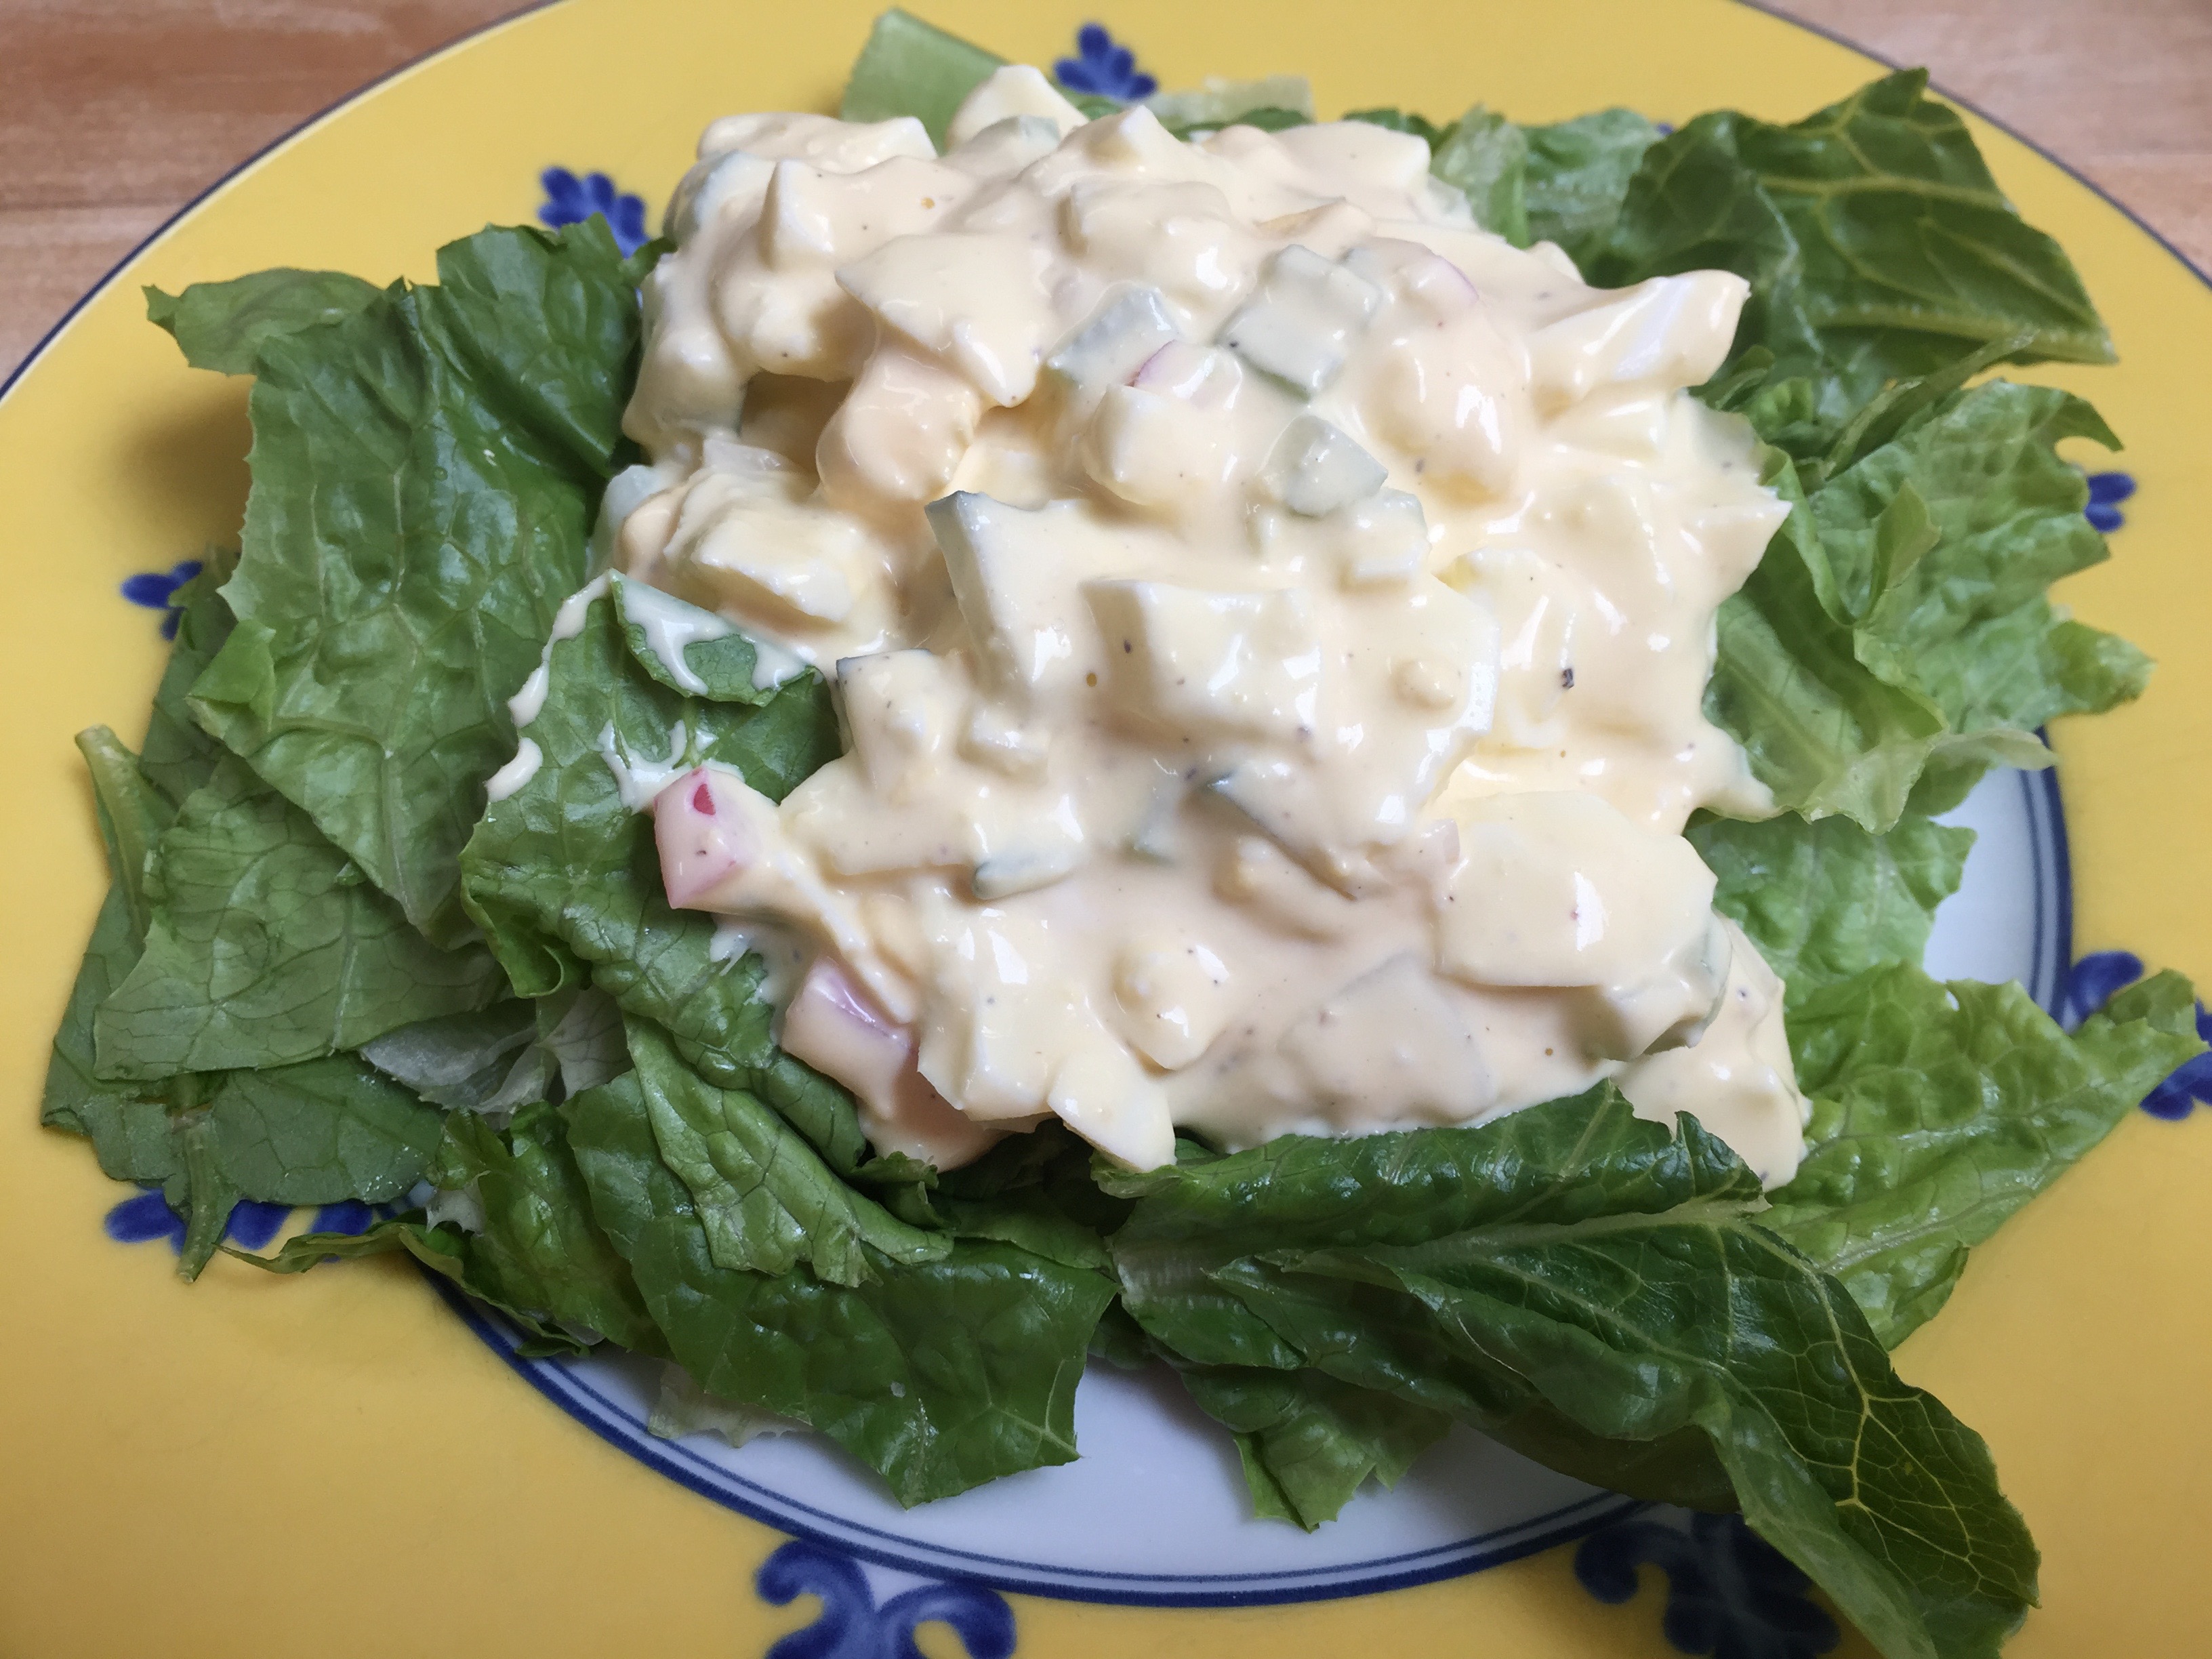
Egg Salad
Sides:
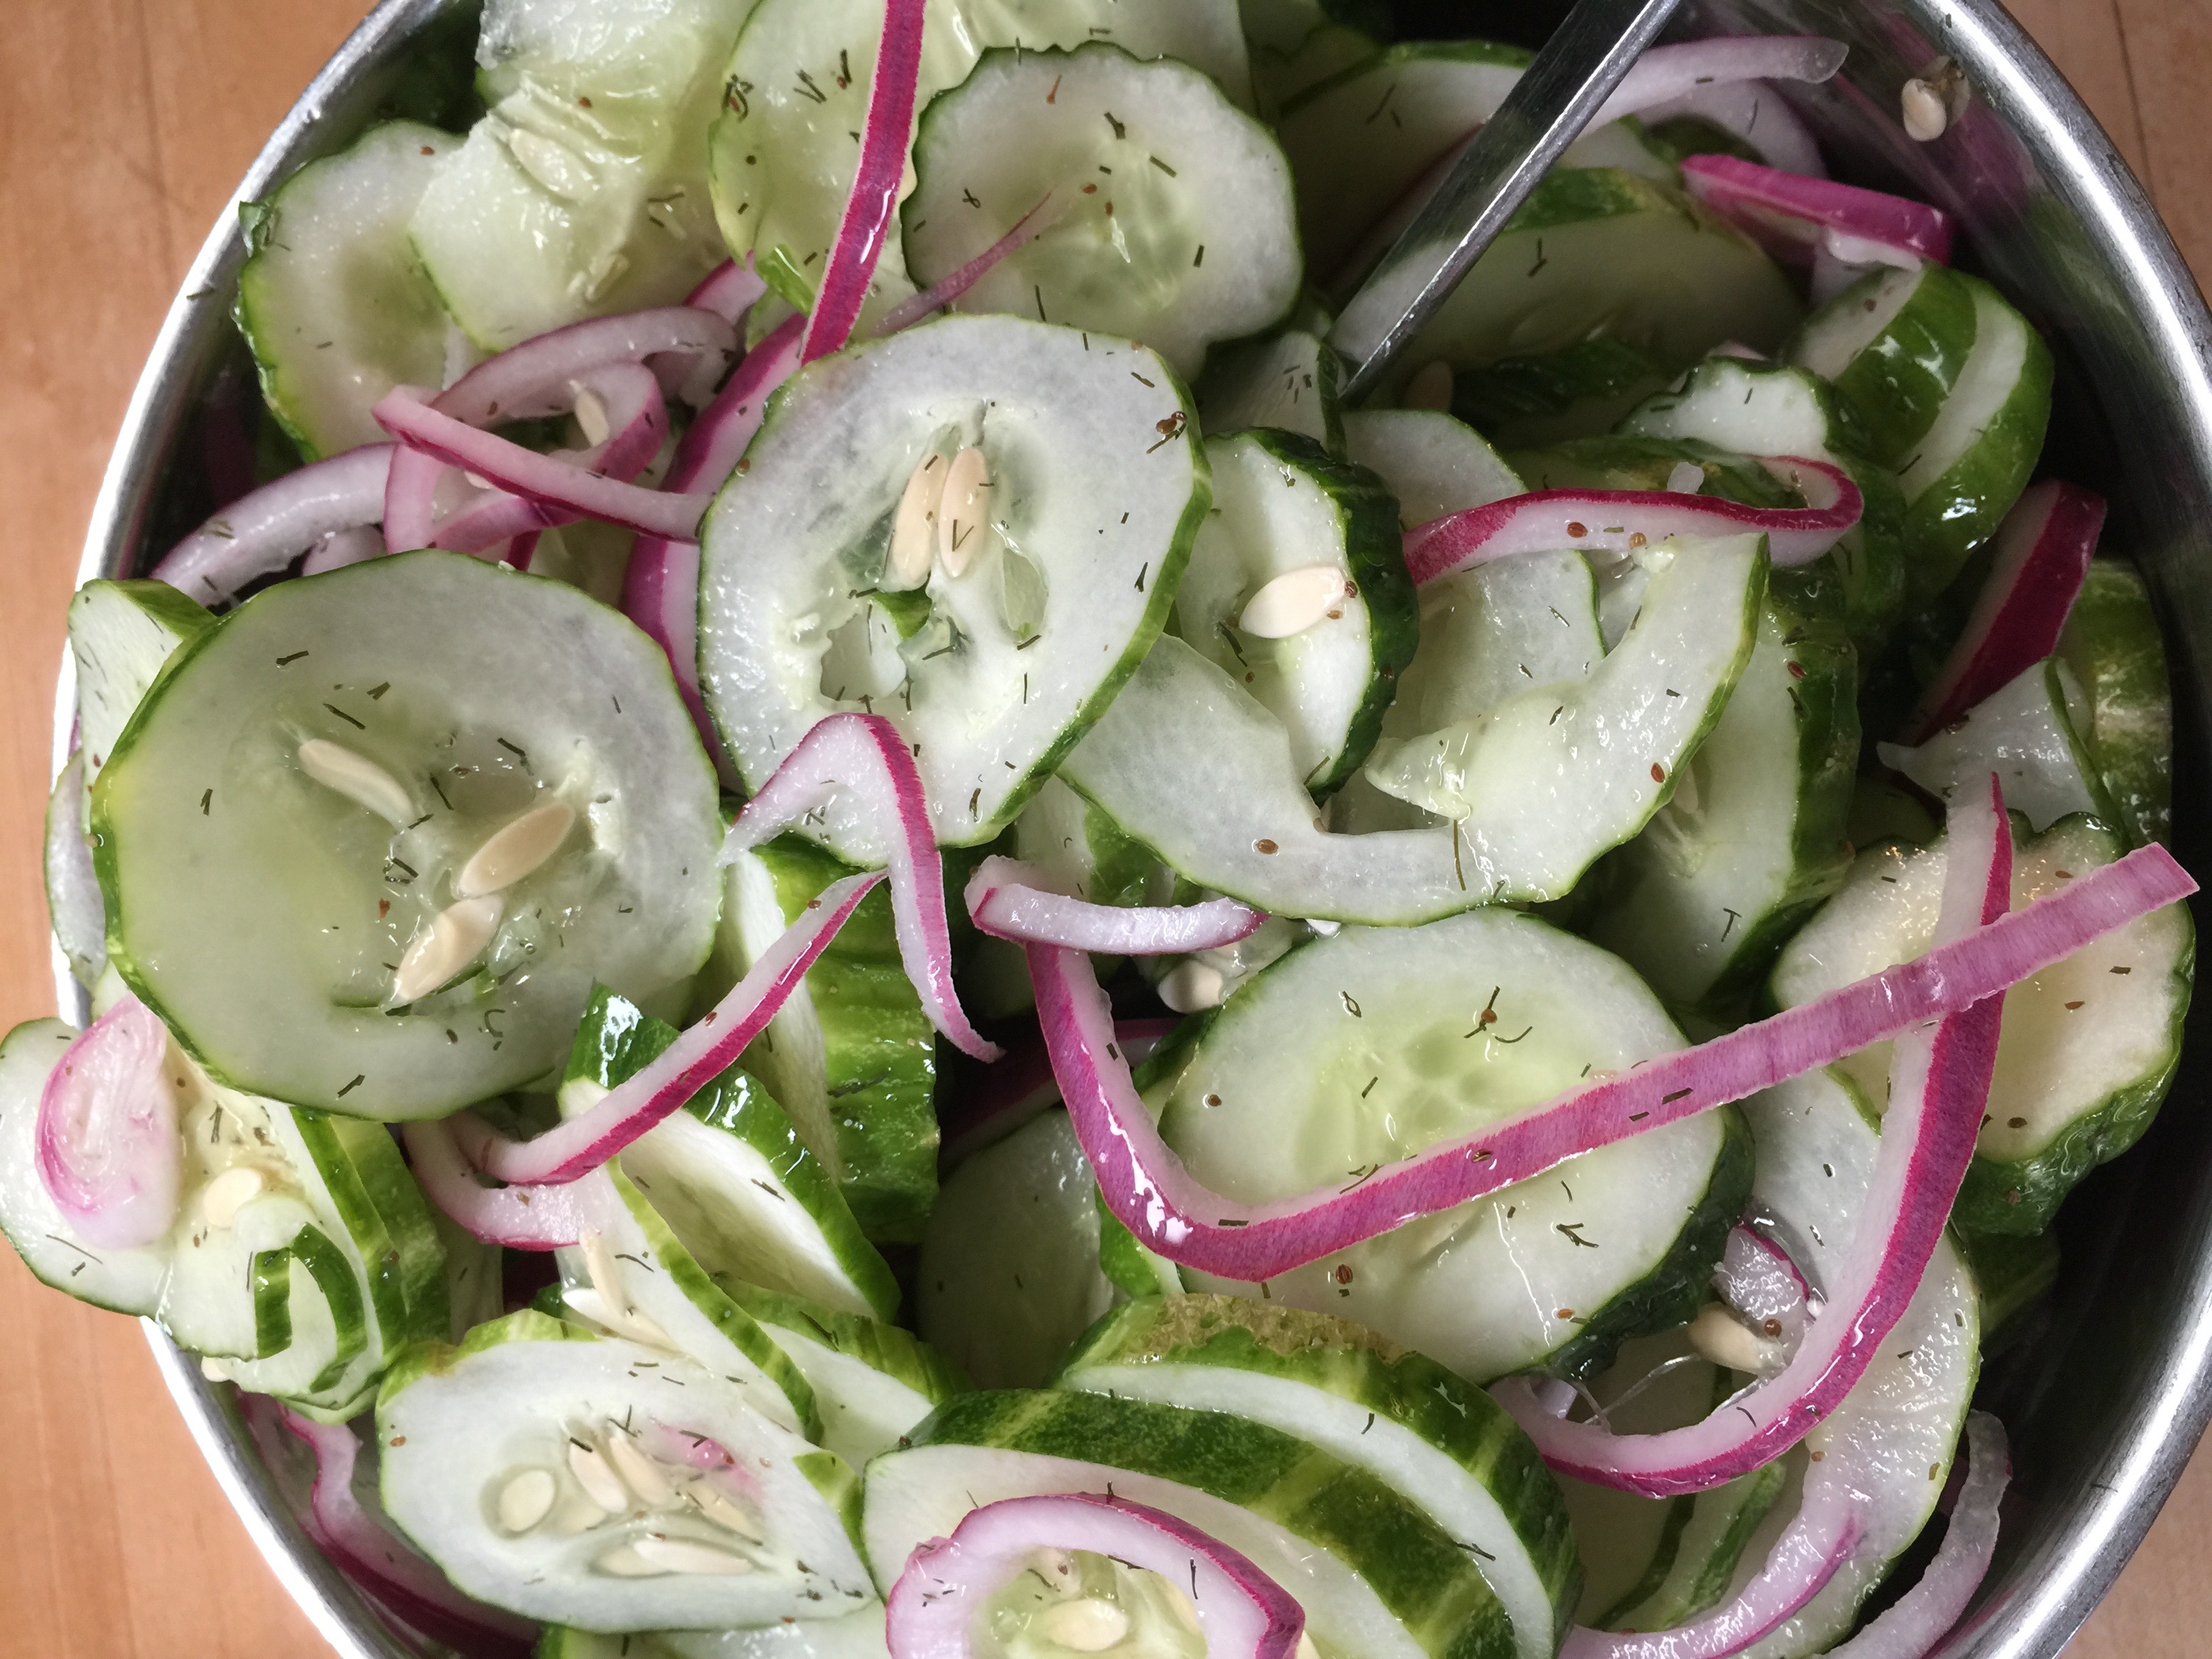
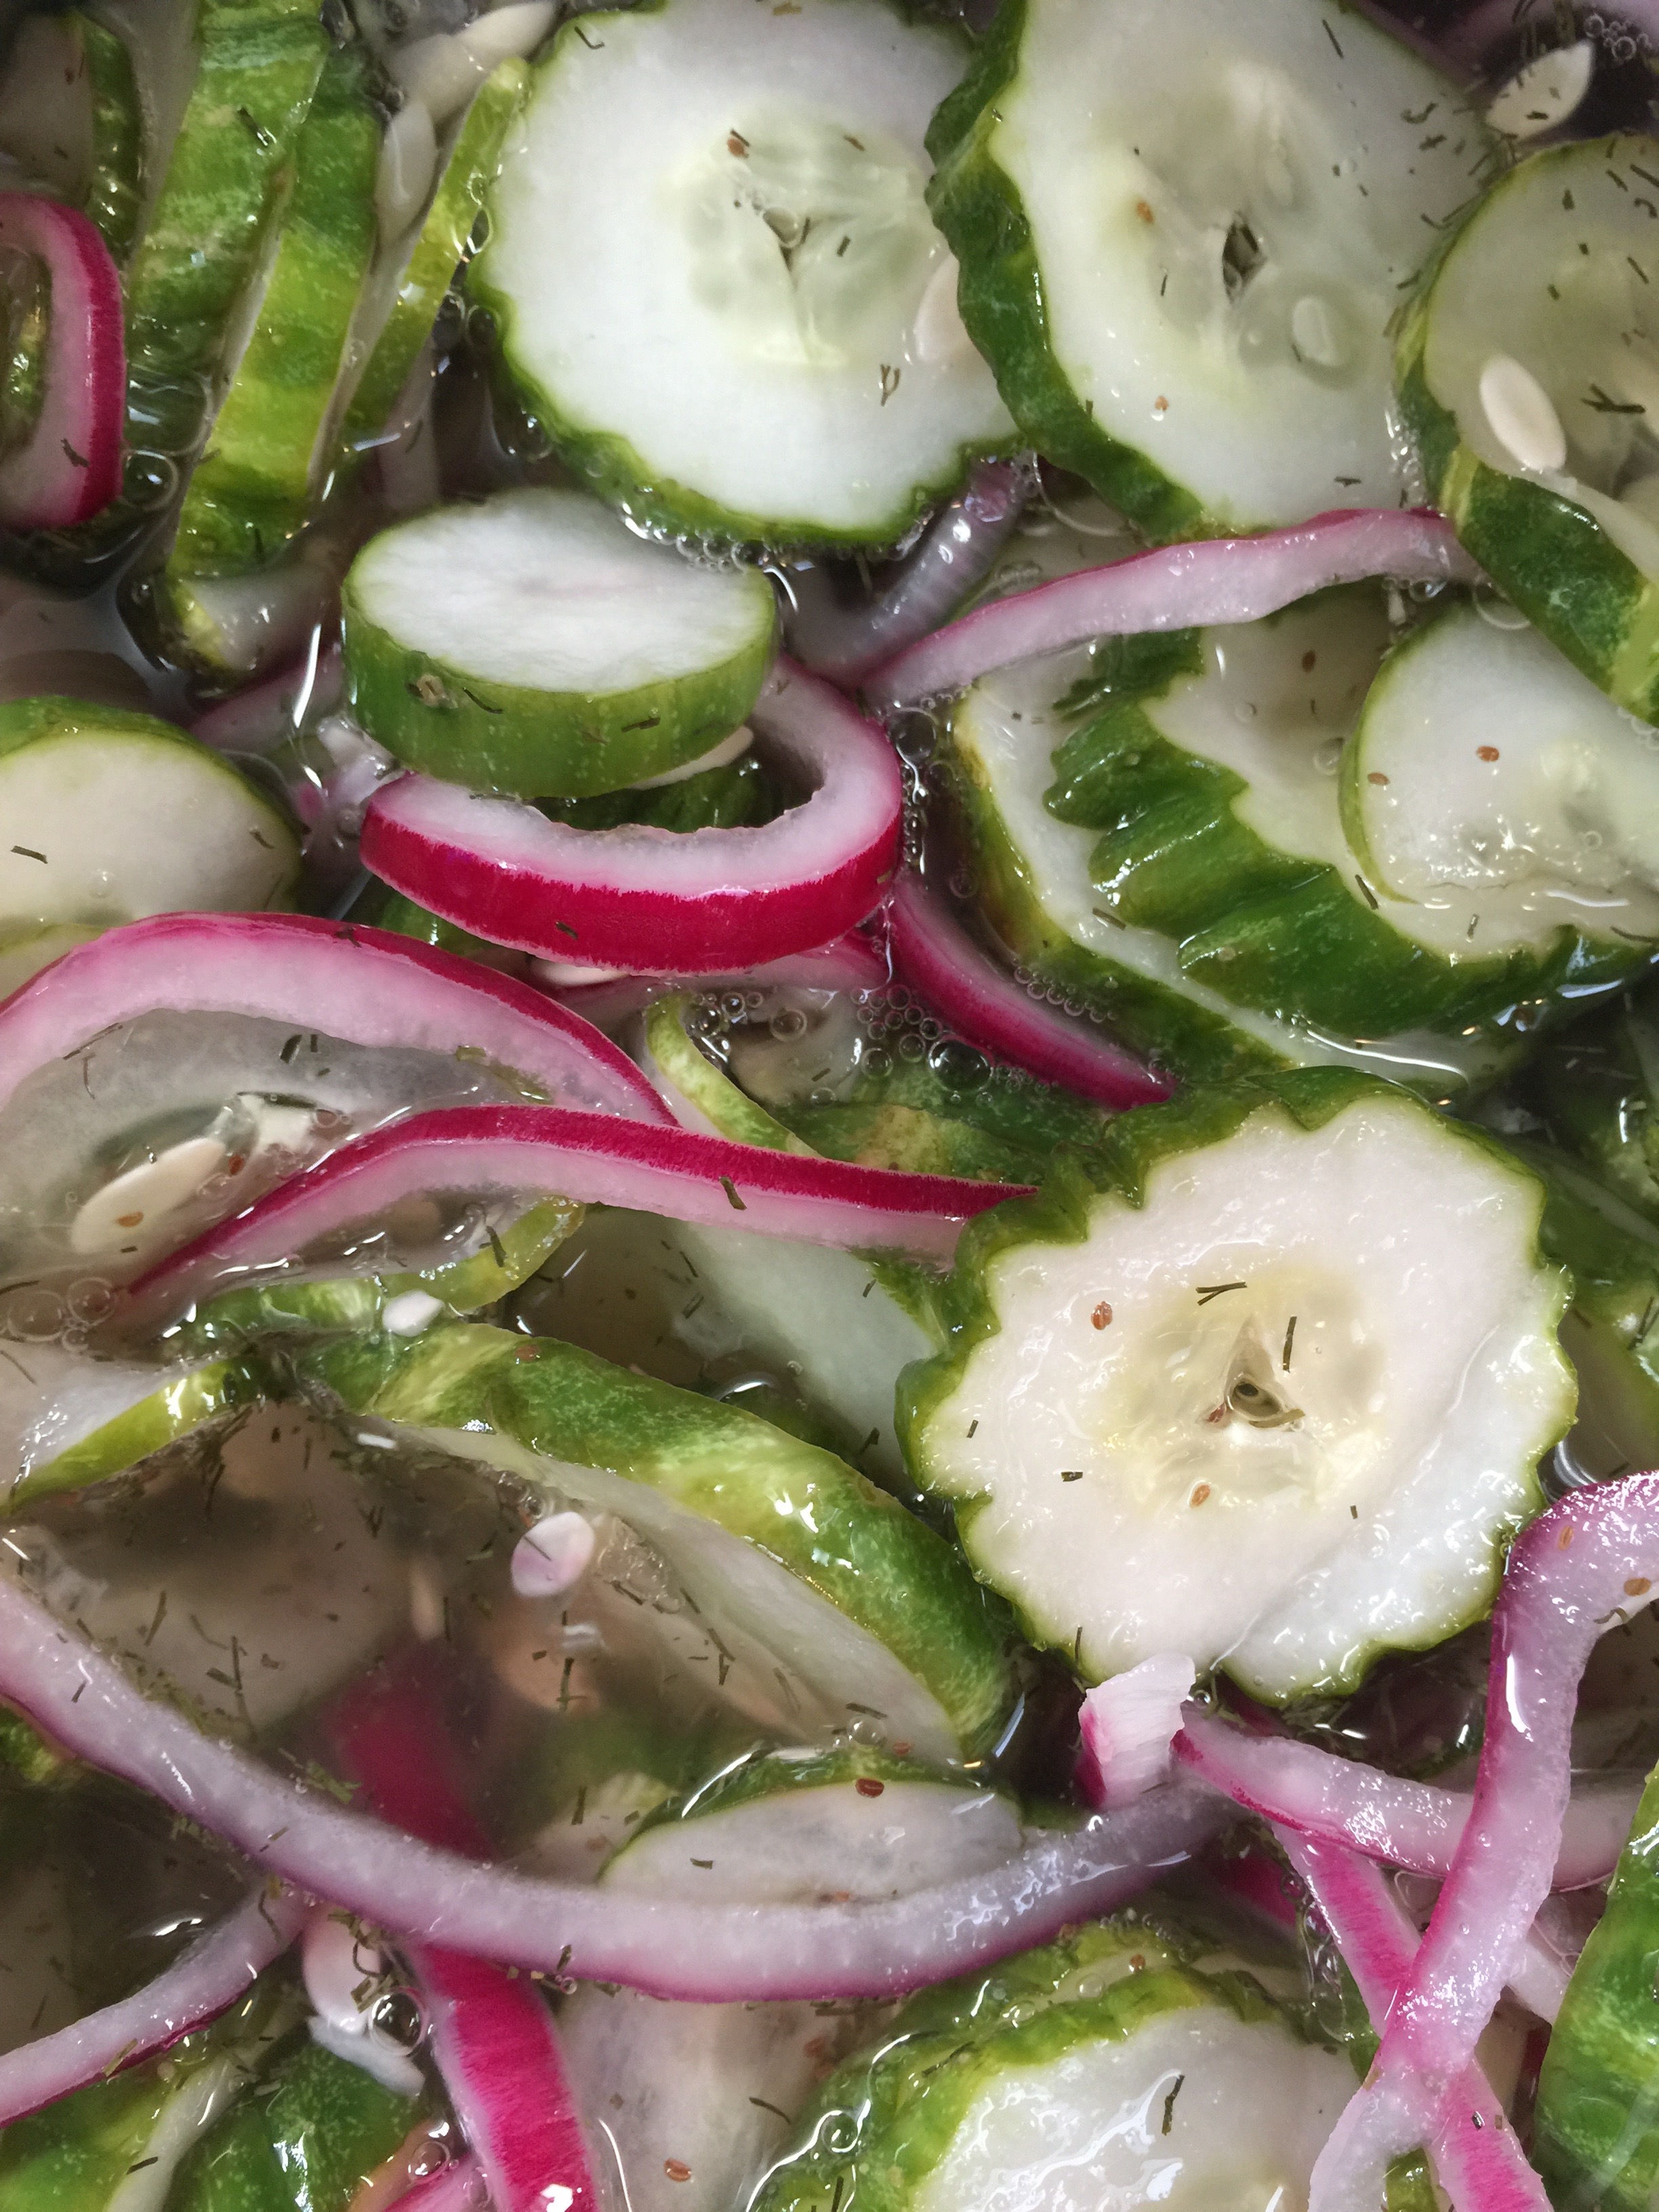
Refreshing Cukes
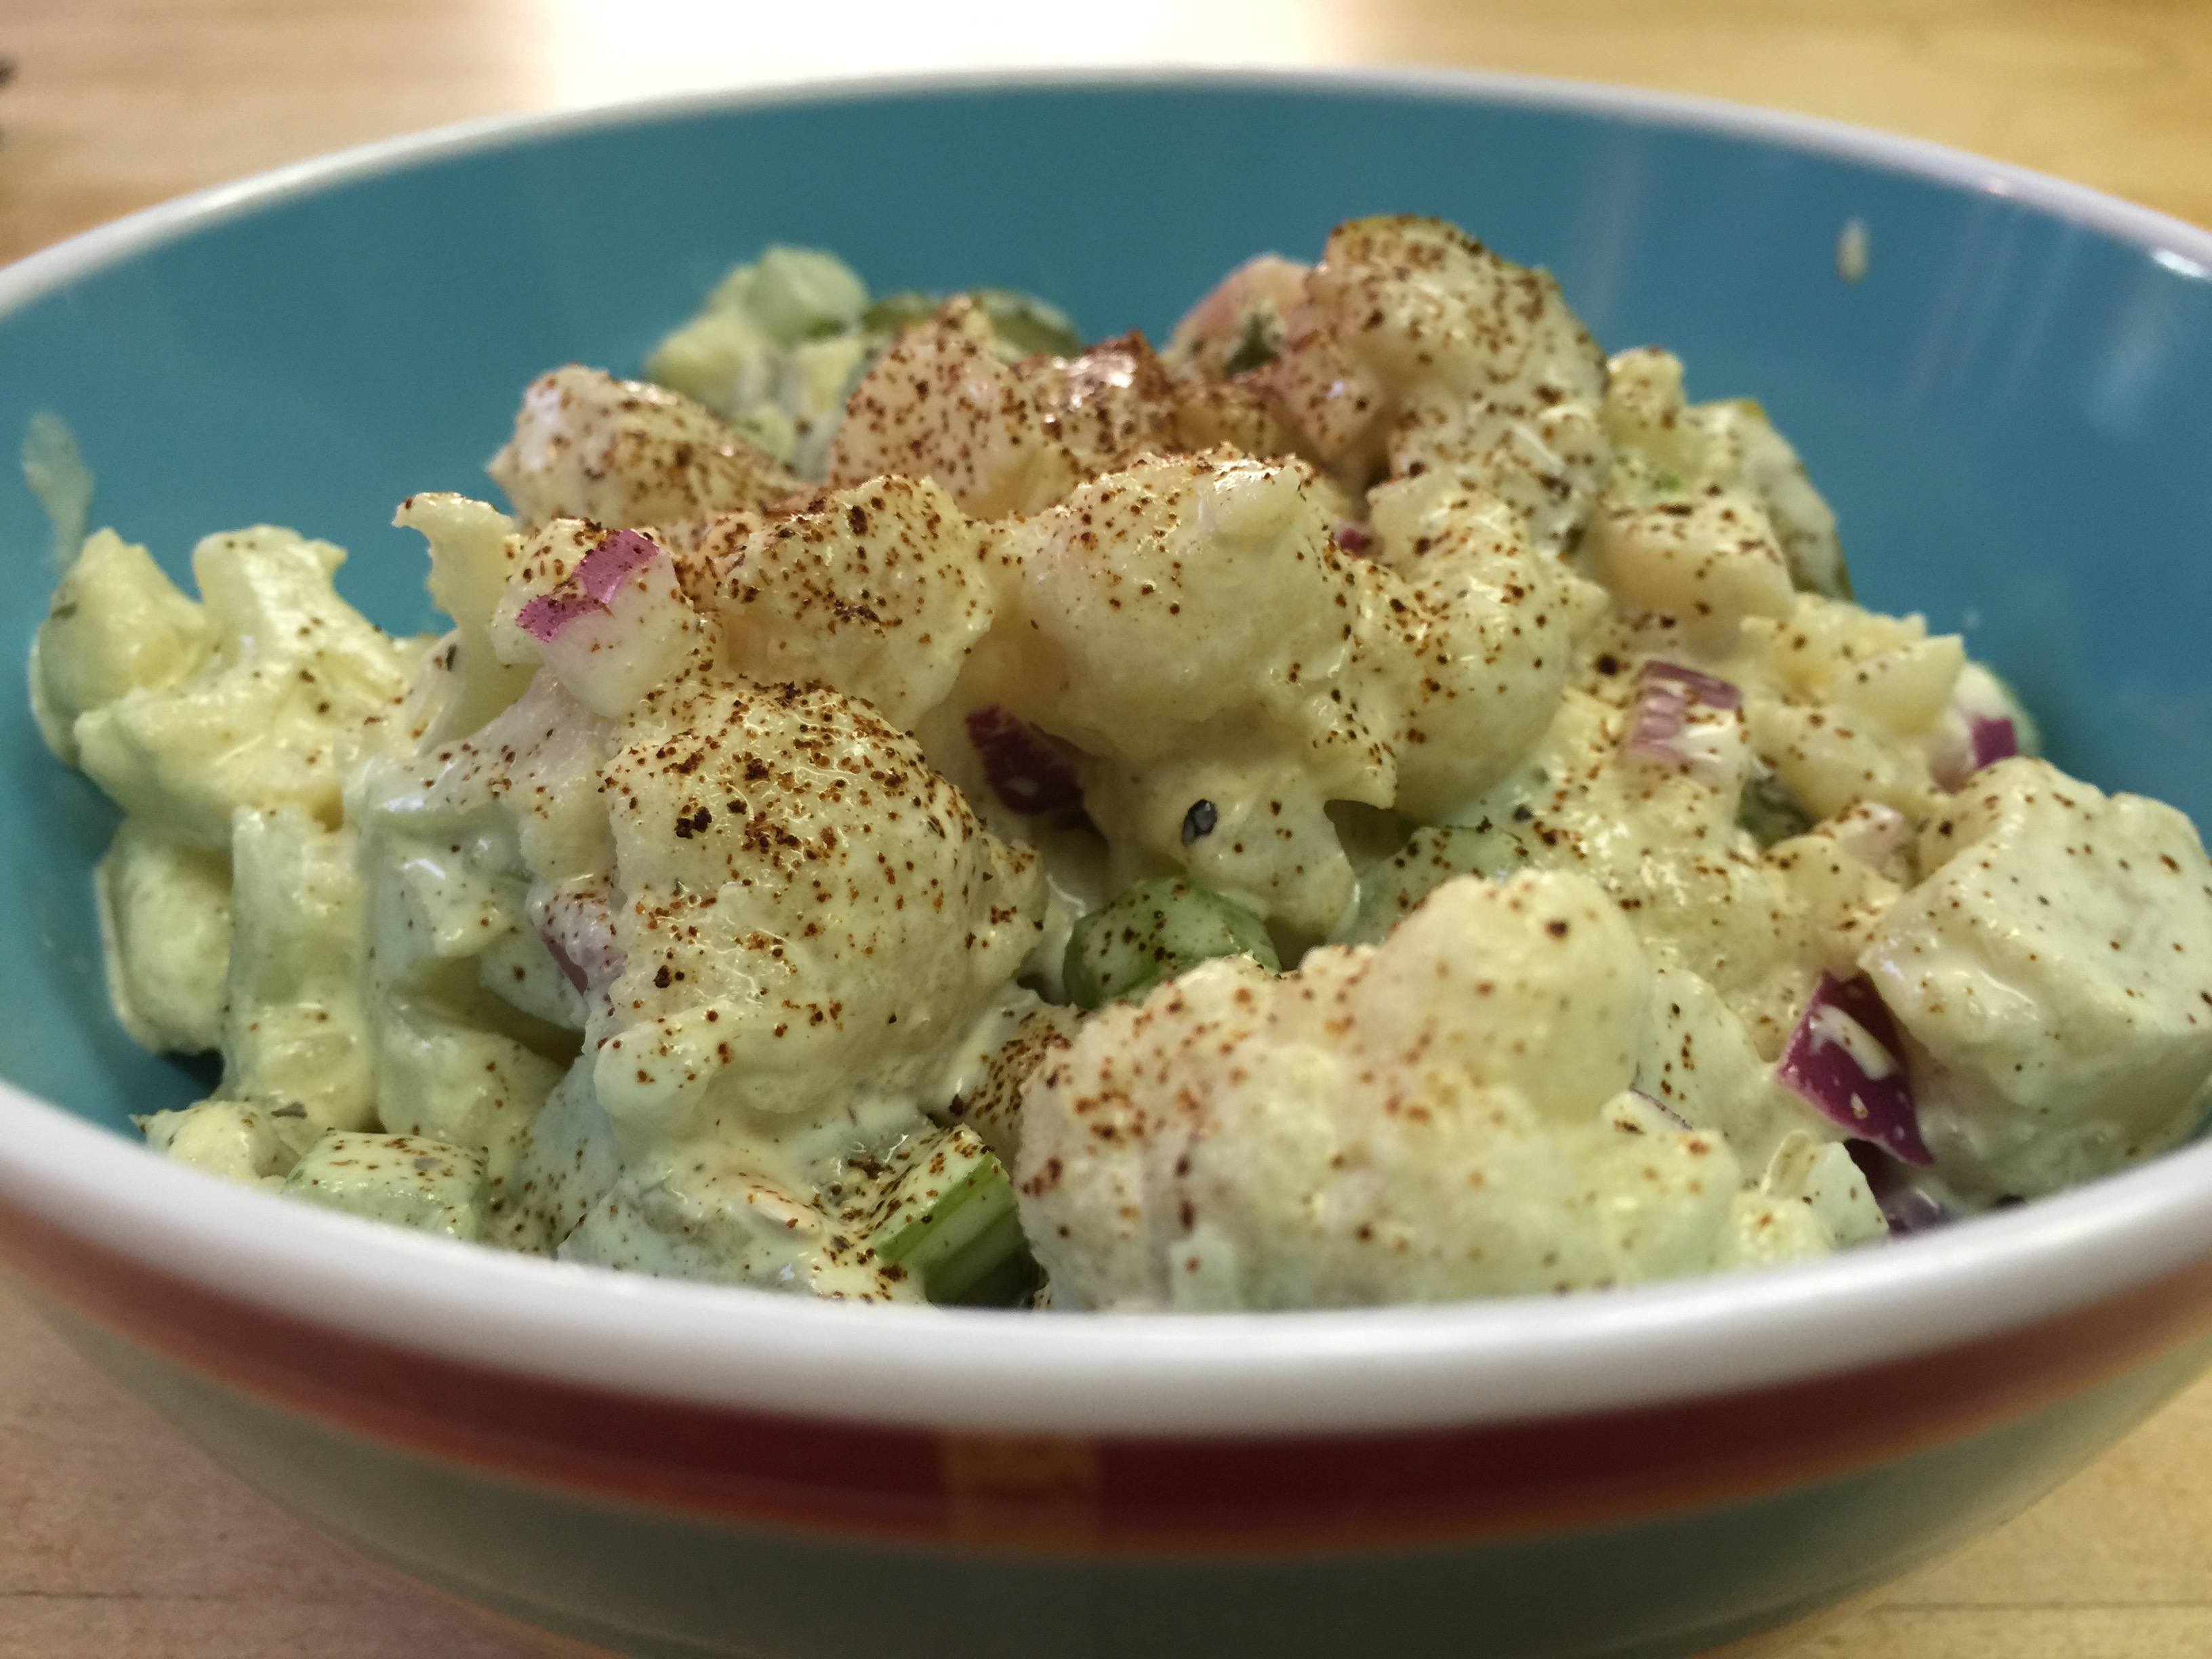
“Potato” Salad”
Cheesy Tater Tots
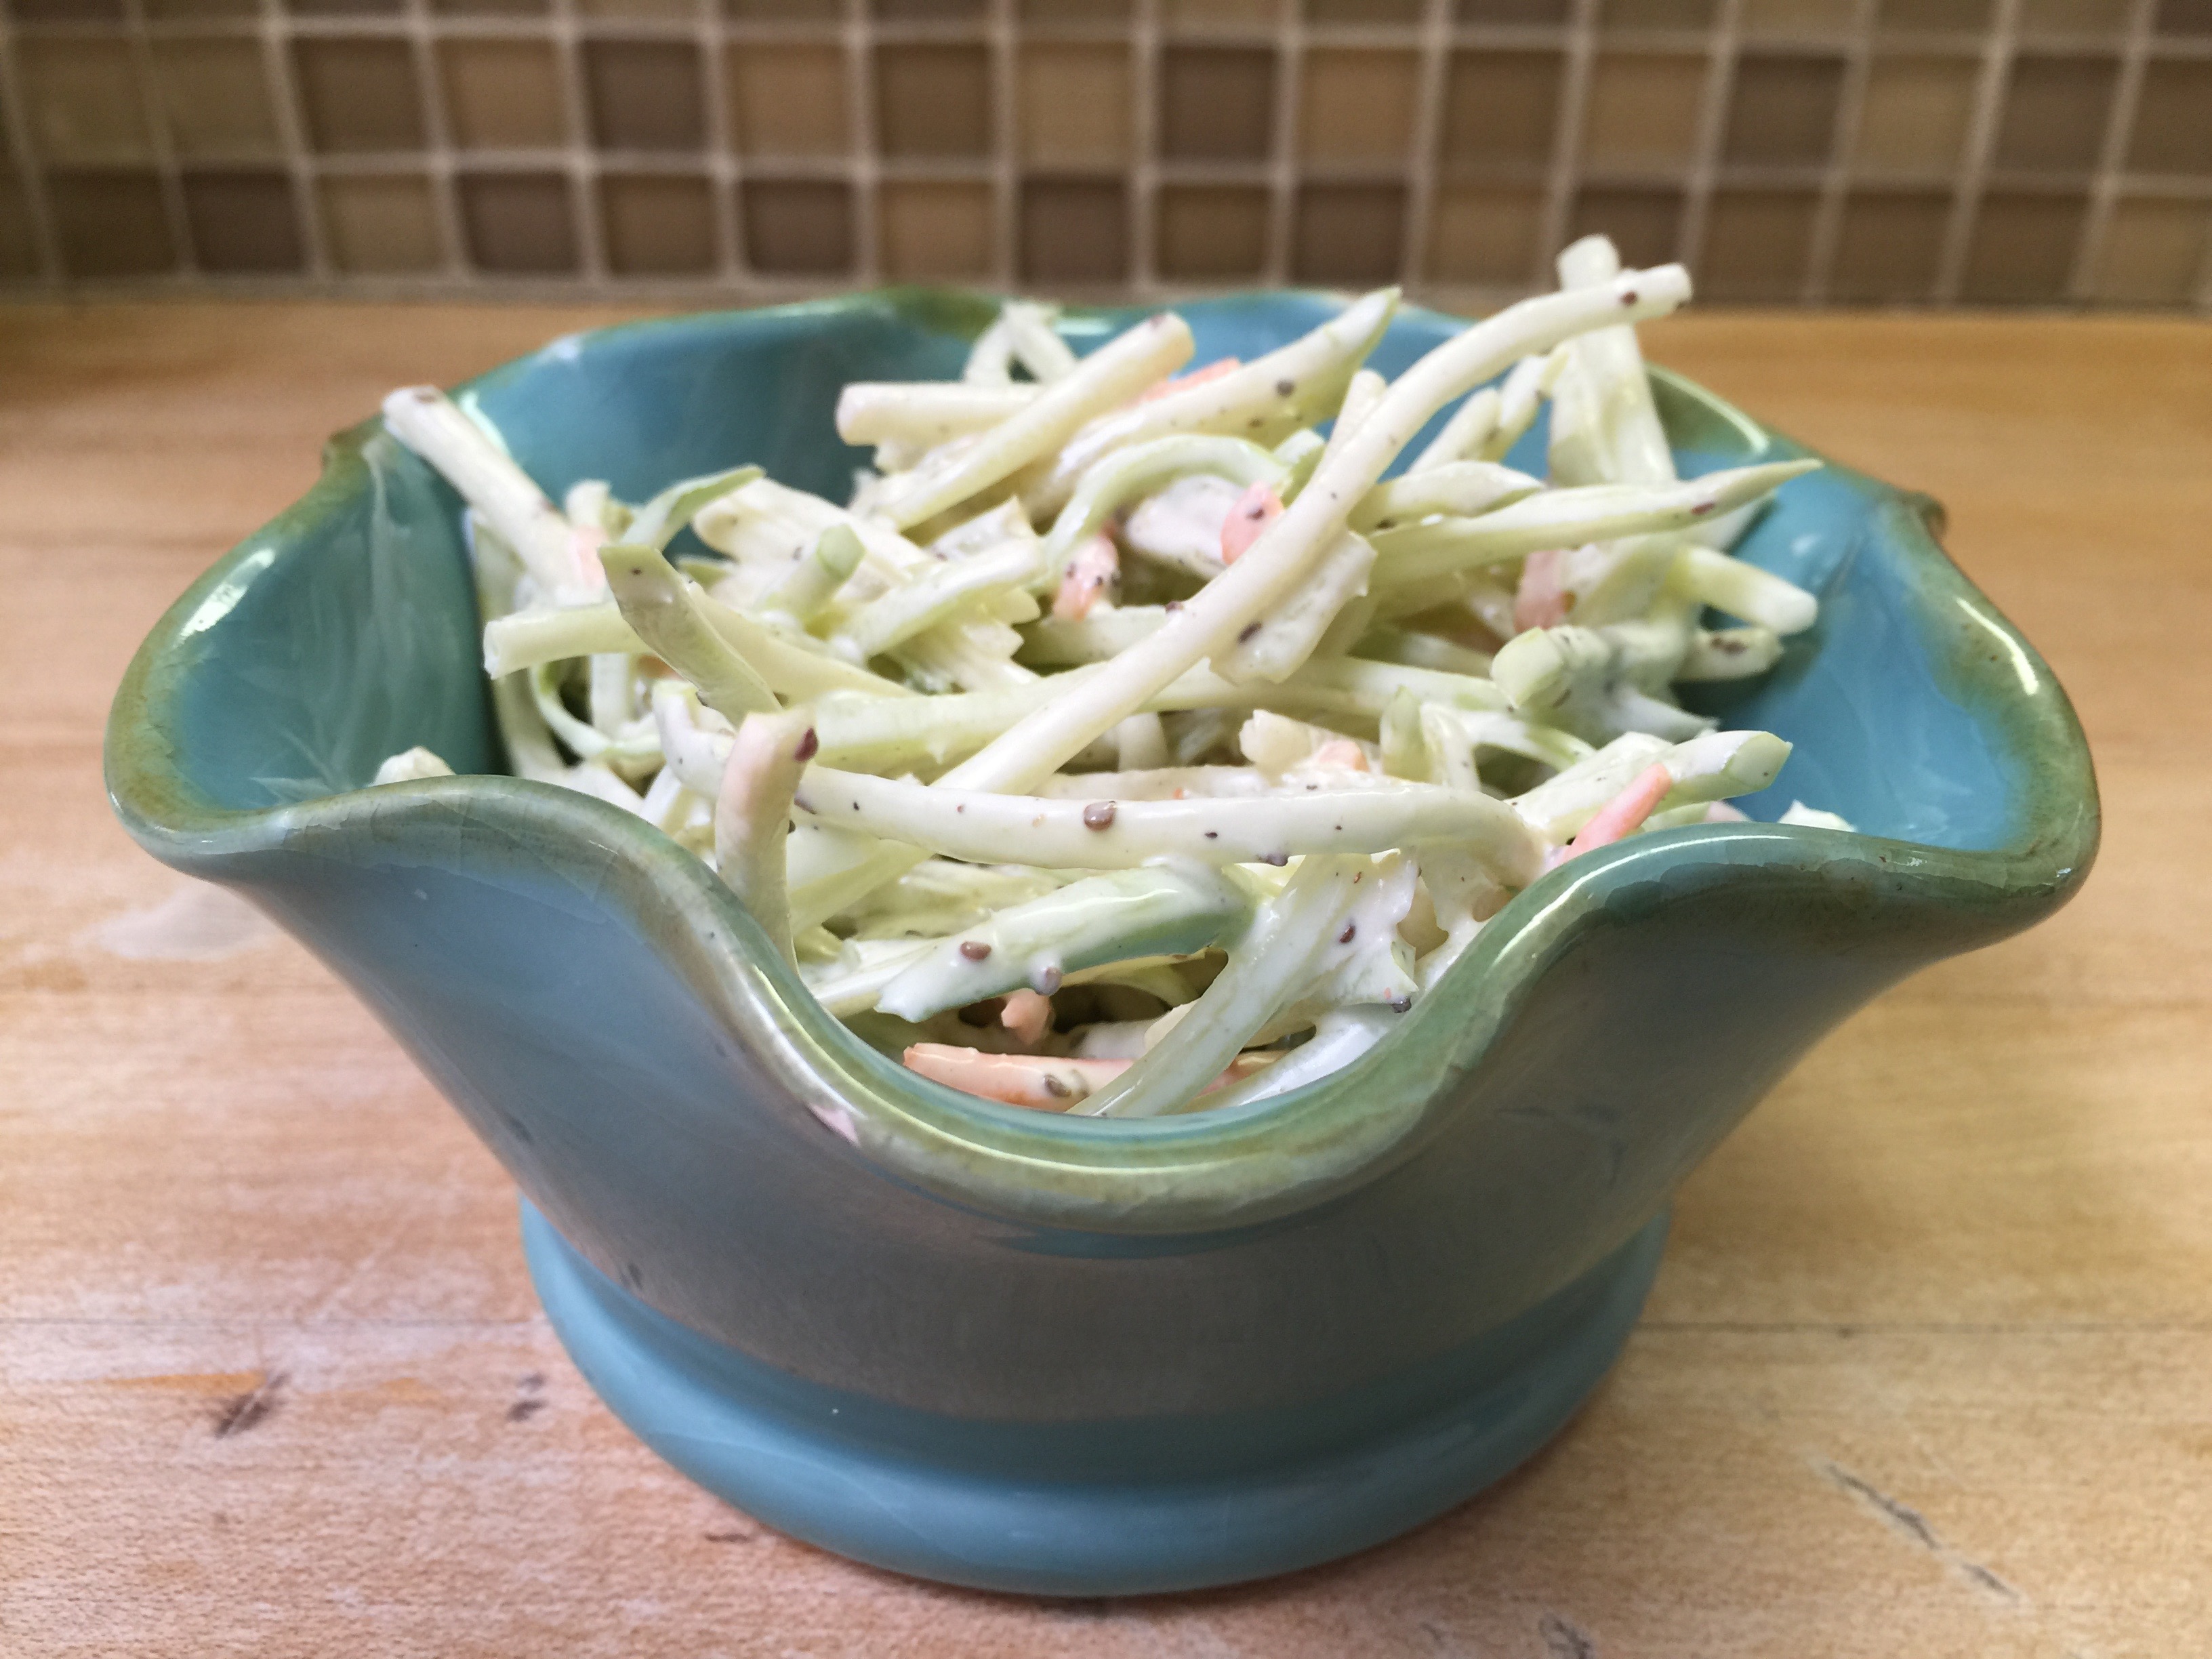
Broccoli Slaw
Broccoli Salad
Appetizers and Snack Ideas:
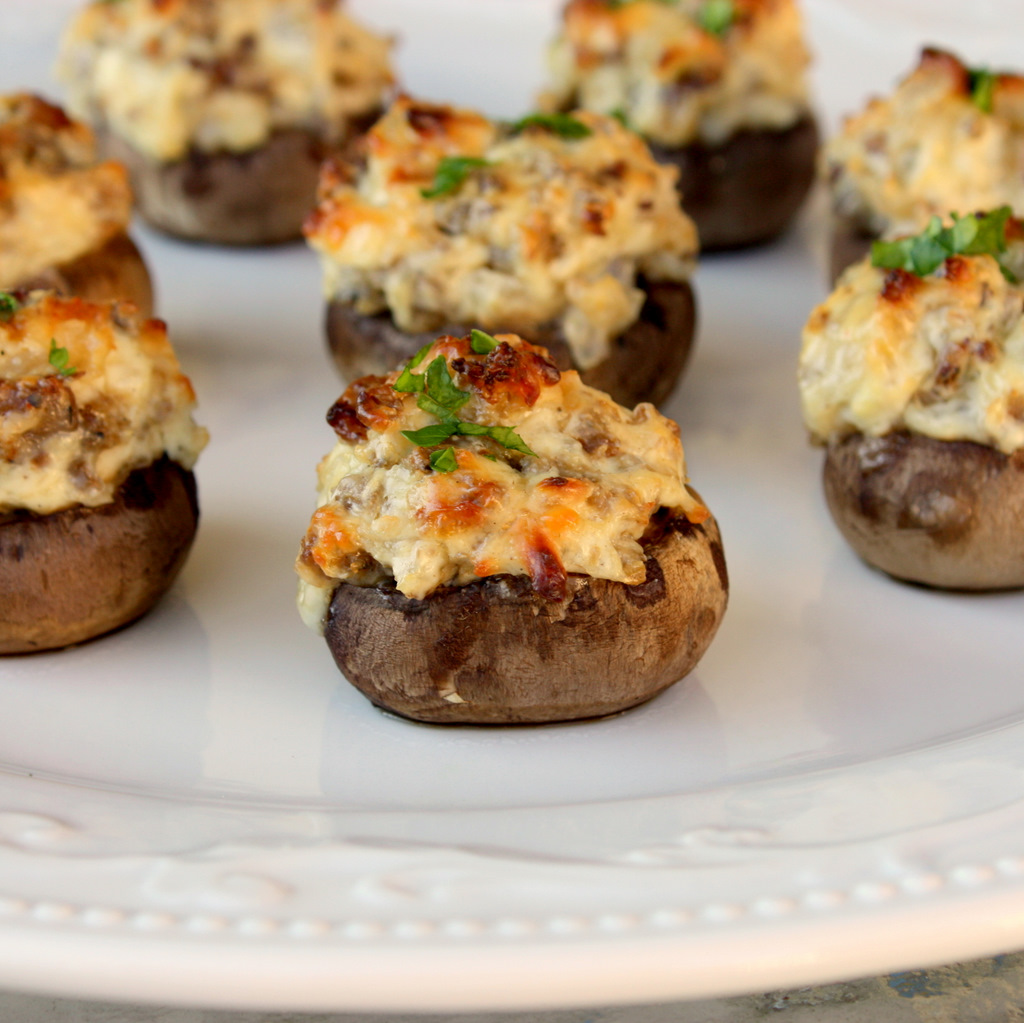
Stuffed Mushrooms
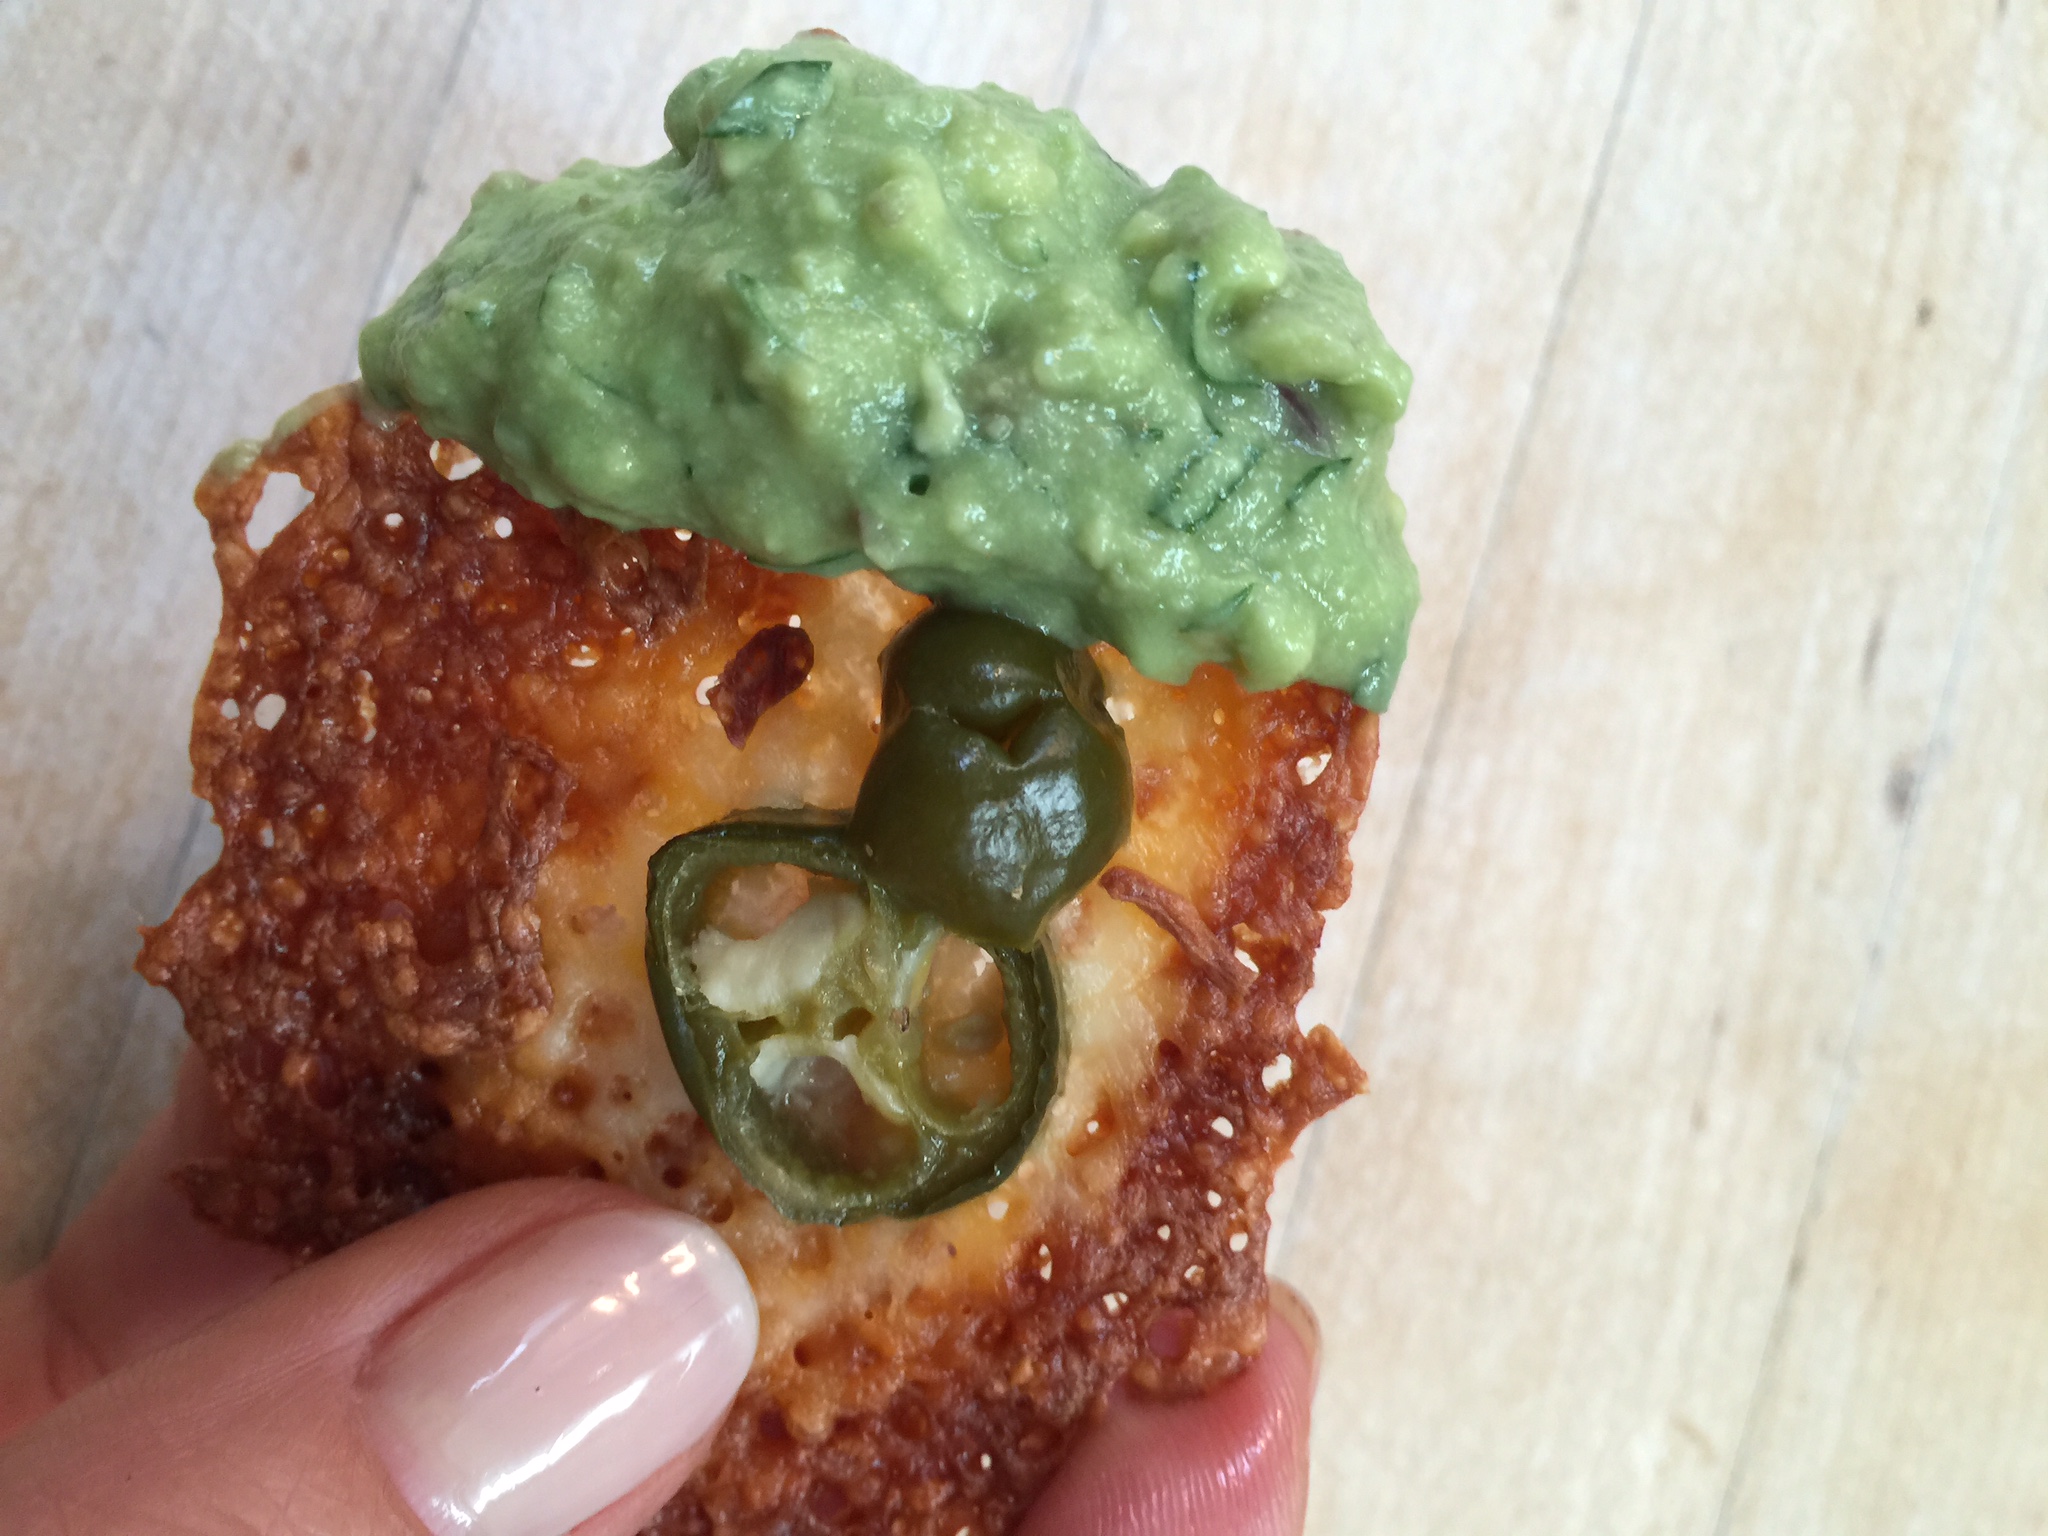
Cheese Crisps
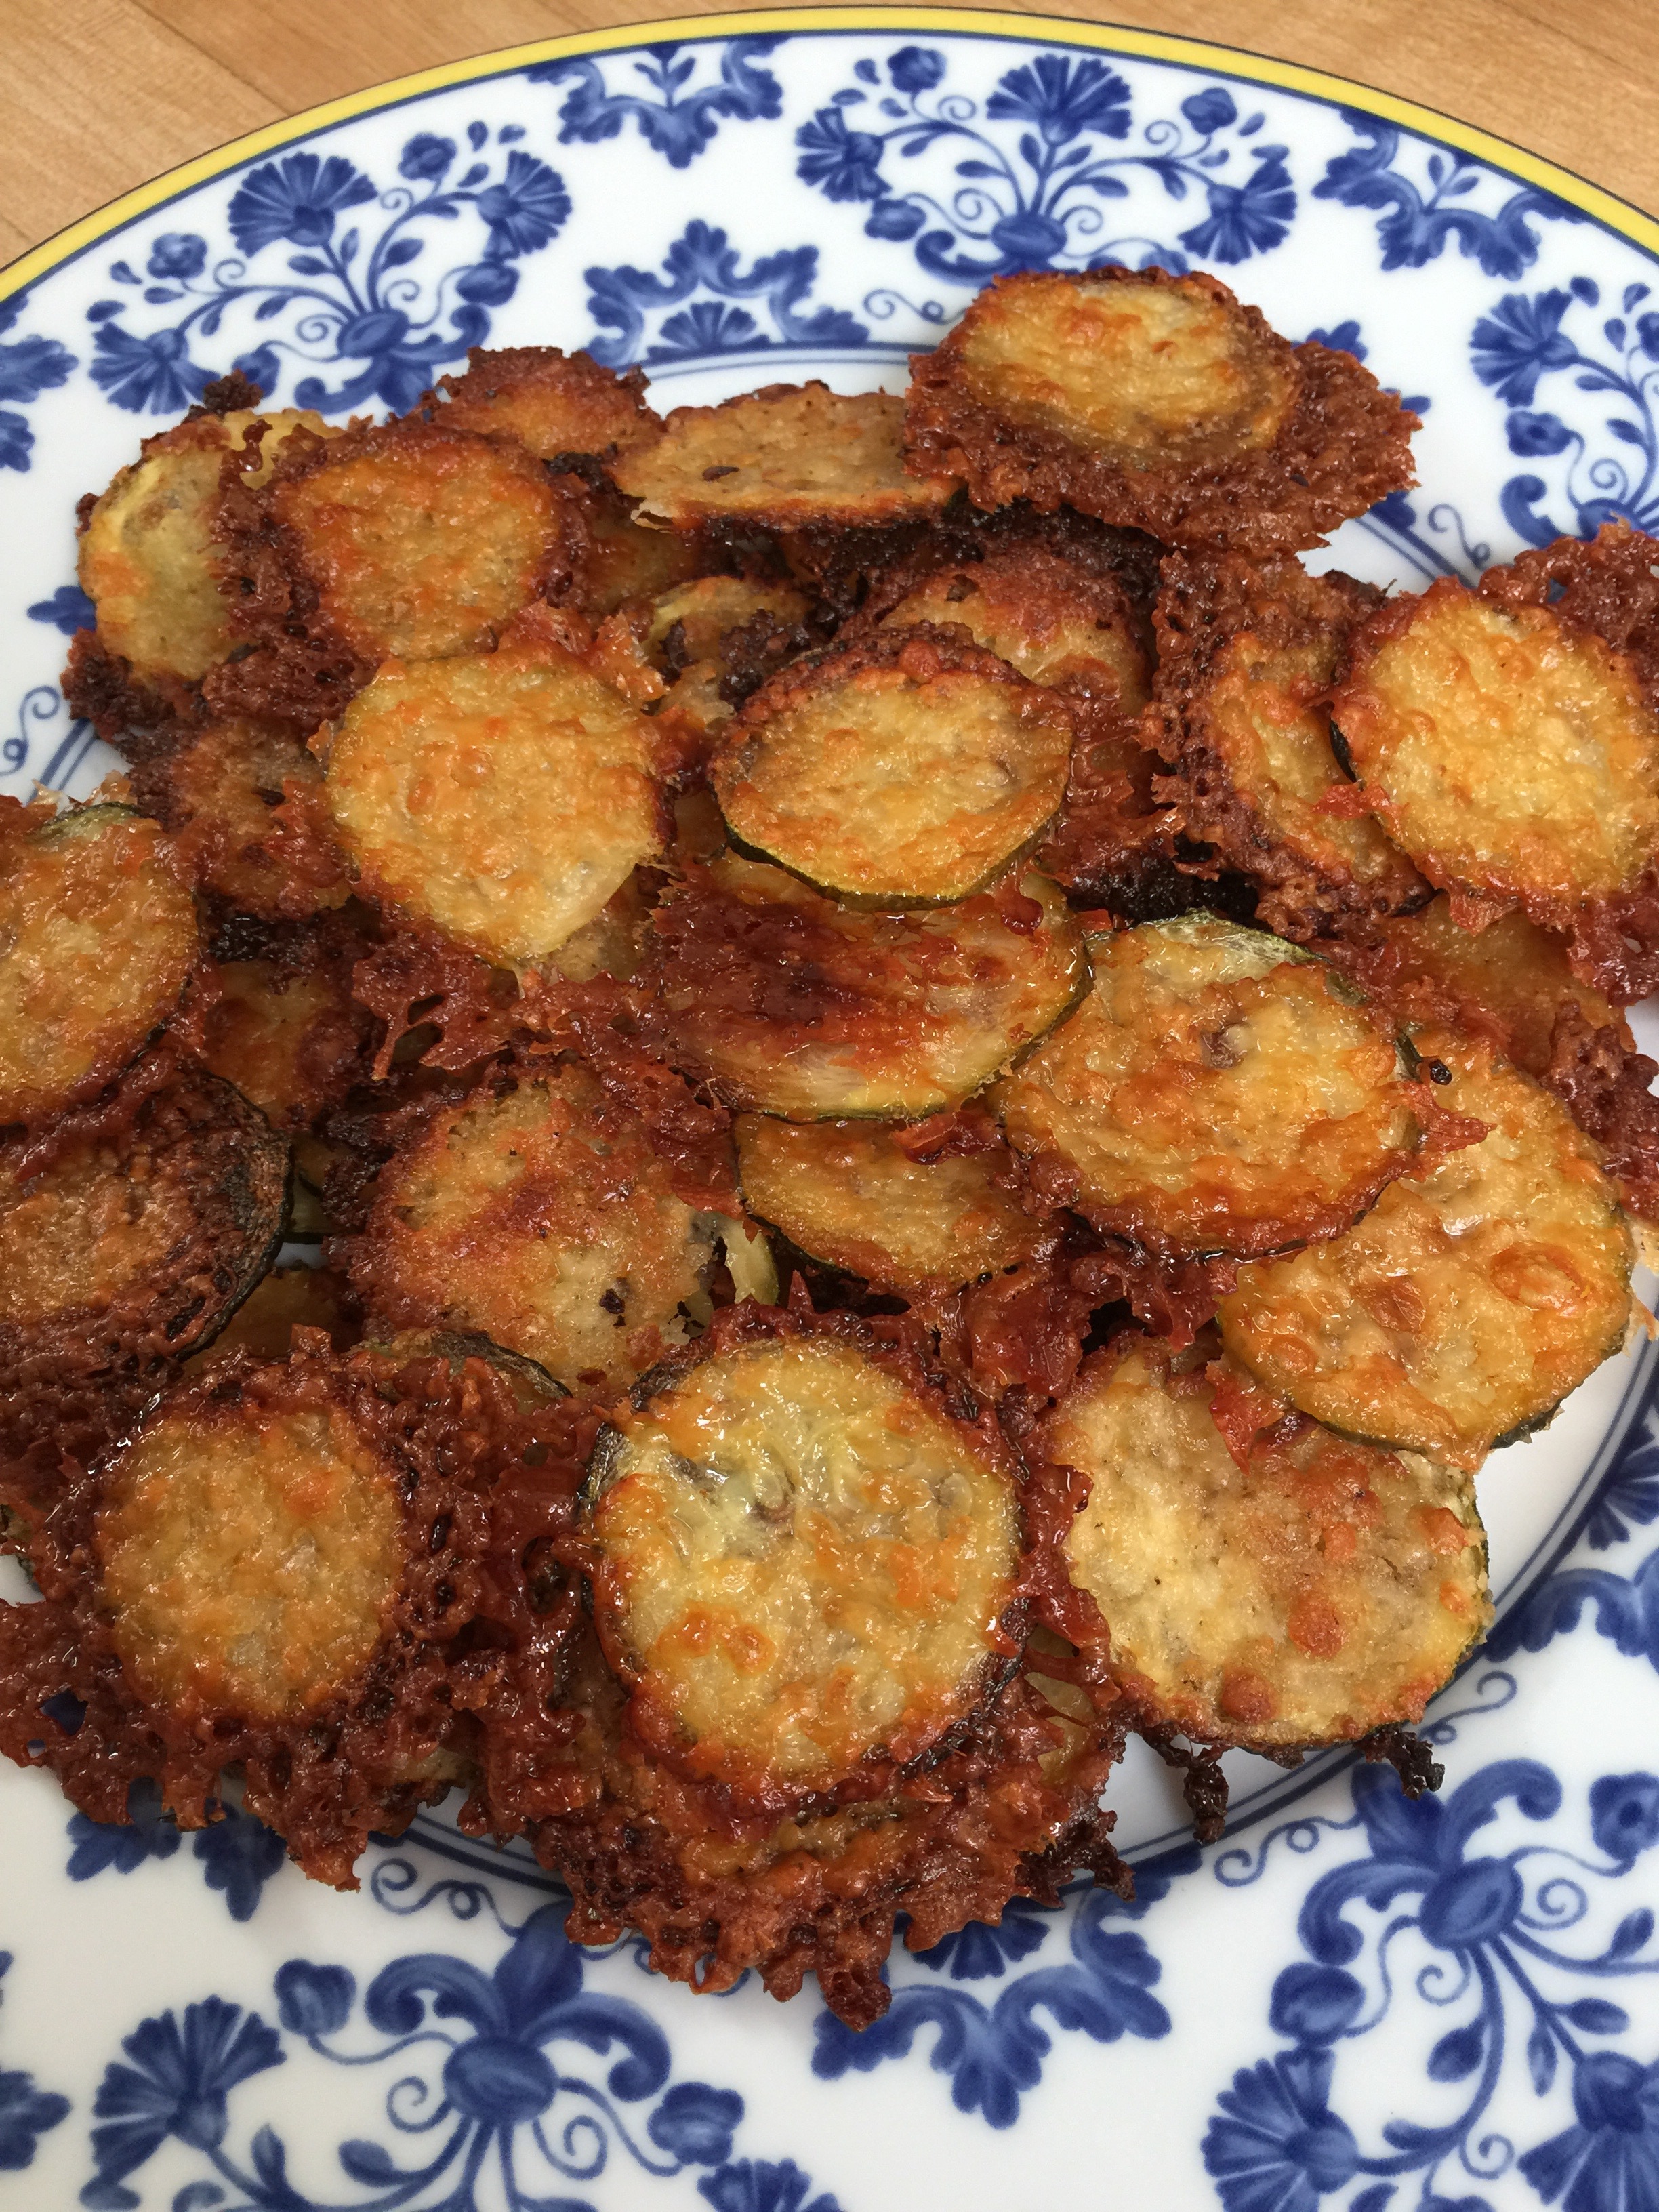
Zucchini Chips
Guacamole
Deviled Eggs:
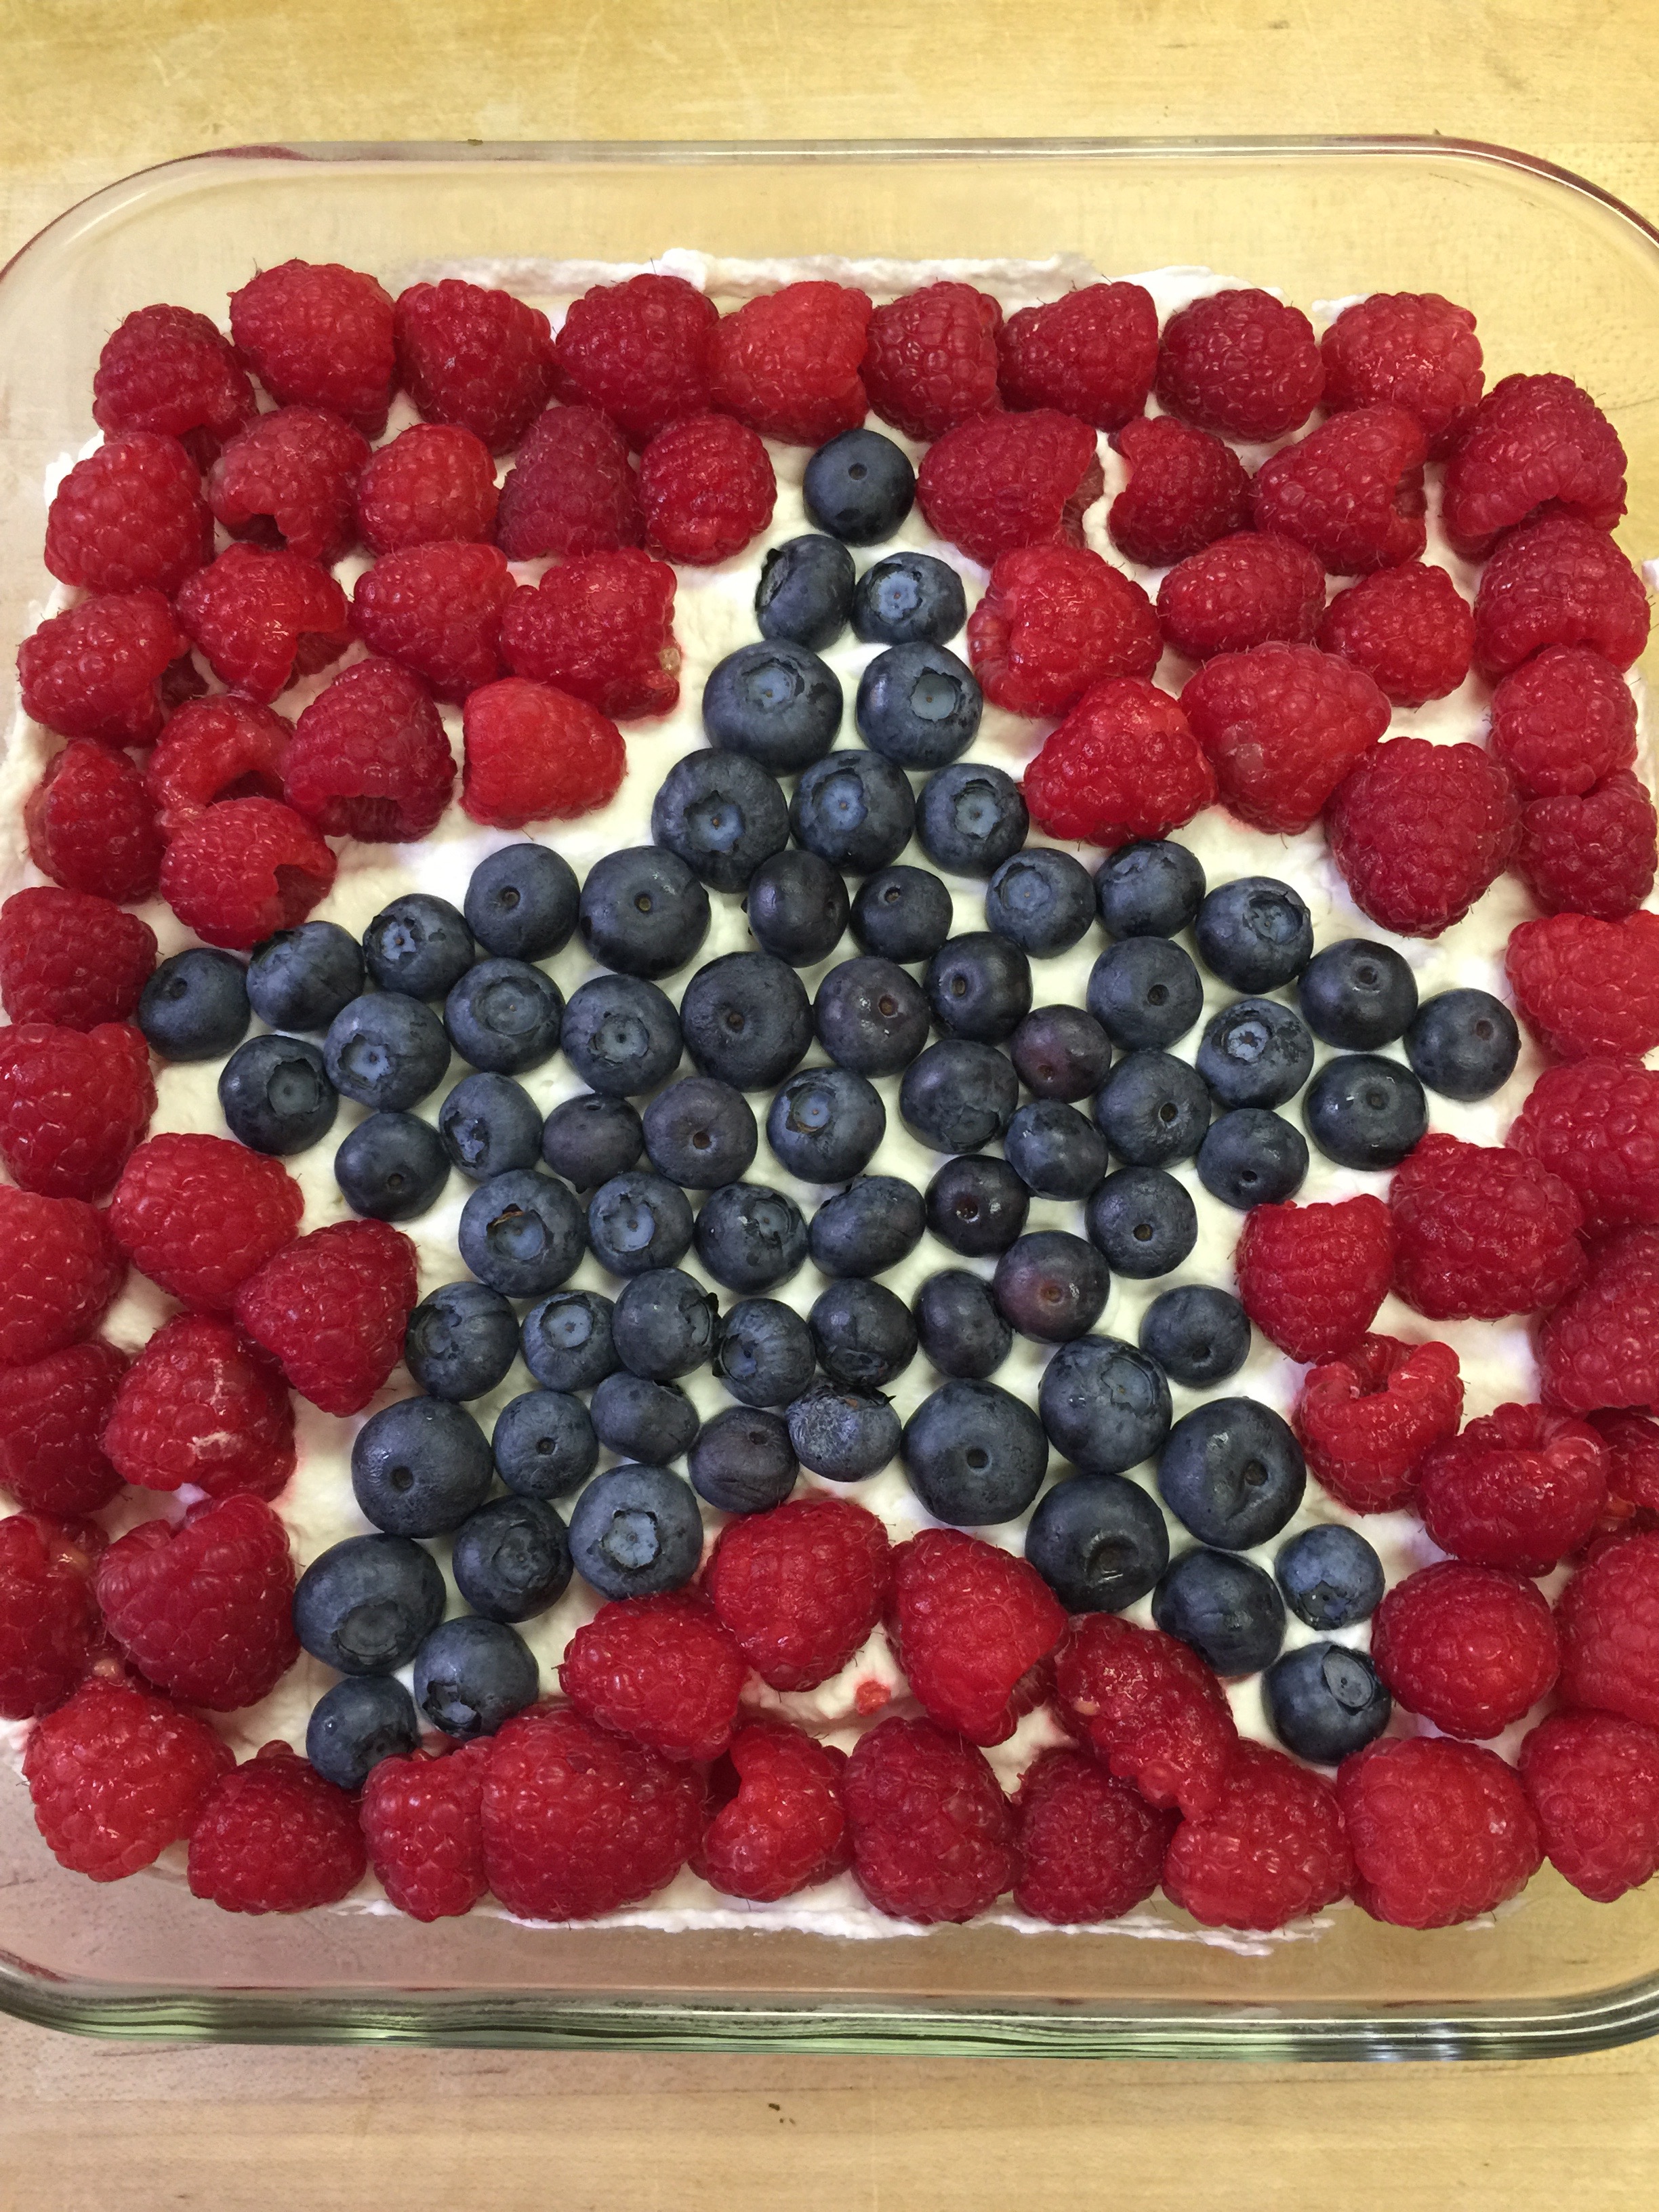
Dessert:
Stars and Stripes Cheesecake with Berries:
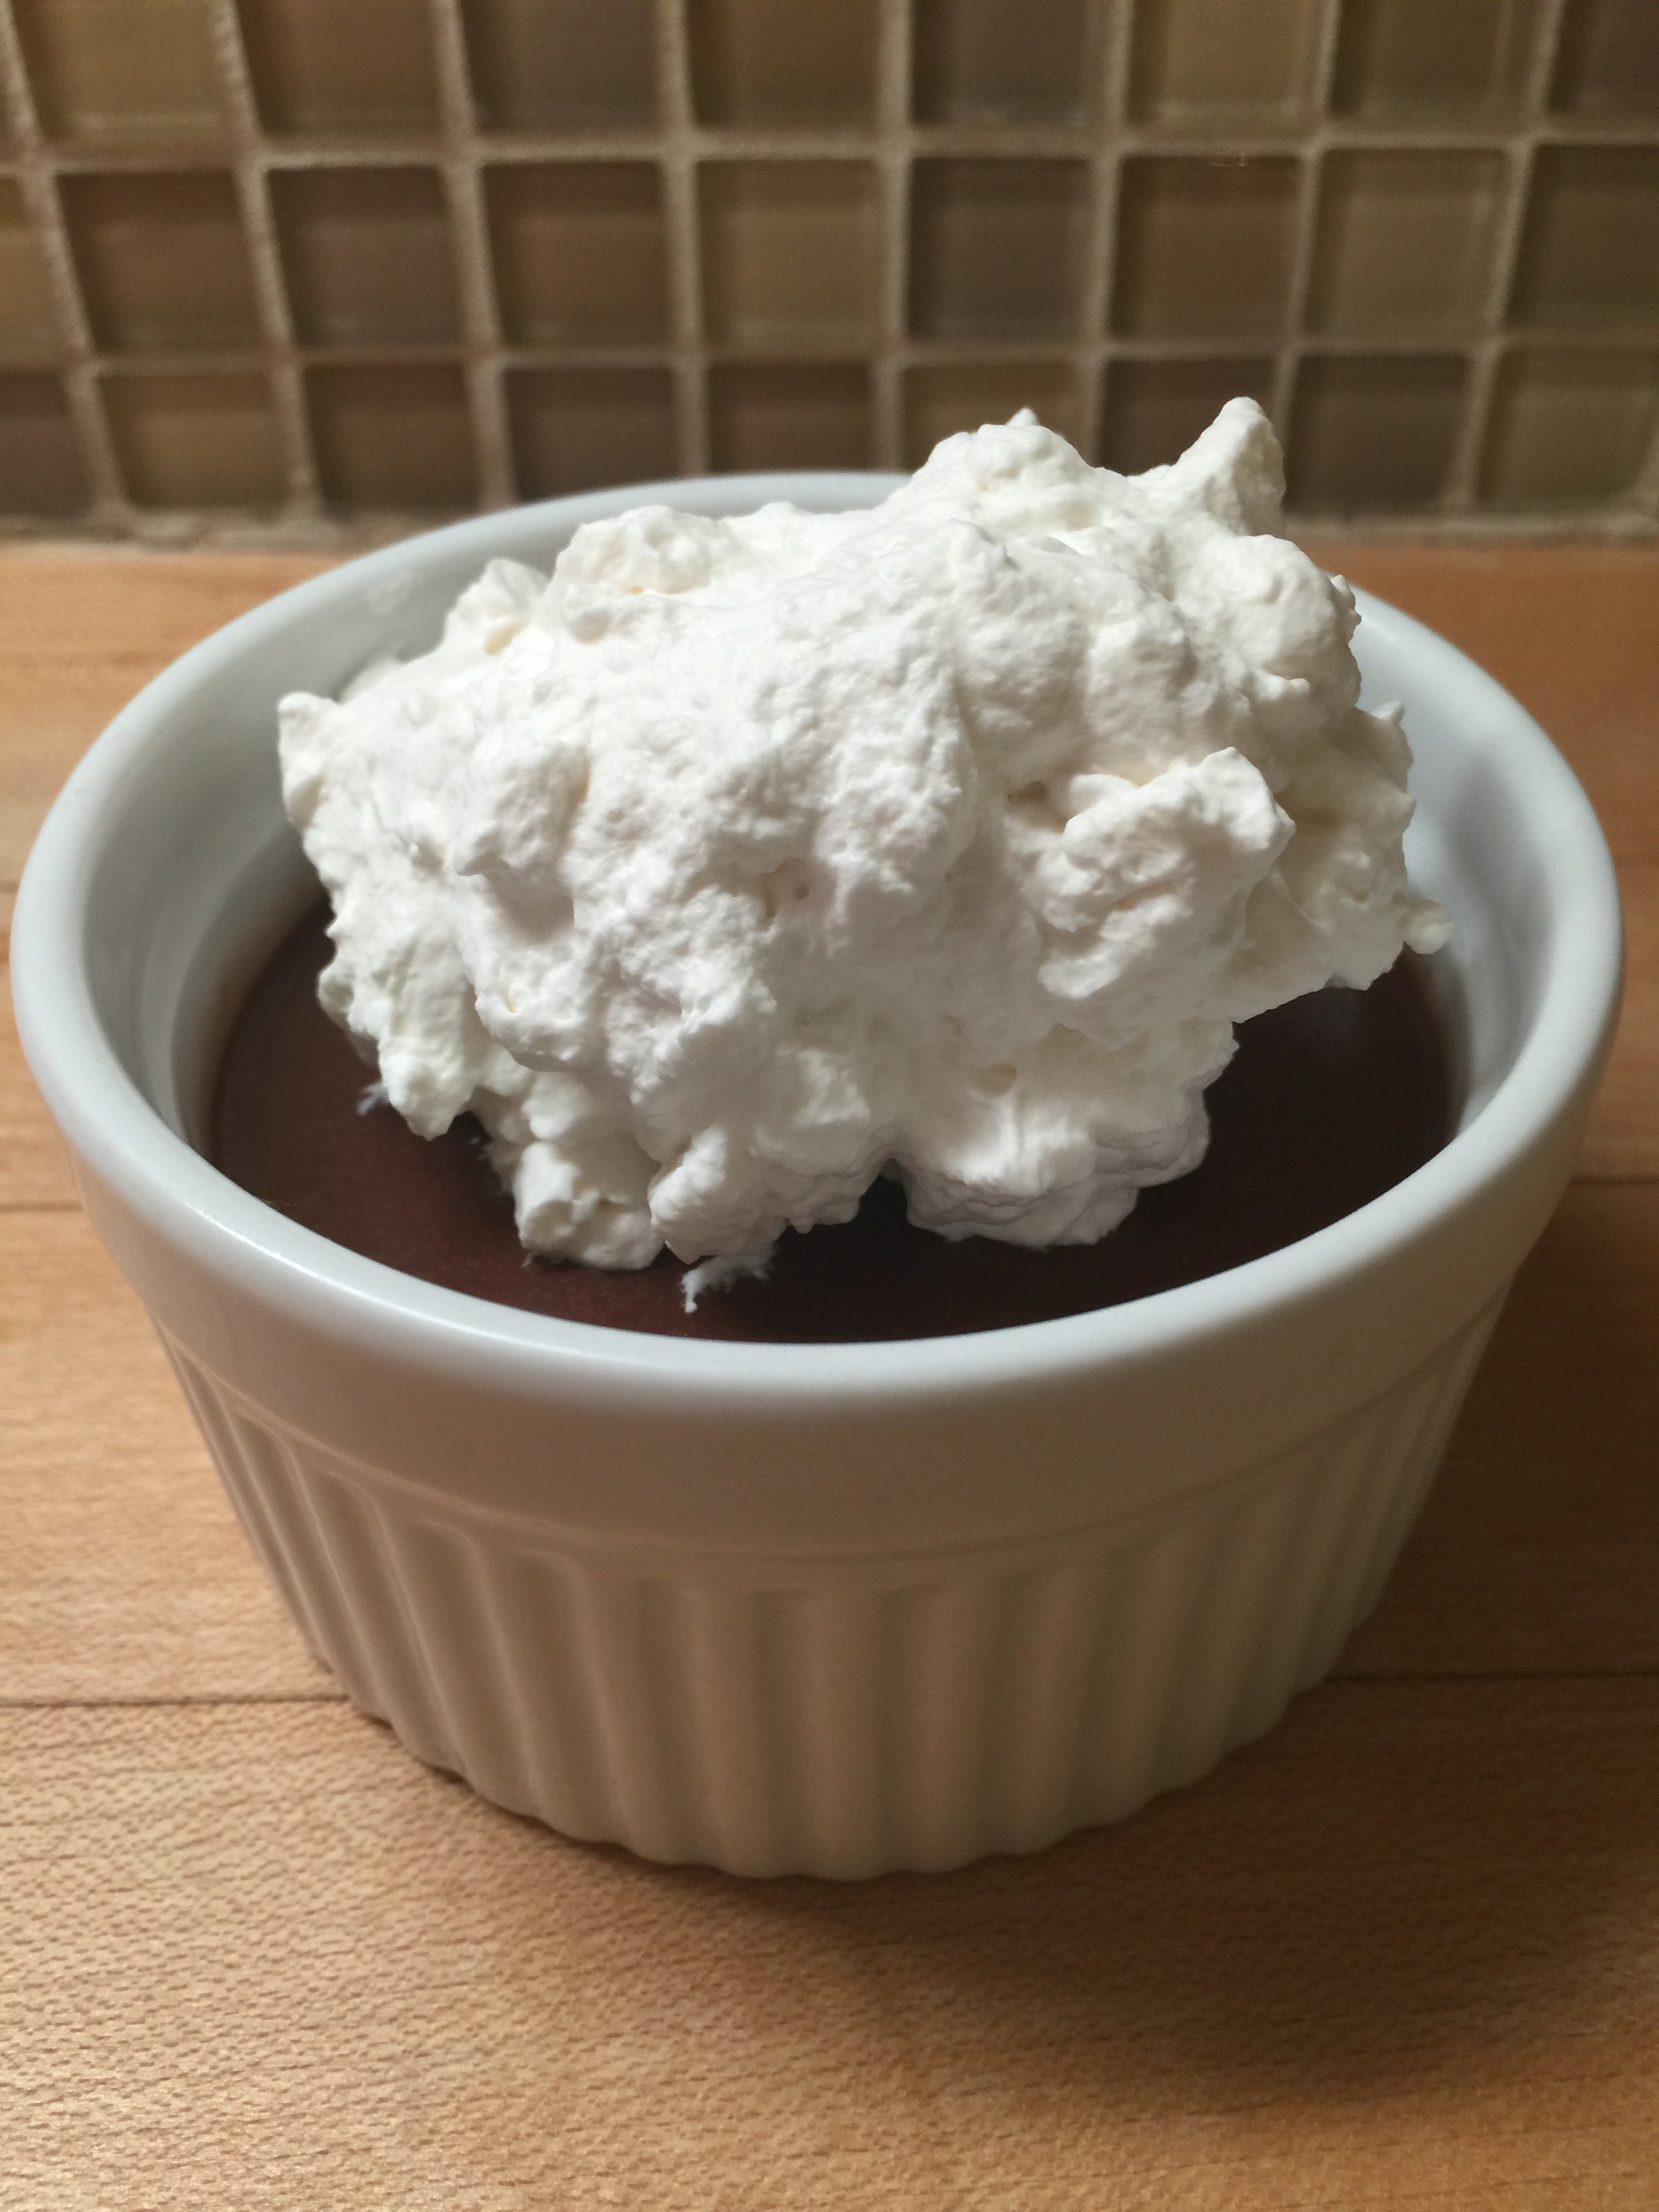
Or, if you are a chocolate person, our chocolate pudding.
Drinks:
Refreshing Low-Carb Margarita on the Rocks
Enjoy a wonderful celebratory day filled with healthy food, healthy sun, friends and family.
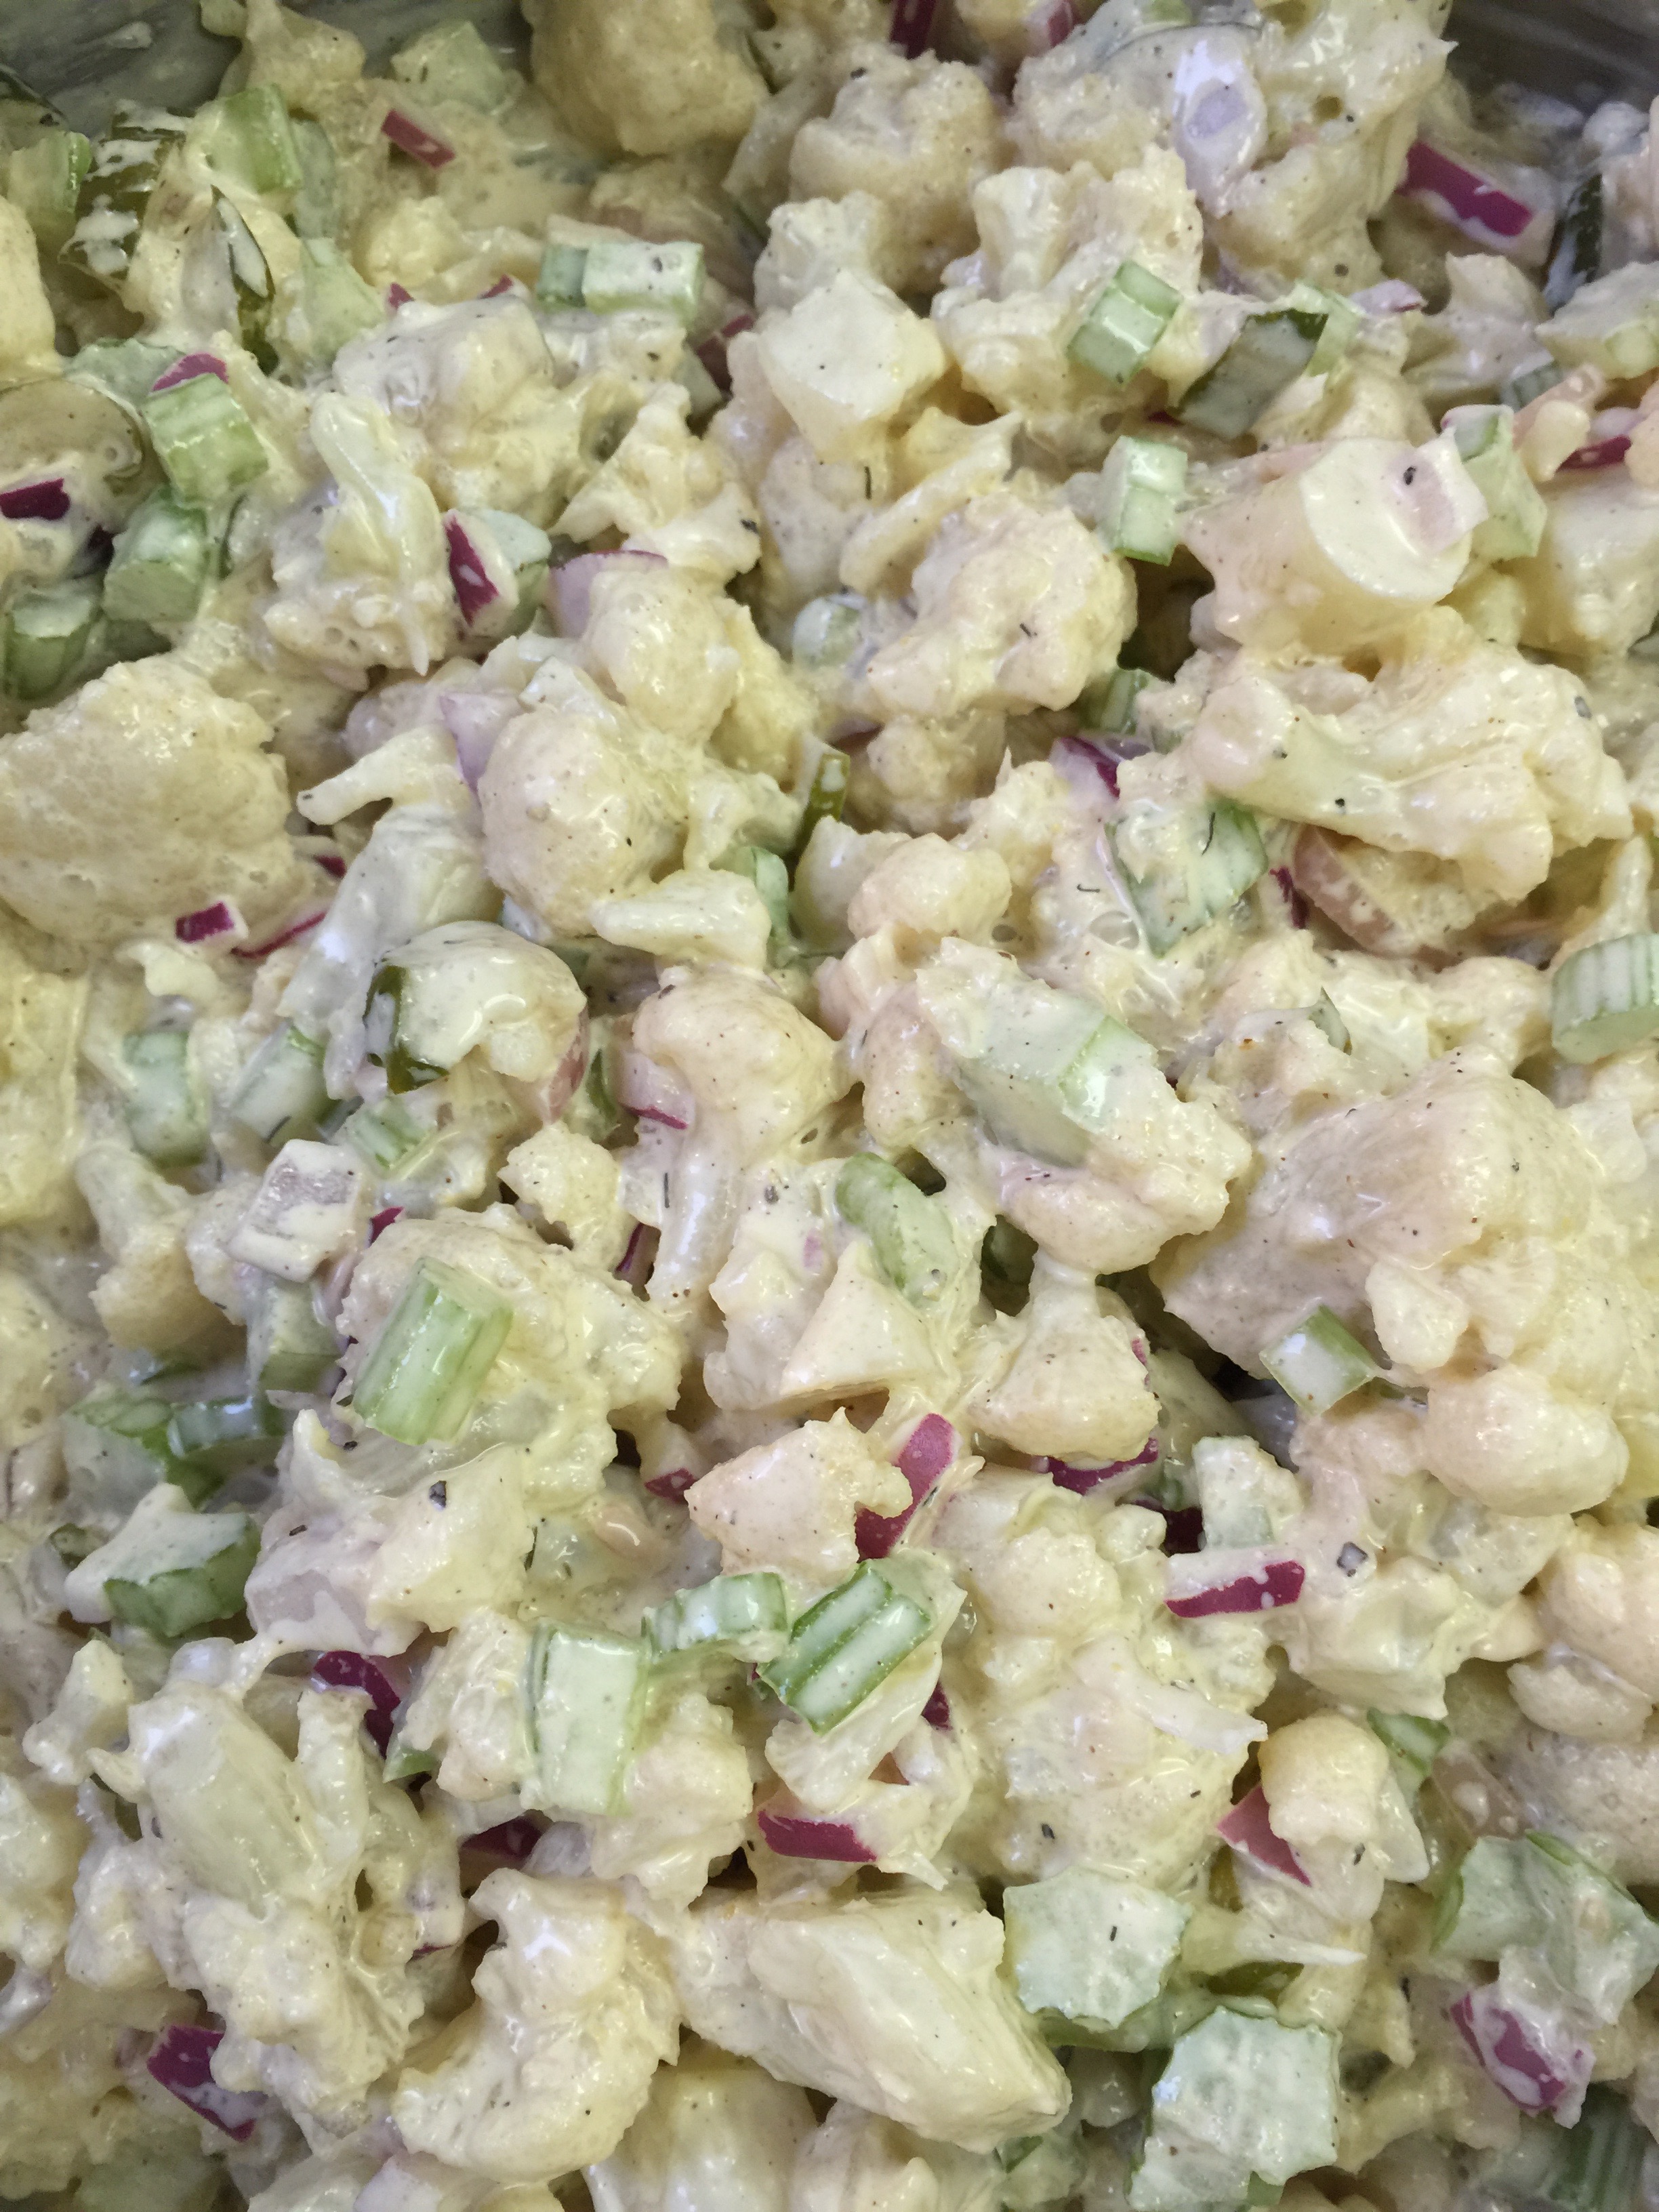
It’s real, and it’s Keto! How can you have a July Fourth celebration without potato salad? We have found a way, and it involves one of our favorite Keto veggies.
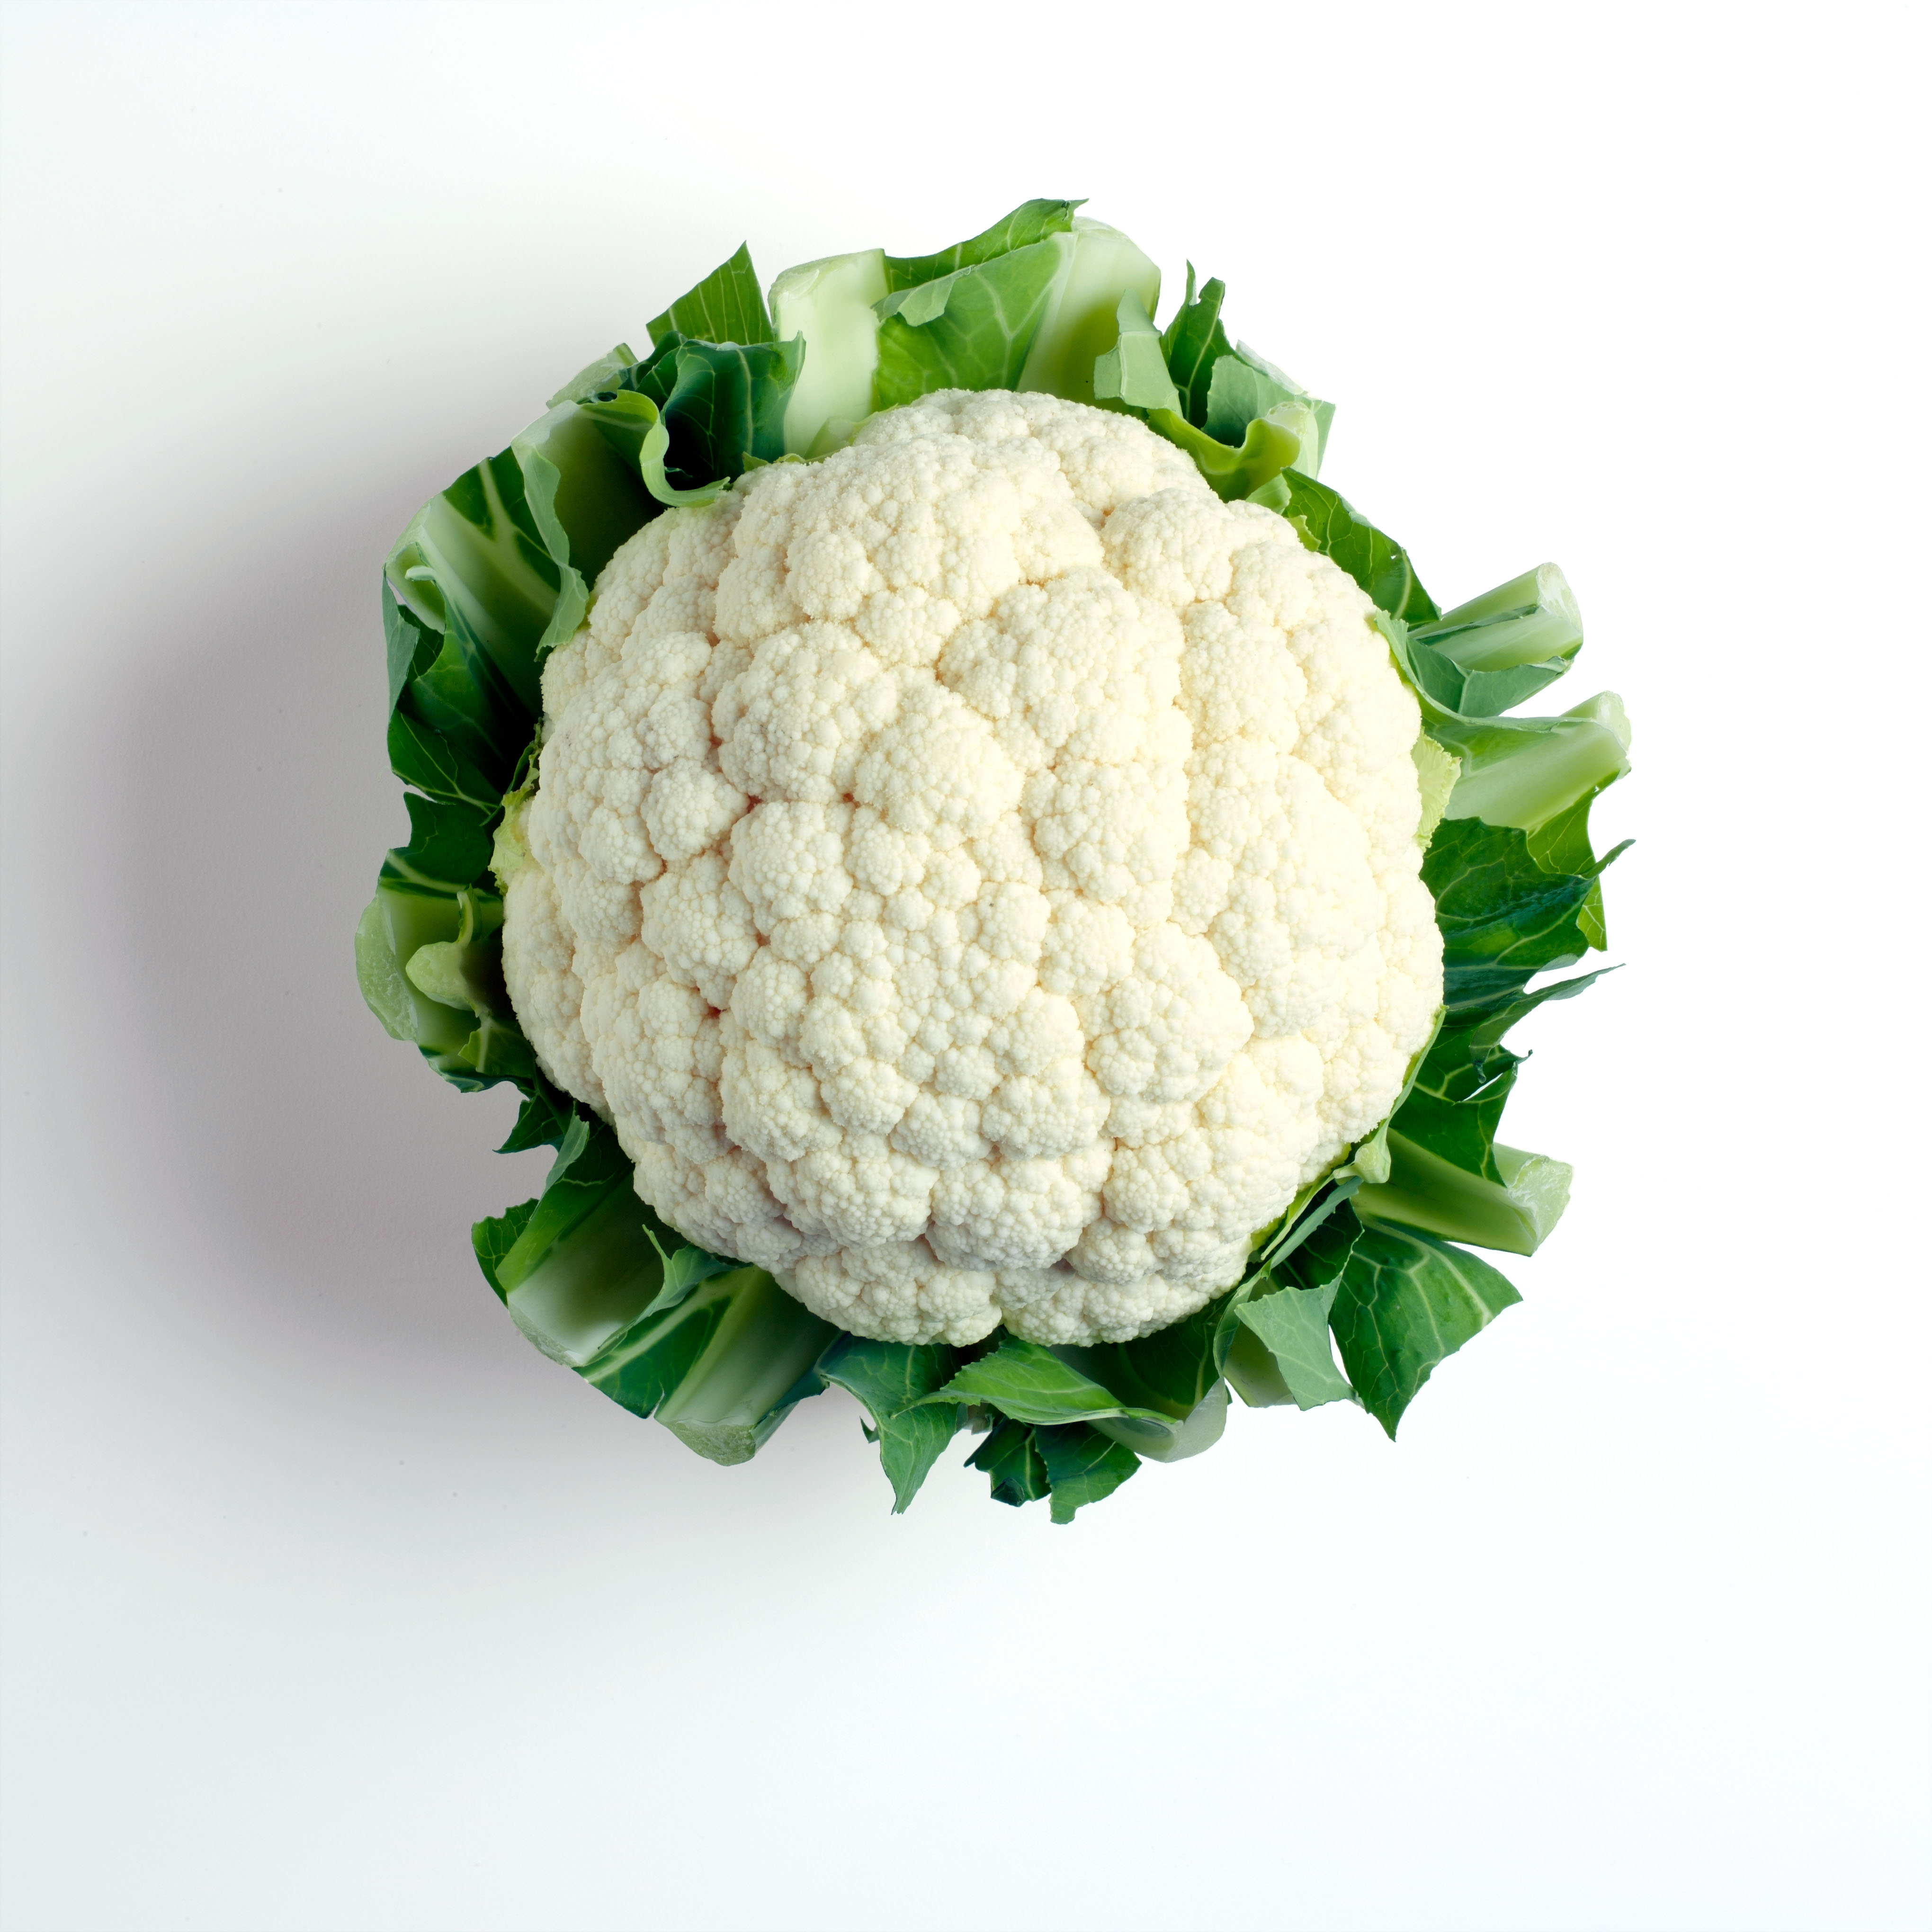
Have you guessed already? It’s the one that makes rice, mashers, tater tots, and pizza crust. The incredible, invincible, and transformative cauliflower! The chameleon of all veggies! I always have a head of cauliflower in the fridge because it can do just about anything for a meal! I was wondering if I could slide this past my crew, and it worked like a charm. You can pretty much use your favorite potato salad recipe by substituting cauliflower for your potatoes. We prefer a creamy mustard type dressing with a little sweetness. I know some like mayo only, and others like a tart mustard, so take it where you like it. So many options!
I still had a few of the refreshing cukes in the fridge, so I thought I would give them a try for the touch of sweet. Worked like a charm. So if you are planning on making the cucumbers for your July Fourth celebration, save a few extra to throw into your “potatoes”.
So here is the recipe along with a few variations for your upcoming weekend:
Dill Pickles with pickle juice if you don’t have the Cukes, but like the pickle idea.
Lemon juice
Chives
Directions:
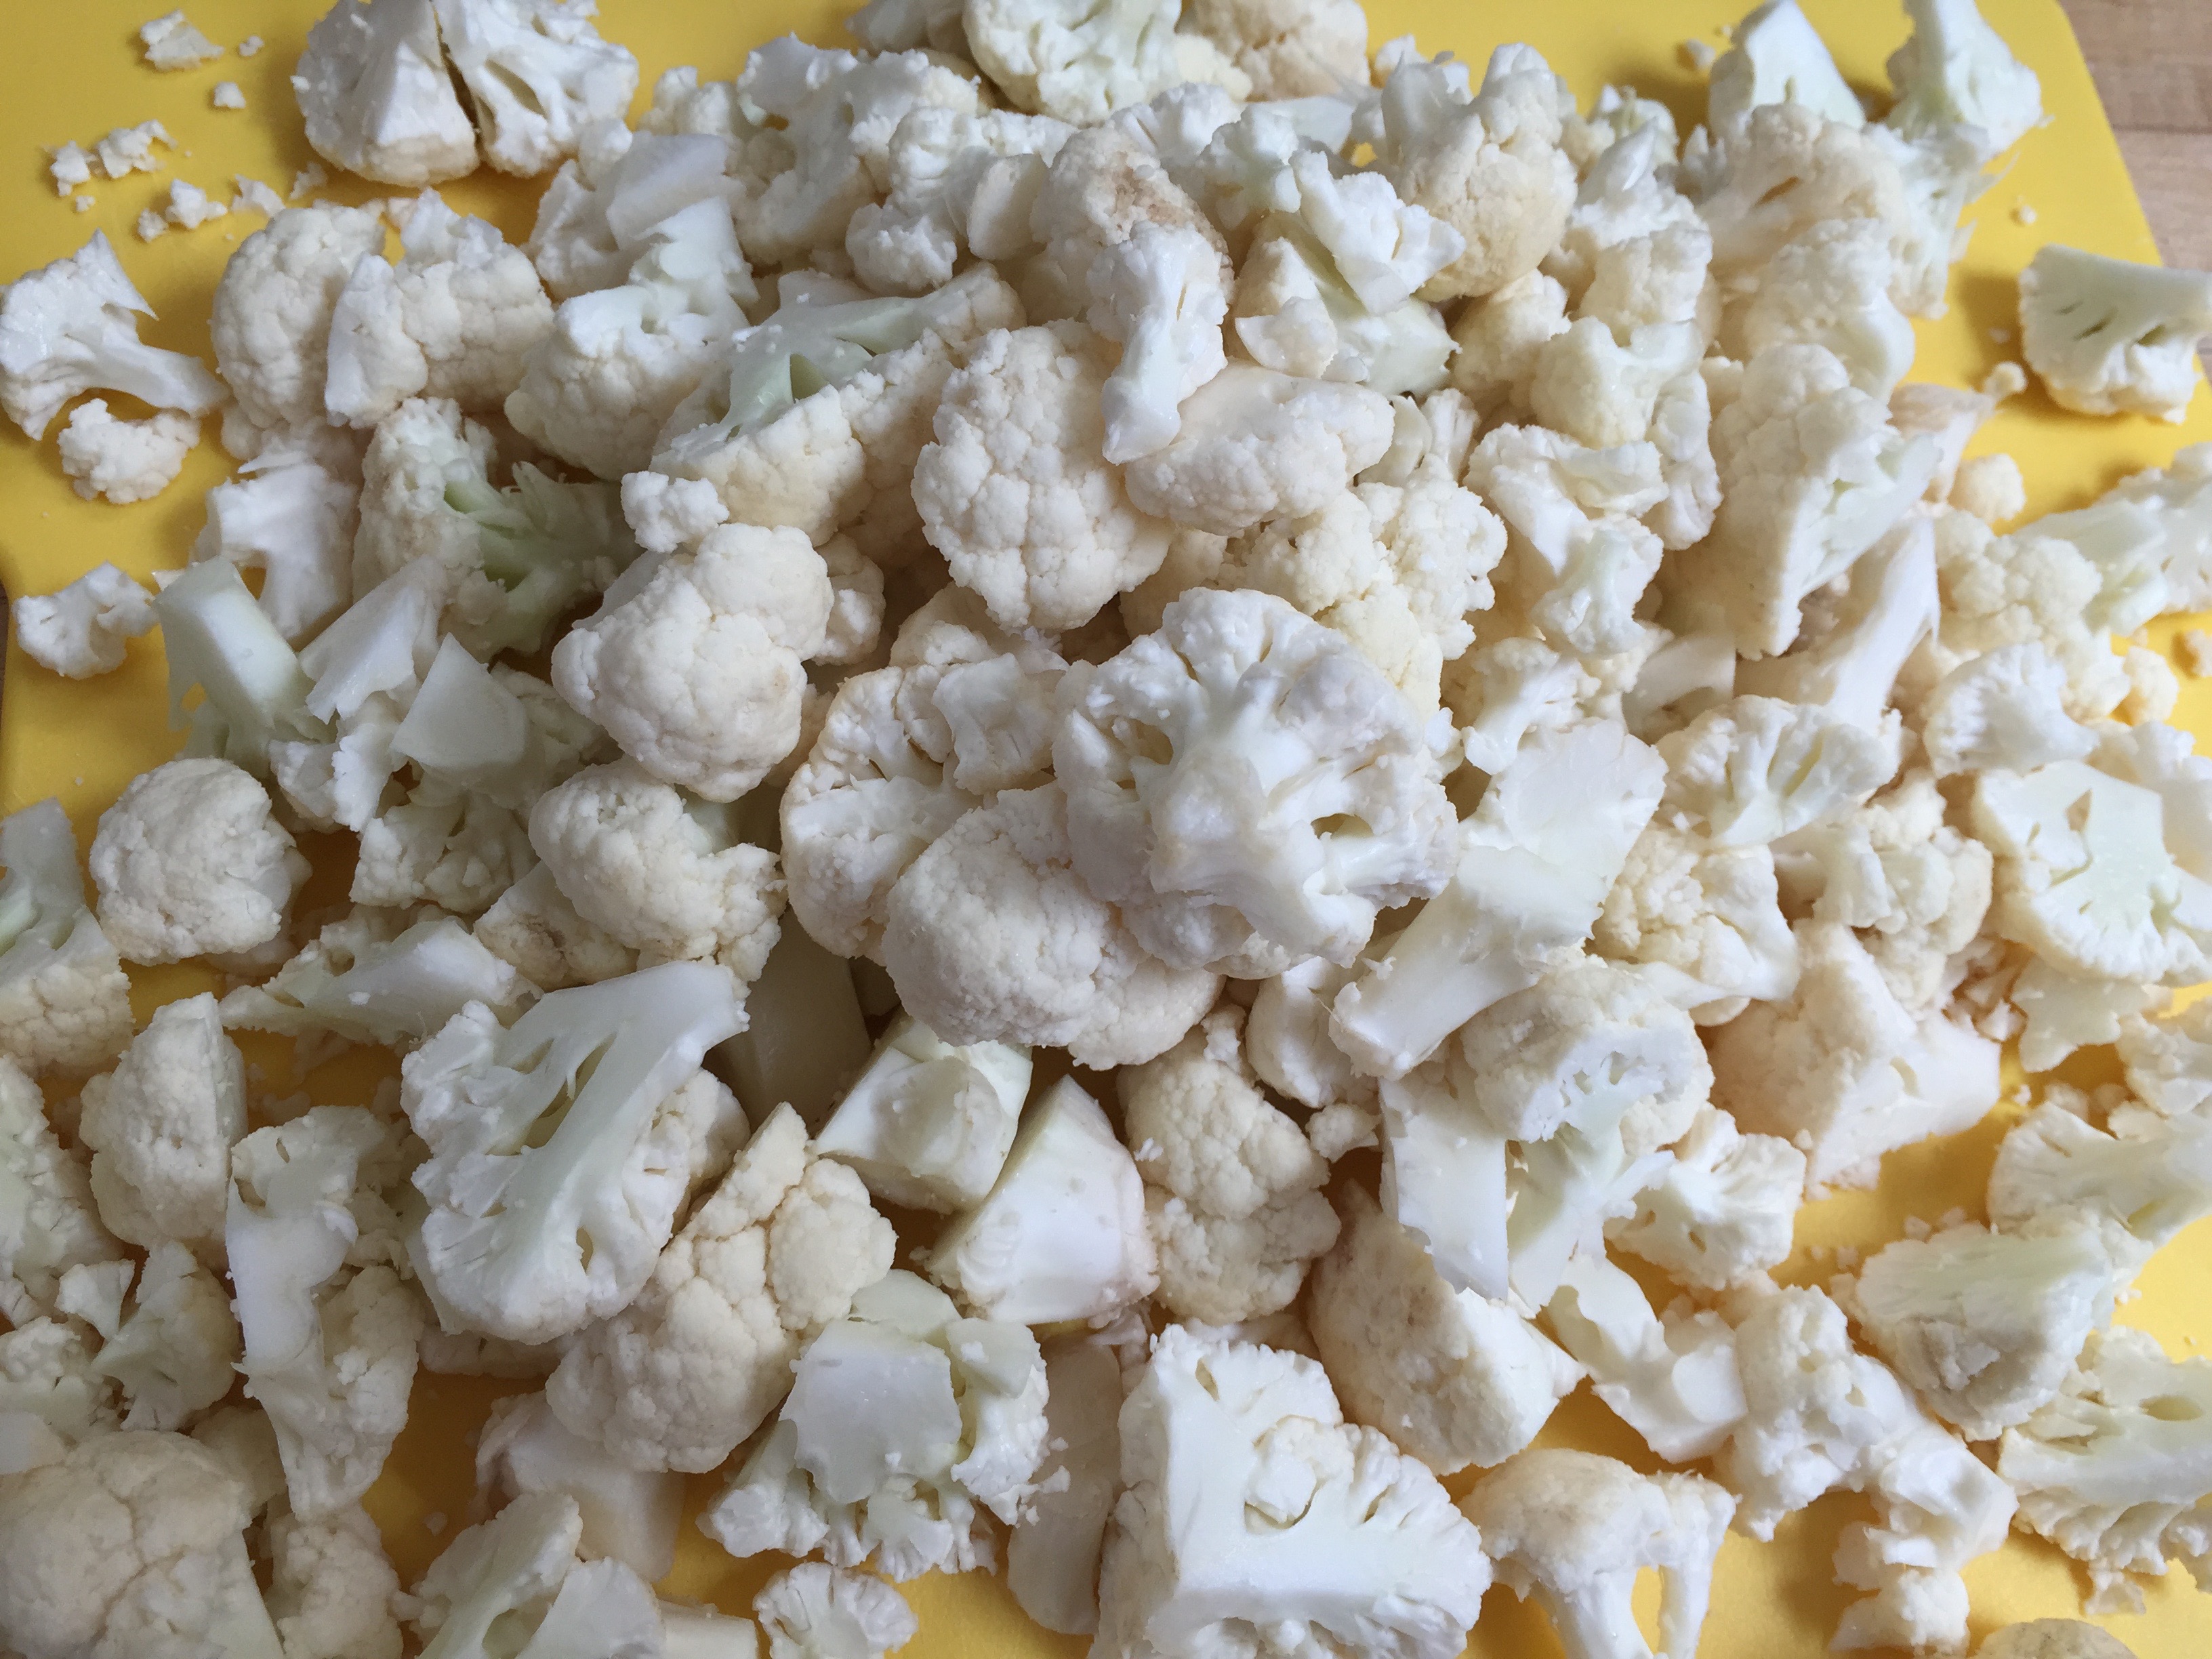
Chop your cauliflower into bite size pieces like you would eat your potatoes.
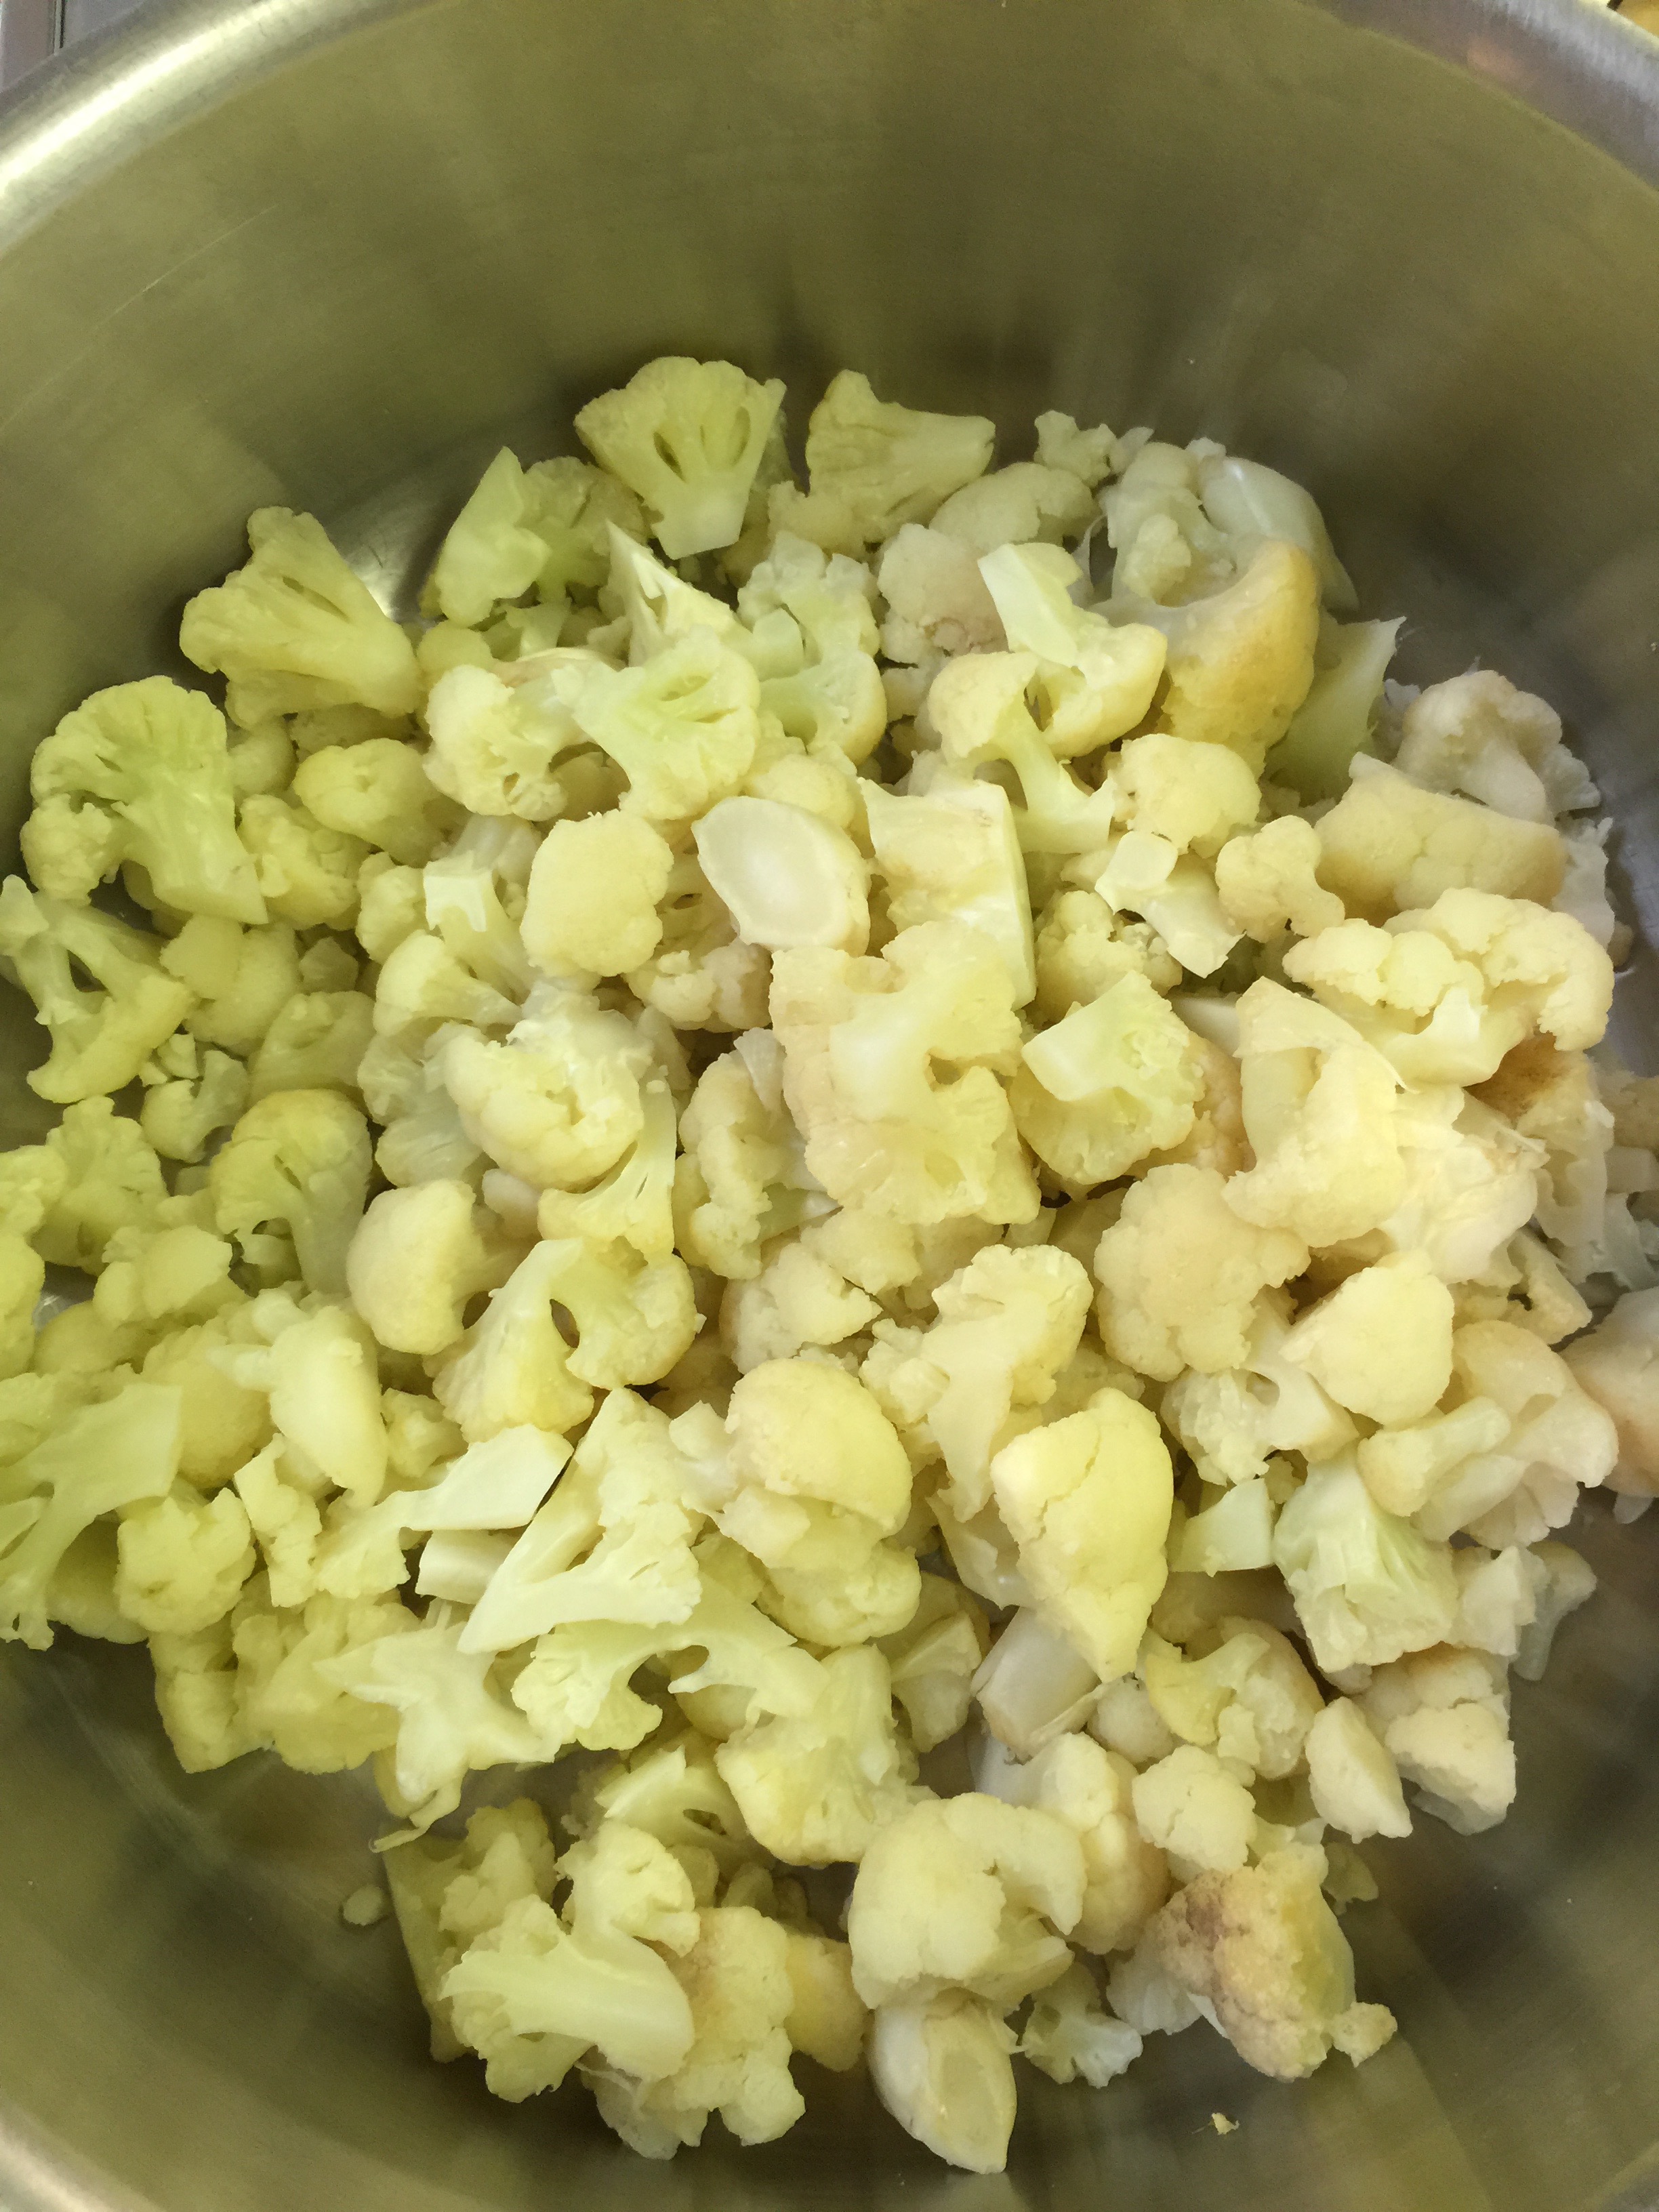
Boil a large pot of water. Once it comes to a rolling boil, lower the heat to medium and simmer your cauliflower for about 5 to 6 minutes. Carefully pierce with a fork to check for tenderness. This is the hardest part…you want it soft enough to mimic the potatoes, but you don’t want it to get mushy once you start mixing your ingredients together. Once you have it to the correct tenderness, strain in a large colander. Let it drain and then return to the pot. If you are worried about the tenderness, (the texture is super important for this recipe) boil them until they are perfect and then immediately submerge in an ice cold water bath to stop the cooking. Then strain in the colander.
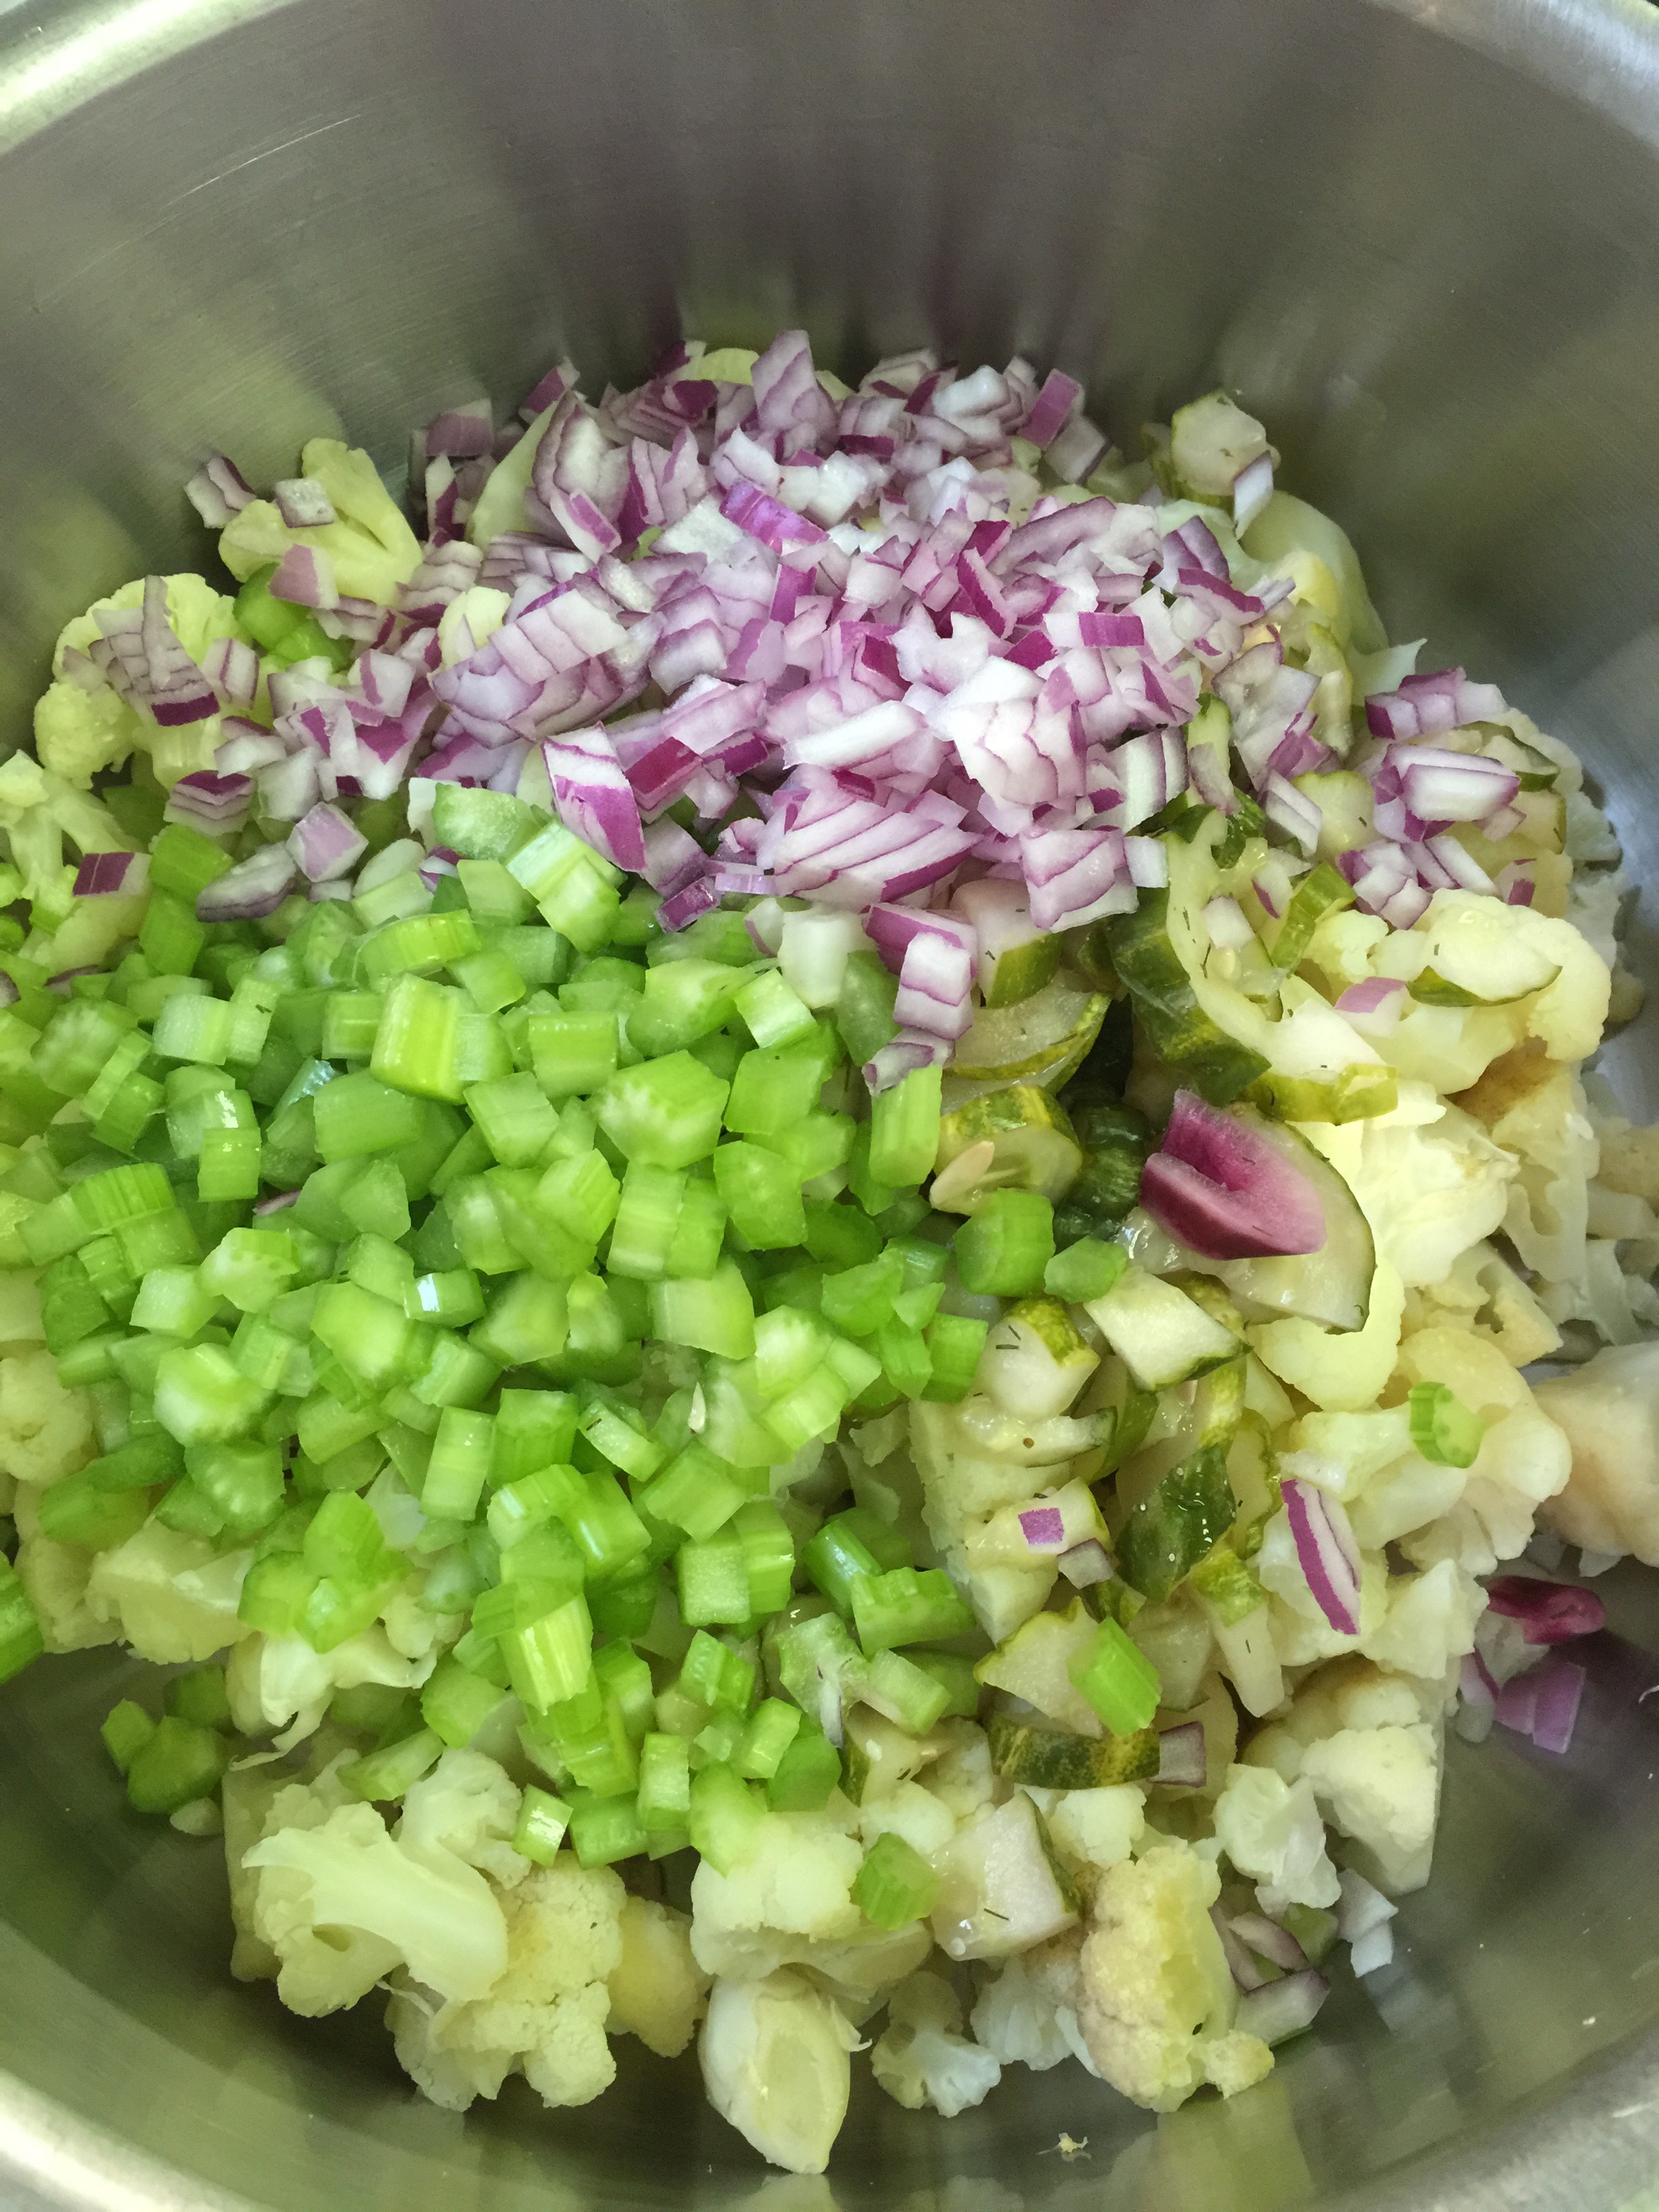
Add your chopped celery, onion, and cucumber or pickles (along with any other solids you choose to add.) Toss to combine.
Now add your mayonnaise, mustard and spices, except for the paprika.
Mix everything together. You can taste at this point to see if it needs anything, but remember, the flavors will meld in the refrigerator a little more.
Refrigerate for a few hours. When you place it in a serving bowl, sprinkle with a little paprika for color and enjoy with your firecrackers!
So, I bought some Mahi Mahi last week Hmmmm. It was on sale, so that was great! In fact, it was a fantastic deal! The problem…I detest cooking fish! It makes the house smell, it has bones, and as much as I cook, I always manage to destroy it! My usual downfall is overcooking because I’m afraid of undercooking! I am not sure what possessed me to purchase this beautiful slab out of the ocean, but I did, so I had to come up with something before my whole house smelled like fish!
Surprisingly, this fish dish was super simple, and it turned out delicious. I did get an upturned nose when my ten year old walked in the kitchen and smelled the raw fish I was deboning. At the end of the meal, however, it was all devoured with the kids asking for more. I had to divy up the end of it so everyone could have second helpings. Best of all, the house actually smelled like roasted nuts instead of fish. Double yay!
To make thing even better, I pulled this dish together faster than I can write this post! I looked up several recipes, and most were very sweet either with added sugar or contained very high fructose fruits like mango and pineapple that do a number on my blood sugar levels. All the macadamia nut recipes were mixed with flour or breadcrumbs, so I decided to go for it, and see what I could do on my own. If it hadn’t been 6 pm and a family screaming for dinner, I may have kept scouring the internet, but I’m glad for you and me, that I was short on time because this was simple, delicious, and nutritious.
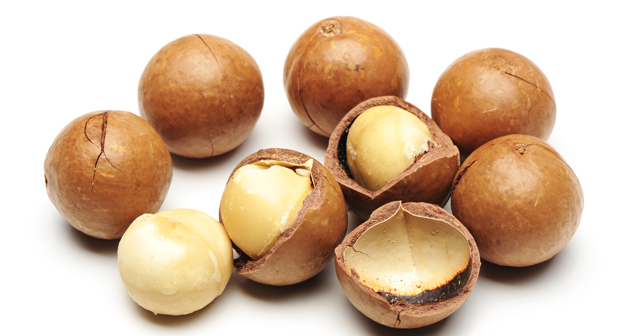
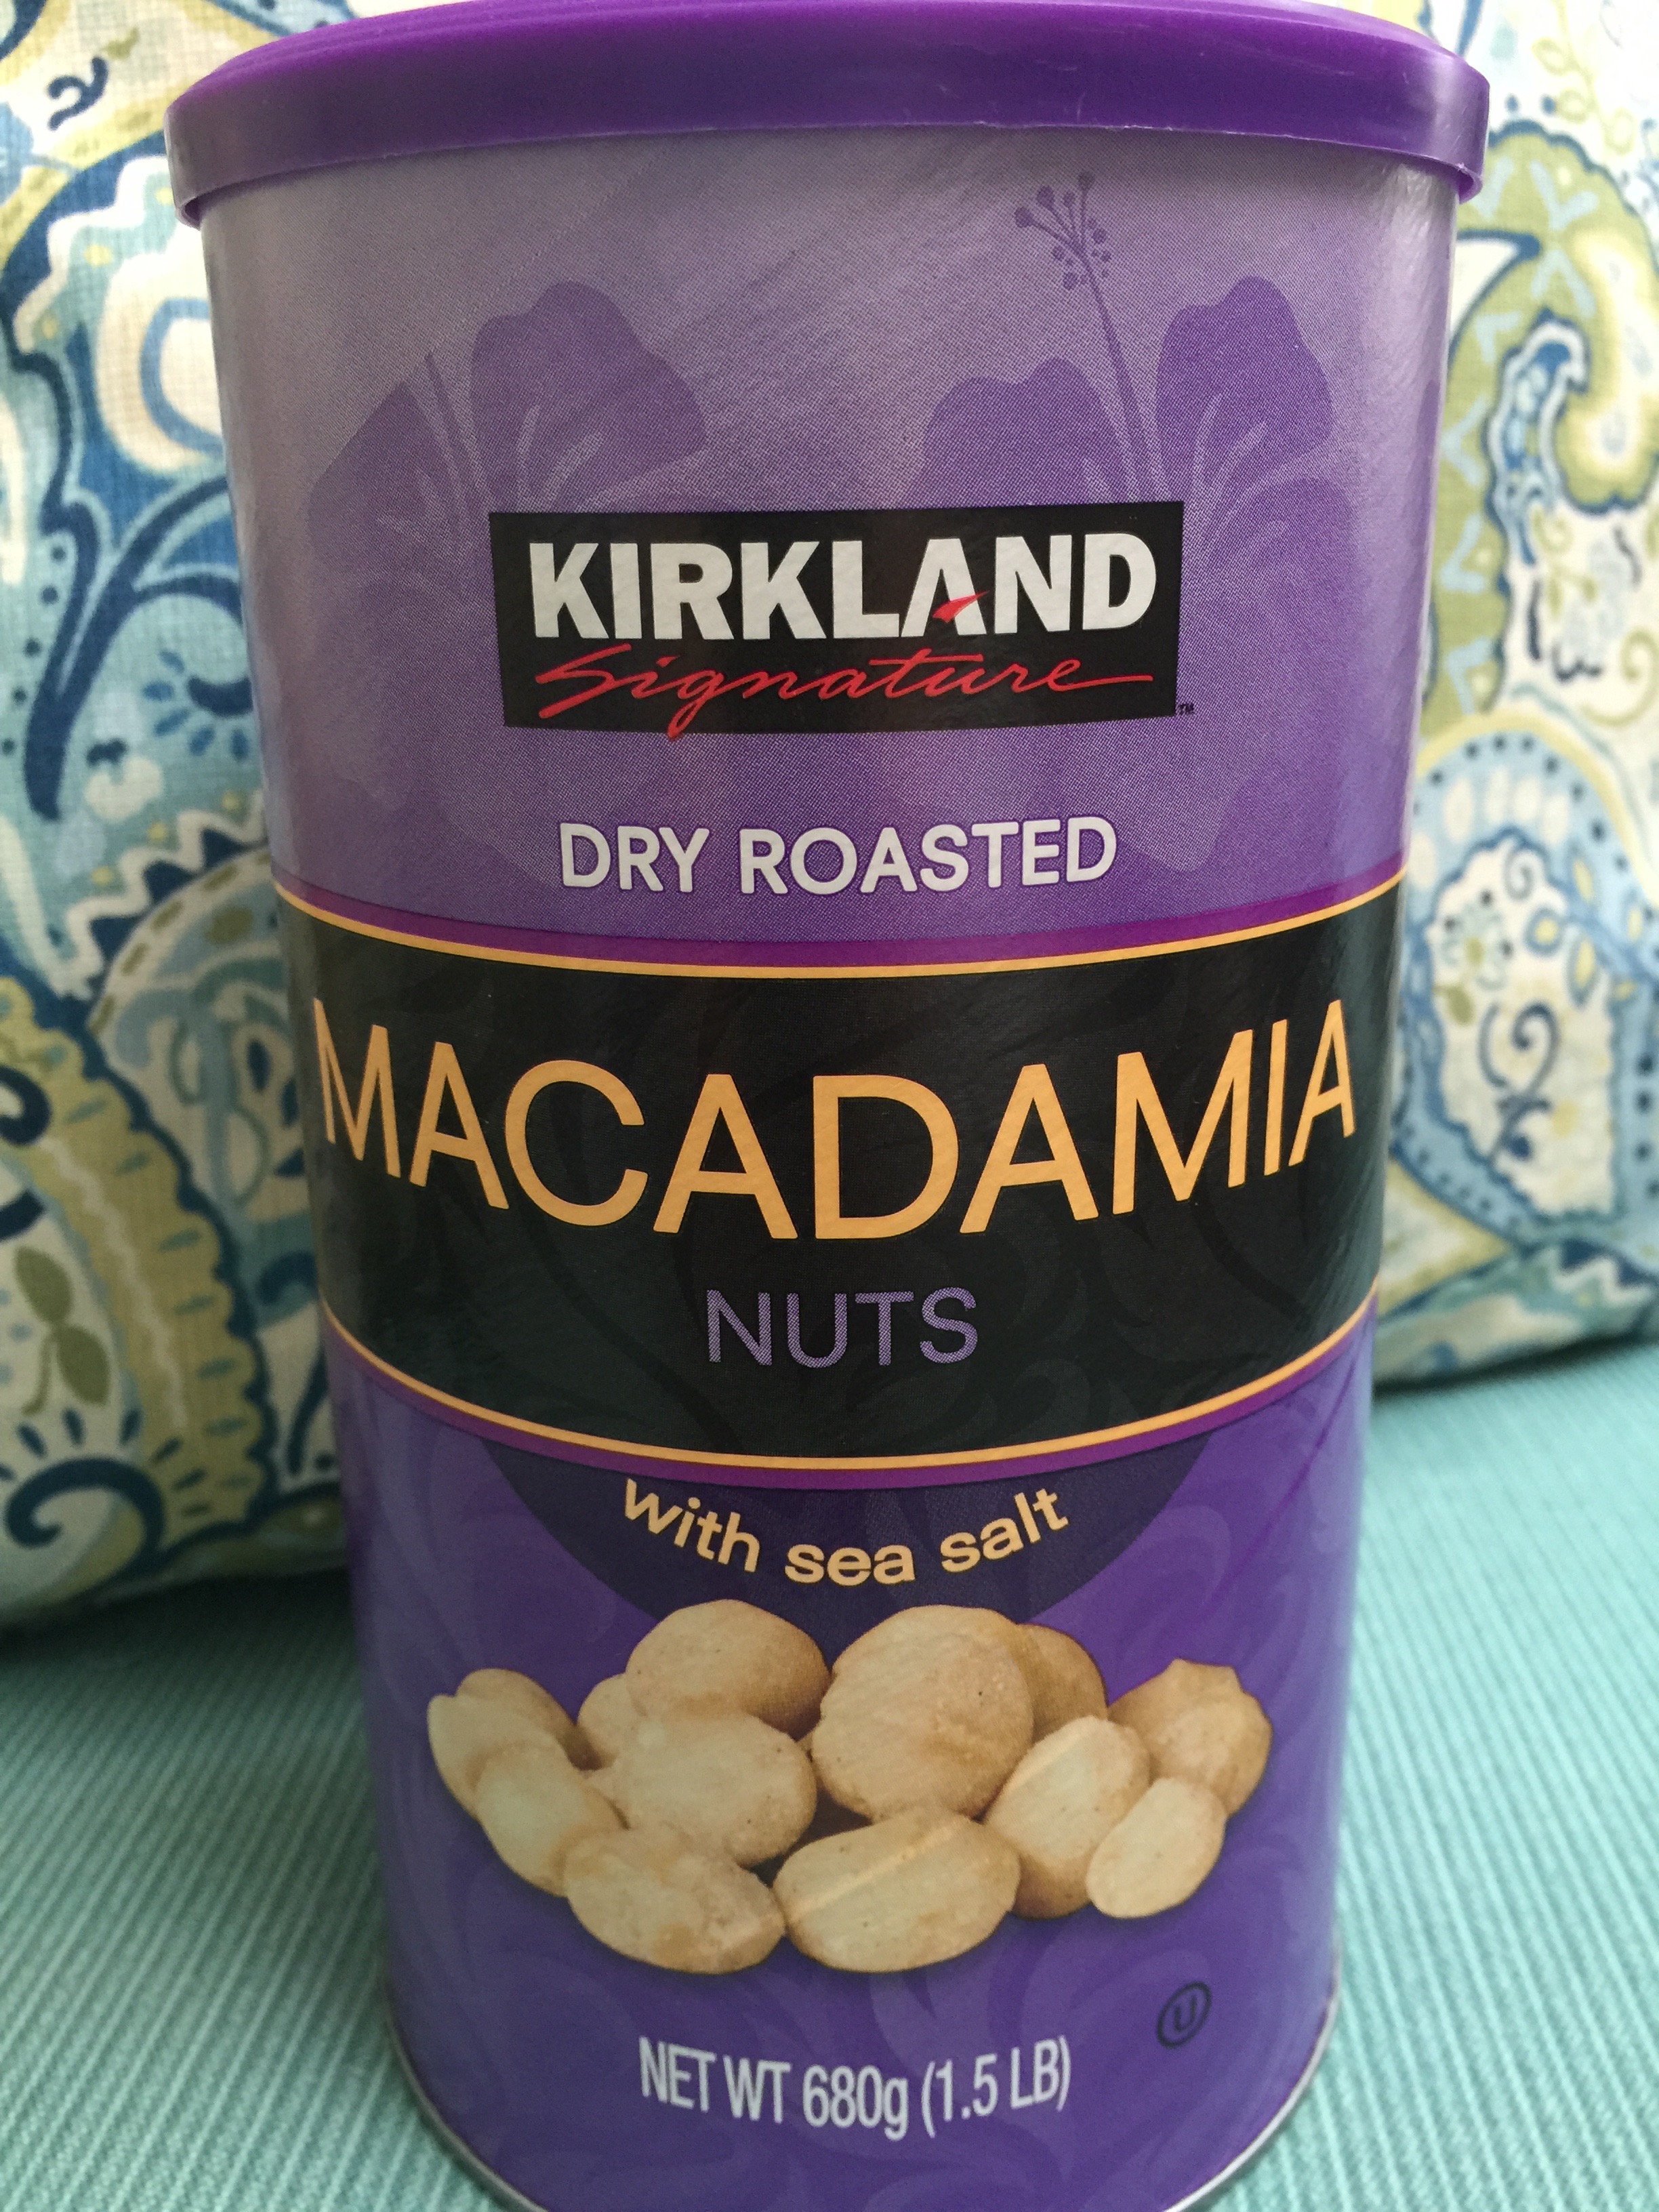
We always have Macadamia Nuts on hand in the Lutz and Stavros households. If you don’t; run out and get some (or order here). They are one of the best nuts you can have around! They are lower in carbs than most, and much higher in fat than practically all, so they are Keto perfect in my book. In fact, when we were in Hawaii, I practically lived off of these beauties and have never been in deeper Nutritional Ketosis. It was fabulous. When I returned, low and behold, I found this gorgeous purple can of natural wonder in the snack aisle at Costco. Who would have thought? Now, I did have a bit of a panic attack when I couldn’t find them for a while, but no worries, they are back! And…just in case you are wondering, these magnificent nuts contain 24 grams of healthy fat, only 4 grams of carbohydrates, and 1 gram of sugar per quarter cup.
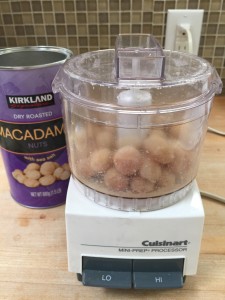
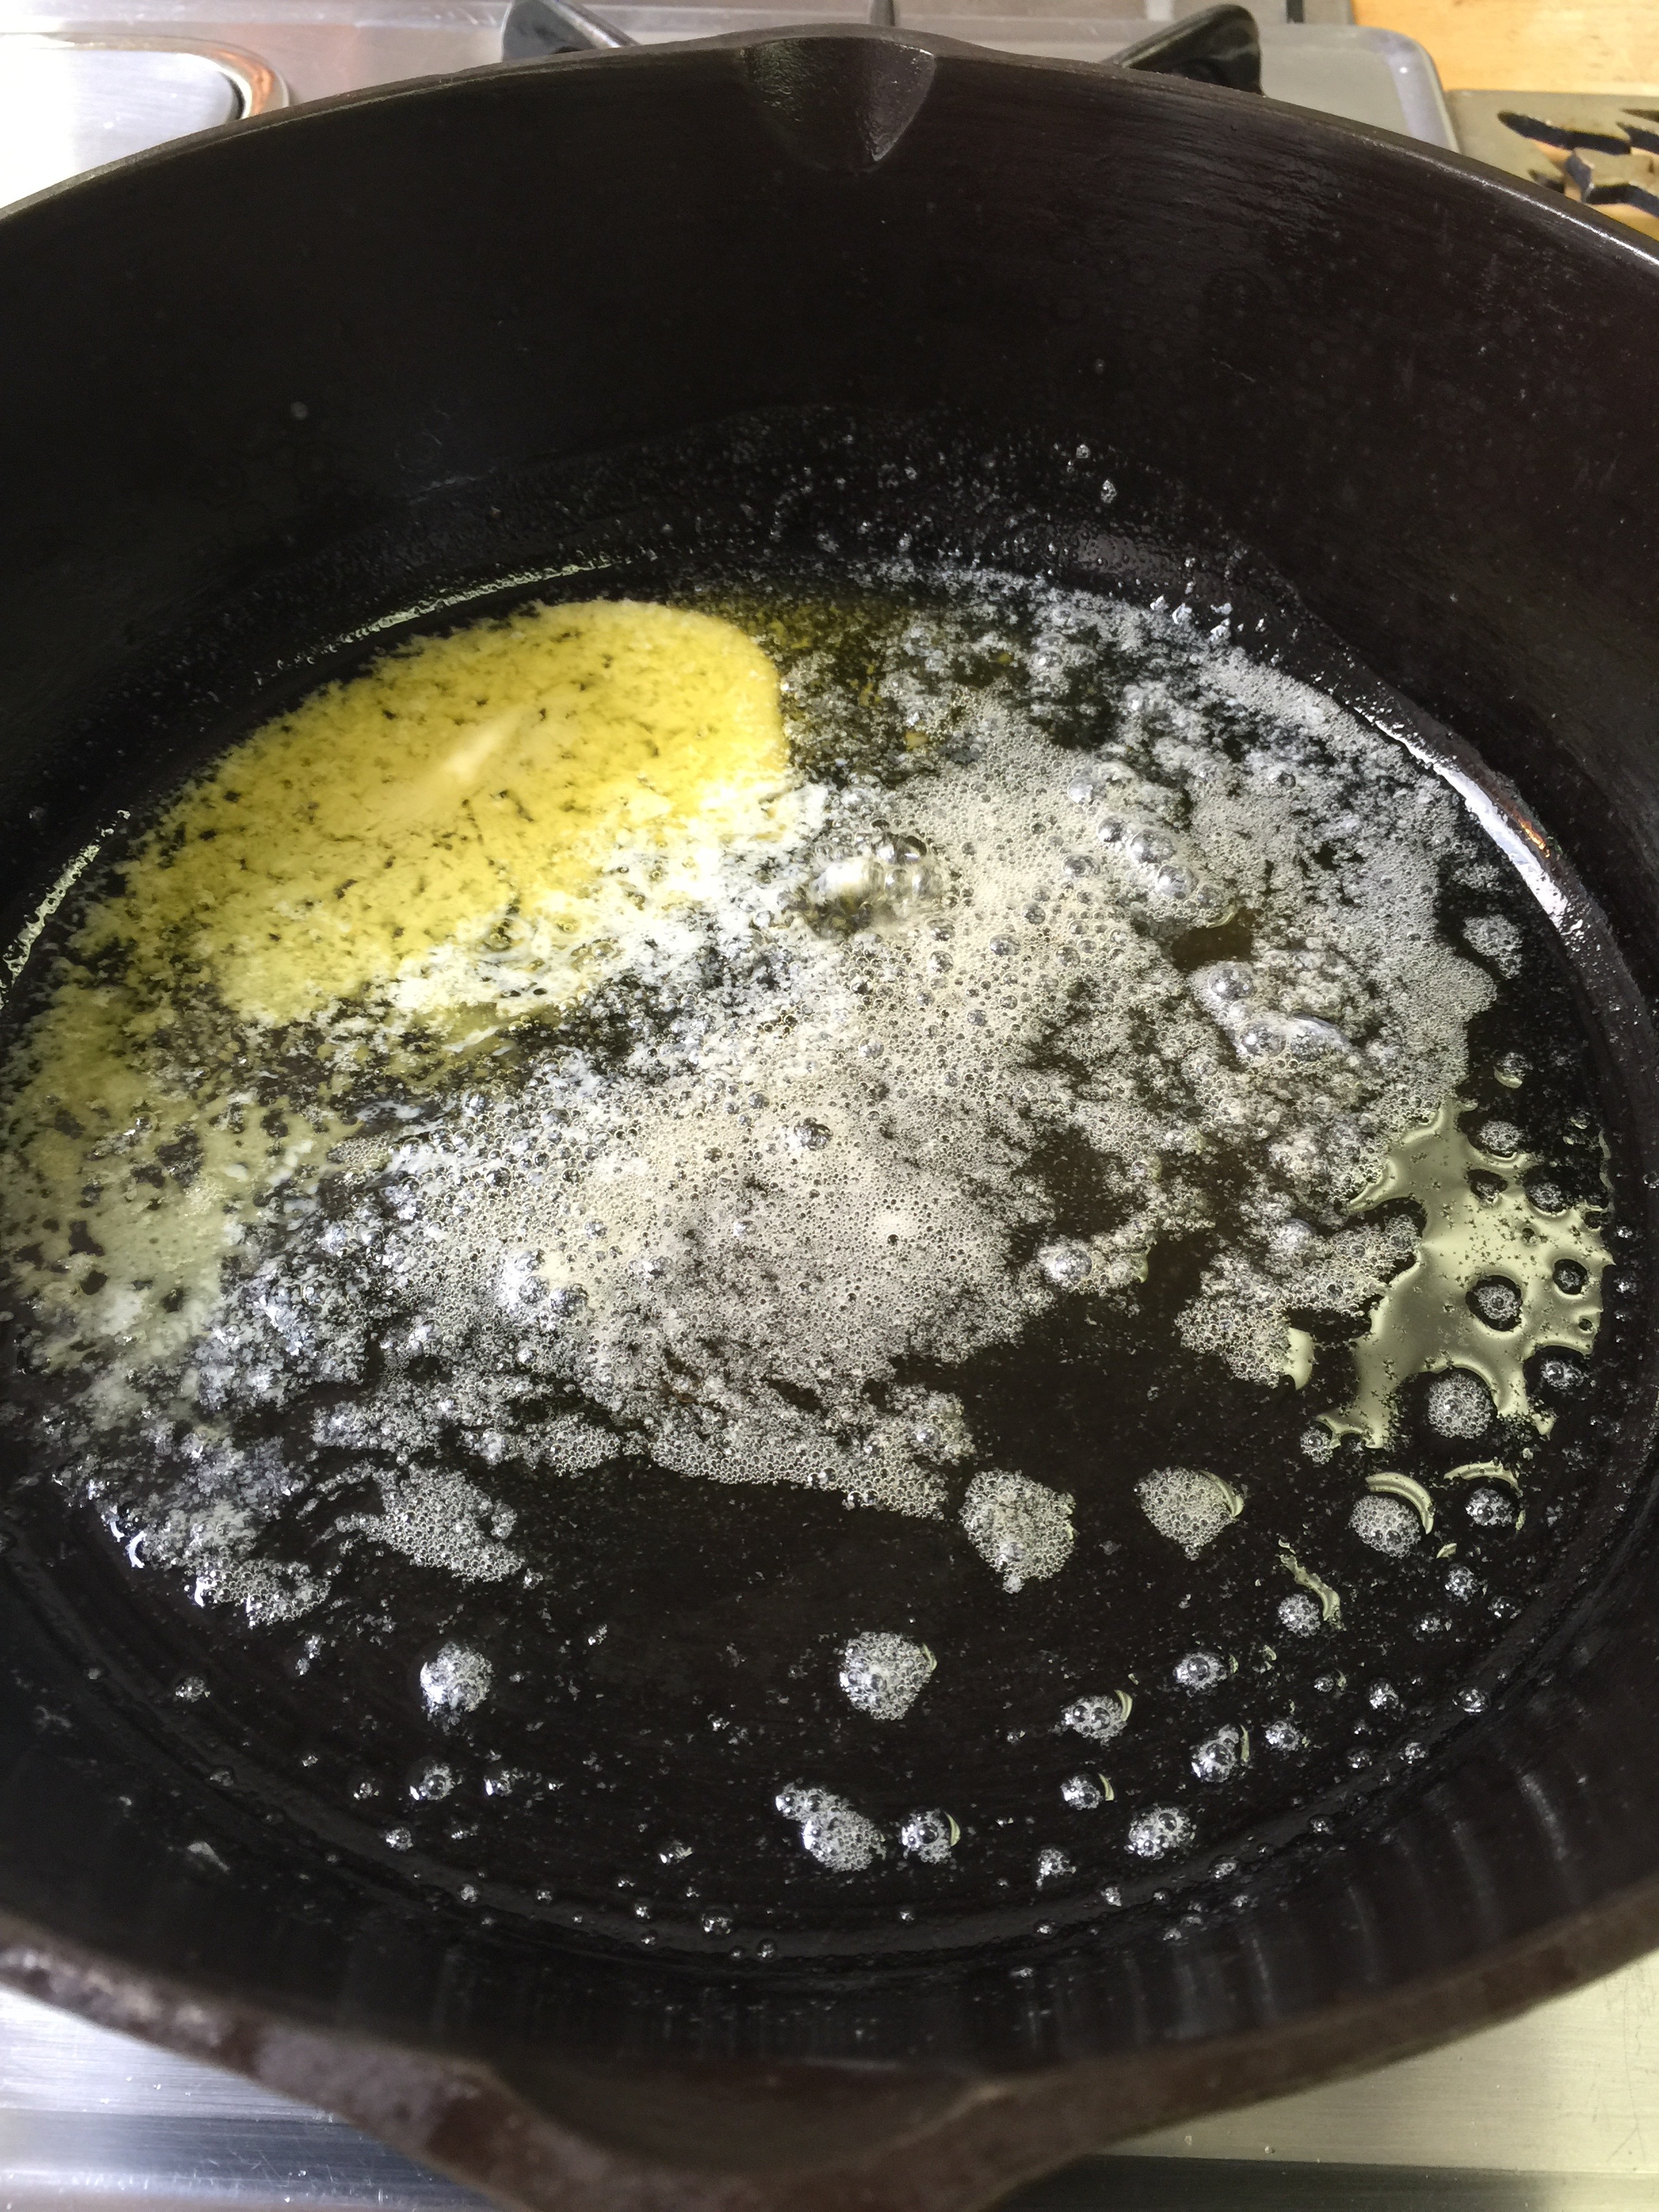
I popped open a can and got to work. All you need for this tasty Keto fish is Mahi Mahi, Macadamia Nuts, Kerrygold, a food processor, and your grandmother’s cast iron skillet! Yes, I really do have my grandmother’s old skillet, and it is a beast of a weapon! If you don’t have your grandmother’s, you can get one here.
Macadamia Nut Crusted Mahi Mahi
1 1/2 Pounds Mahi Mahi Cut into Filets
1 Cup Ground Macadamia Nuts (More if you like – You can find some here.)
1/2 Stick KerryGold Butter
Food Processor
Cast Iron Skillet
Instructions:
Preheat oven to 375 degrees.
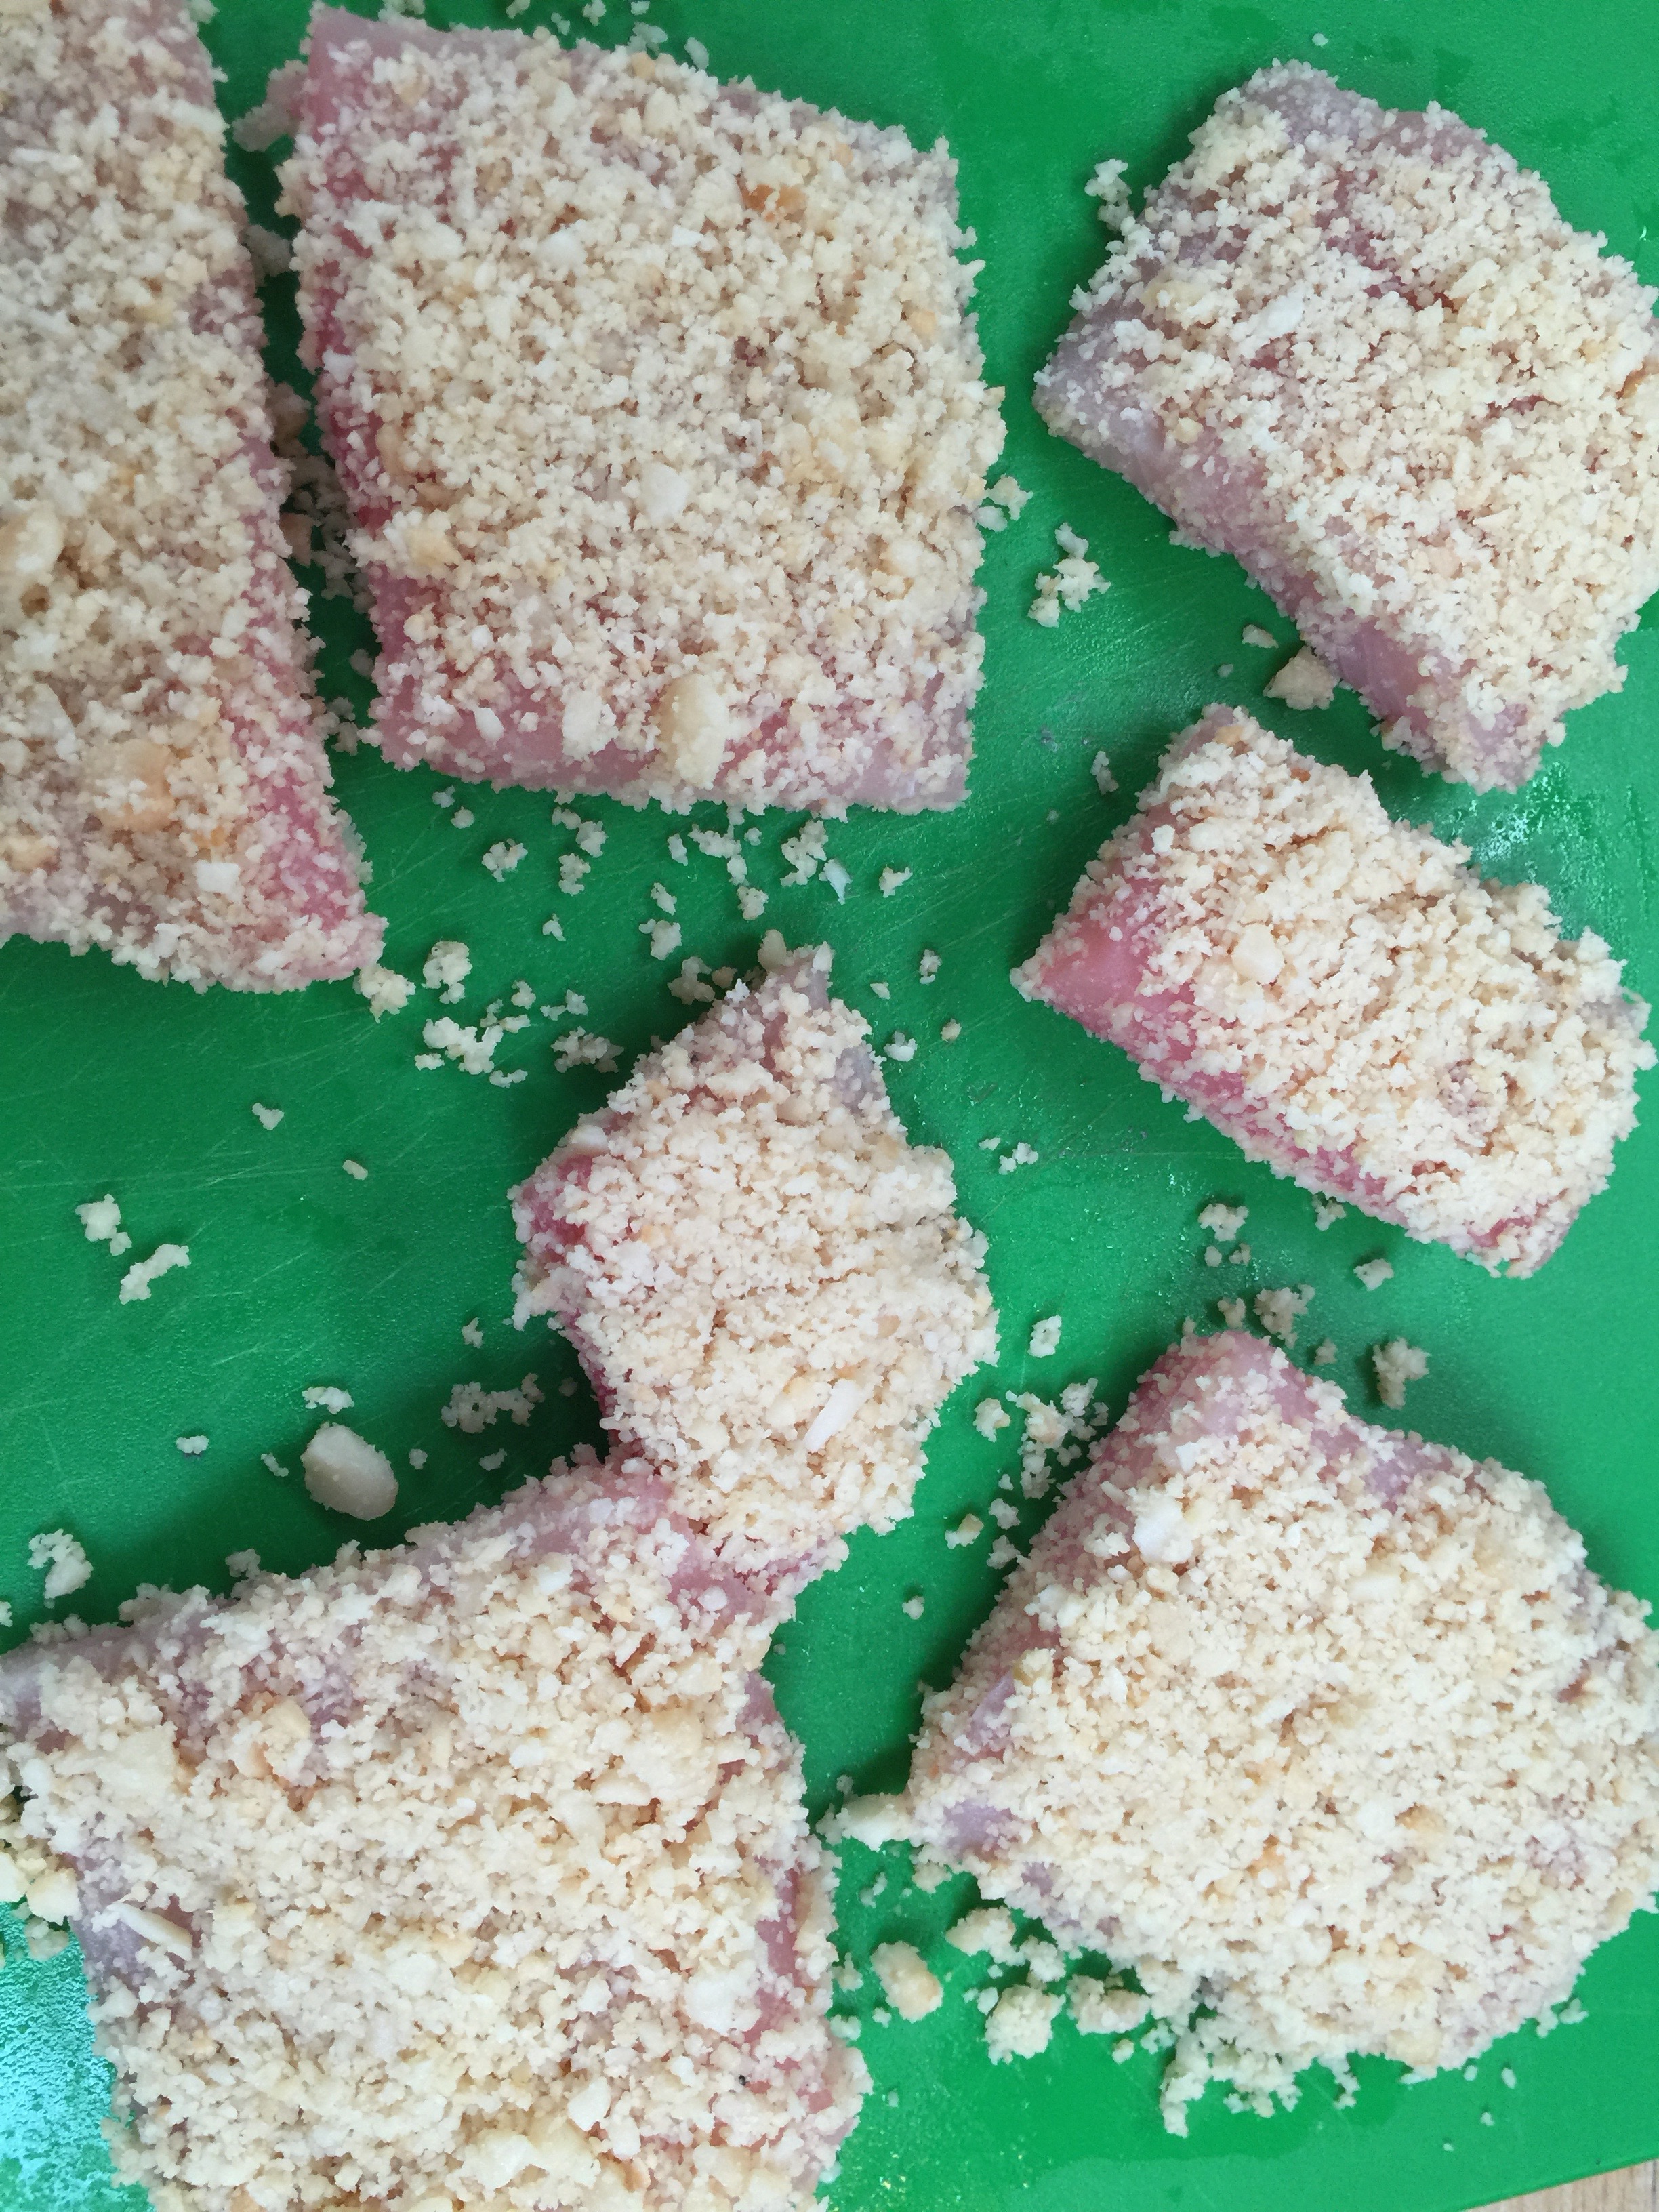
Cut your Mahi Mahi into filets. I did different sizes for adults and children, and it cooked just fine.
Debone and remove the skin (I just removed the section of bones with a filet knife from the middle of the filet – the bones are very large given this is a huge fish so they are easy to see and cut out.)
Grind your Macadamia nuts finely in a Food Processor. I used my mini-Cuisinart, but the large one would have been better. Fresh Macadamia Nuts are very hard so you need a powerful unit. This is the newer version of one I have here. Don’t over process or you will get a paste.
I sifted out the fine crumbles and put the larger pieces back in with the next batch.
All you have to do, is press your filets of fish into the ground Macadamia Nuts on both sides. After I had both sides nicely coated, I went back and added the rest to the top of the filets. You can never have too many Macadamias!
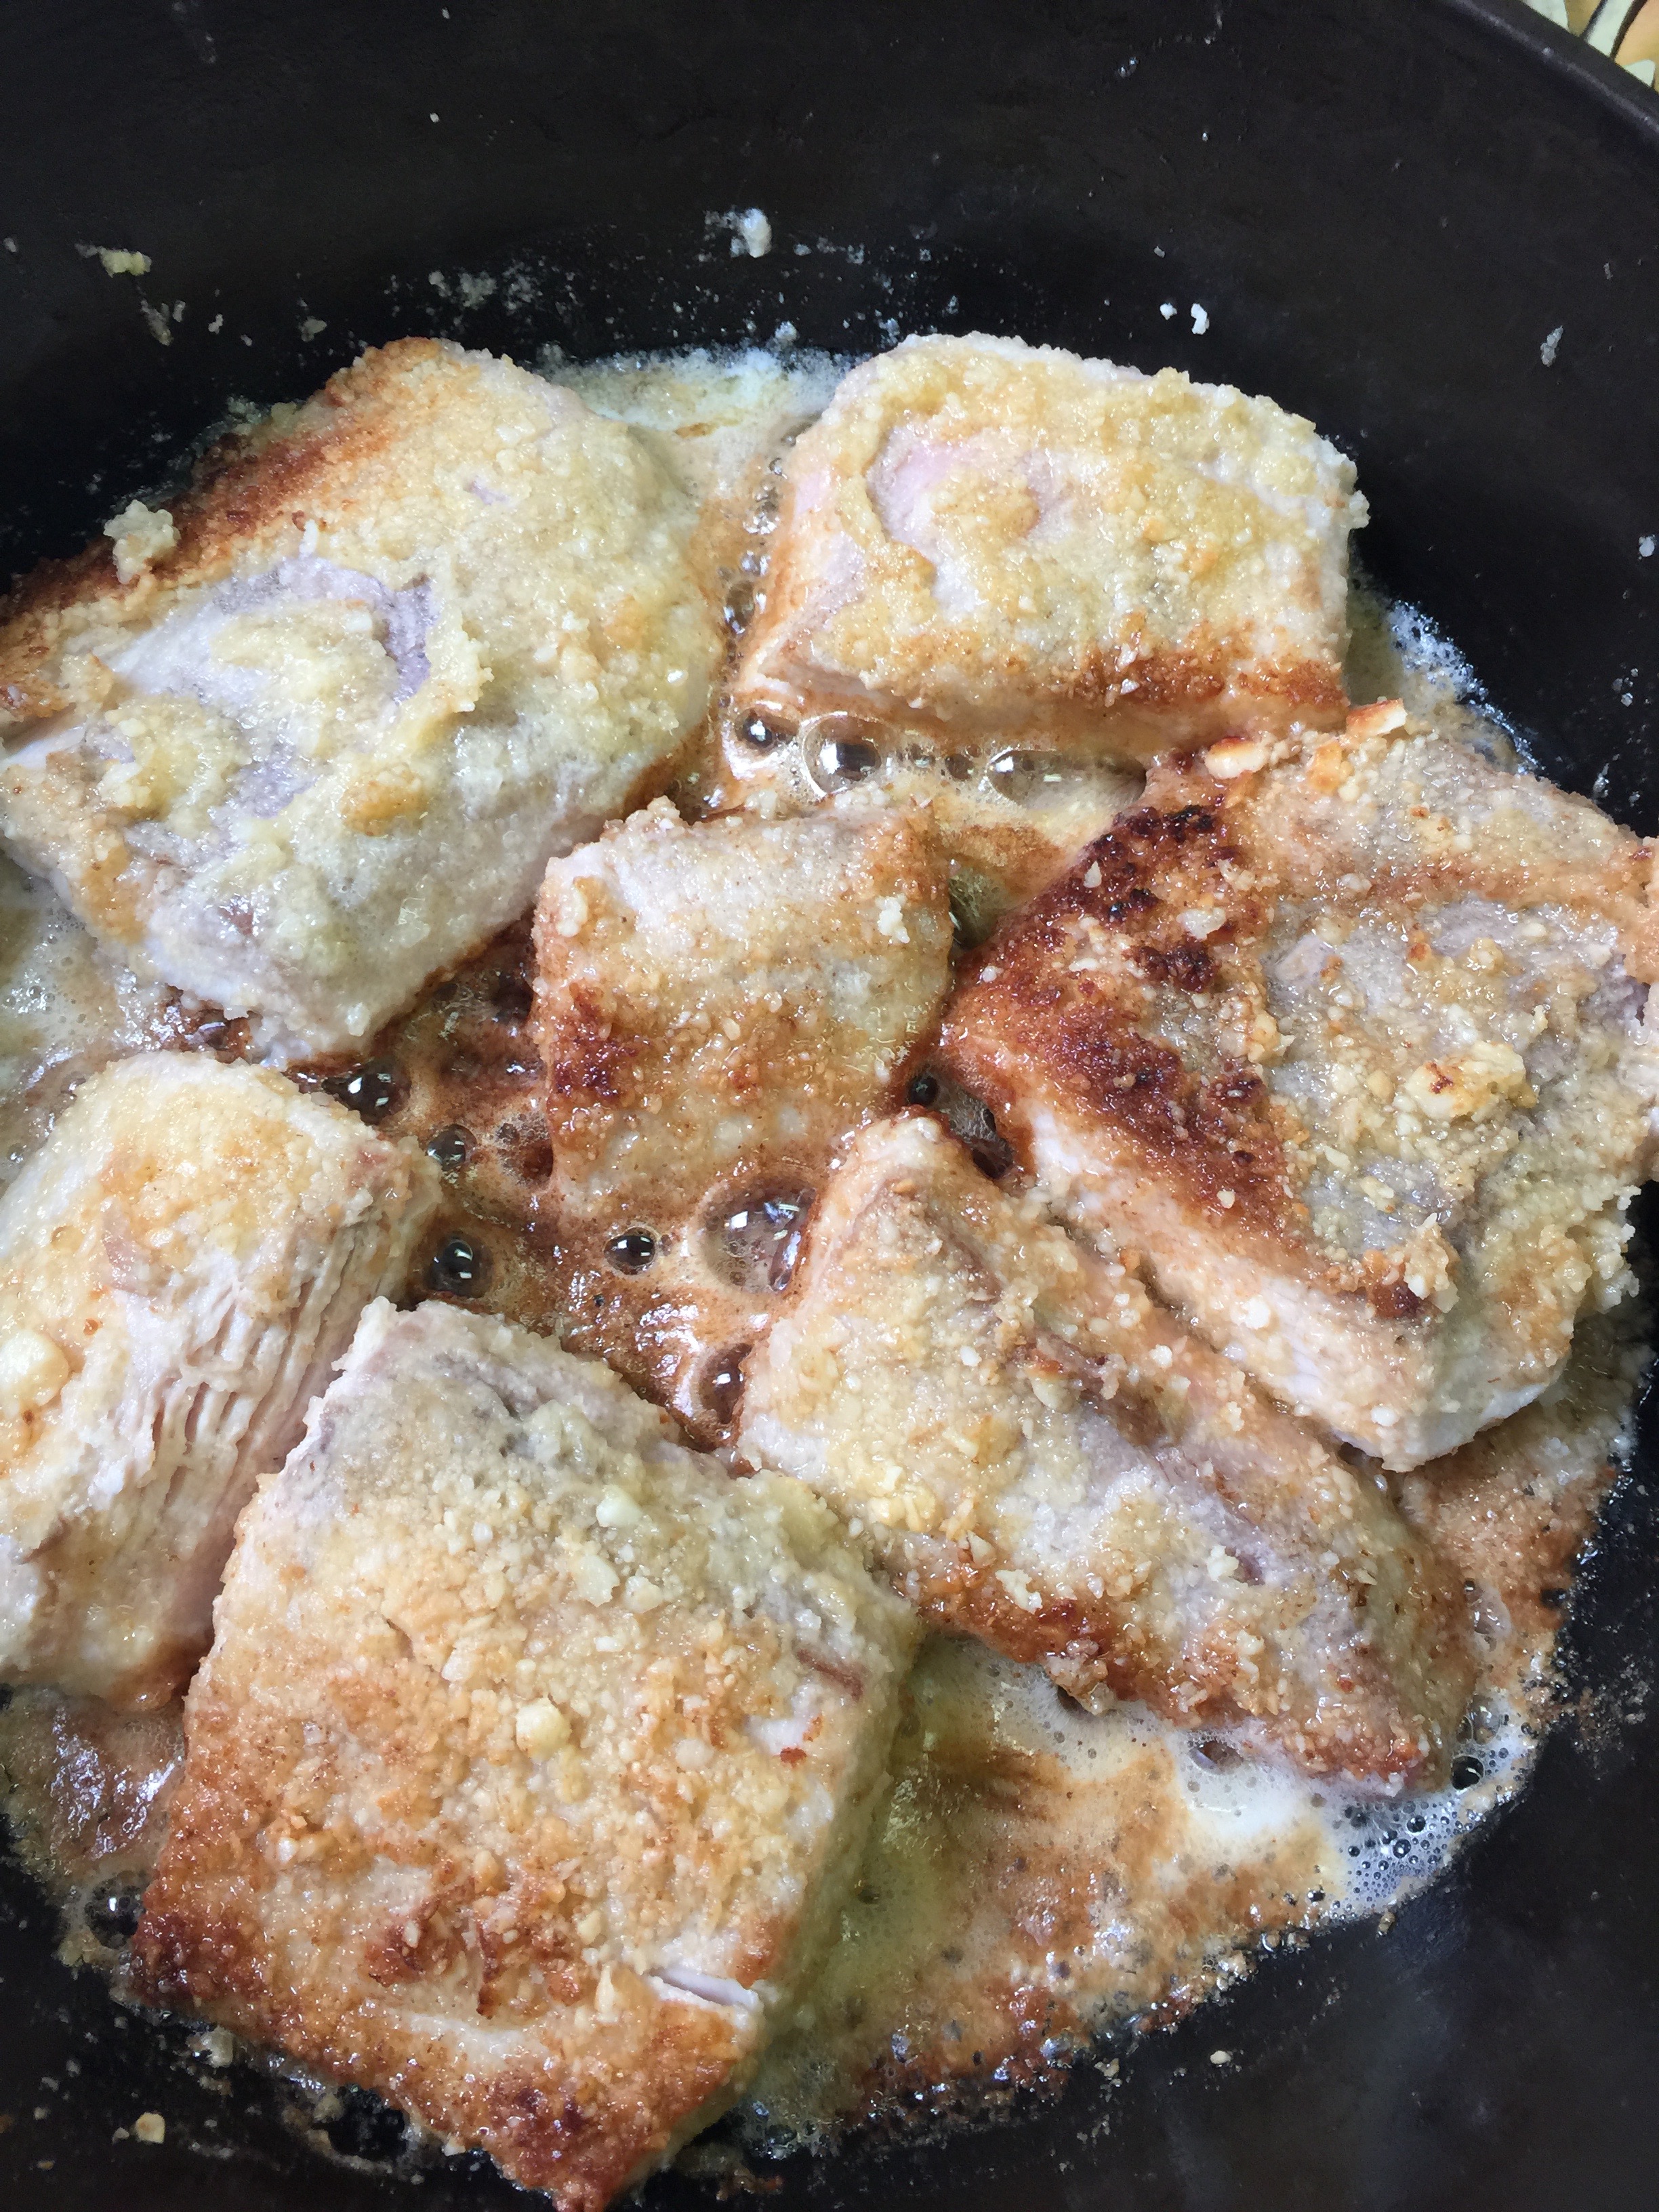
When your butter is sizzling, add all of your filets gently. I cooked them for 4 minutes on each side, and then moved the whole skillet to a preheated 375 degree oven for 10 minutes and they were perfect! Please use your oven mitts so you keep your hands to eat!
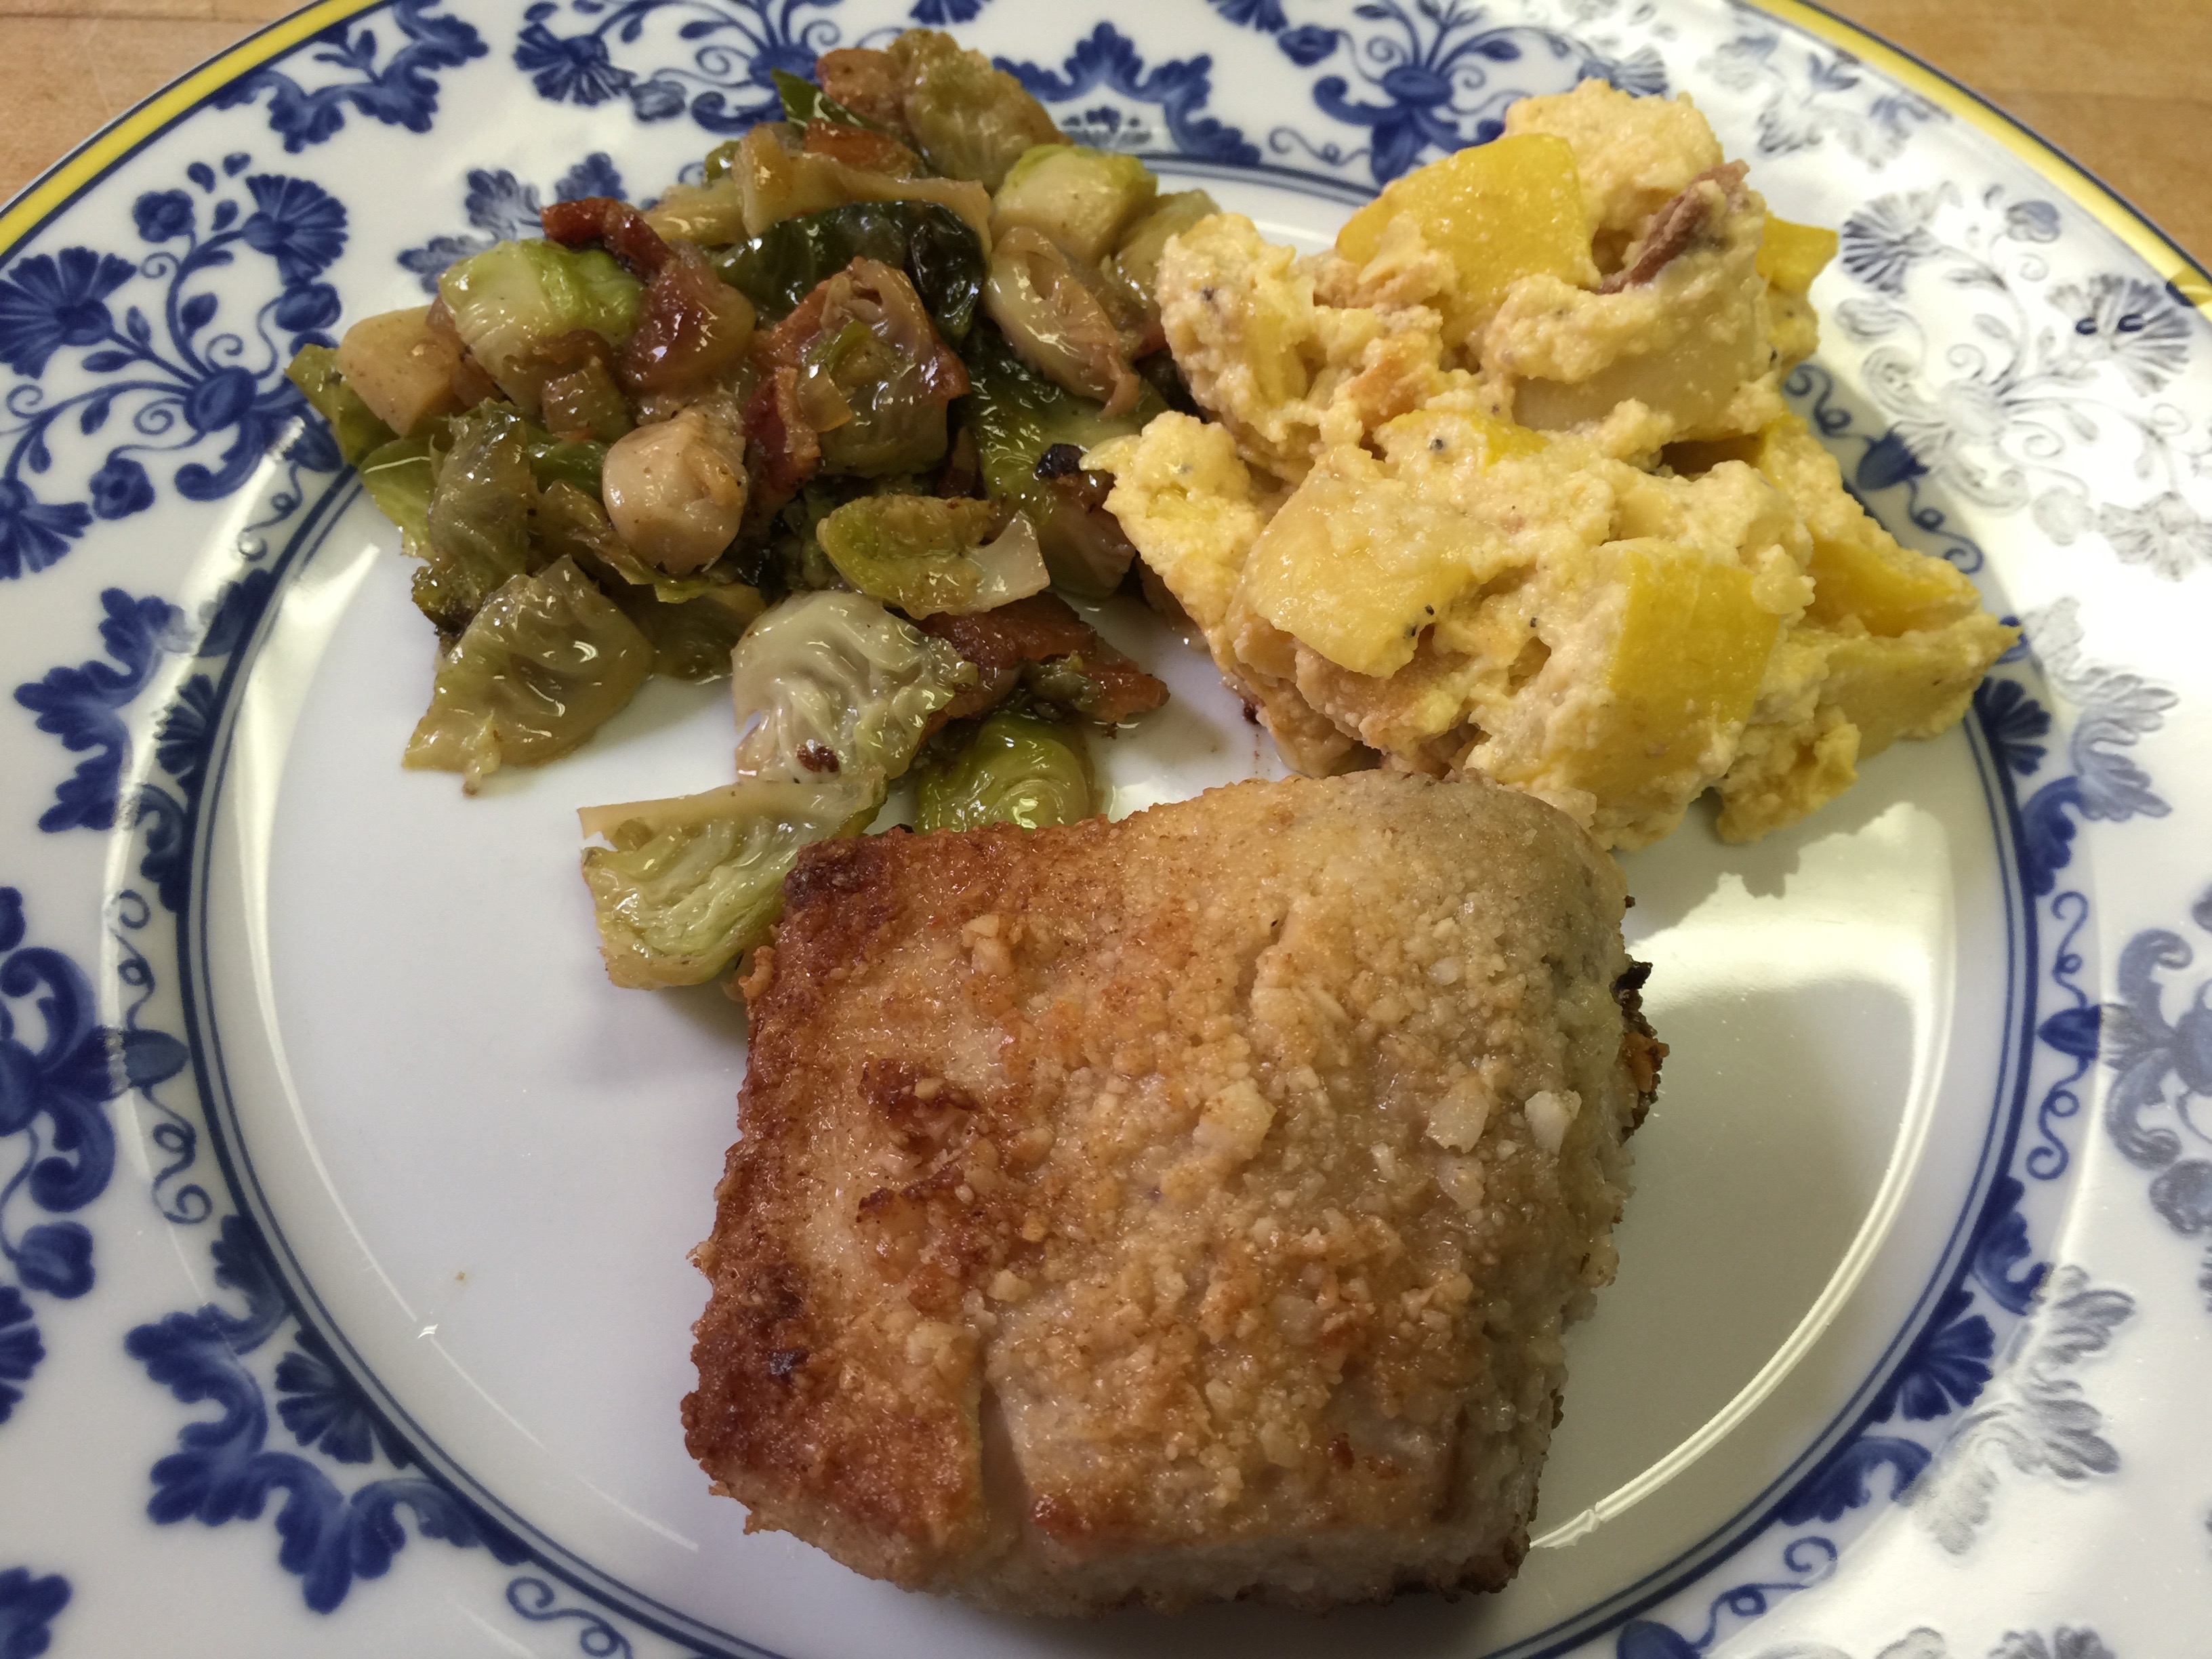
Serve immediately. I served them with left over squash casserole and bacon brussels that brought smiles around the table!
Most of you know by now that I love squash! All squash, but especially summer squash! Lucky for me, it is summer, and all those summer squashes are plentiful. The yellow is my favorite!
About a year ago, we celebrated my dad’s birthday at a great restaurant in San Antonio called Bohanan’s. It is a wonderful special occasion restaurant if you have not tried it! Most of my family would consider themselves foodies, and really enjoy a great meal. I am no exception! You can always count on having a great meal at Bohanan’s. Not only do they have some of the best steaks in Texas (which is saying a lot), but they have great seafood and side dishes as well. One of my favorite side dishes we were served that evening was their Baked Squash. It is melt in your mouth delicious, with just the right amount of savory paired with the sweet. The sugar in ours is, of course, replaced with Swerve or natural sweetener of your choice.
Just a few weeks after my father’s birthday, I found the squash recipe in our local Sunday paper. I just love restaurants that publish their prized recipes! It was so close to being Keto, that I knew I could tweak it to make it healthier for our family without the sugar and flour. I think I have mastered it enough to share:
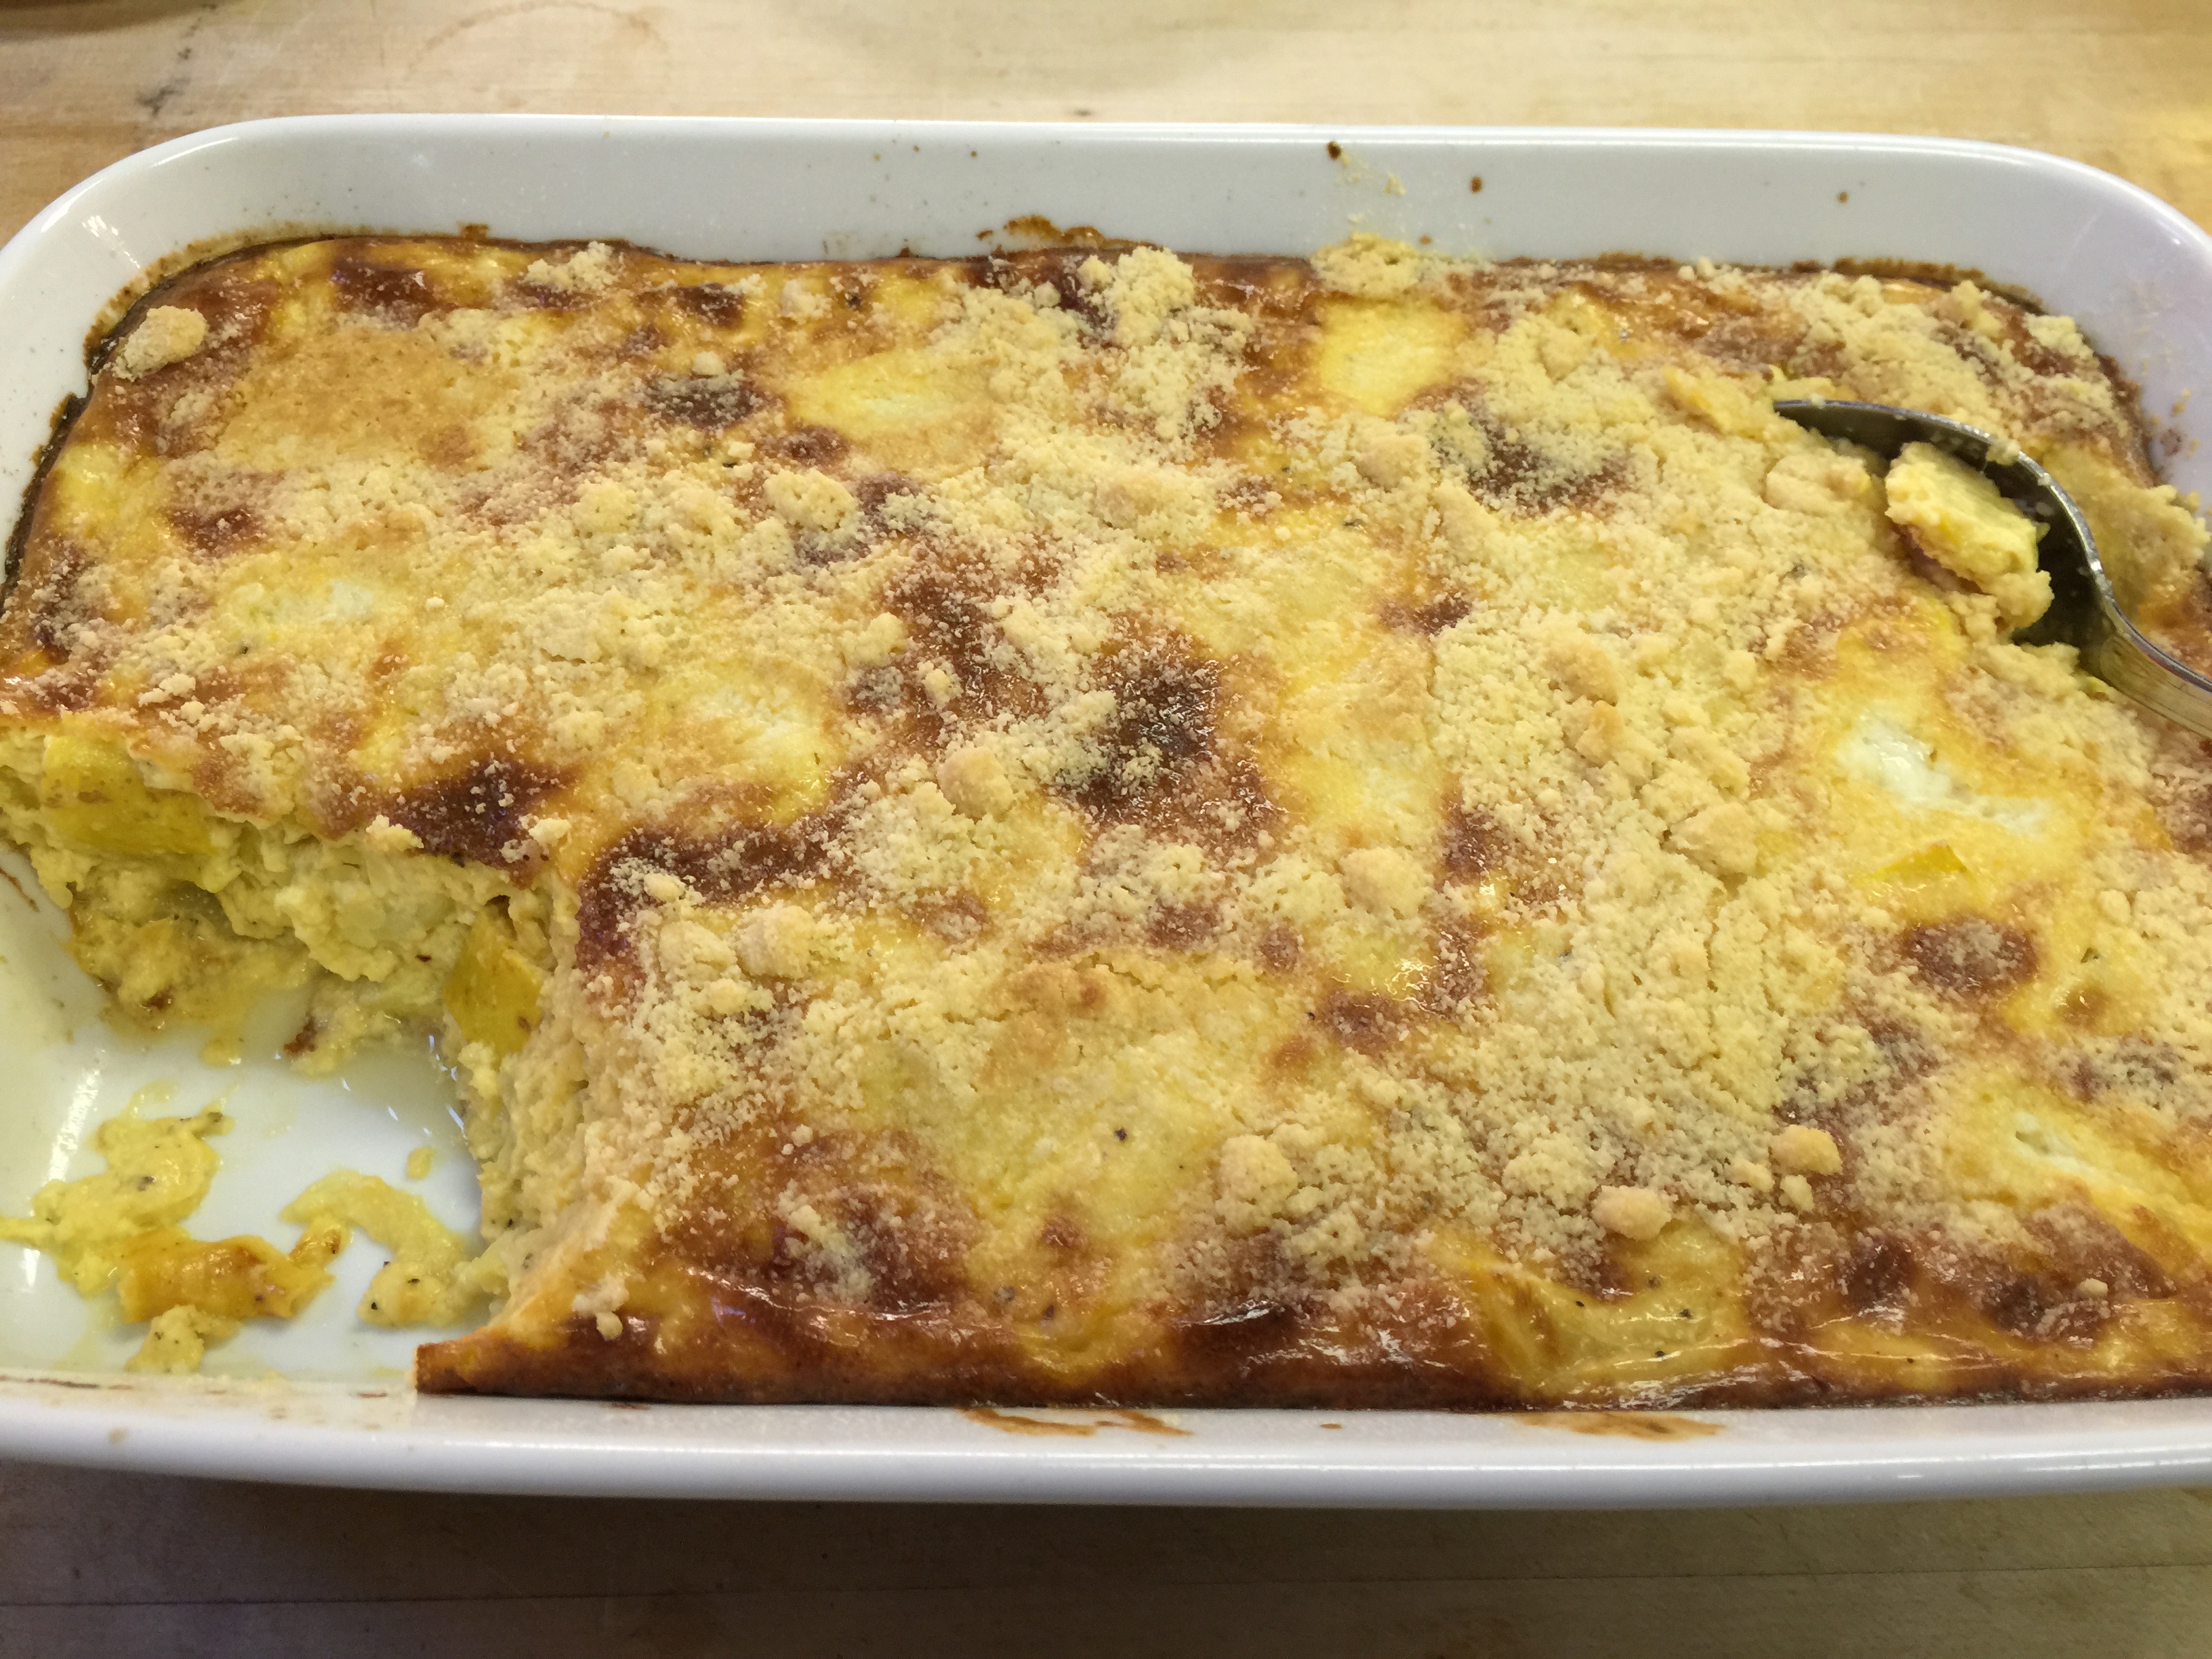
Sweet Life Baked Squash
Serves 10-12 (Can half, but saves great for leftovers)
3.5 lbs yellow summer squash
1/2 brick of Kerry Gold butter (extra for top)
20 slices of Kraft cheese
4-5 tsp of Swerve granular
1 cup mayonnaise
1/2 tsp Celtic salt
2 tsp fresh ground black pepper
4 eggs
Almond Flour for top
Directions:
Preheat oven to 350 degrees, and gather your ingredients.
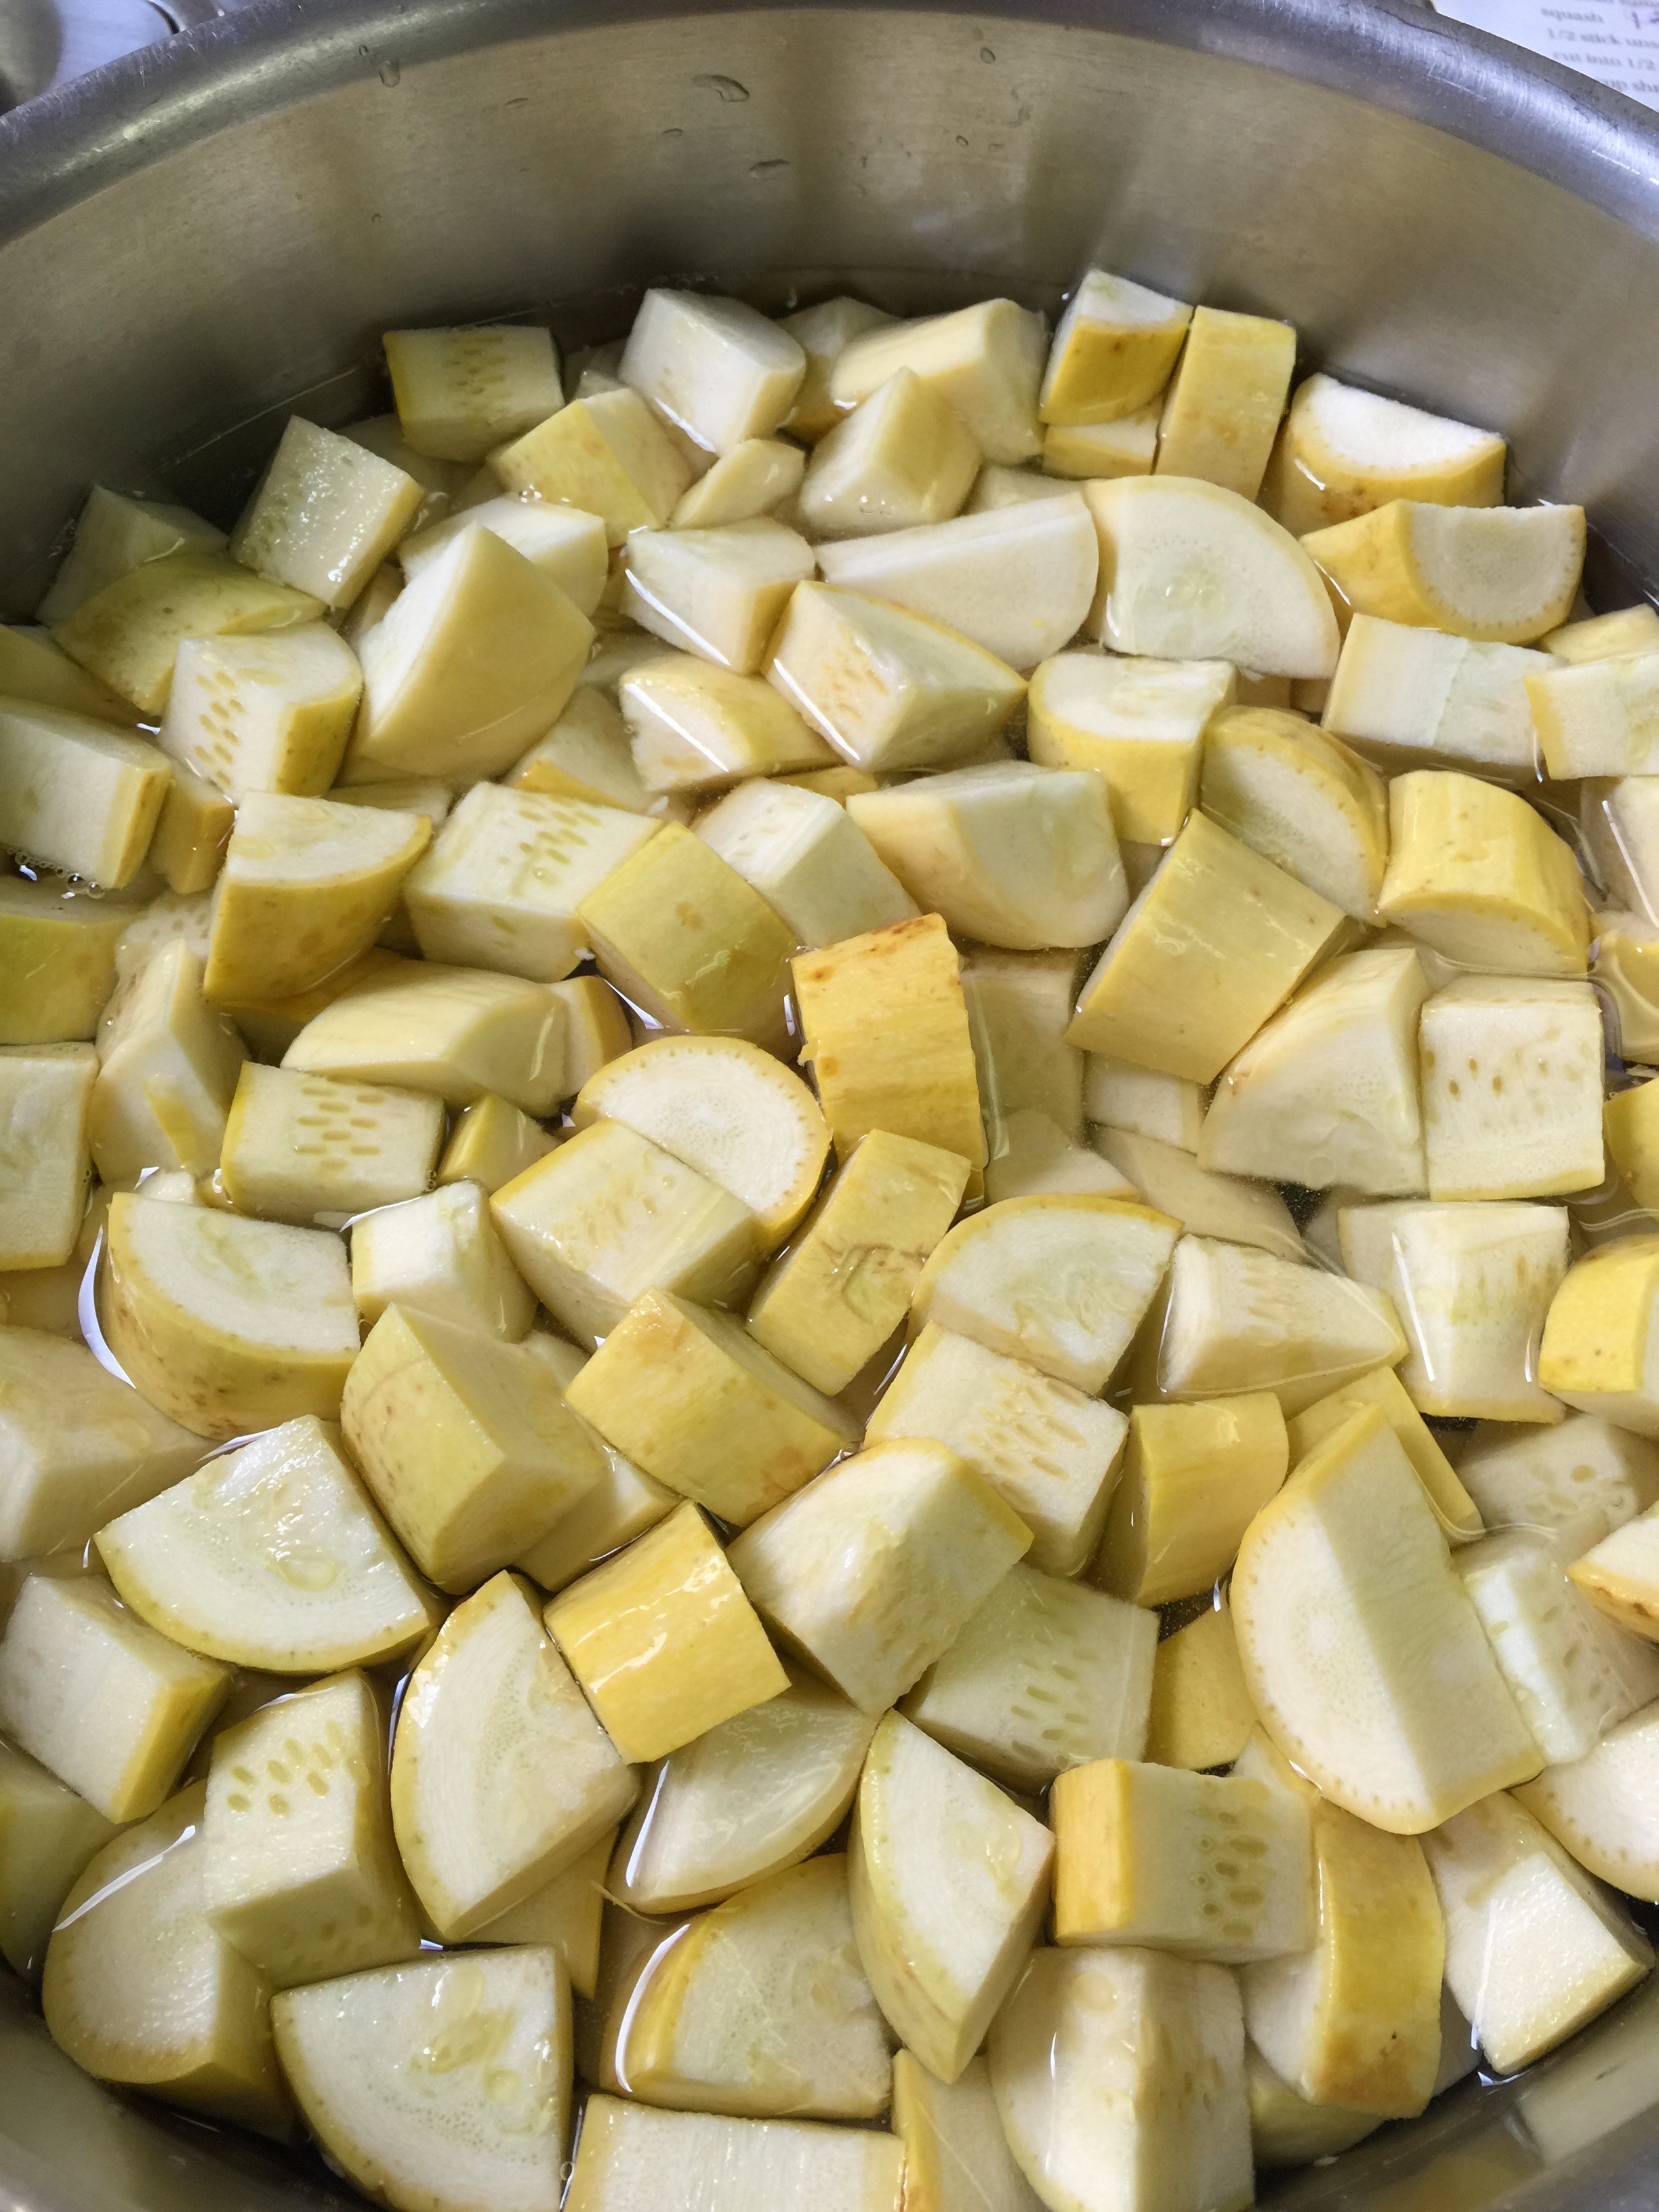
Start by washing the squash, trimming off the ends, and cubing it.
Place your squash in a large saucepan and cover with water and a pinch of salt.
Boil for about 10 minutes until tender when pierced with a fork.
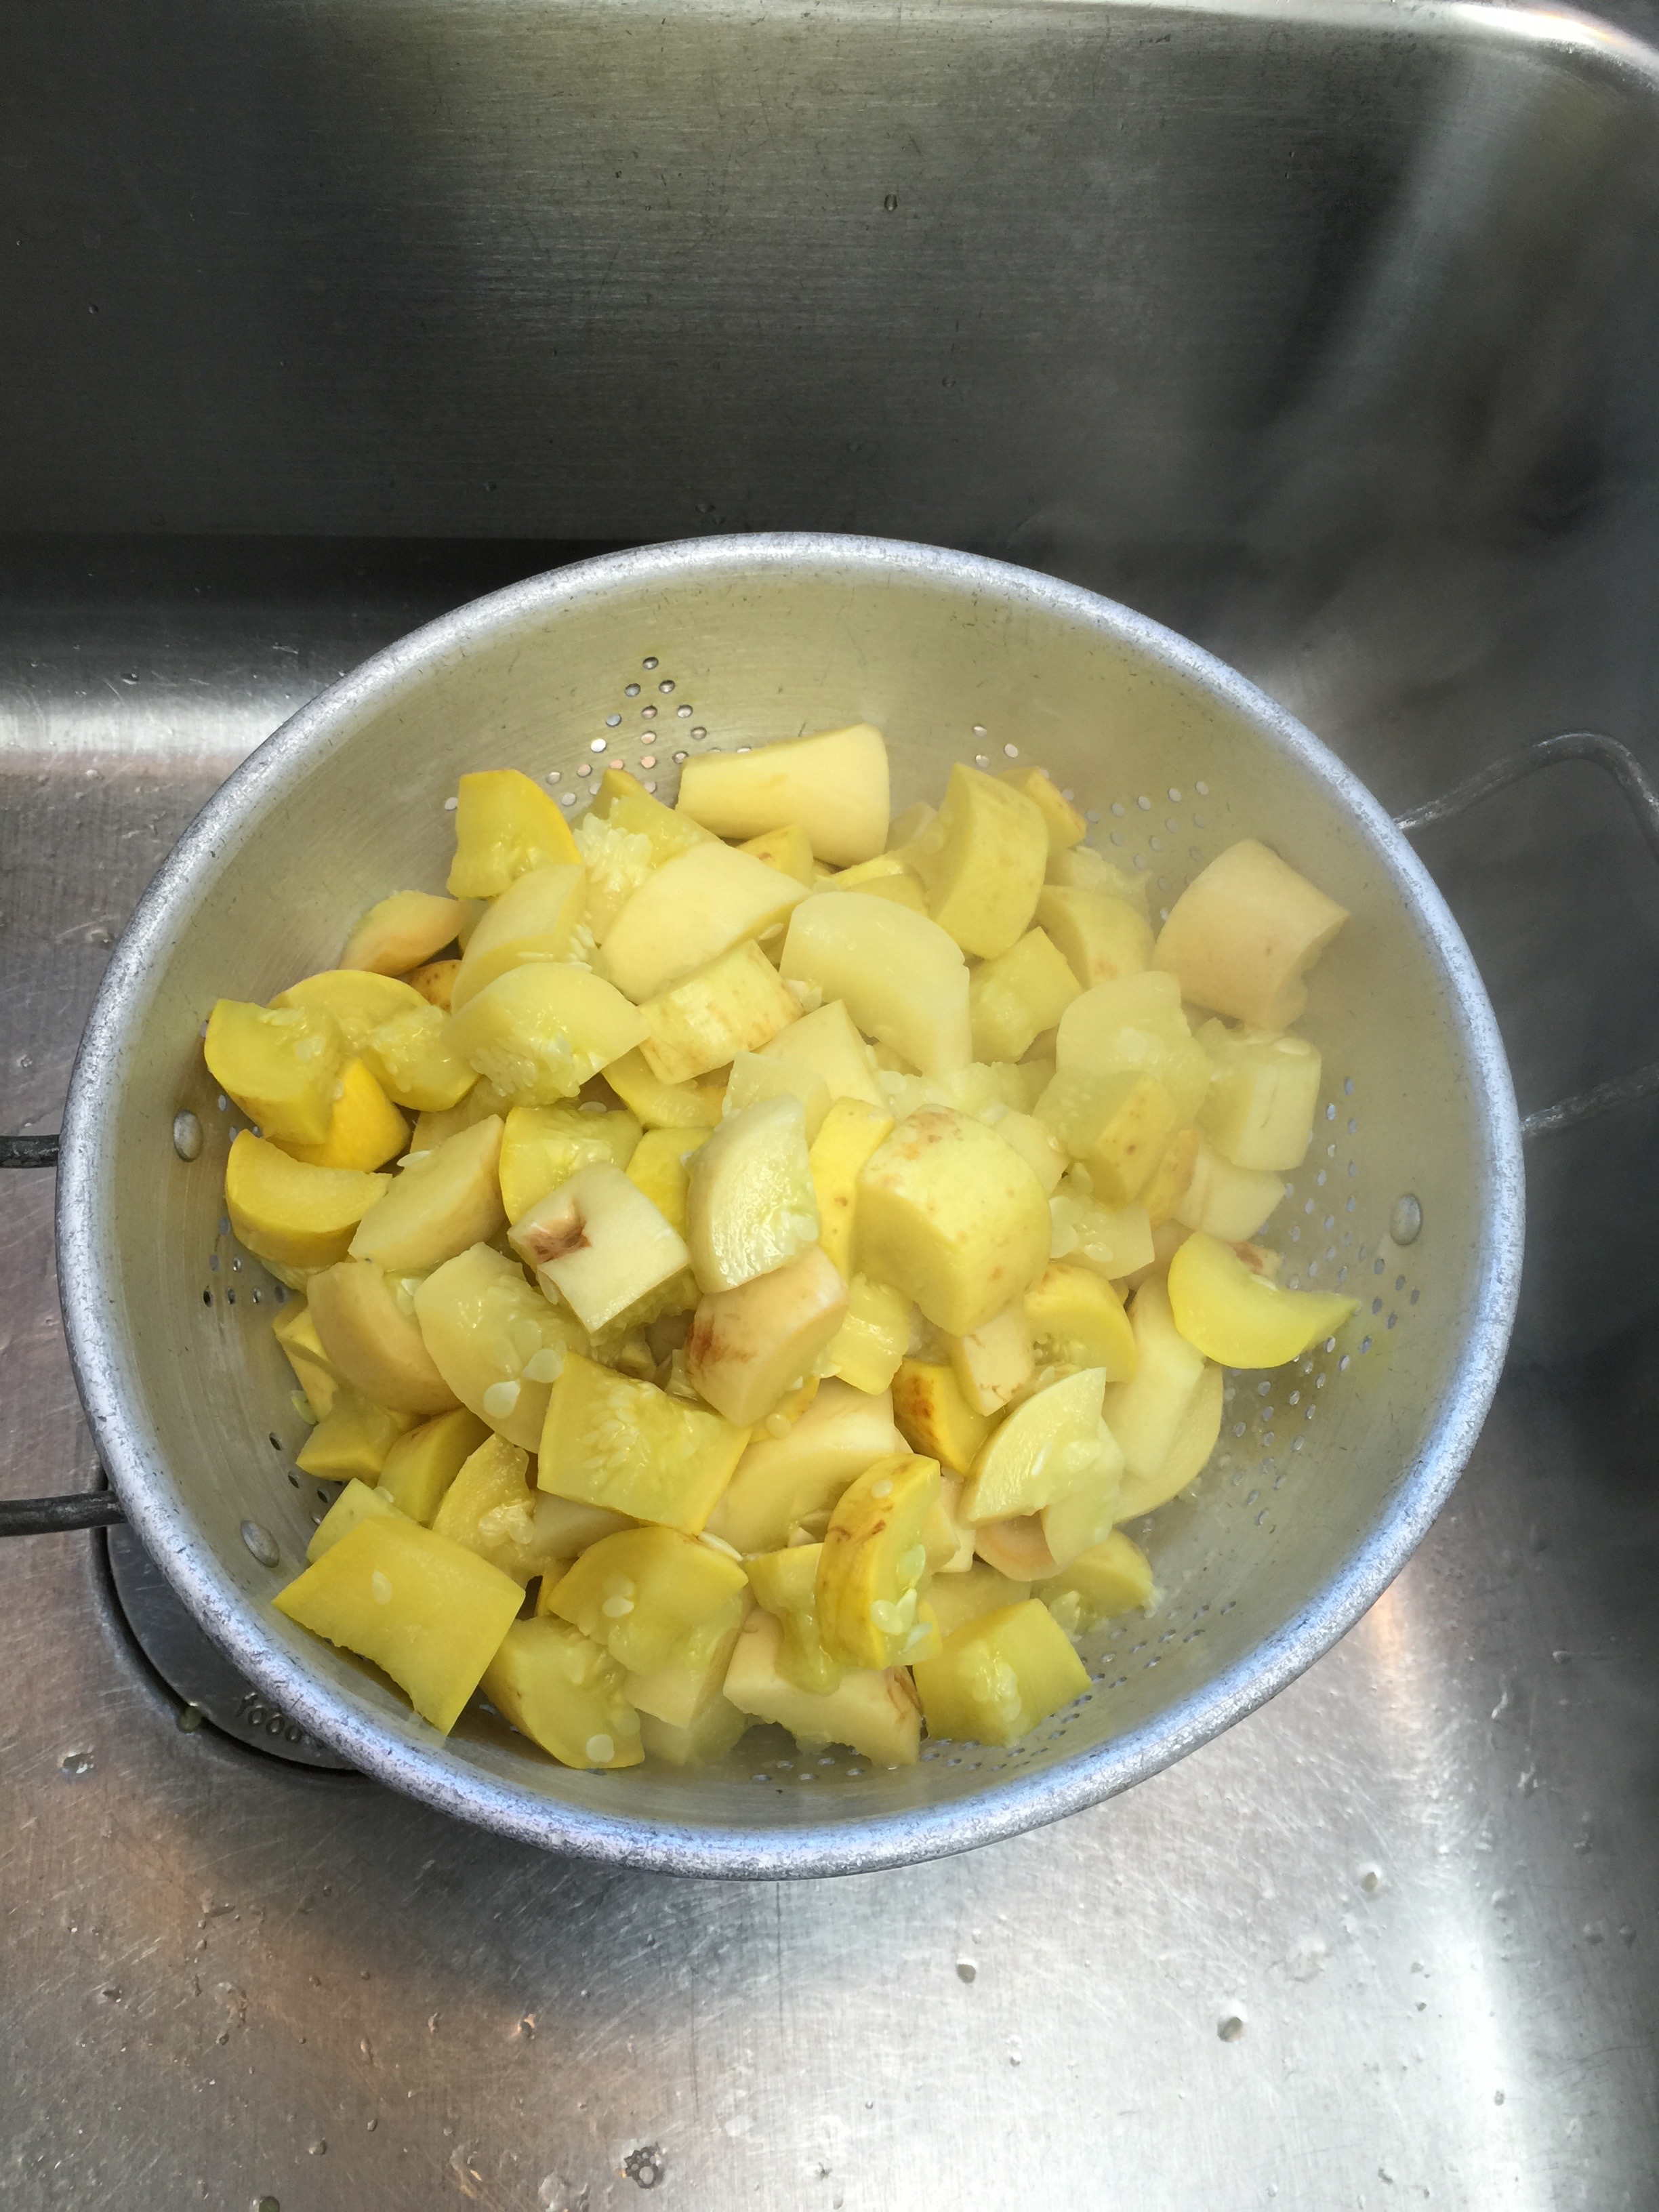
Drain in a colander, place back in the pan, and cook over medium heat to release more of the moisture in the squash. Stir for a few minutes, and then remove from heat. Most (not all) of the moisture should be evaporated from the pan at this point.
Stir in your Kerrygold, Kraft cheese, Swerve, mayonnaise, salt, and pepper.
Mix until all the cheese is melted.
Beat the eggs lightly in a small bowl, and temper them by adding a small amount of the squash mixture. Then pour them into the pan, and mix well. It will look super runny, but it will firm up when you bake it.
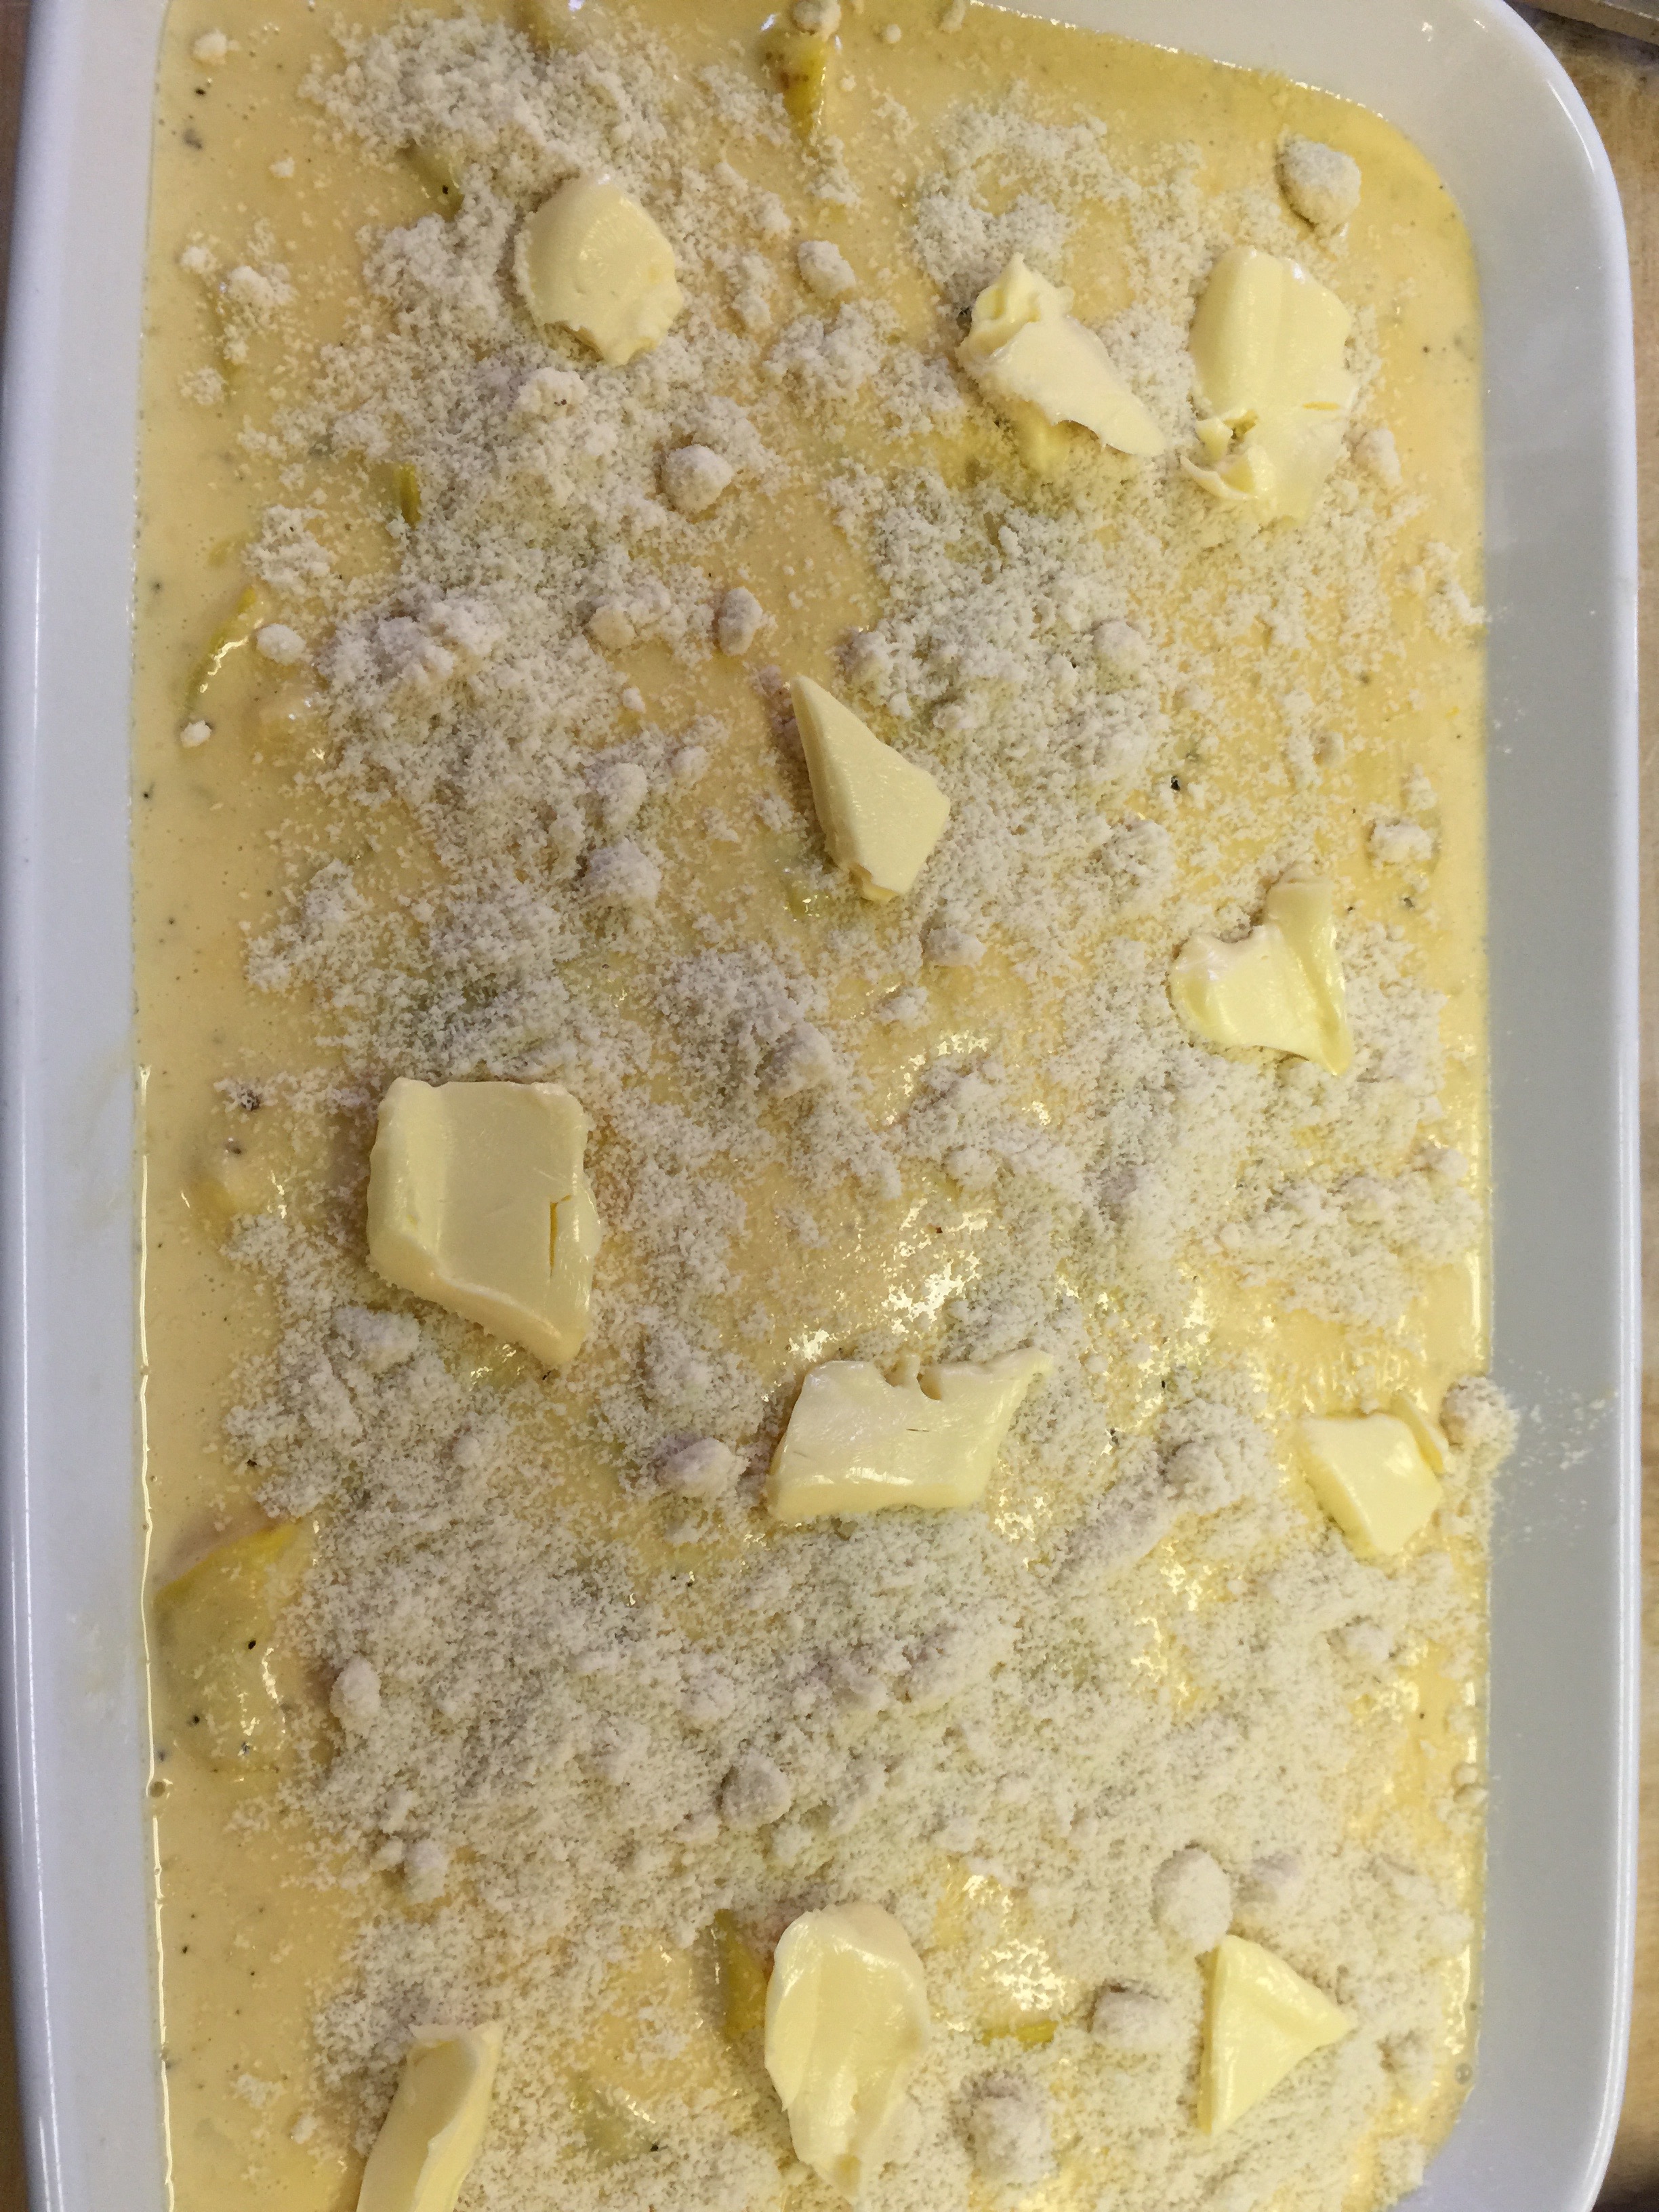
Pour your mixture into a 9×13 baking dish sprayed with coconut oil.
Top with a sprinkle of Almond Flour and a few dabs of additional Kerrygold.
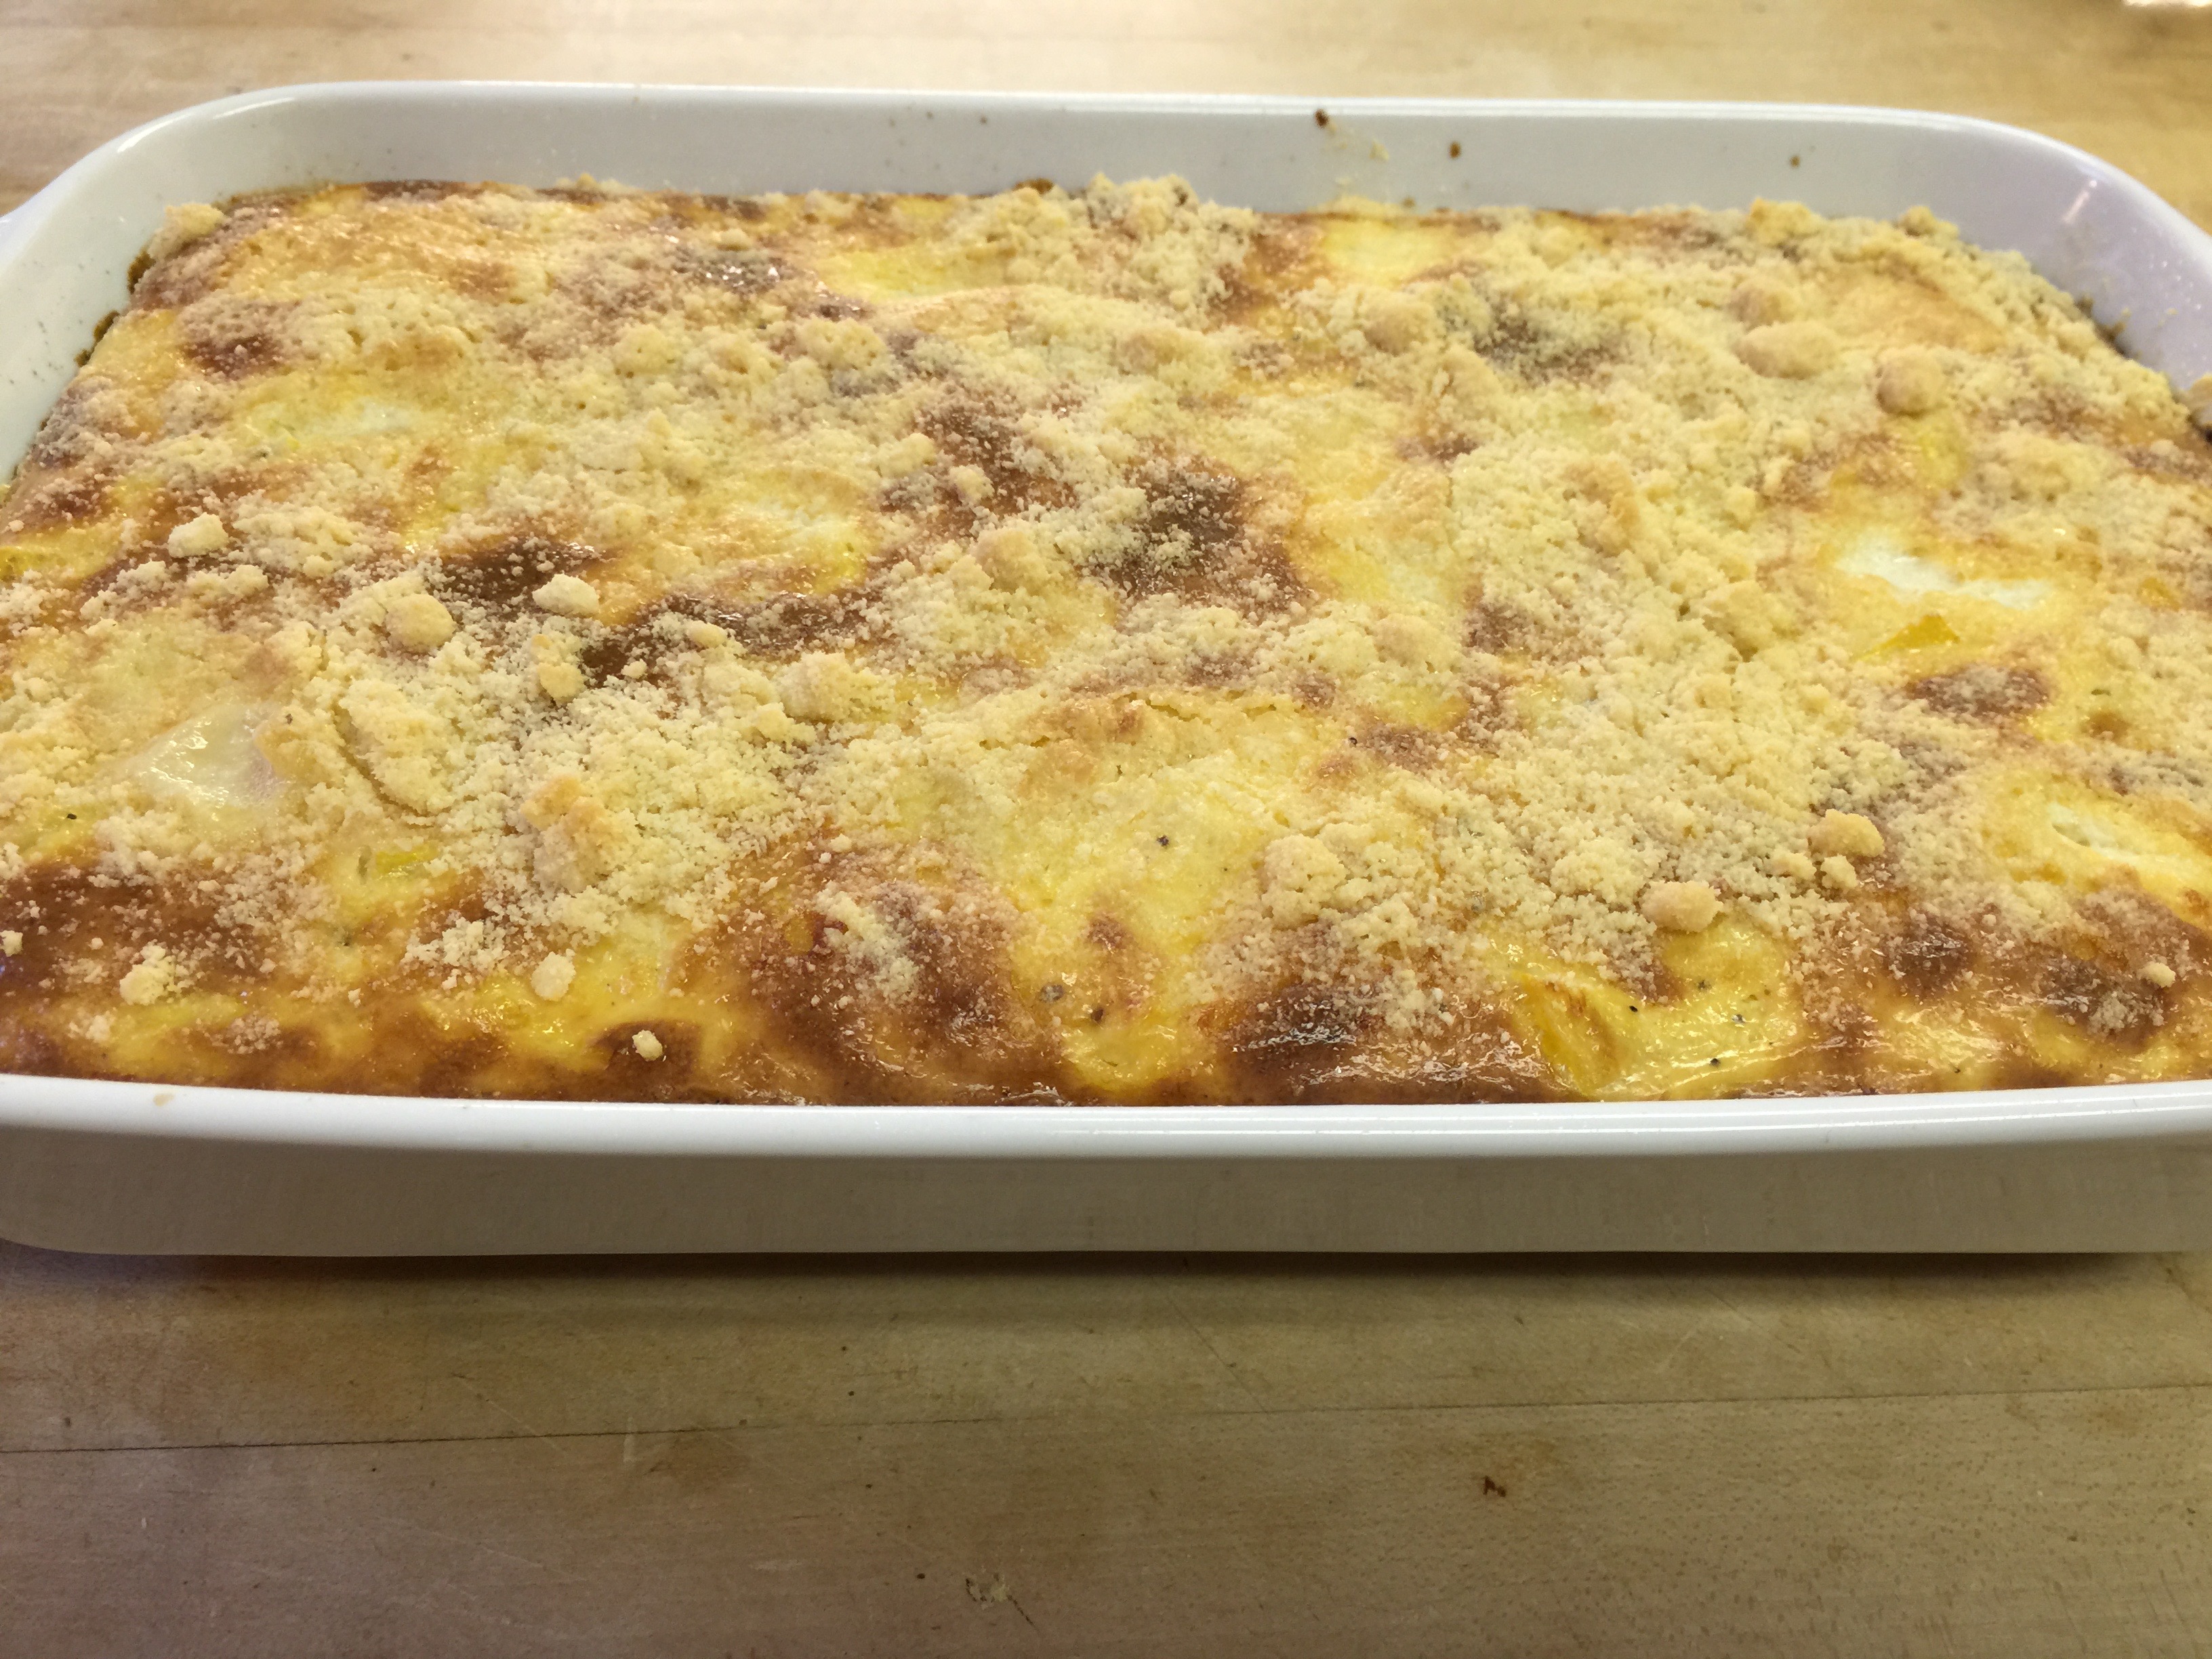
Bake at 350 degrees for 45 minutes.
This dish goes great with any kind of bar-b-que, hamburger patties, steak, fish – really anything. I was going to serve it with some brisket, but my husband was in the mood for burger patties so that is what you see.
I hope you enjoy this great side dish with your next summer meal! Enjoy!
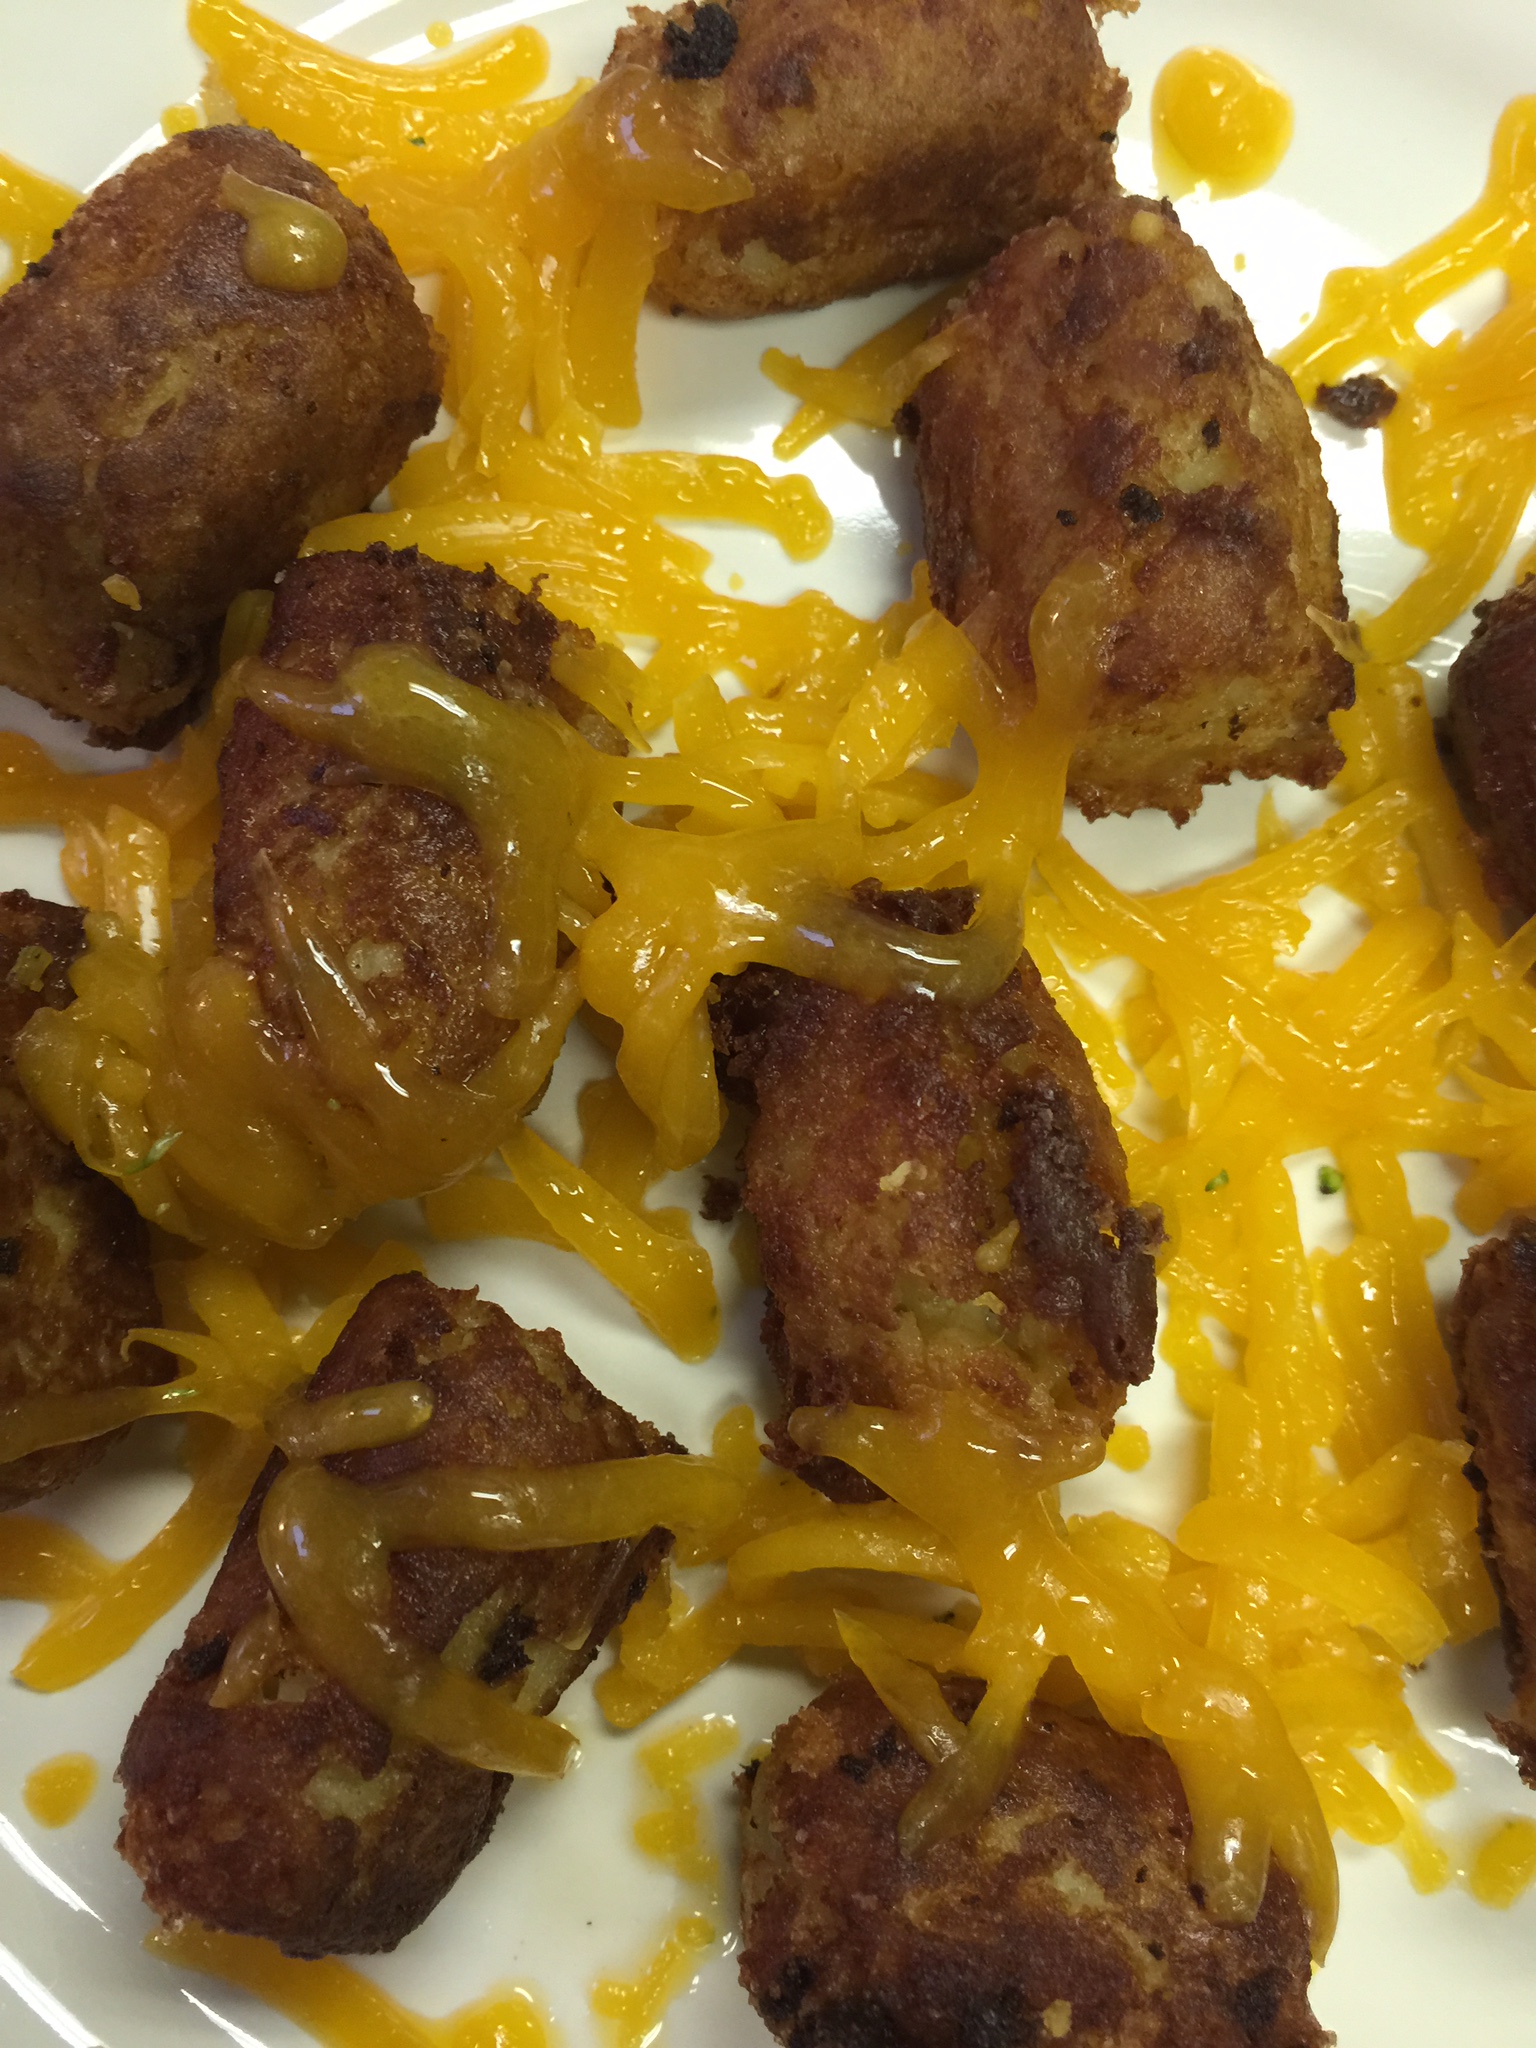
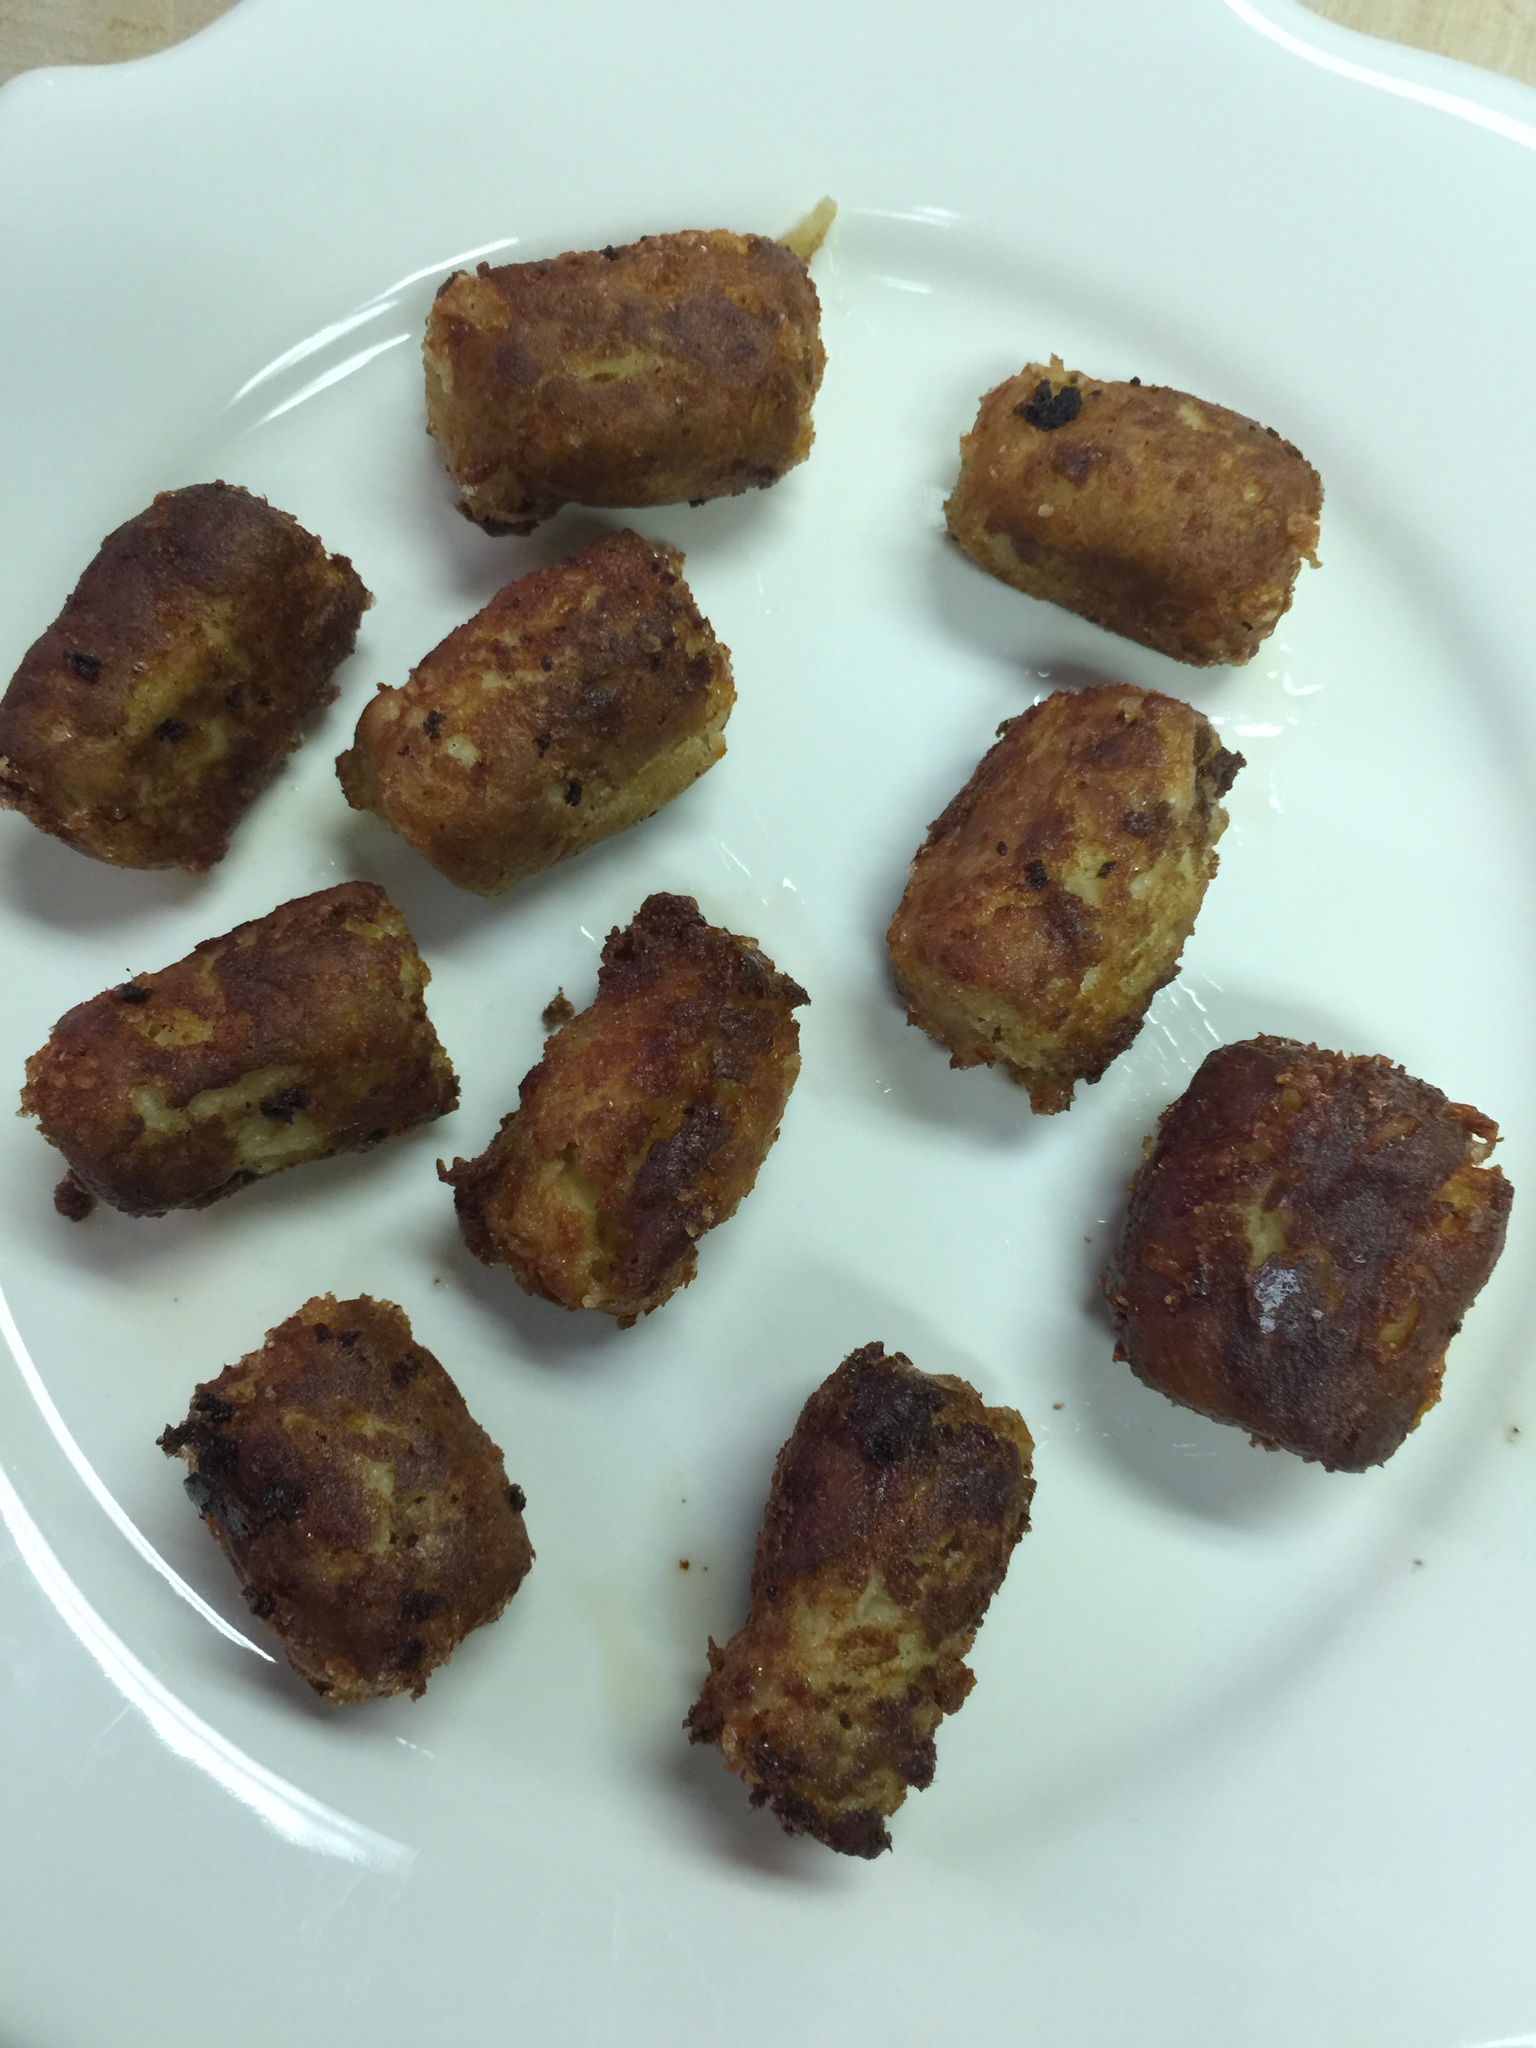
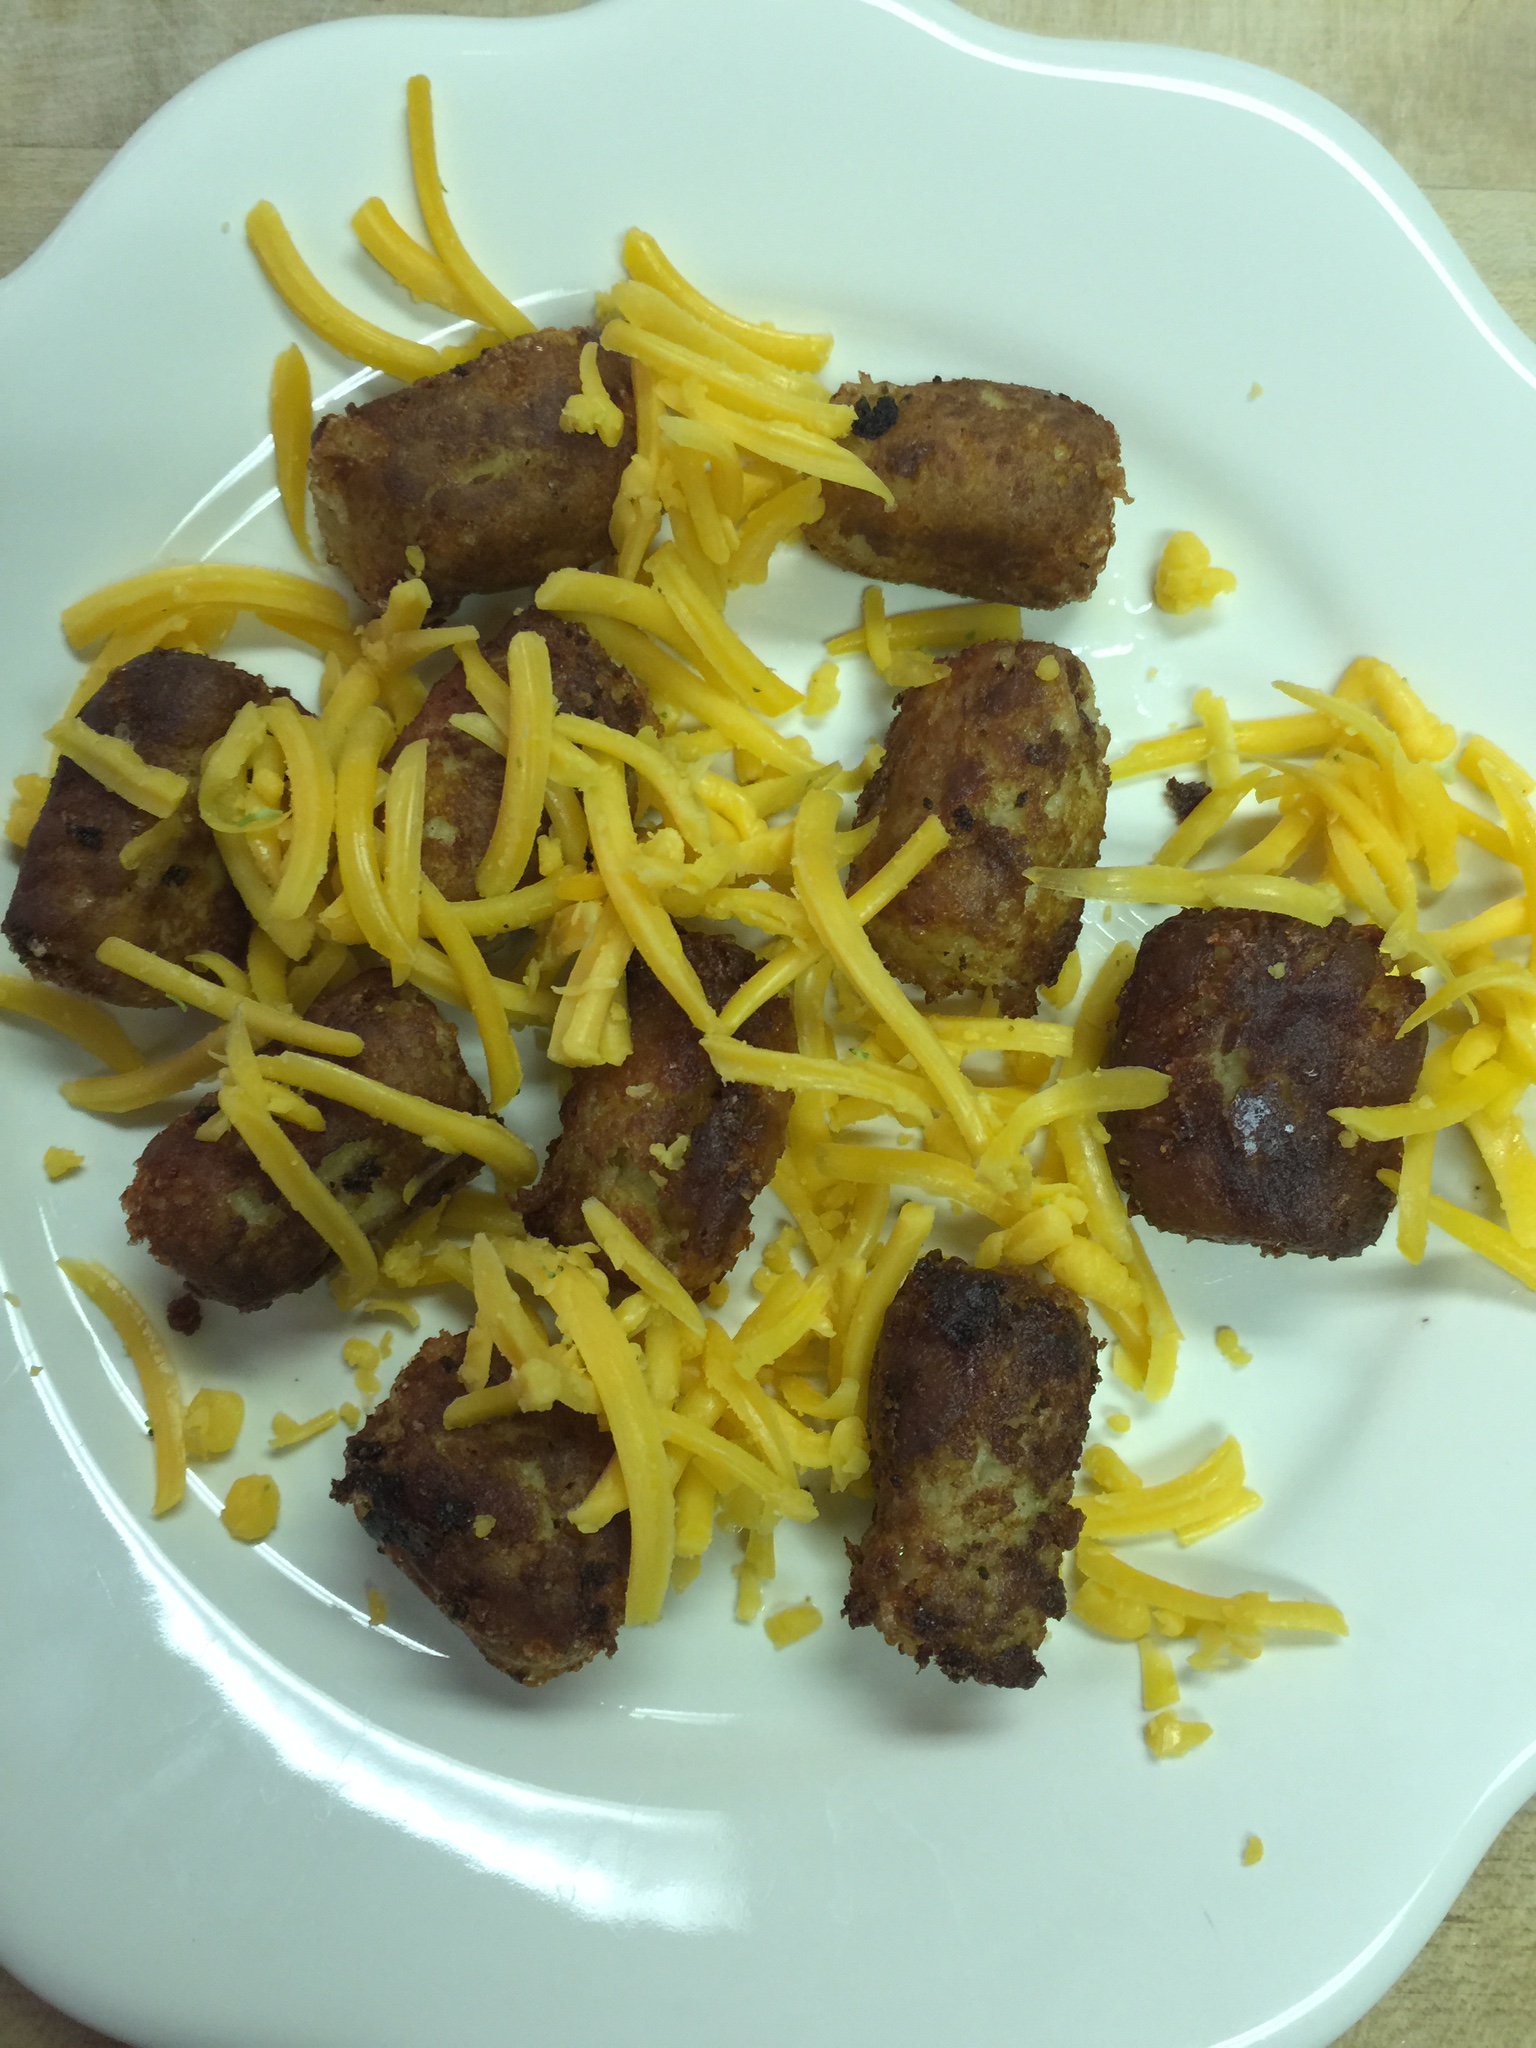
Summer has arrived, and so has burger and hot dog season! We all love a good cookout in the more relaxing summer months. Of course, what goes hand in hand with burgers? Some sort of fried potato off limits to us low-carbers! Going Keto means no more fries and tots, right? Wrong! I told my children I was making tater tots, (which they have missed) and they started doing cheers!
I did NOT tell them how I was making them, however, and they could not tell the difference. These suckers were good, and there was nothing left to save after dinner. Bummer!
Keto tater tots take a little preparation and forethought, but overall they are pretty easy – and I don’t even fry – before or during Keto, until now. This was a game changer for our family!
CheesyTaterTots
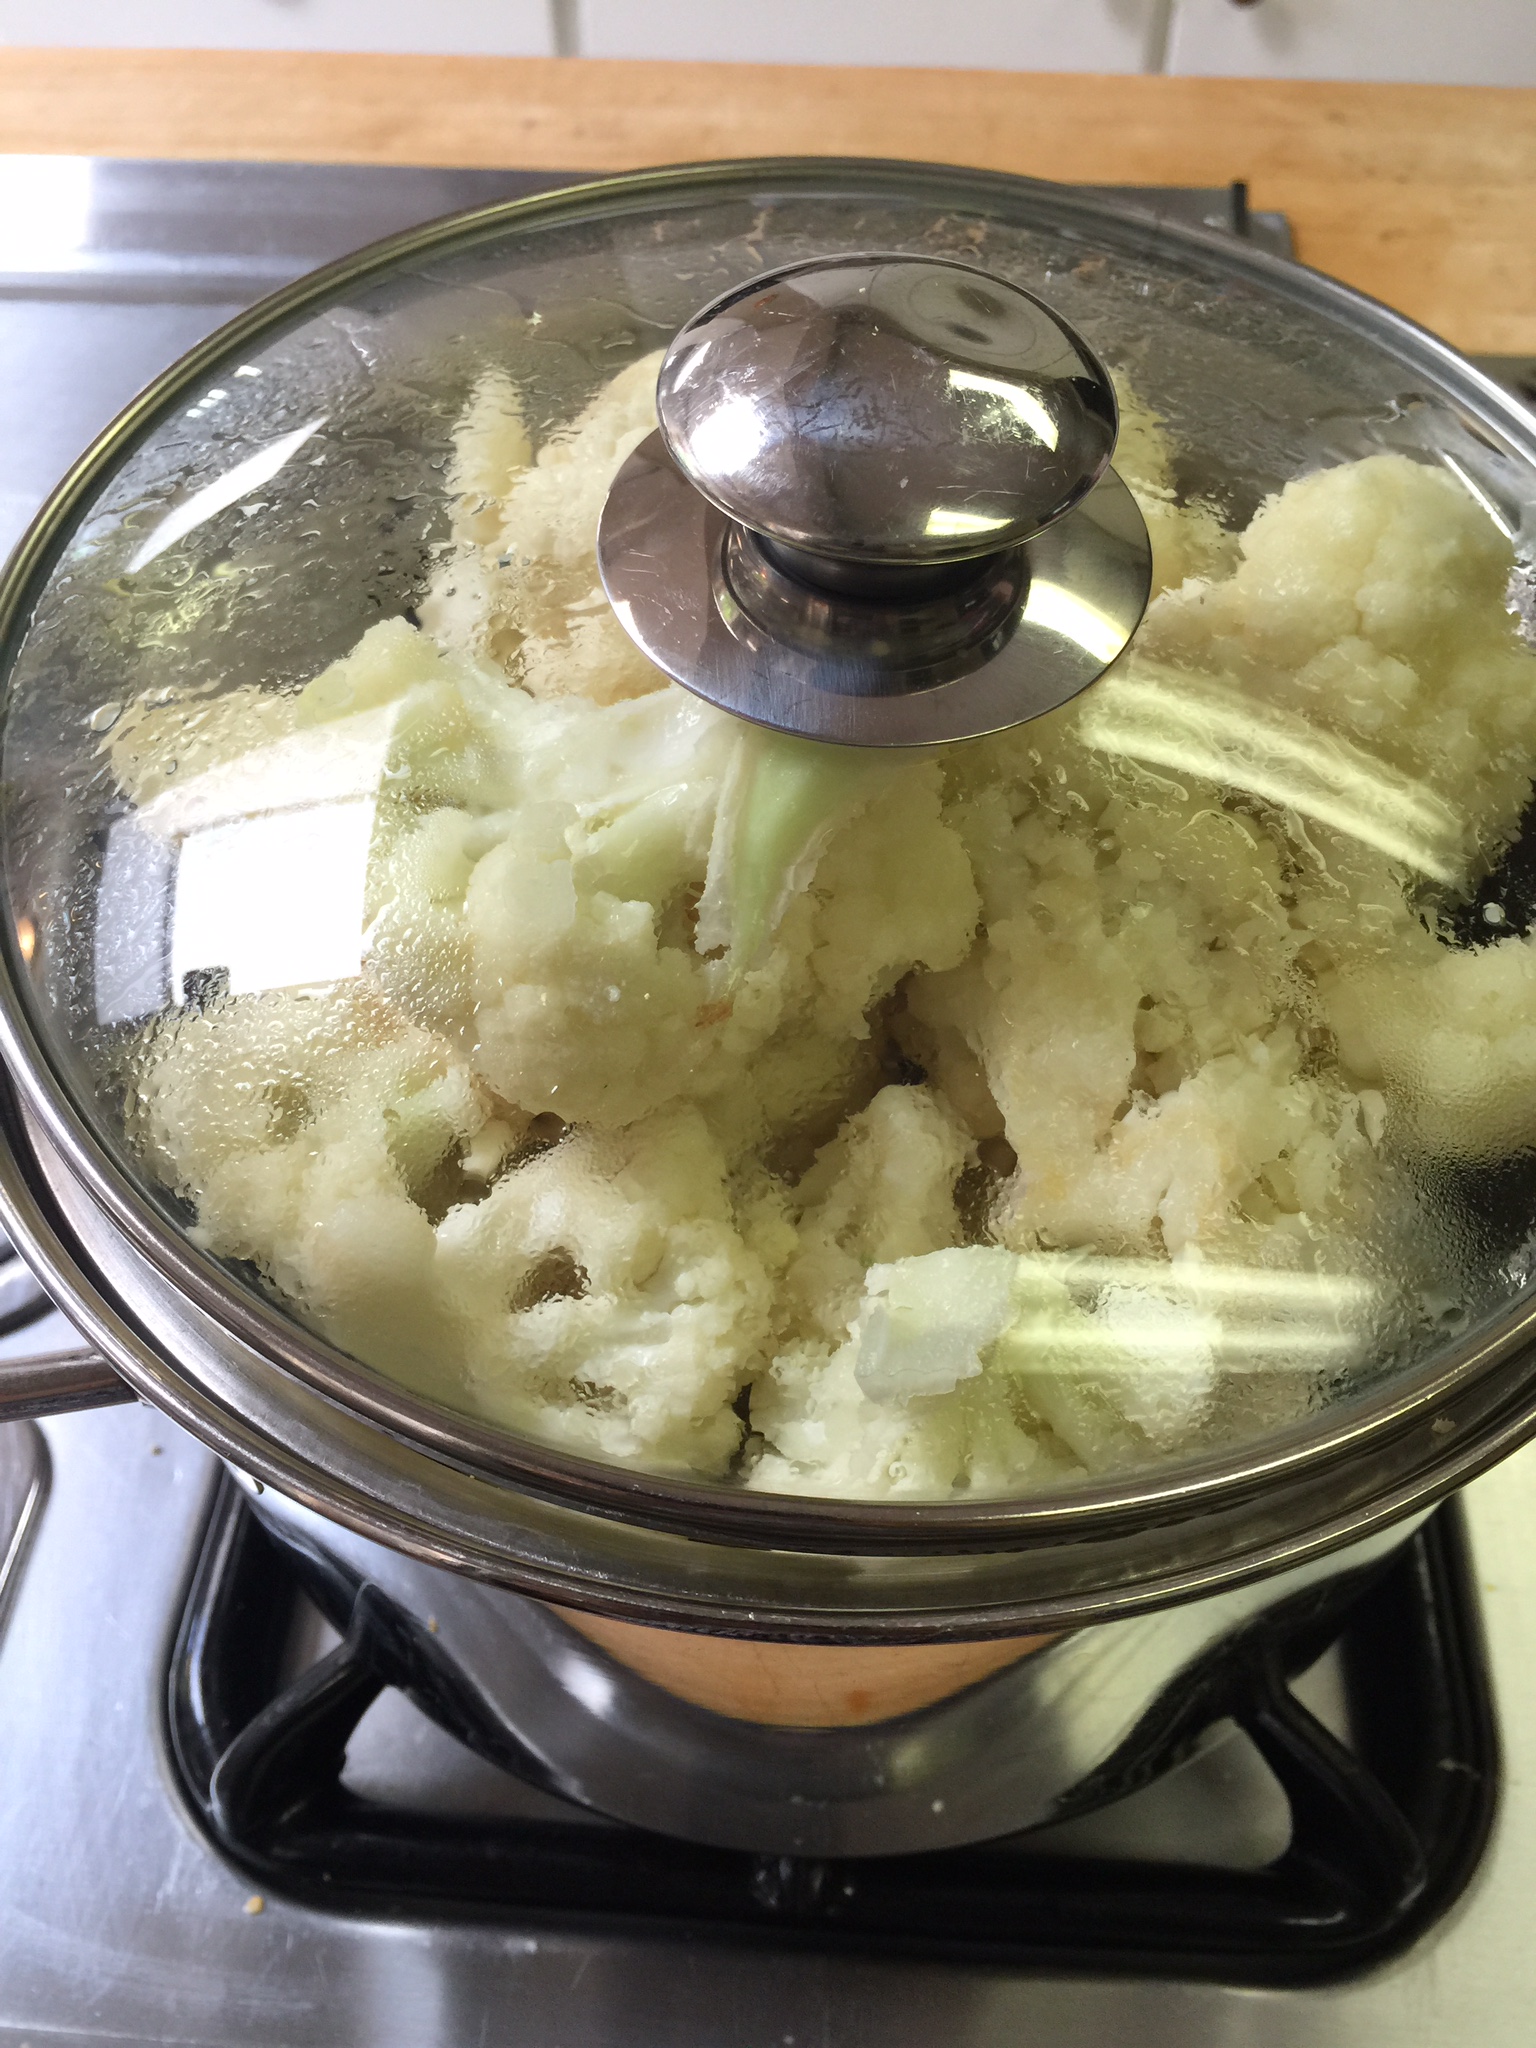
1 large head of Cauliflower
1/3 cup Parmesan Cheese
1/2 cup Mozzarella Cheese, shredded
1 Egg
2 tsp Psyllium Husk Powder
1 tsp garlic salt
1-2 cups Bacon Fat
Salt and Pepper to taste
Shredded Cheddar to melt on top (I used sharp cheddar)
Directions:
Cut your cauliflower into small pieces to steam. Place in your steamer and steam until tender but not too soft.
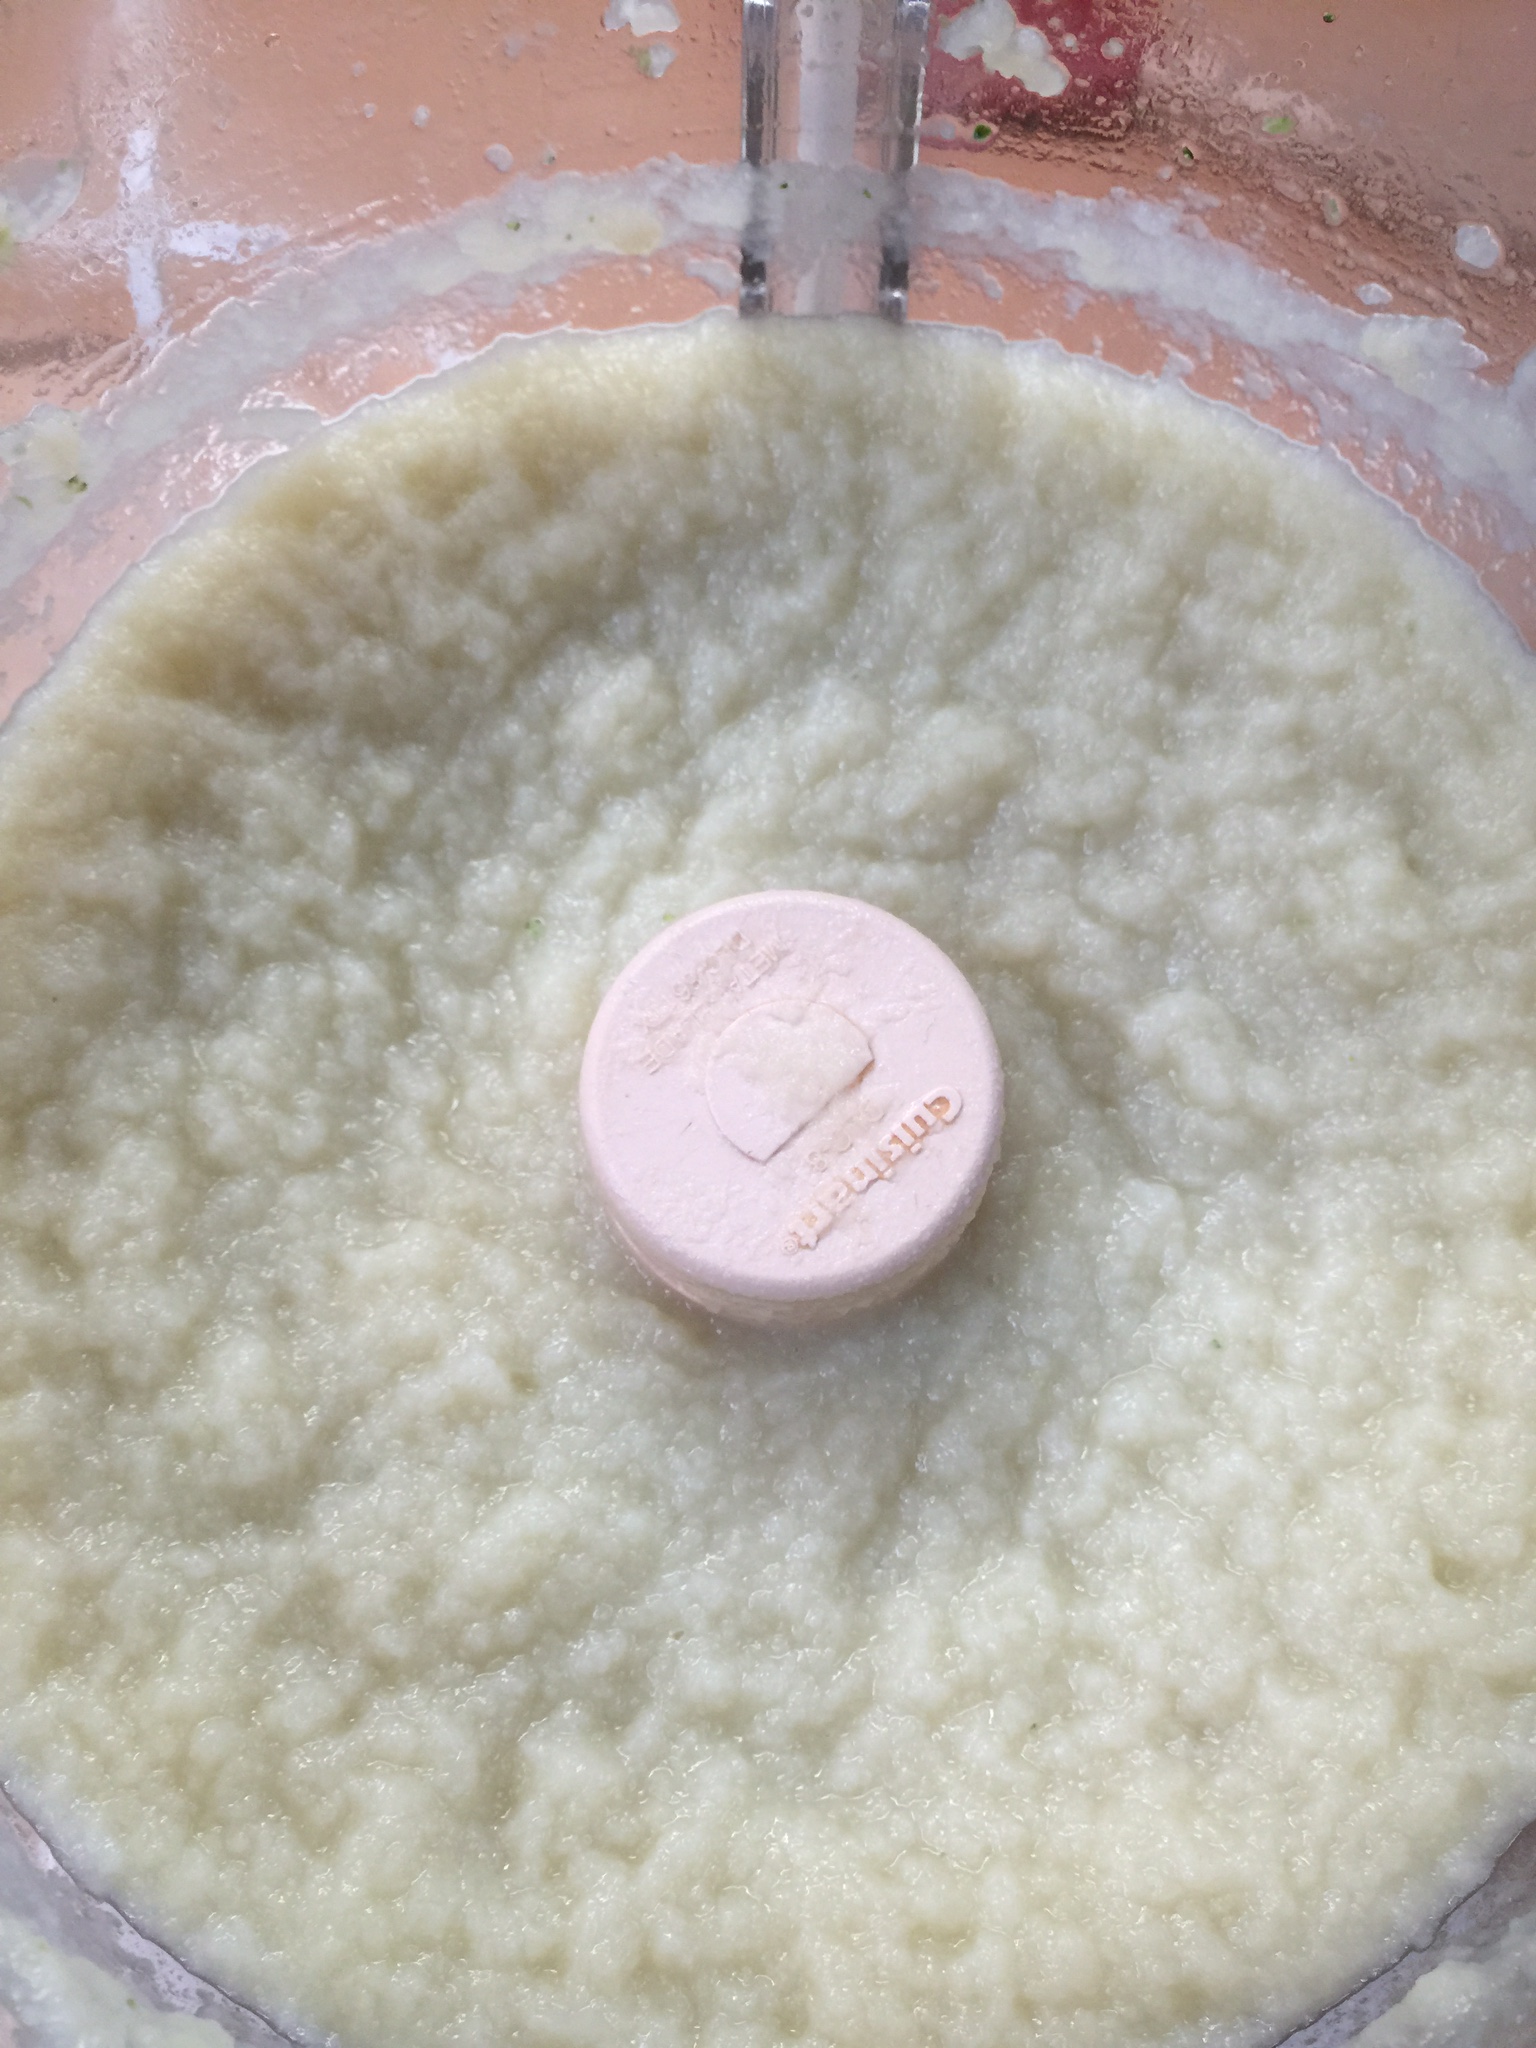
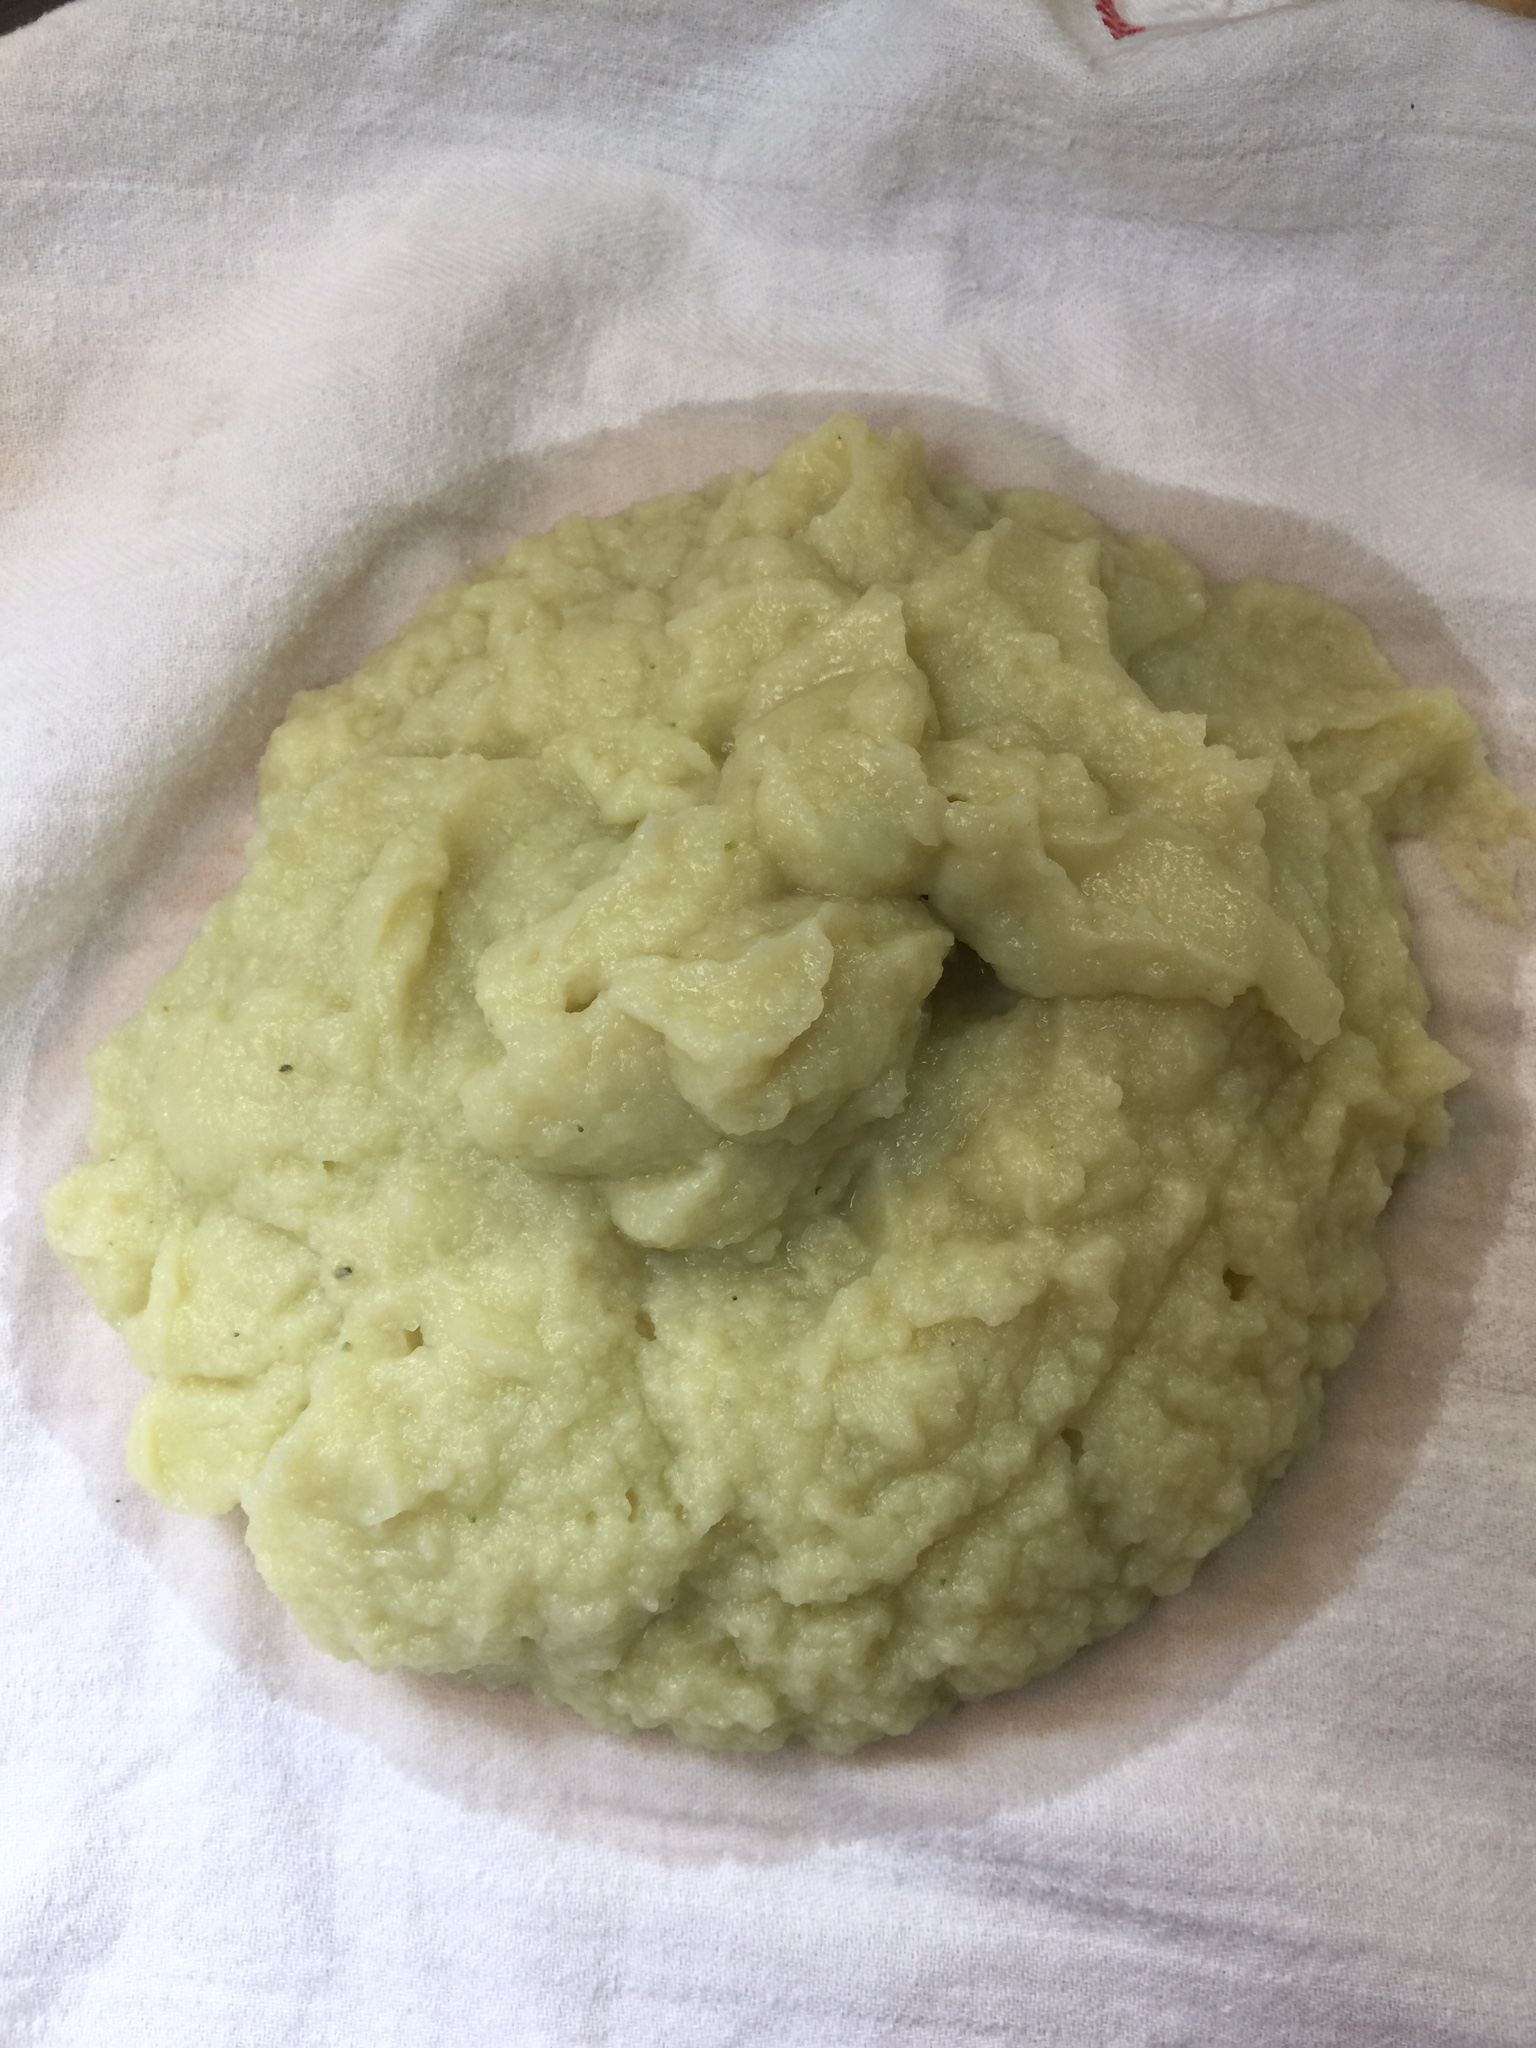
Place in your food processor, and pulse until it is smooth without any chunks.
This is not enough, above ^.
This is how it should look below:
At this point you can make mashers or tots!:) I’m going for tots!
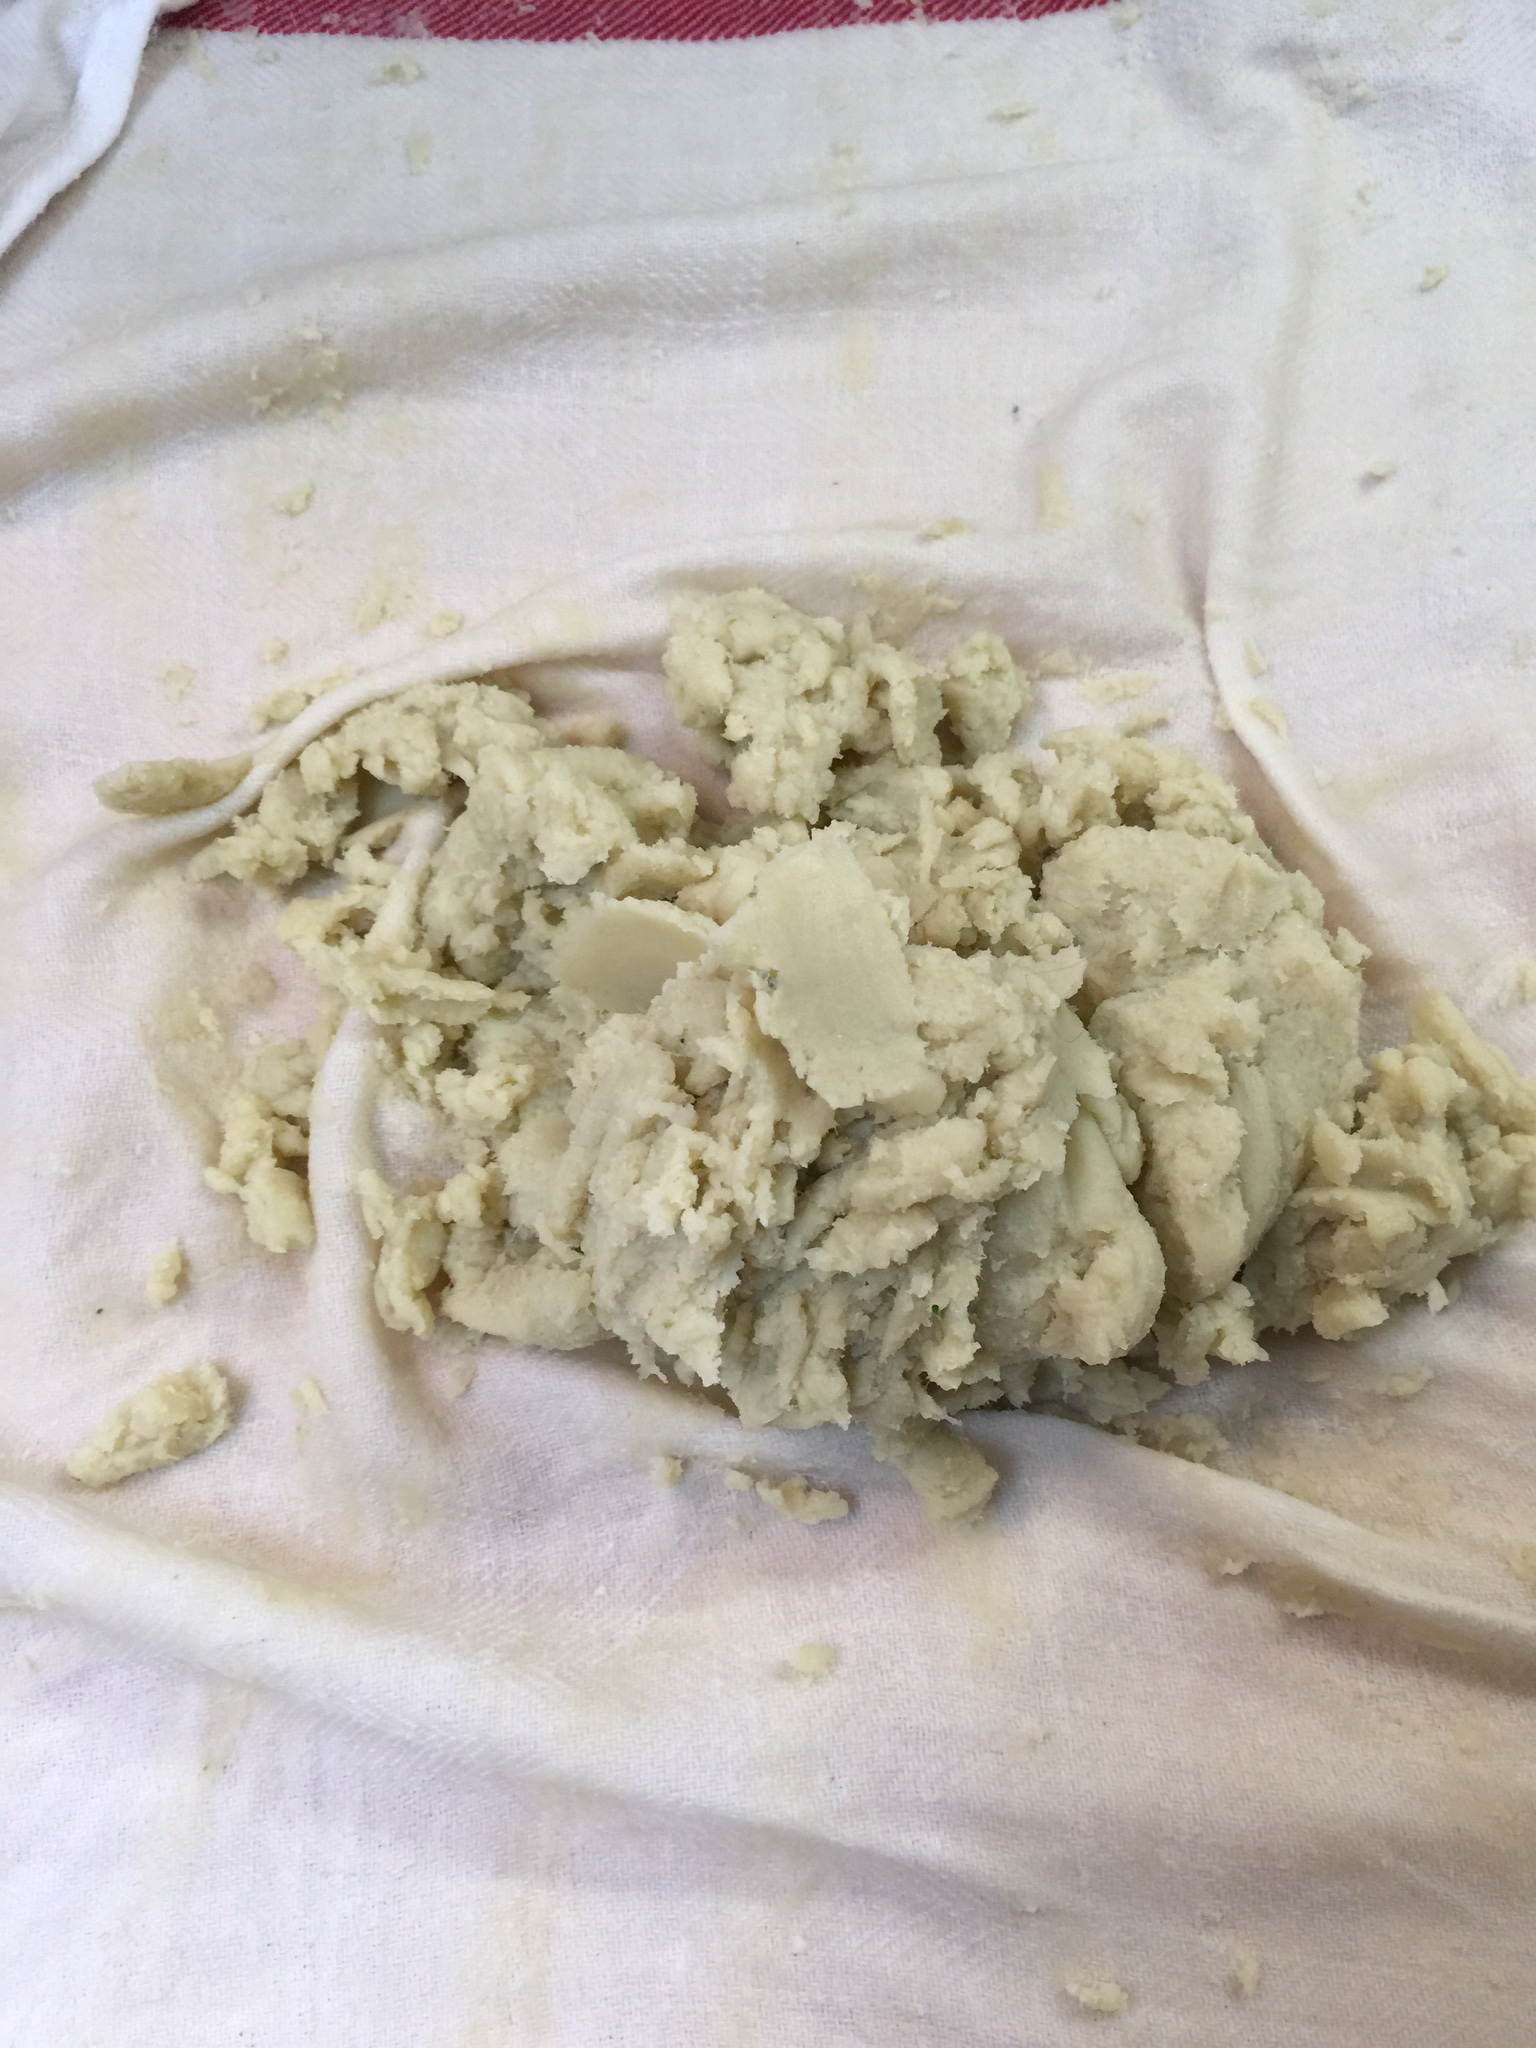
After you get your cauliflower to this consistency, you are going to want to wring out the excess water – and there is a LOT!!!
This is the time consuming part, and you will want to make sure your cauliflower is cool, or you will burn off your finger tips. Trust me – I didn’t quite burn mine off, but it was close! Make sure you allow time for your cauliflower to cool either right after steaming or after processing.
Once cool, I use a light dish towel to wring out the excess water. You can use a cheese cloth as well. The cauliflower will slip right through a colander.
When you place it on the dish towel, be ready to start wringing. See the water spreading…It will look like this:
After you squeeze and squeeze, and wring and wring, it will look like this:
Doesn’t look verry appetizing, but just wait!
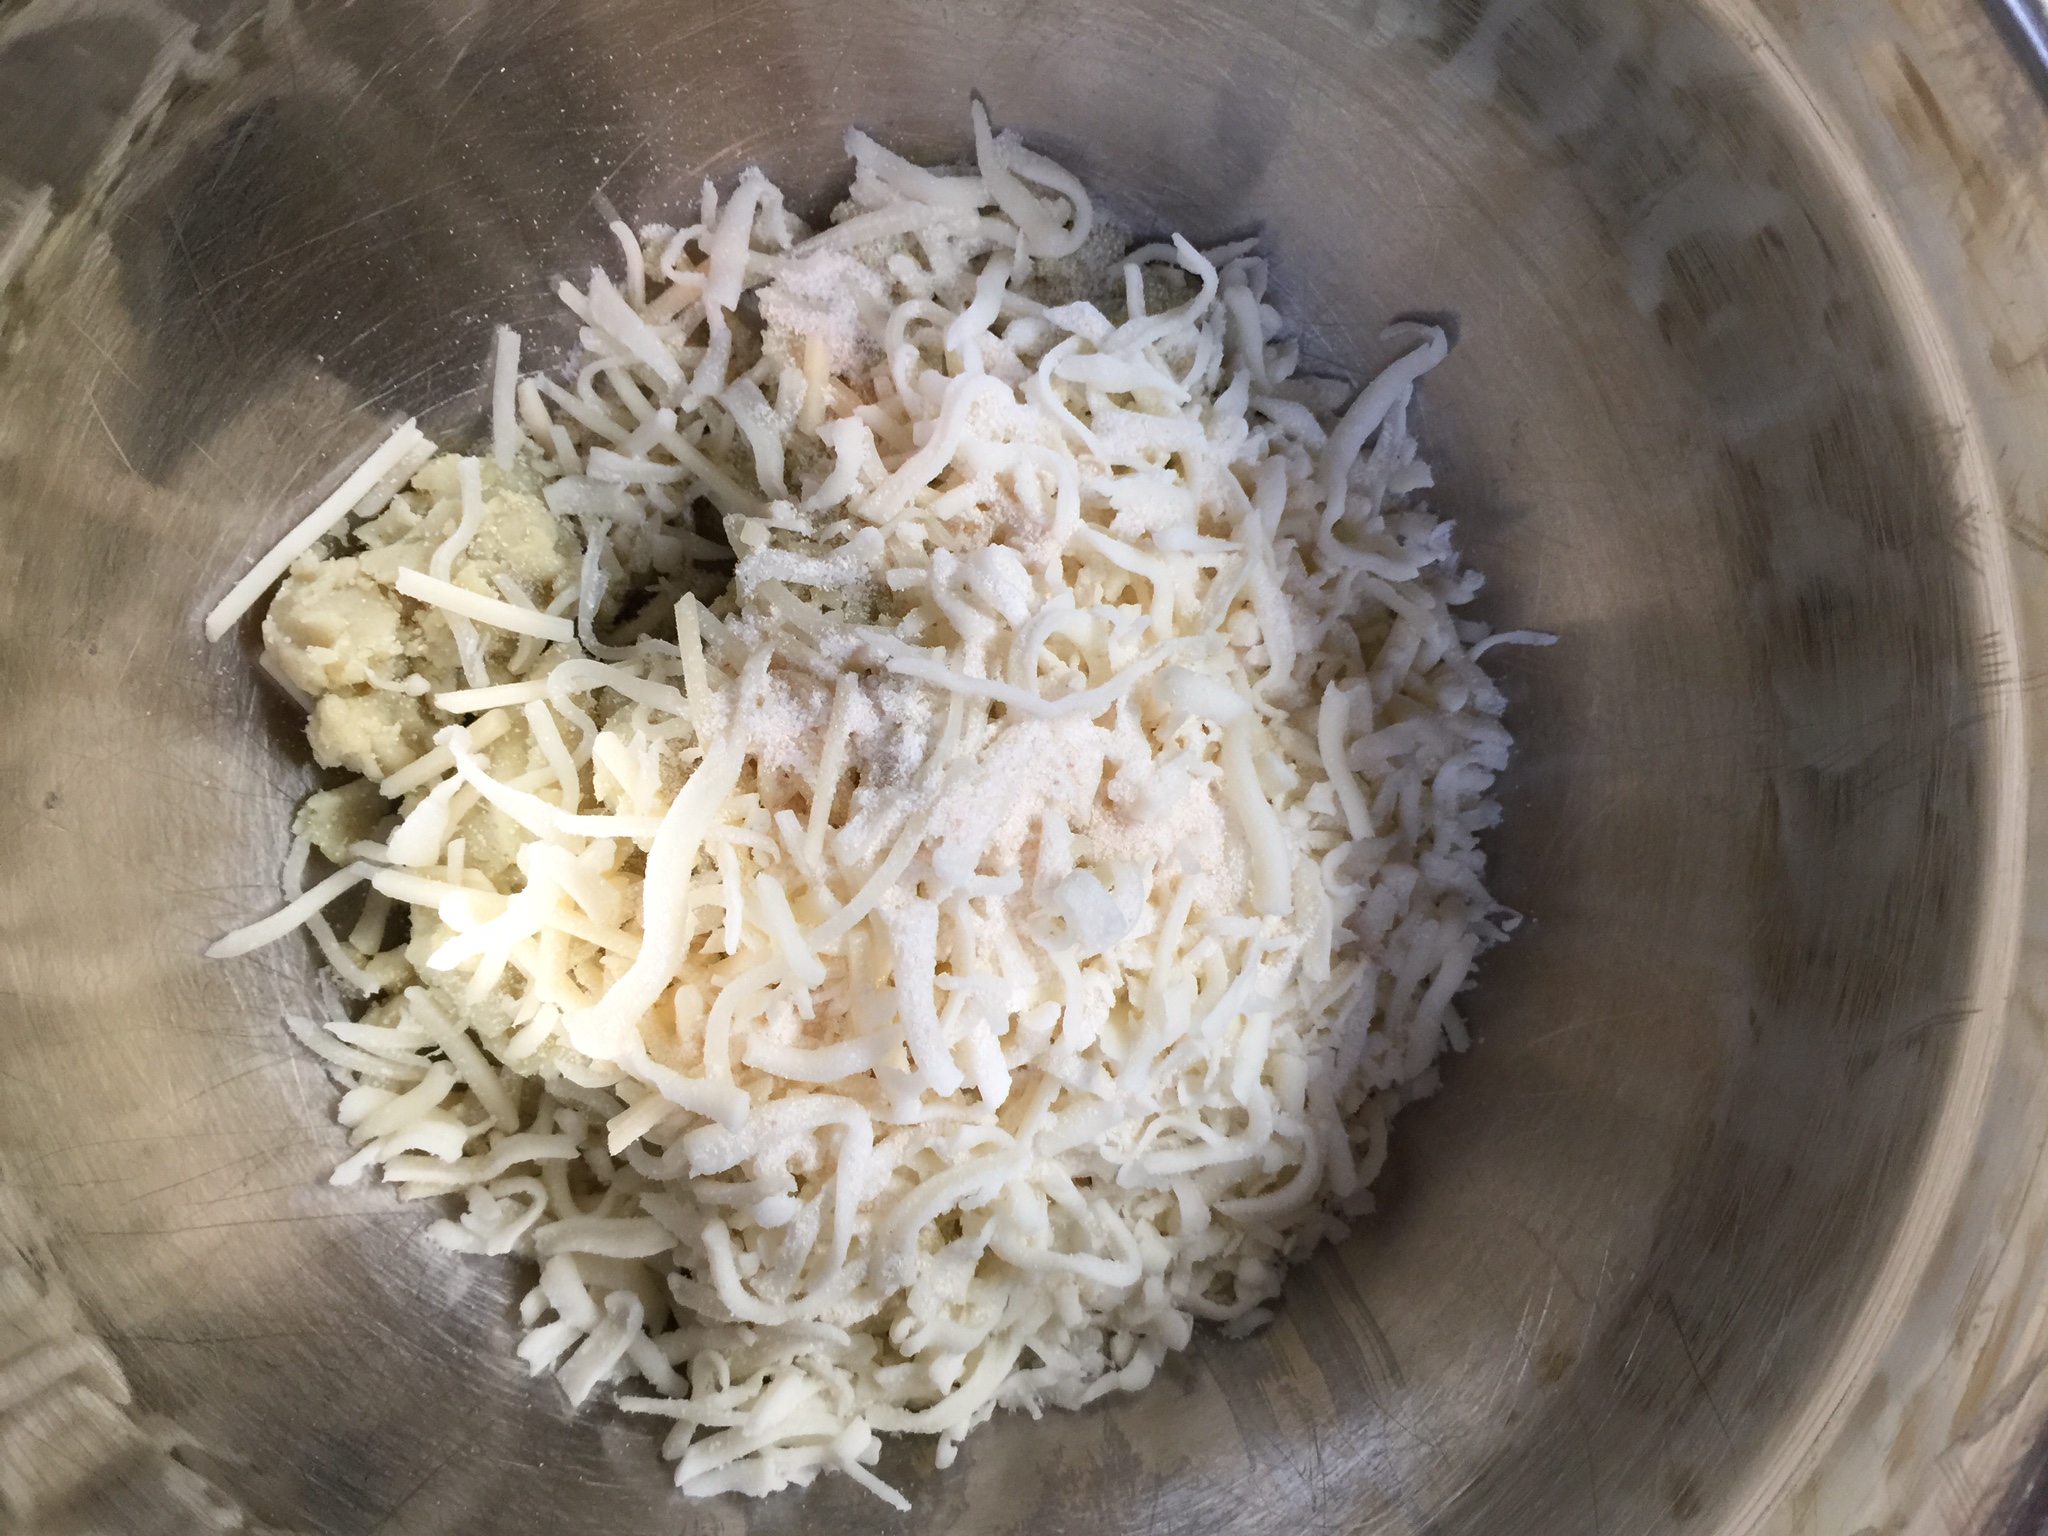
Now, take your cauliflower “paste”, and add your cheeses, egg, and garlic salt. You may have to use a dull knife to scrape the dry cauliflower off the towel.
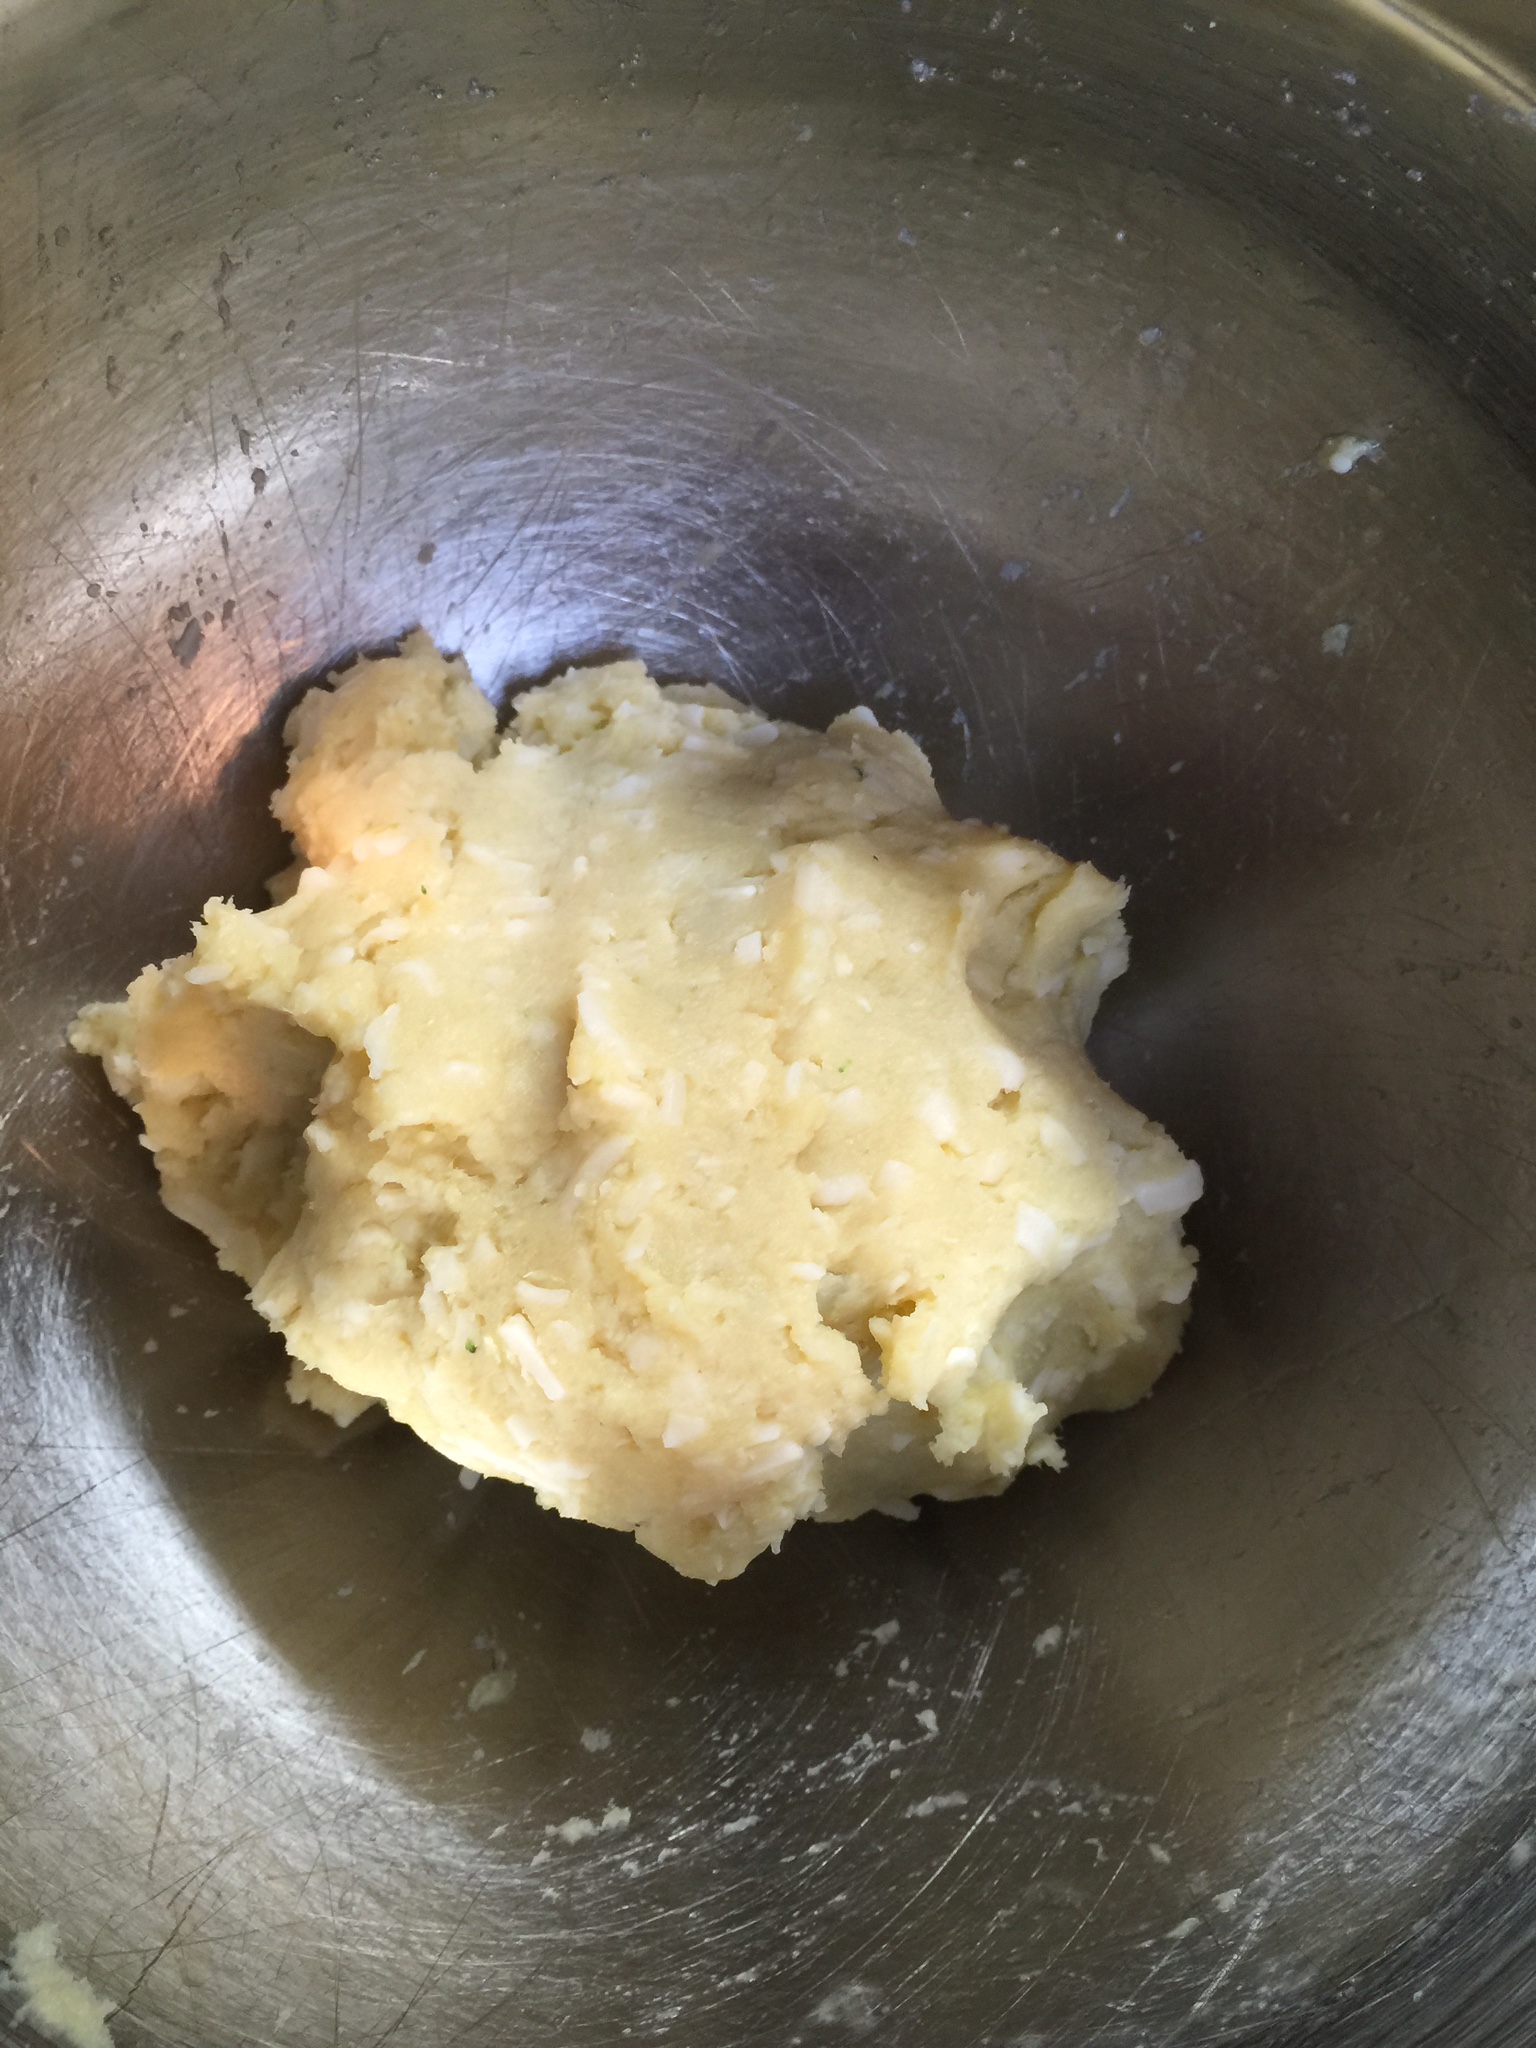
Mix well. It should be a very thick mixture. If it is too runny to roll, then add your psyllium husk powder a little at a time.
It should look like this:
Take out about a teaspoon of “dough” at a time and roll into your tots! This is fun for the kids too!
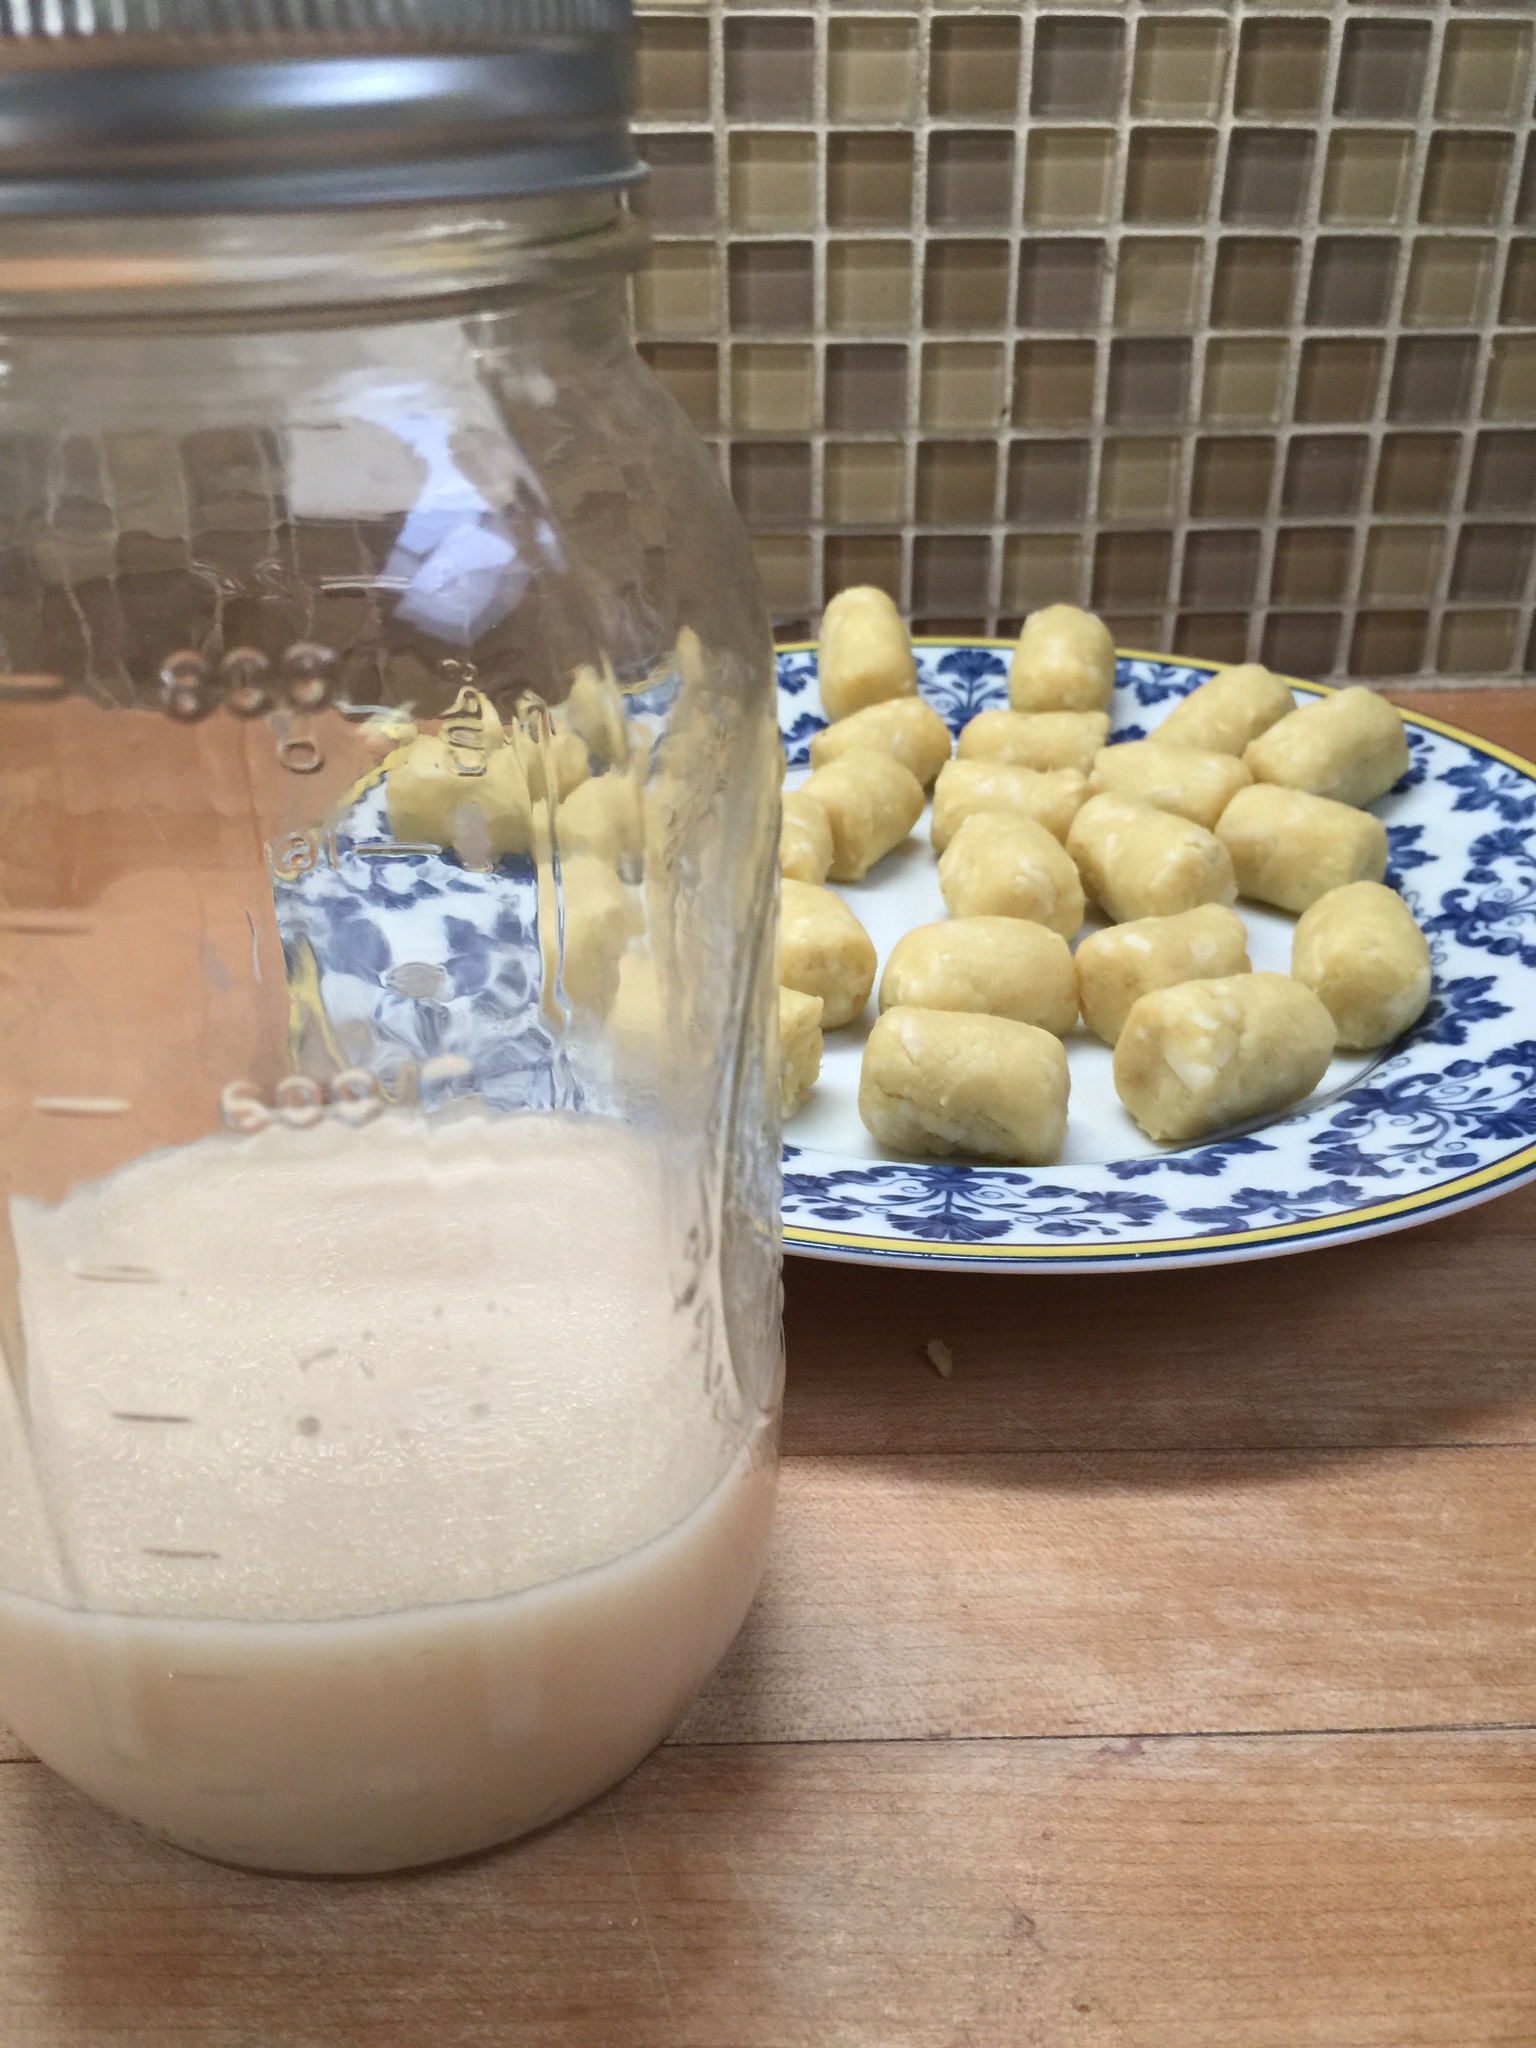
Now, get your yummy bacon grease ready (that you have saved from all those batches of bacon, right?) Remember that cast iron skillet that Erin posted about? This is the perfect time to pull that big daddy out as well!
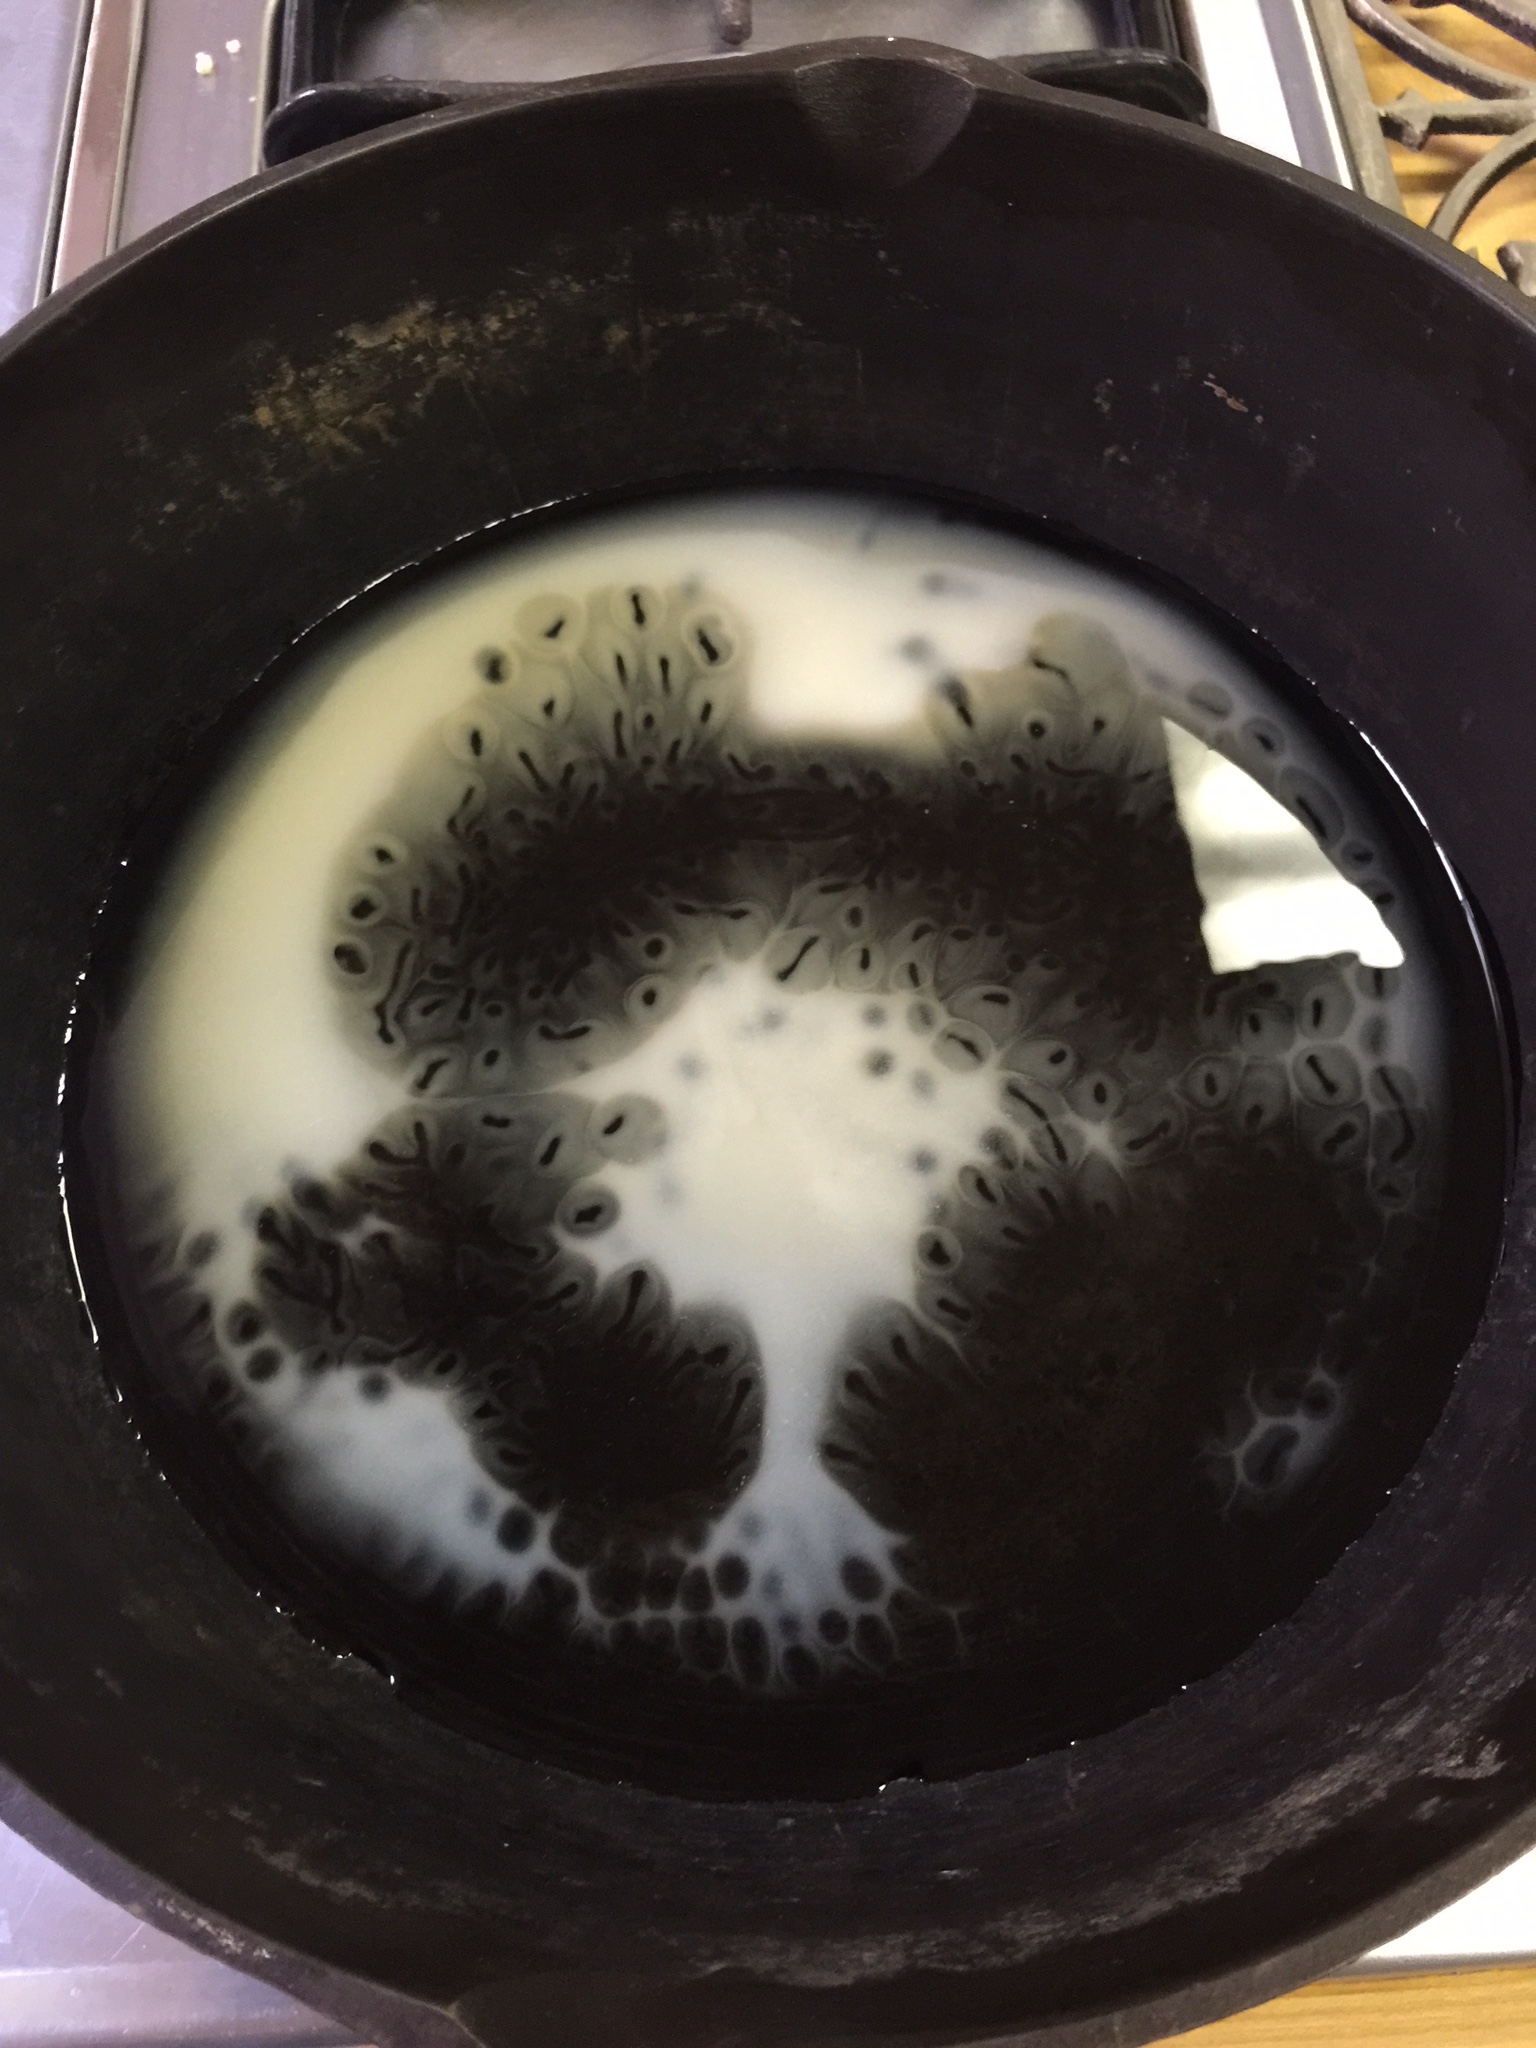
Start heating your fat in your skillet over medium heat! Your grease really needs to be perfect. If it is too hot, they will burn, but if it is not hot enough, the tots will stick to the bottom of the skillet. Keep it on medium, and be patient. The first picture is my mason jar of grease. The second is the grease melting in my cast iron skillet. Yum!!!!
You will also need to set up a plate with either paper towels or a mesh splatter shield to drain your tots after they cook so they start to crisp. I used a splatter shield over a plate, and had it ready to go before frying.
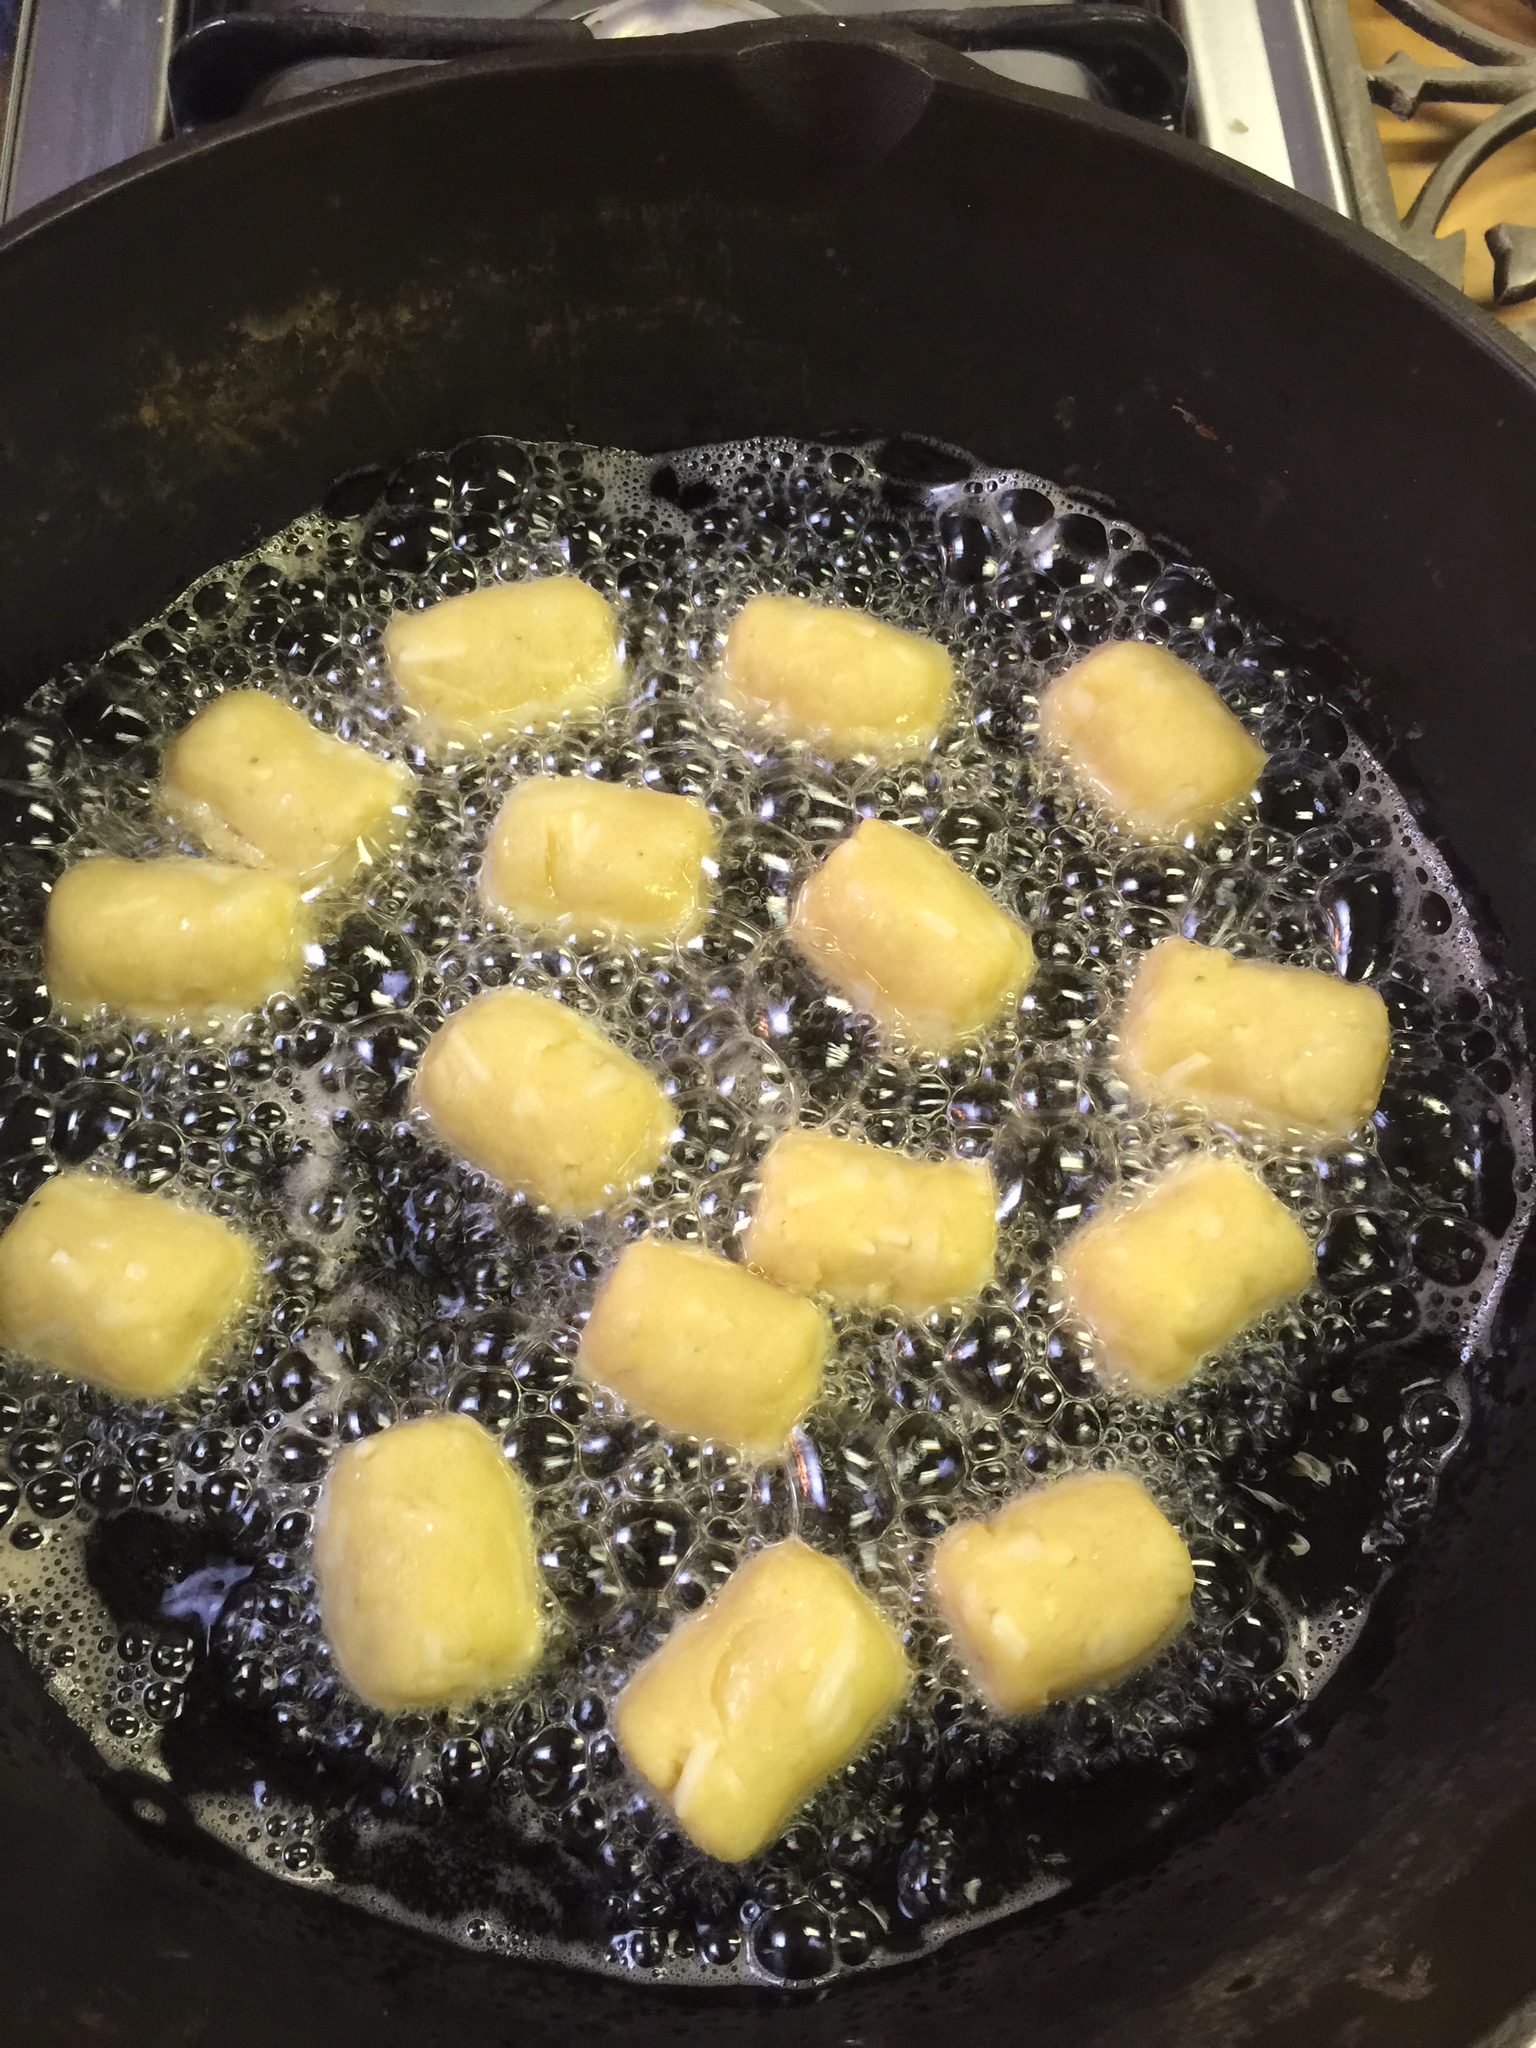
When your grease is hot, gently drop your tots into the grease, and move them around so they don’t stick to the bottom. Continue to rotate until they are golden brown on all sides:
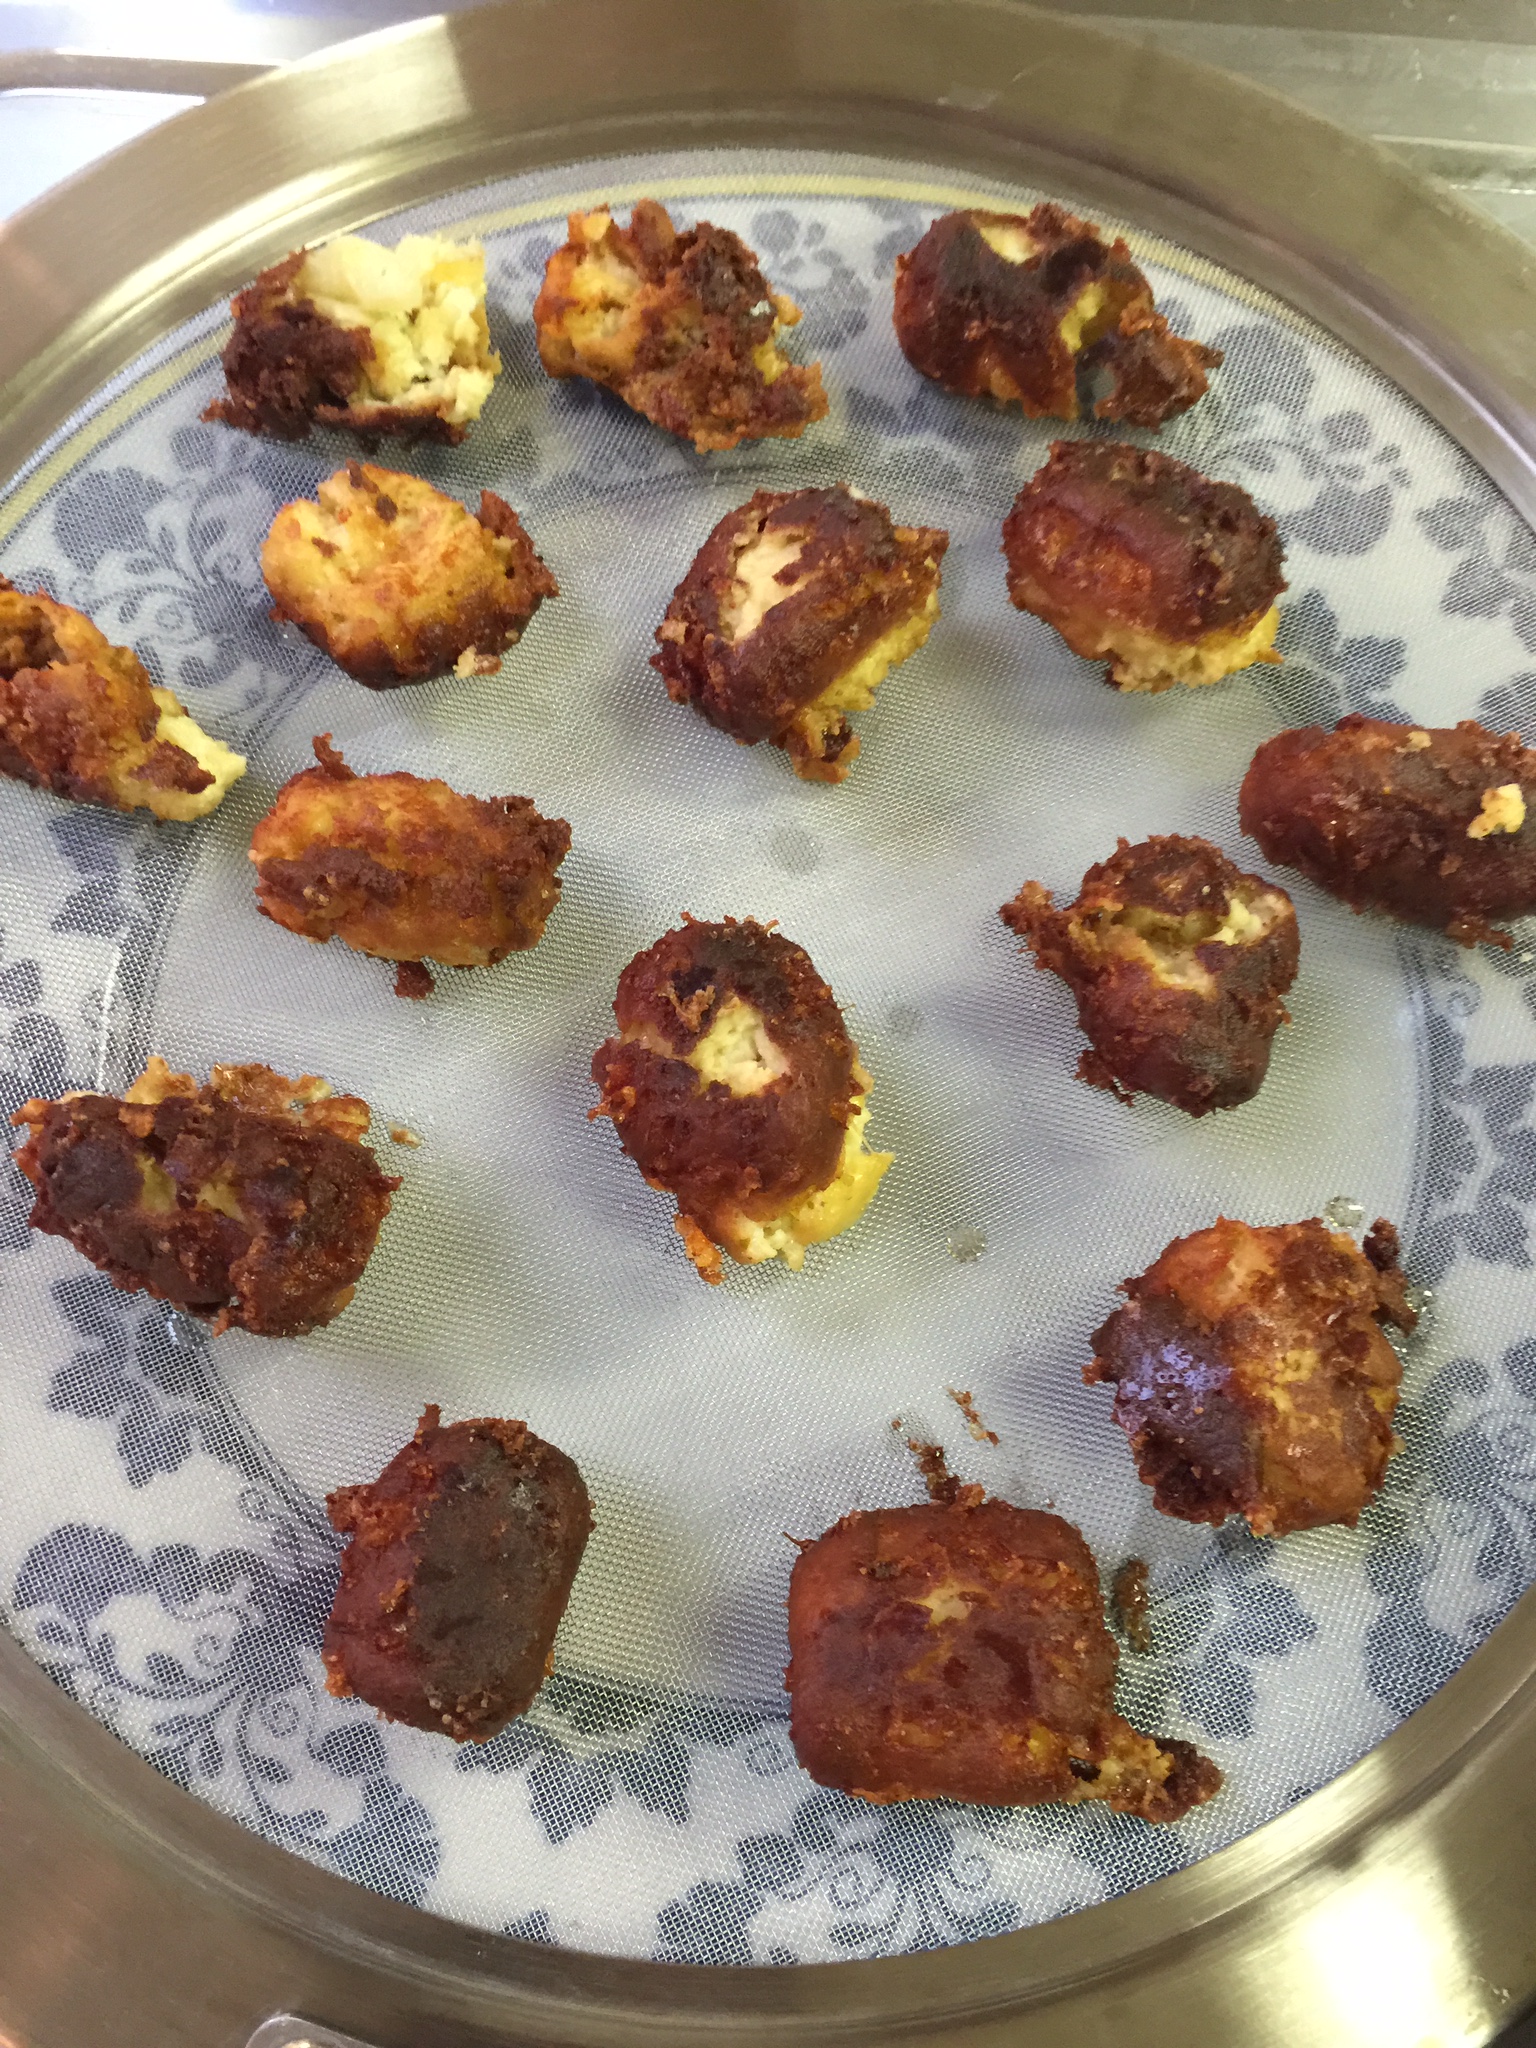
When they are cooked on all sides, remove to your plate.
This was my first batch, before my oil was hot enough so you can see where some stuck. I was not very patient:).
Once you remove them, you can add salt and pepper, if you like, or cover with cheese.
Let them cool slightly and serve! I hope you enjoy these beauties as much as we did!
It seems that everyone I run into lately is running around in a million different directions, and the last thing on their mind is dinner.
I get it! I’m a mom of three busy kids, and it’s the end of school! In fact, I am pretty sure that May and early June compete with December for the busiest months of the year.
A friend told me today that she just needed some simple dinner ideas to throw together before her son’s baseball games. My thought is, that many of you need some easy dinners to throw together this week, so here are a few I have pulled together in a snap on weeknights that I am just too busy to even think about dinner, but still want to feed my family something healthy!
1. Salmon and Veggies (Love broccoli with Salmon)
Make sure your Salmon is wild from a good clean source, and not farm raised. I like the Alaskan Salmon, but any reputable fresh fish retailer will be able to help you pick out a great fillet. I usually get the whole fillet and cut them into portions for my various ages of children and adults in the house. Sprinkle with butter and lemon pepper. Bake it at 400 degrees for 10 to 15 minutes depending on the thickness and serve with a steamed vegetable topped with Kerrygold.
Then we like to top it with this sauce:
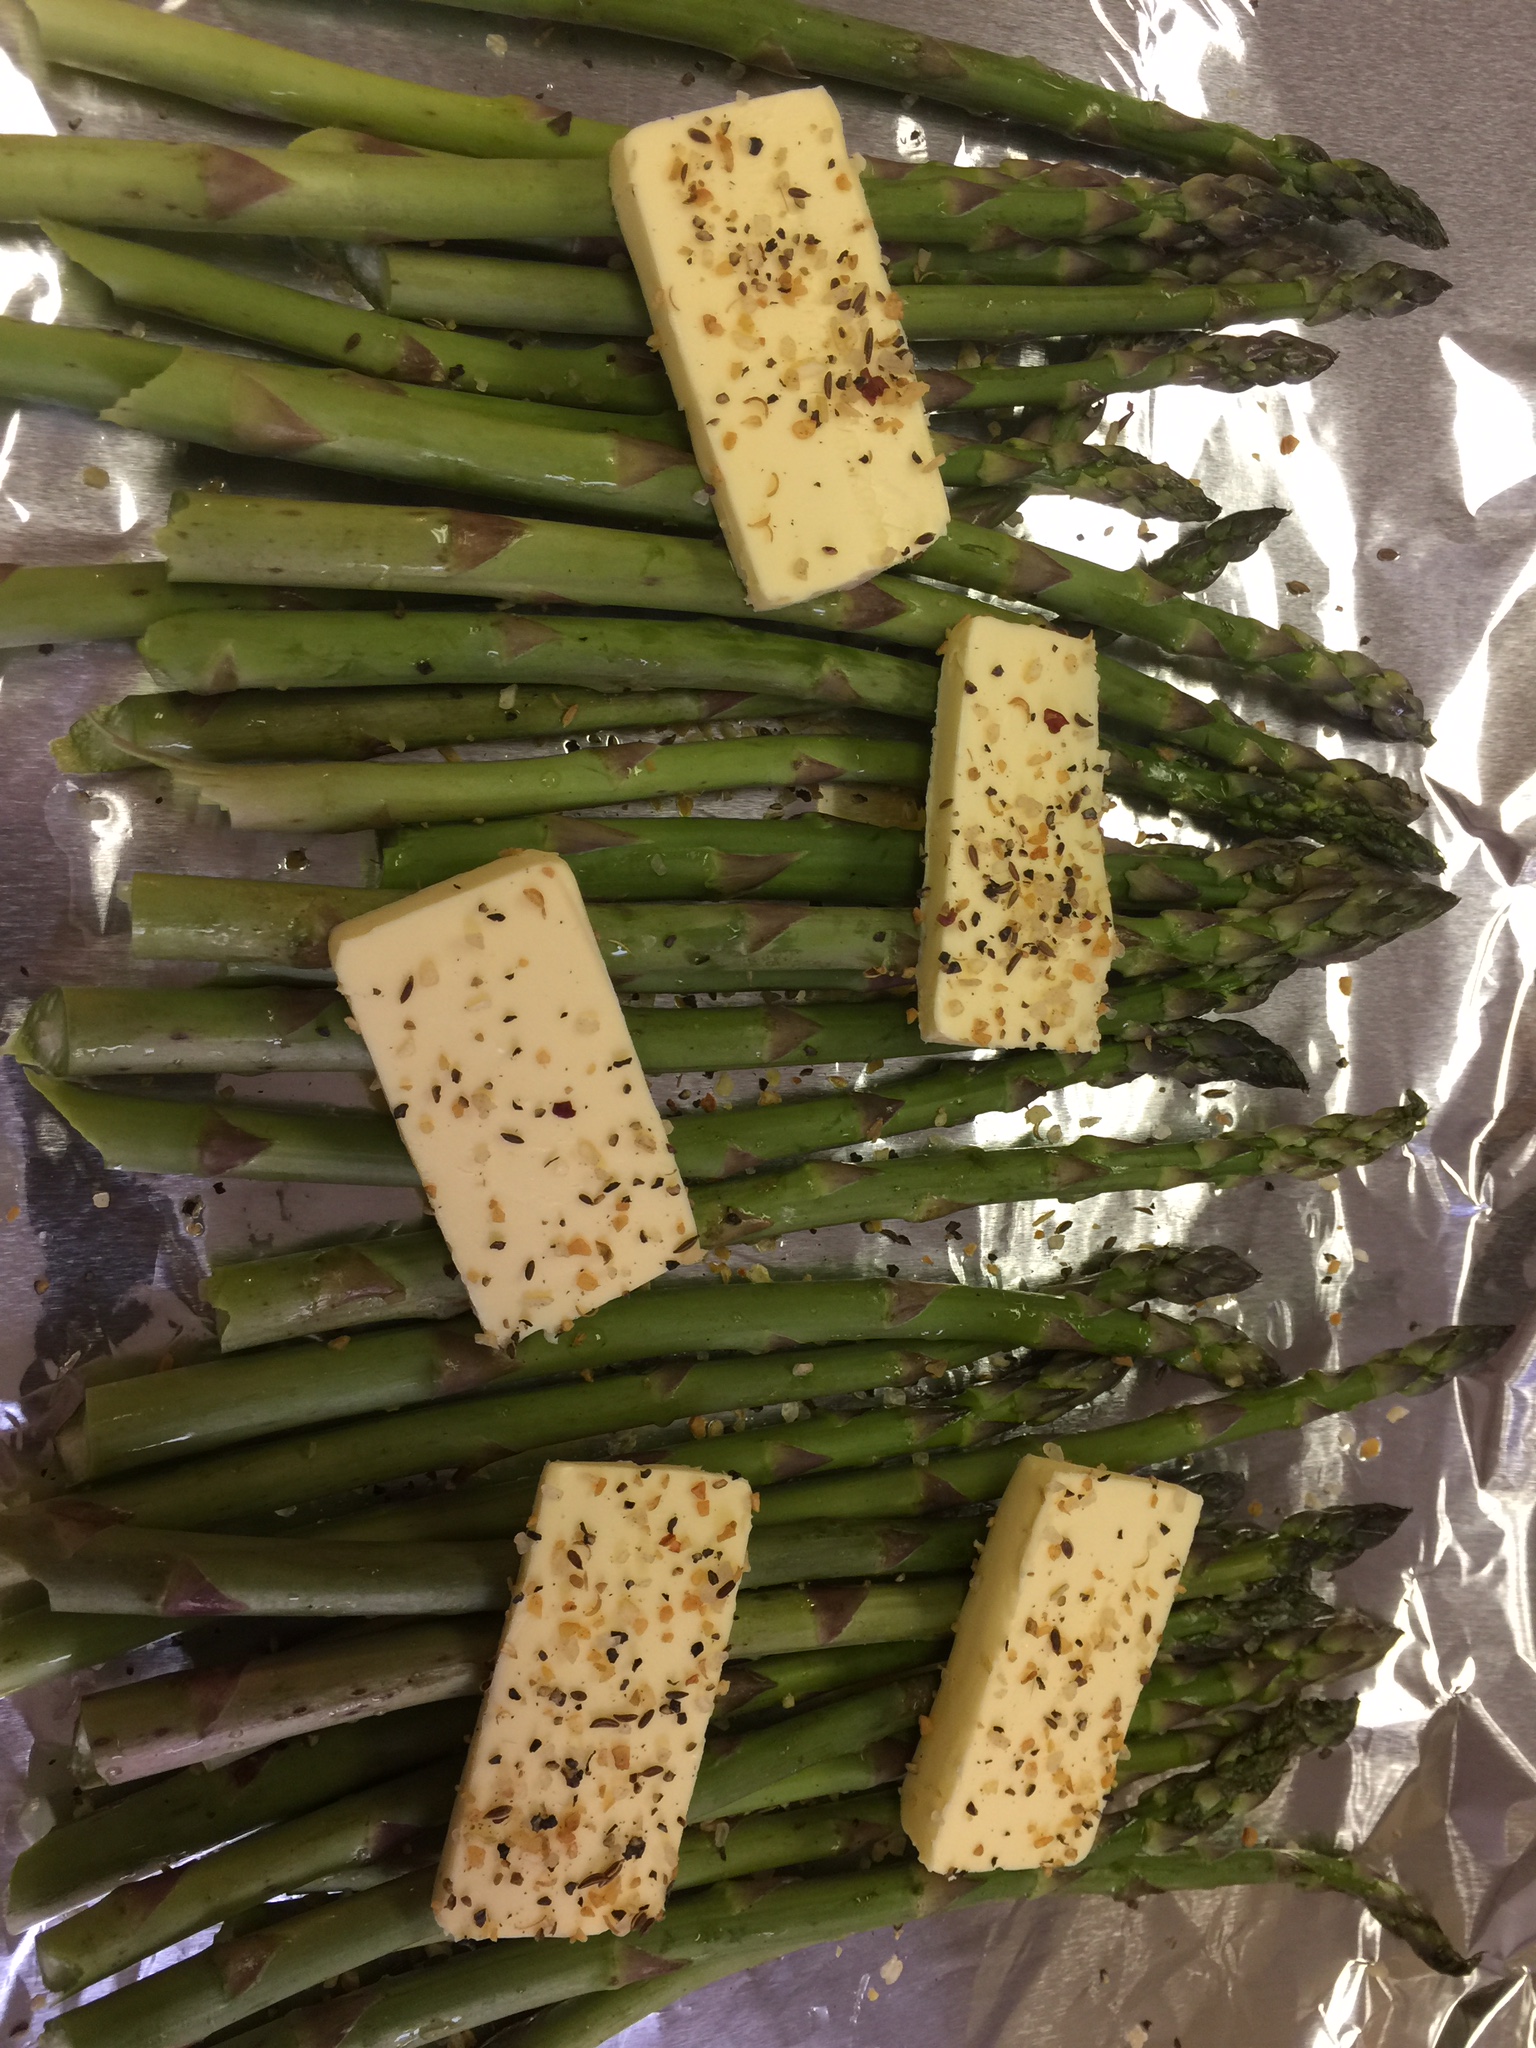
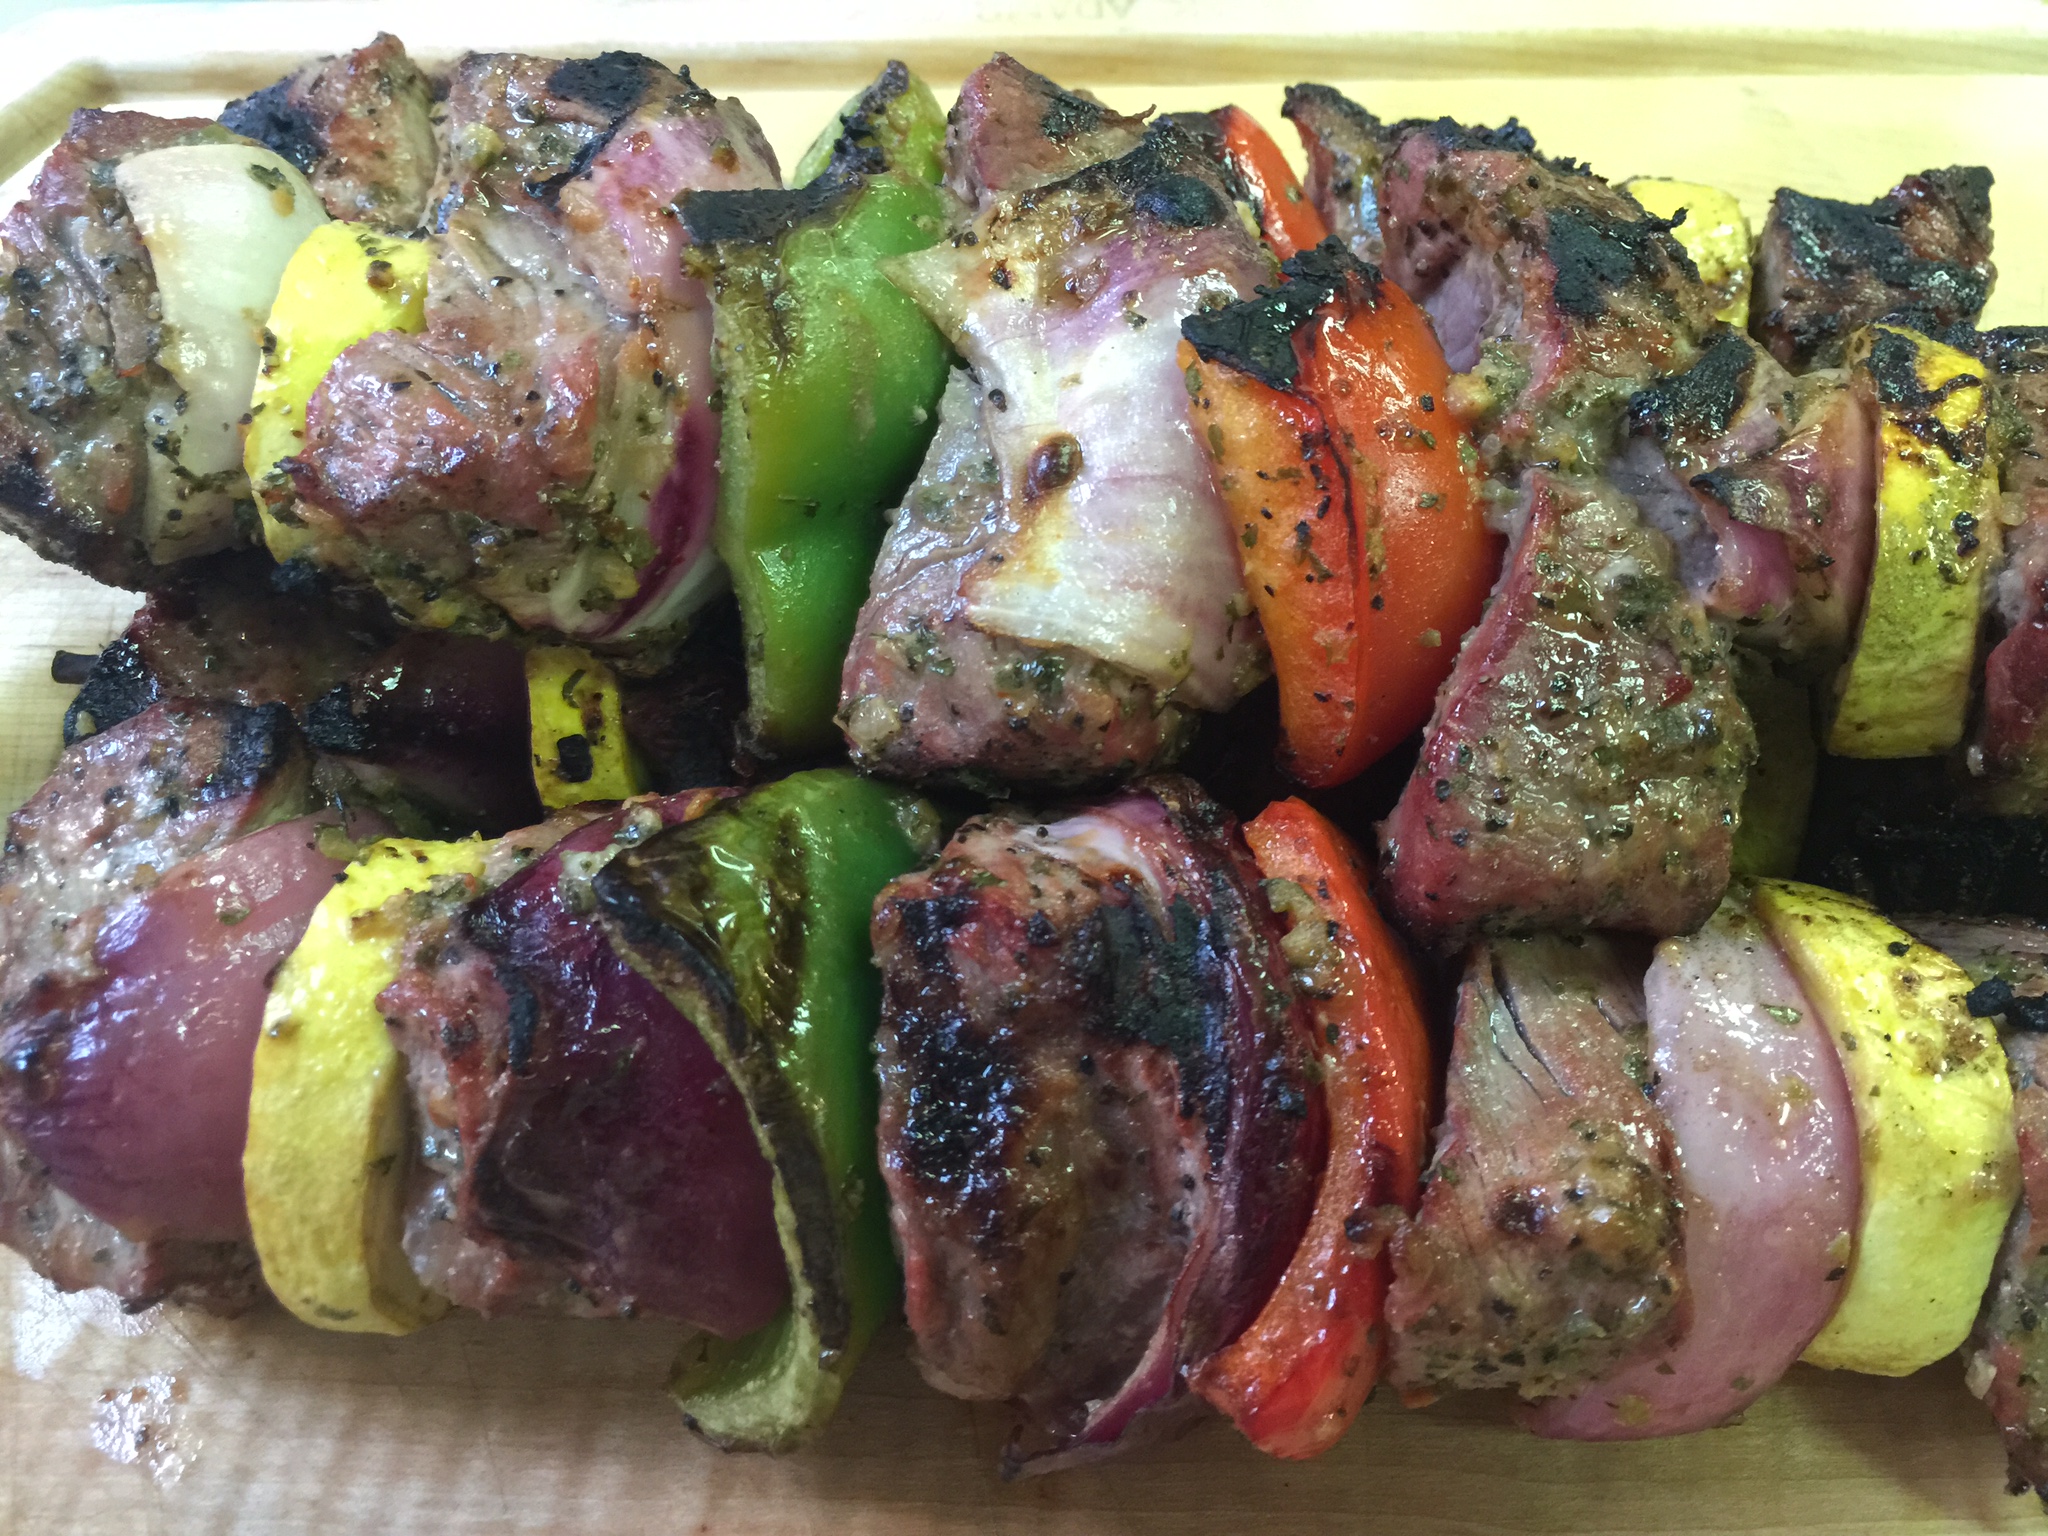
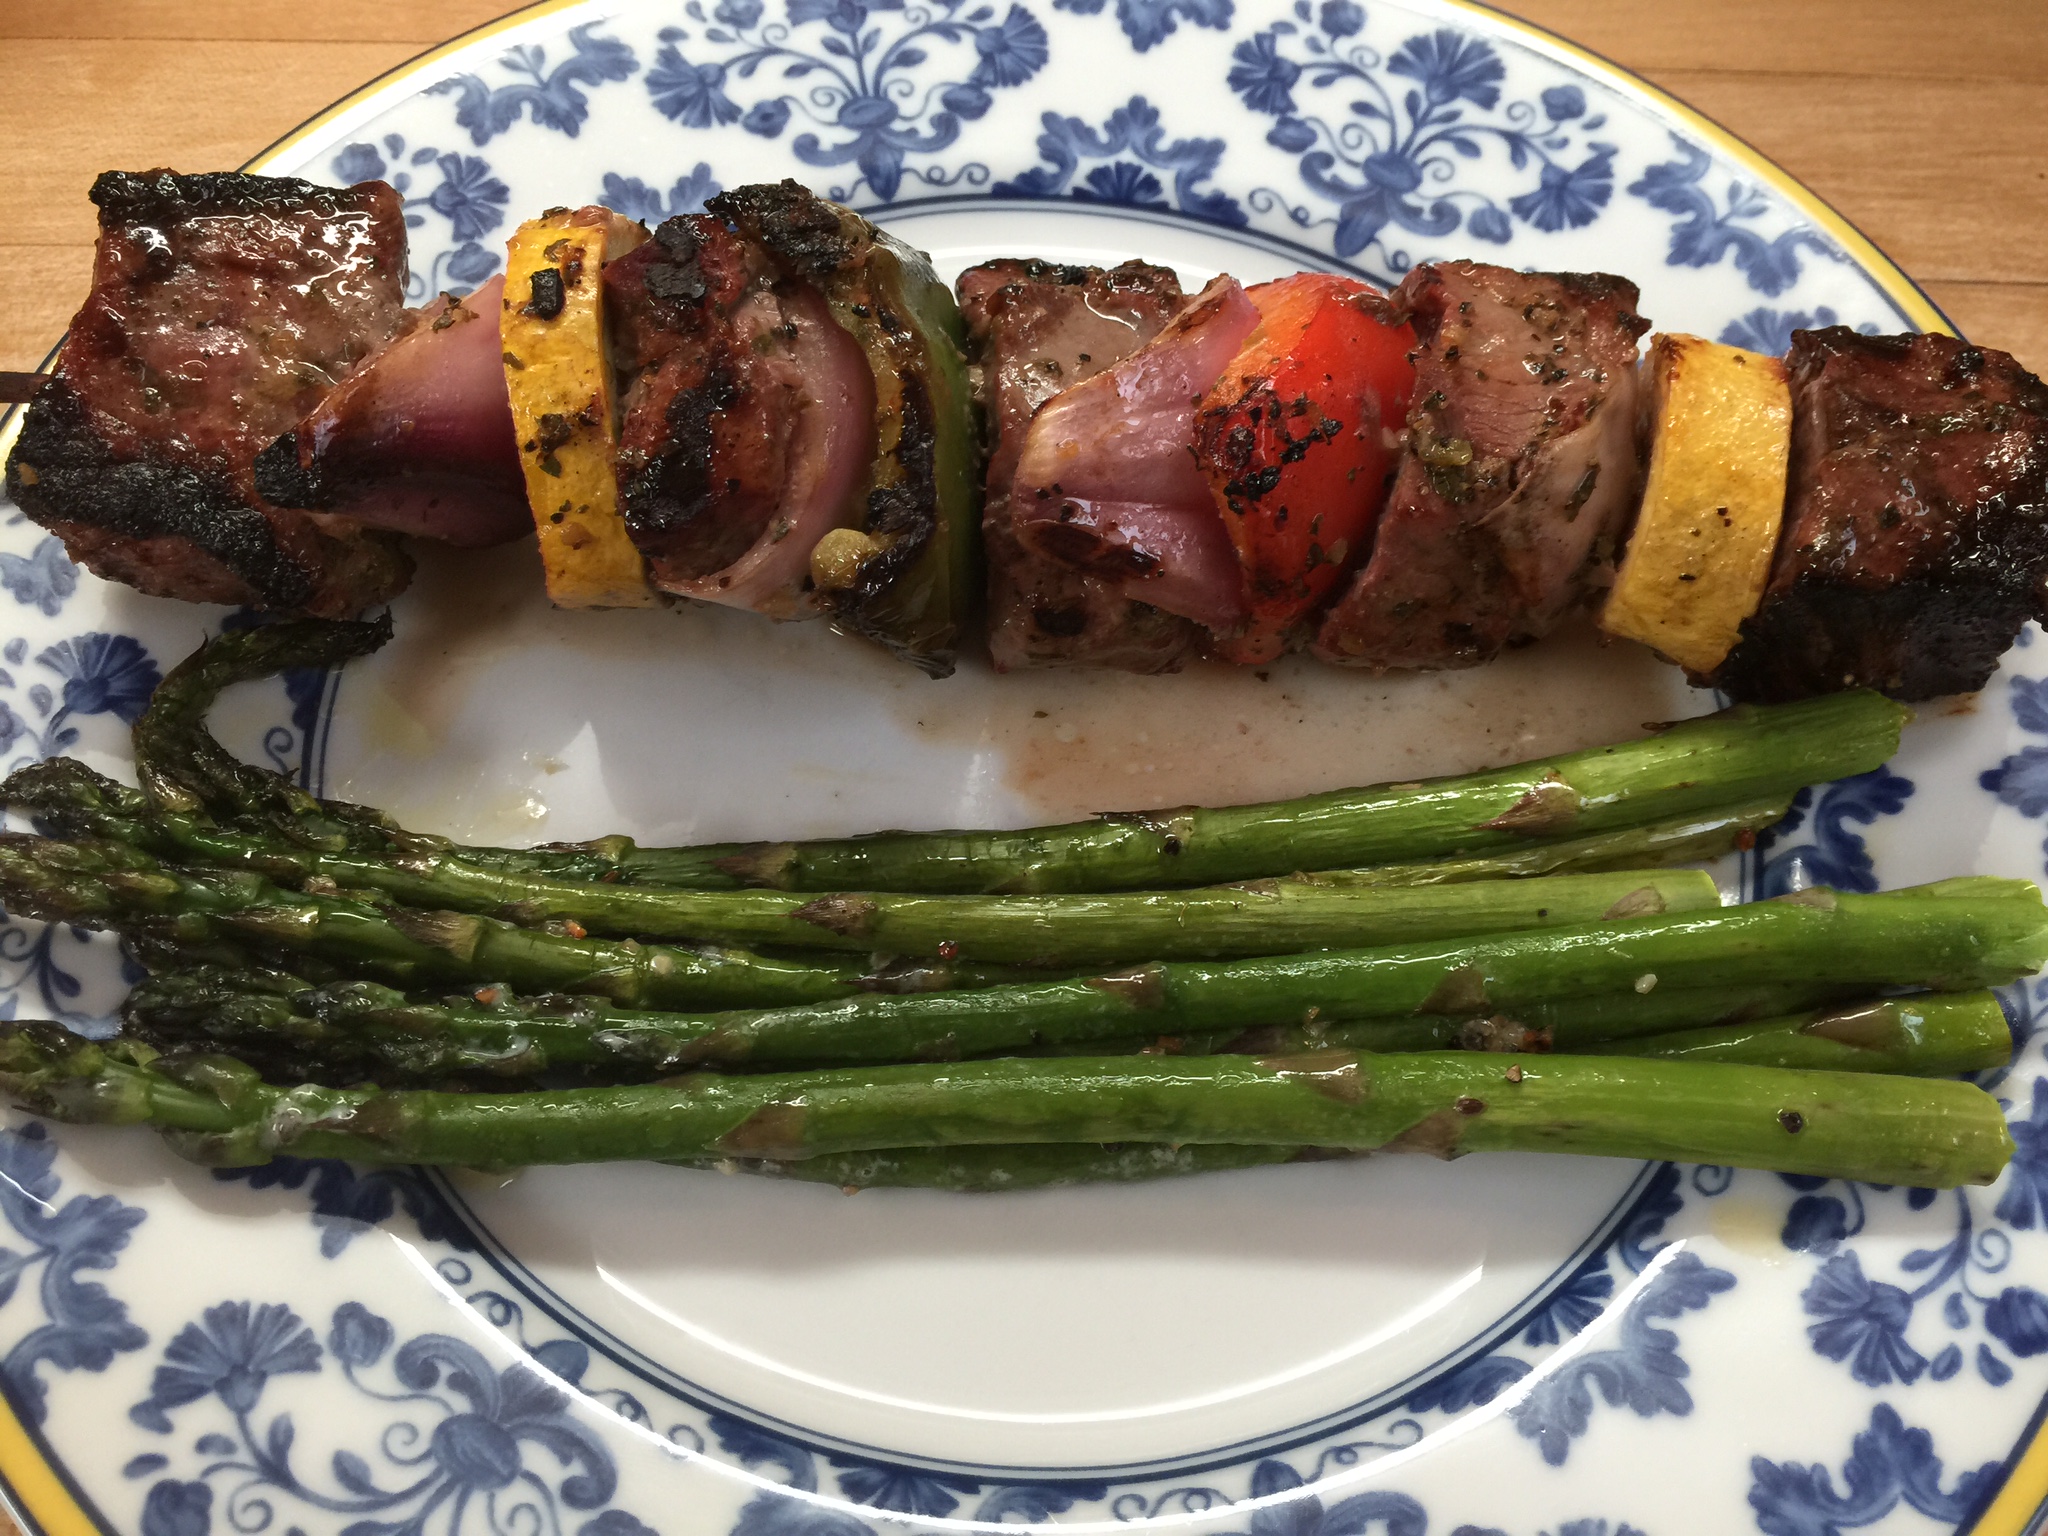
2. Beef Shish-kabobs with peppers and onions.
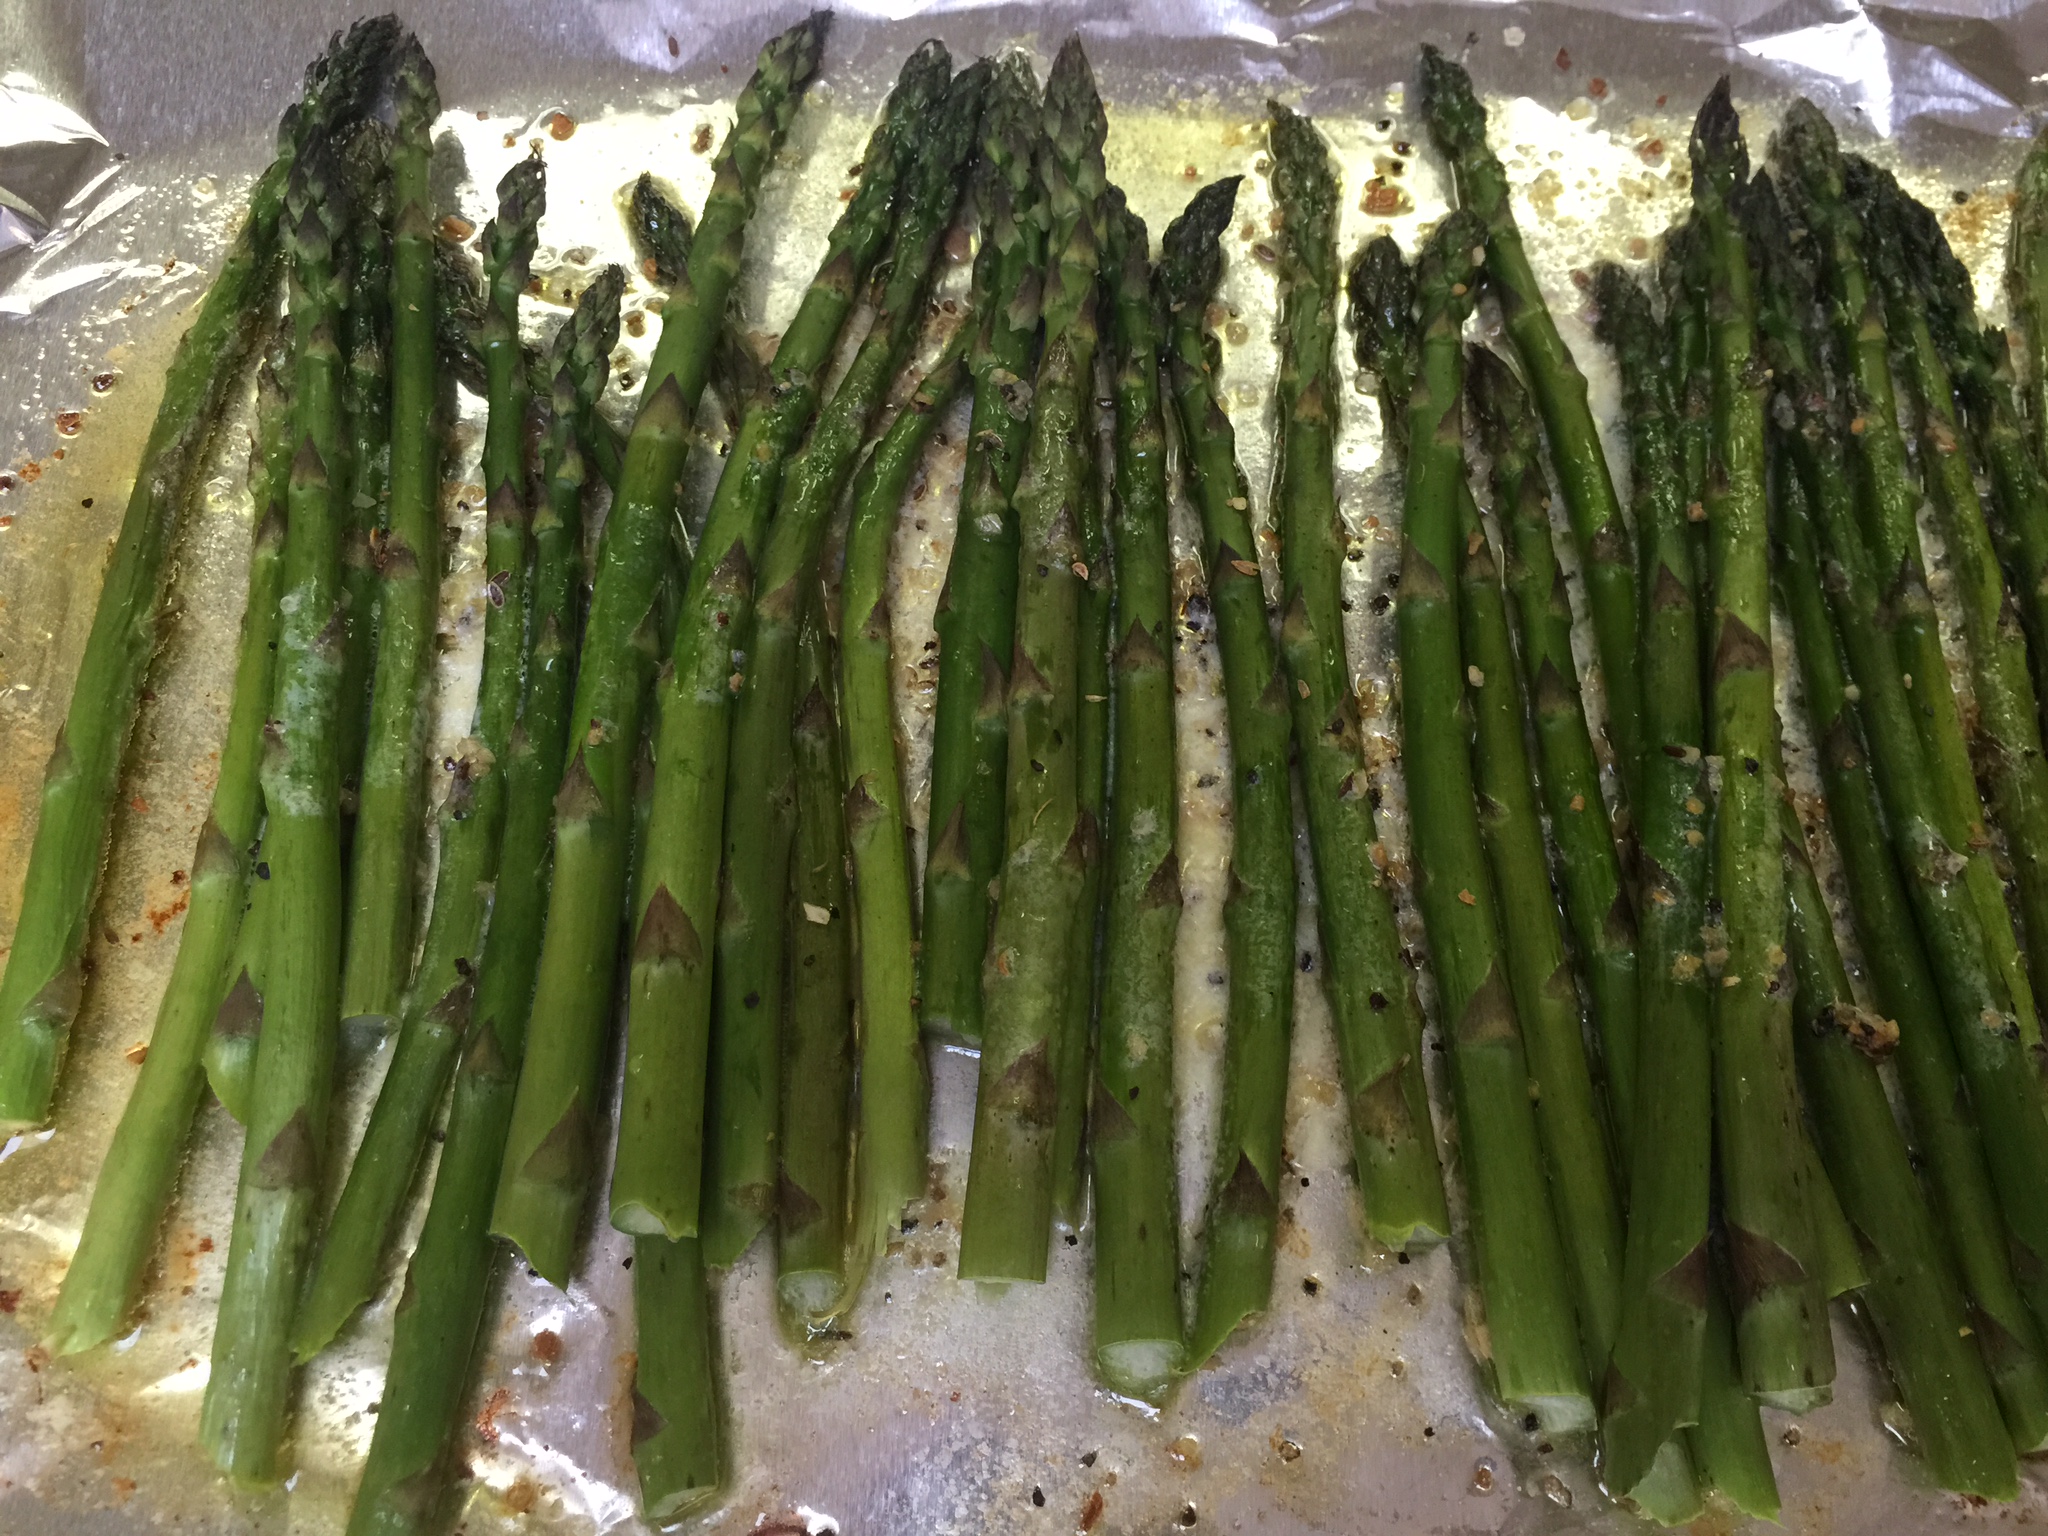
These are super easy to make ahead, but I bought these on a whim at Central Market when I knew I was in a pinch. They were marinated in a lime marinade and were melt-in-your-mouth tender and delicious. I served these with a side of asparagus that I roasted on 425 degrees for about 10 to 15 minutes. Topped with Kerrygold, salt and pepper.
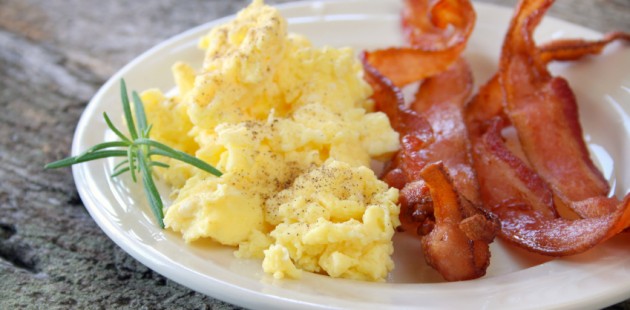
3. Many of us forget just how healthy eggs are for so many cells in our bodies. Eggs are the “perfect” food as we like to say! We always think of eggs for breakfast, but why not serve them for dinner. We do this often when the hubby is out of town because he doesn’t want eggs twice a day, but the kids love it. It is a great nutritious meal anytime of the day! Super simple and super healthy! We call it breakfast for dinner – creative-huh?
Hopefully these are just a few ideas to help you power through the week. Check out your grocerers meat display case. Central Market has great quality prepared meats (like the shish-kabobs) that you can throw on the grill Many other places do as well. Pick up some patties, some sausage or some steaks and serve with a side veggie roasted or steamed and topped with Kerrygold and seasonings. Super simple, super healthy, and super fast!
What else can I make besides scrambled eggs and bacon? This is in the Top 10 list of questions we receive.
Eggs are great! We know that, but we also get tired of the same old thing every day!
A Quiche is a great way to dress up your eggs in a beautiful way that the whole family can enjoy for any meal of the day. It is filled with all the great nutrients that eggs provide, and anything else you wish to add to give it that special touch. It is also a method to hide vegetables if you have picky eaters! And…best of all, it cooks great without a crust. No need to add carbs to something so savory and wonderful already!
These are great with the end of school approaching because you can prepare it a day ahead, and it reheats quickly and perfectly. It is also delicious as a weekend dish straight out of the oven! Fresh quiche just melts in your mouth. Prepare to be creative and enjoy!
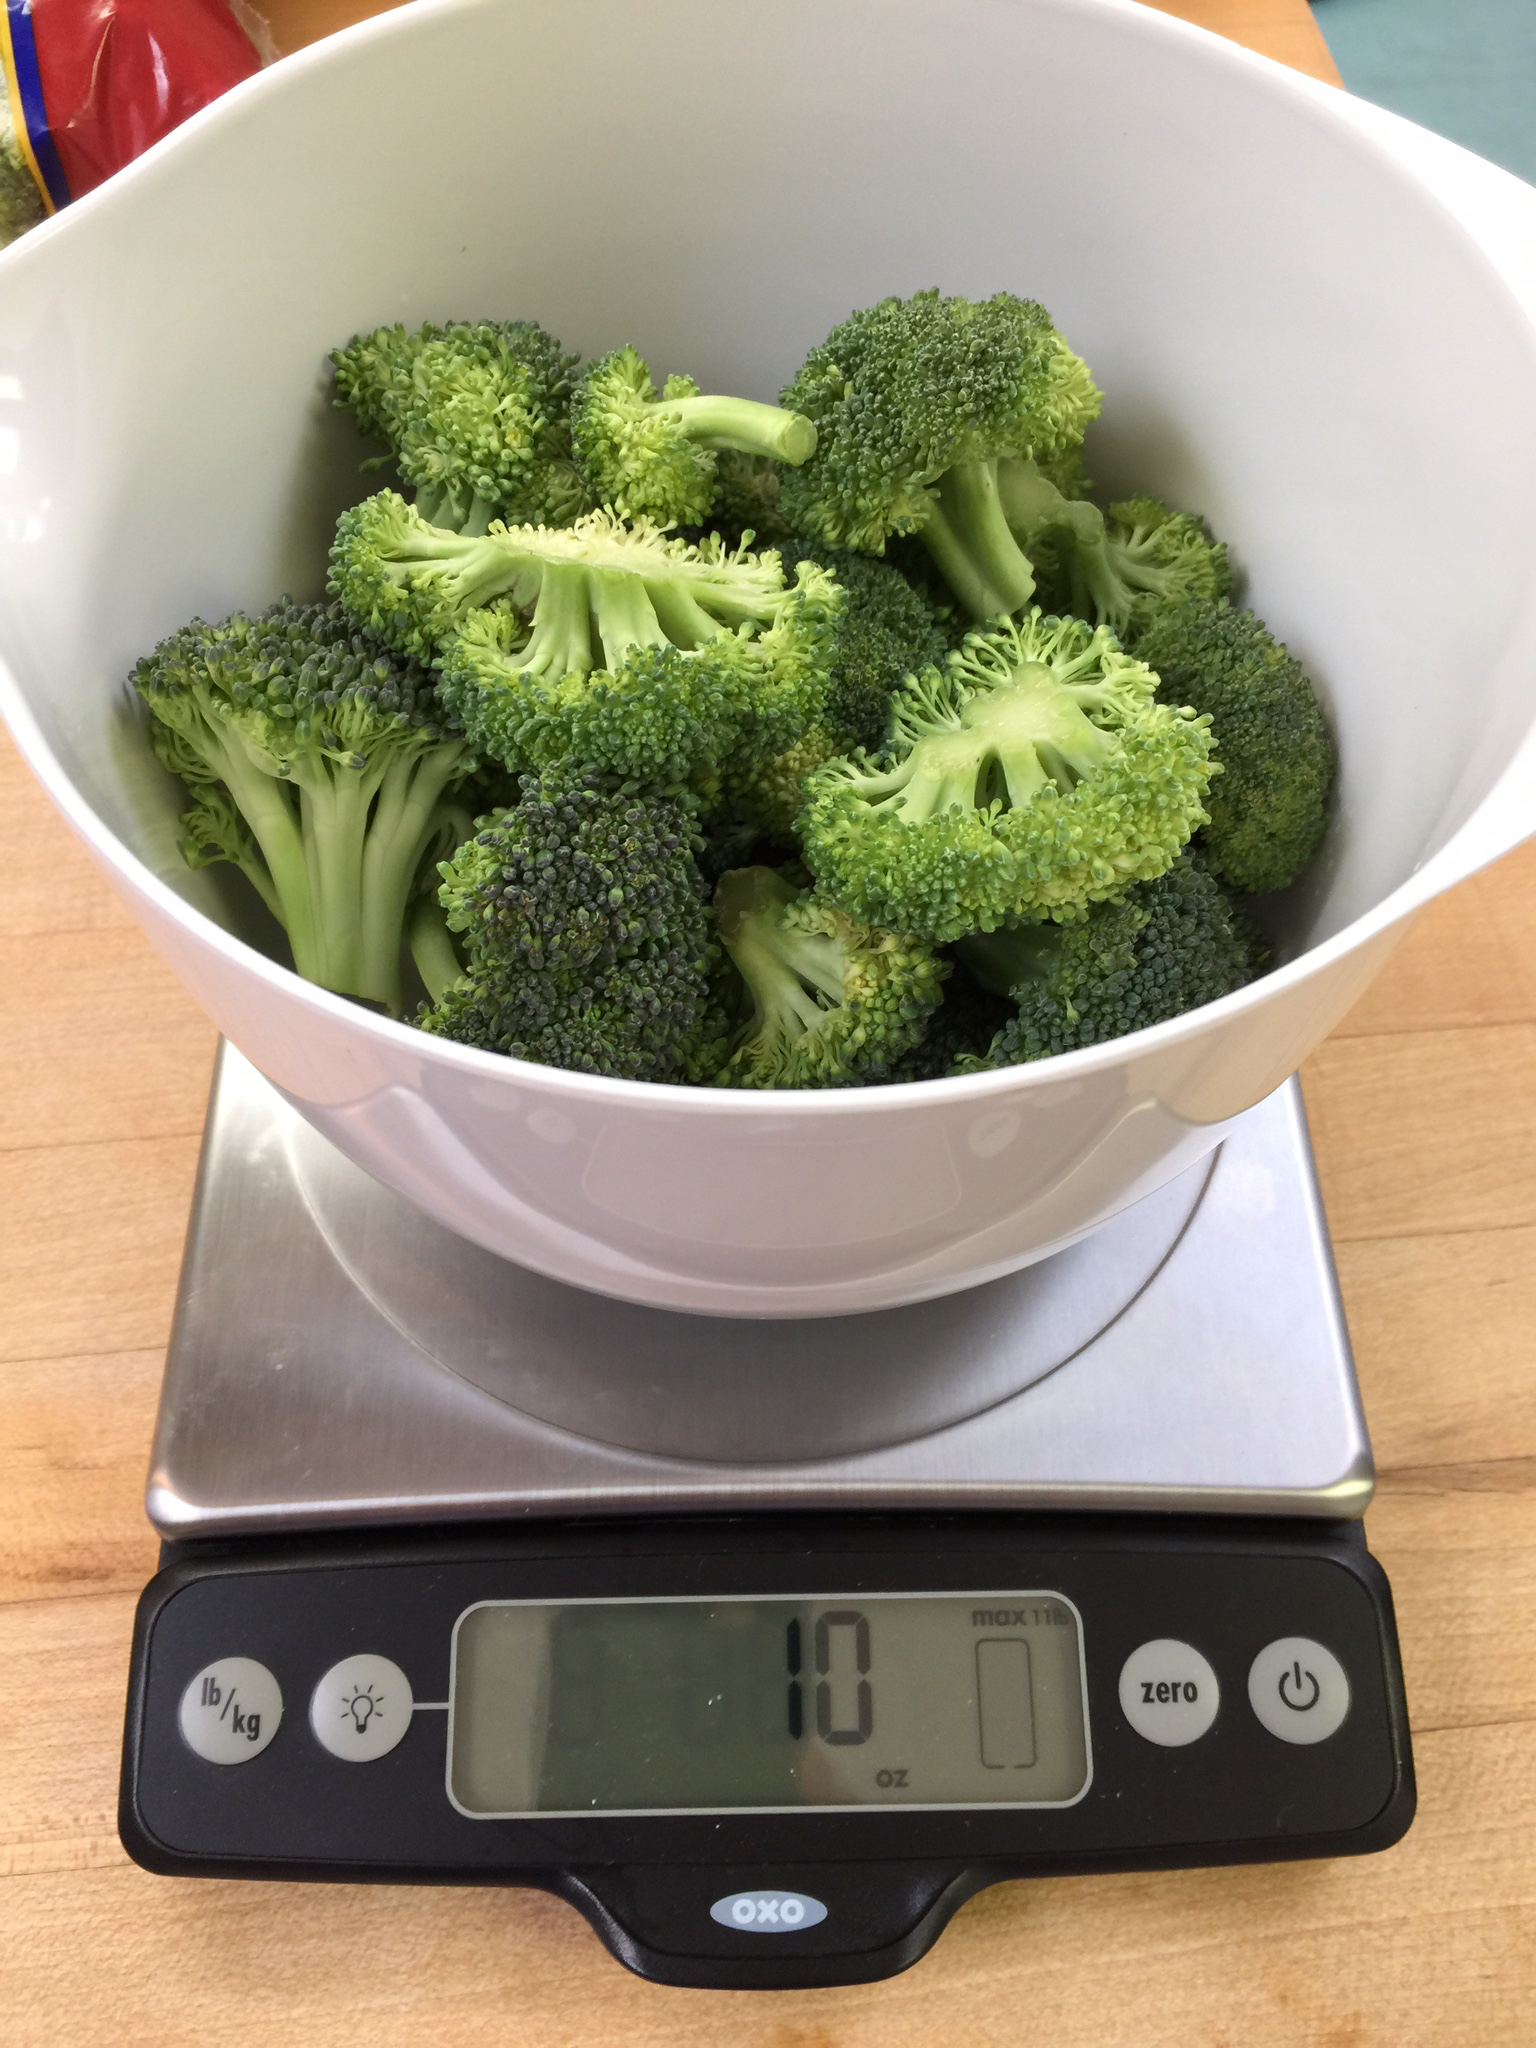
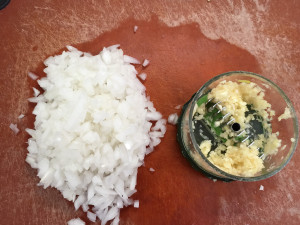
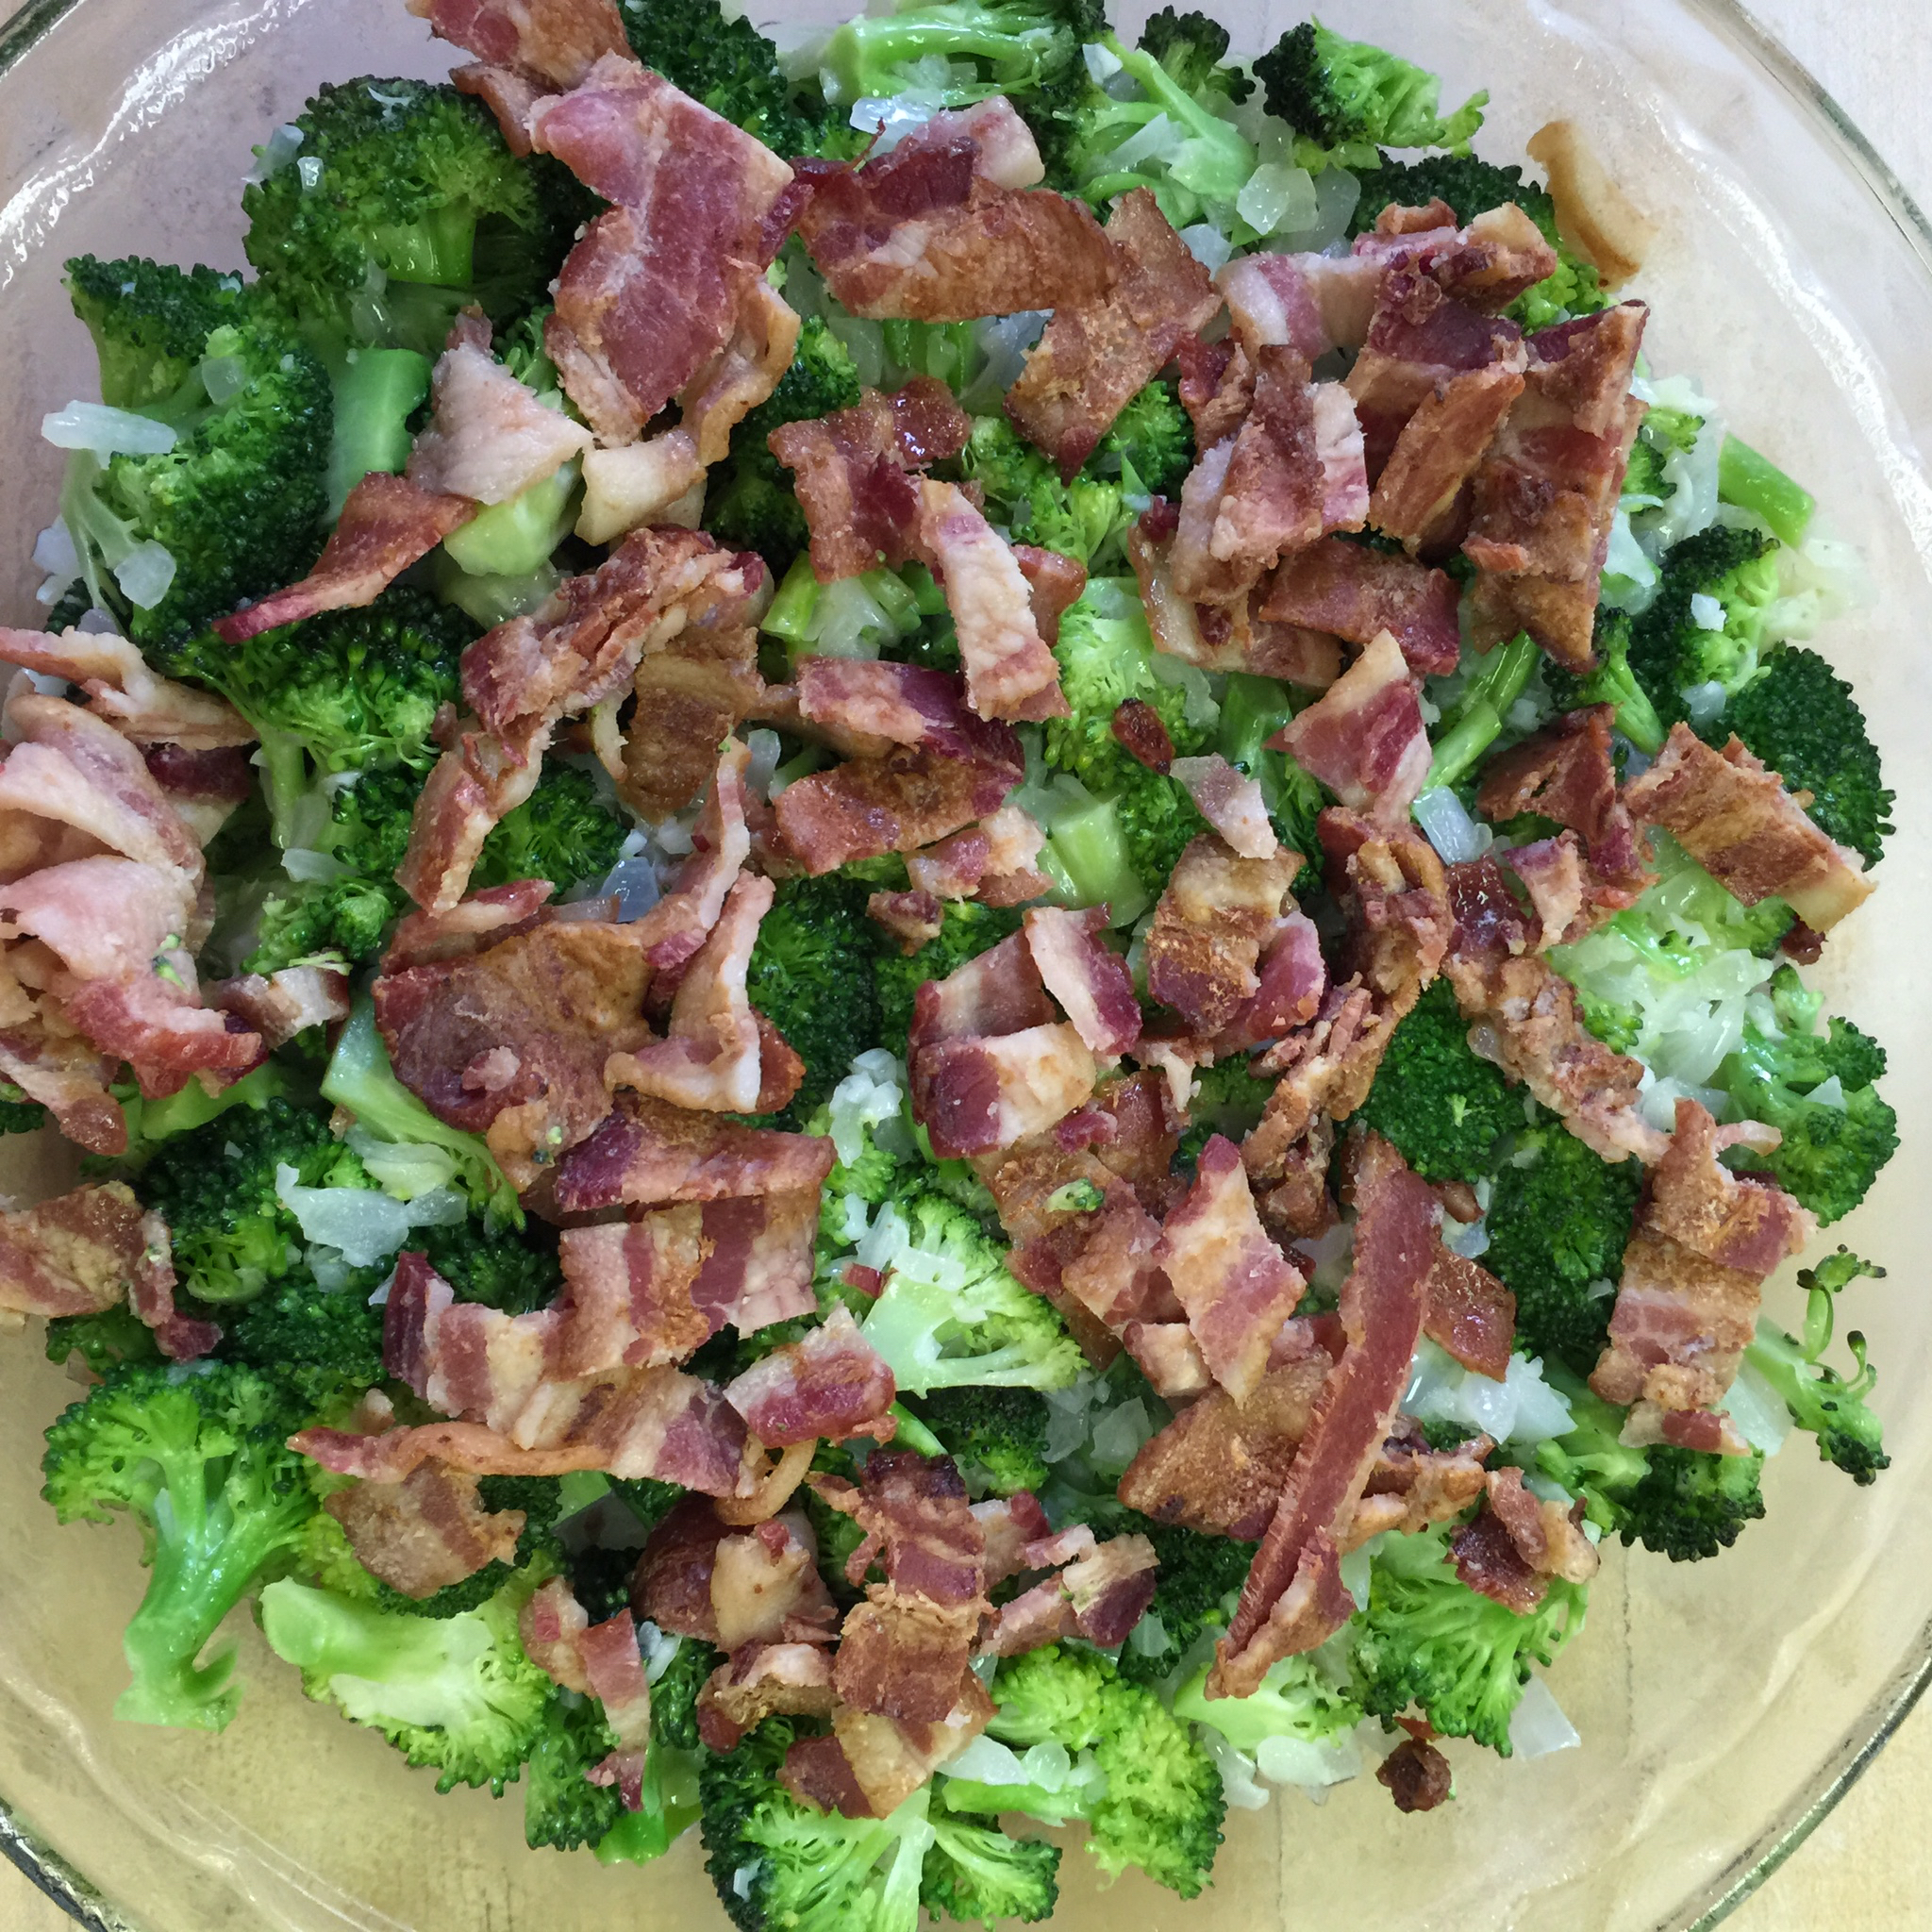
Gather your ingredients, and chop your onion, garlic, and broccoli. This is my favorite garlic chopper!
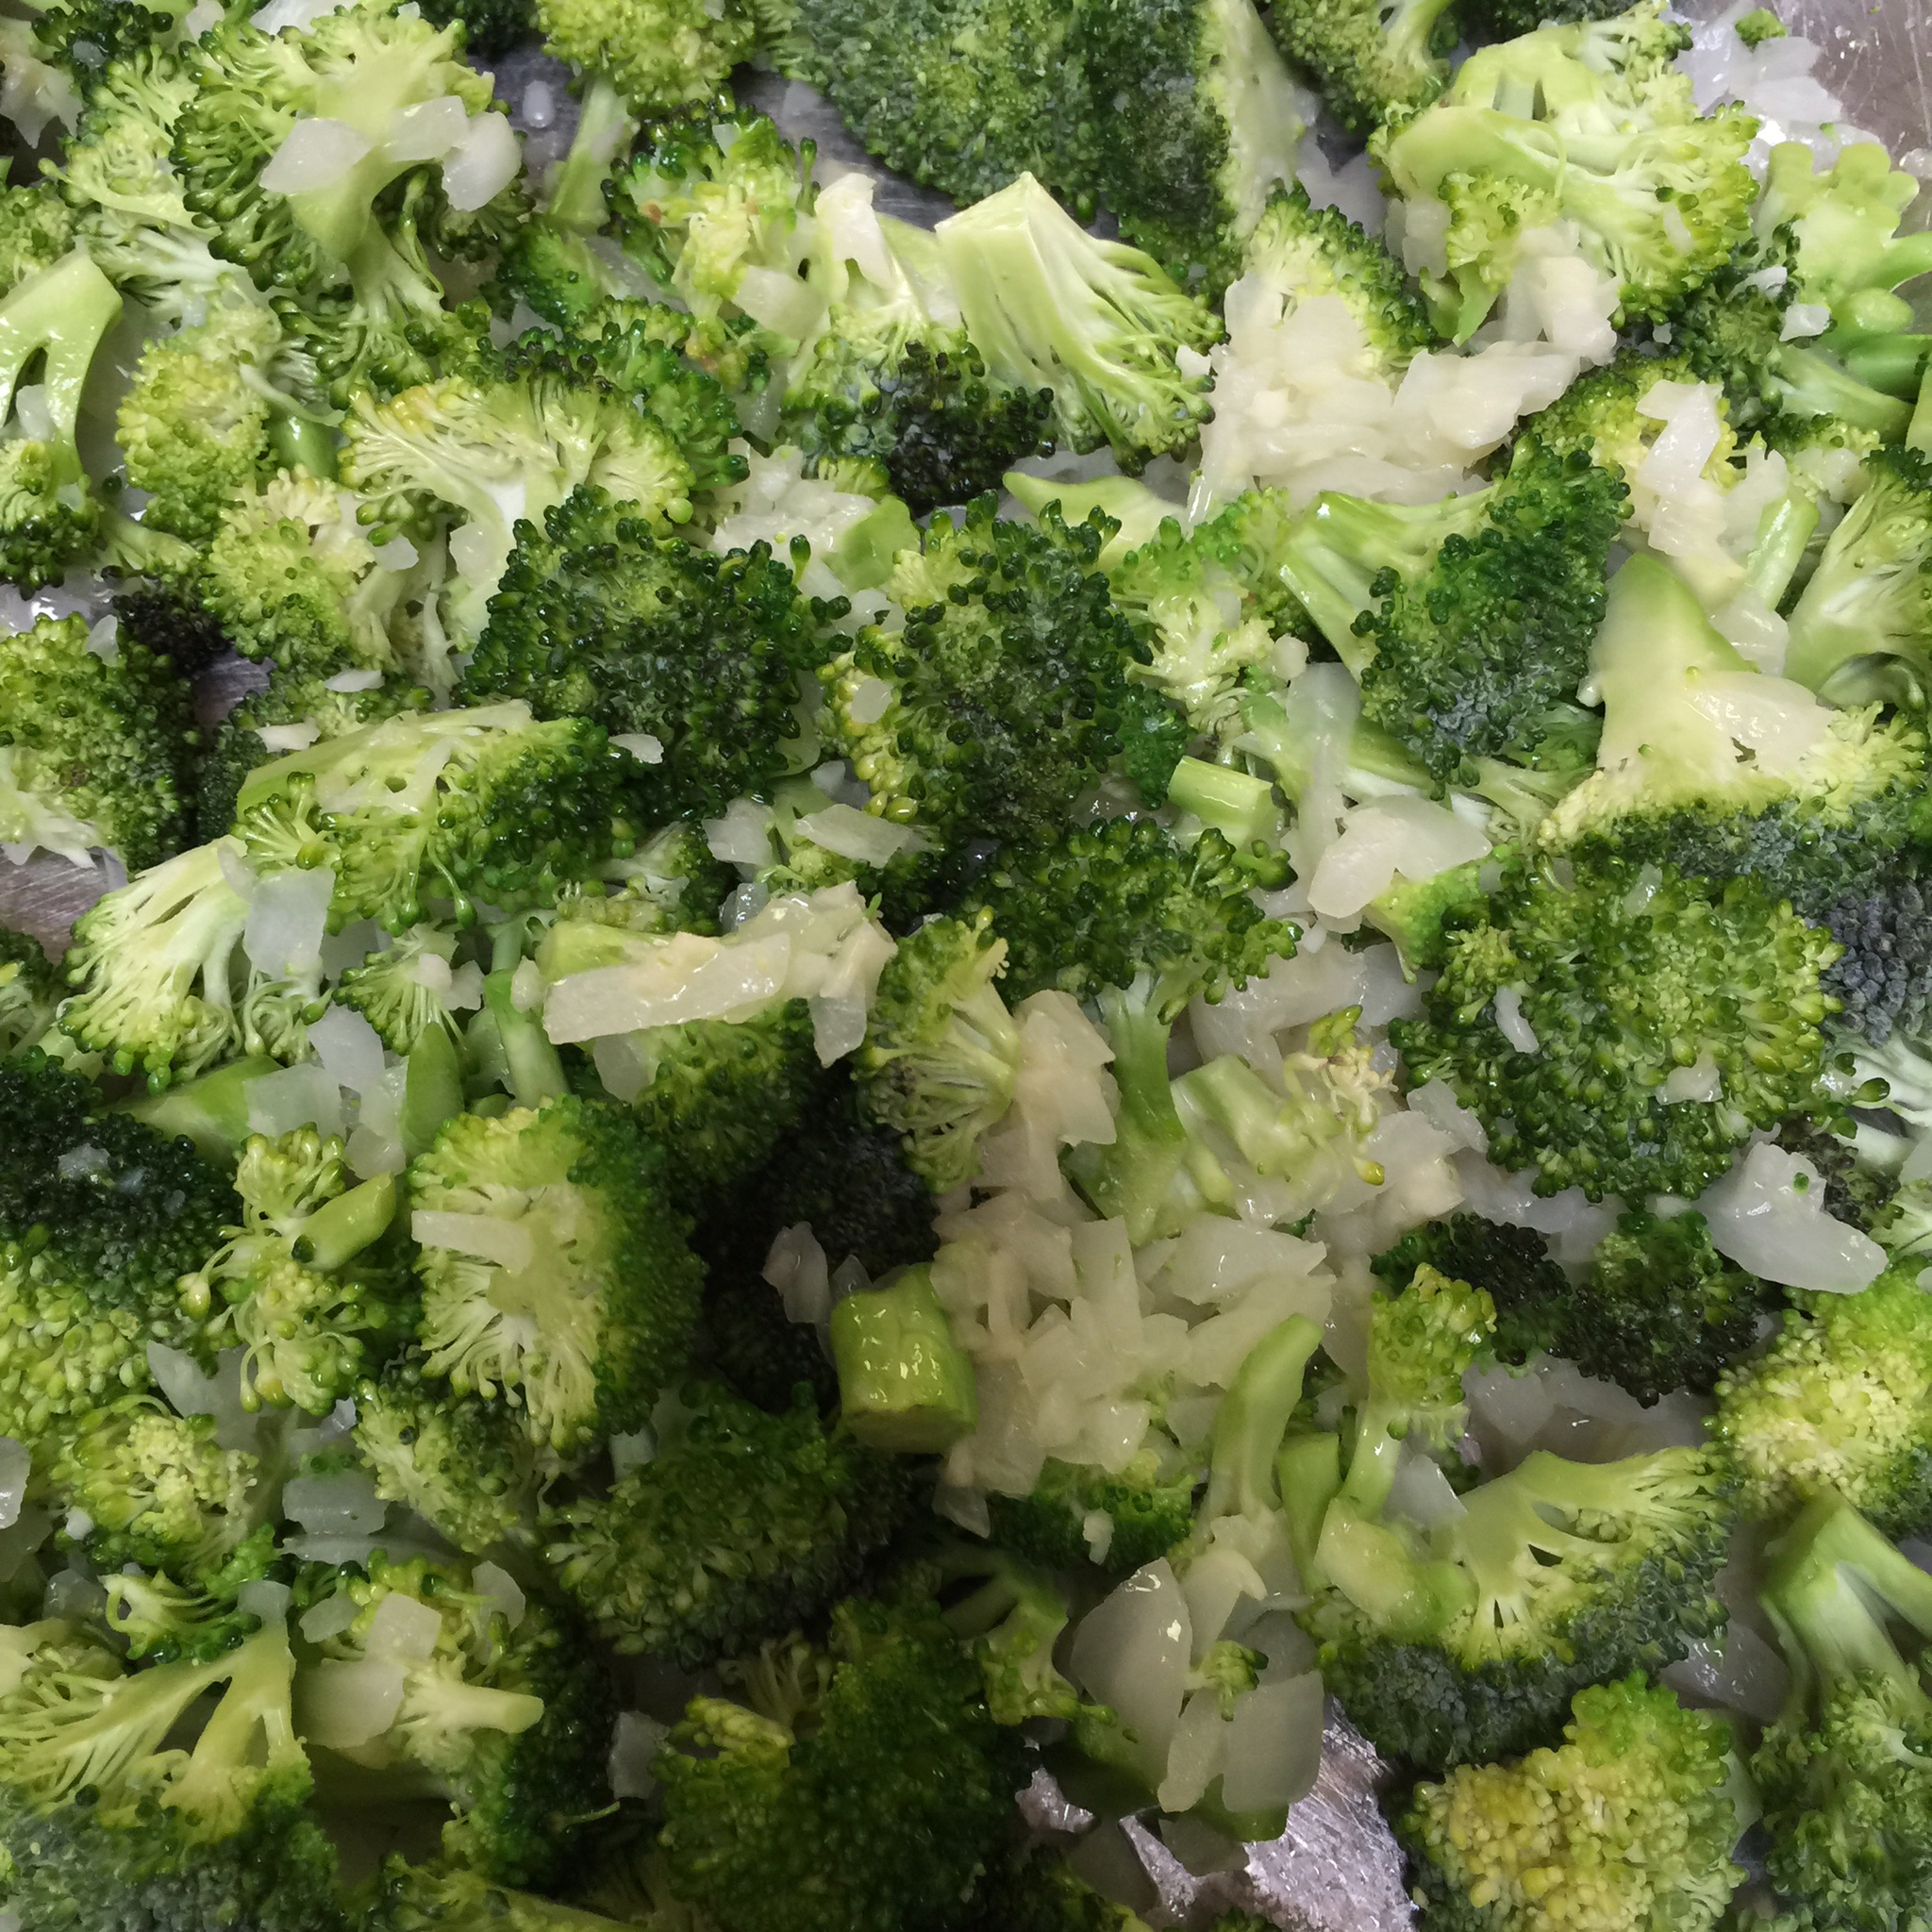
Sauté your onion and garlic in the butter. Then add your broccoli to soften slightly.
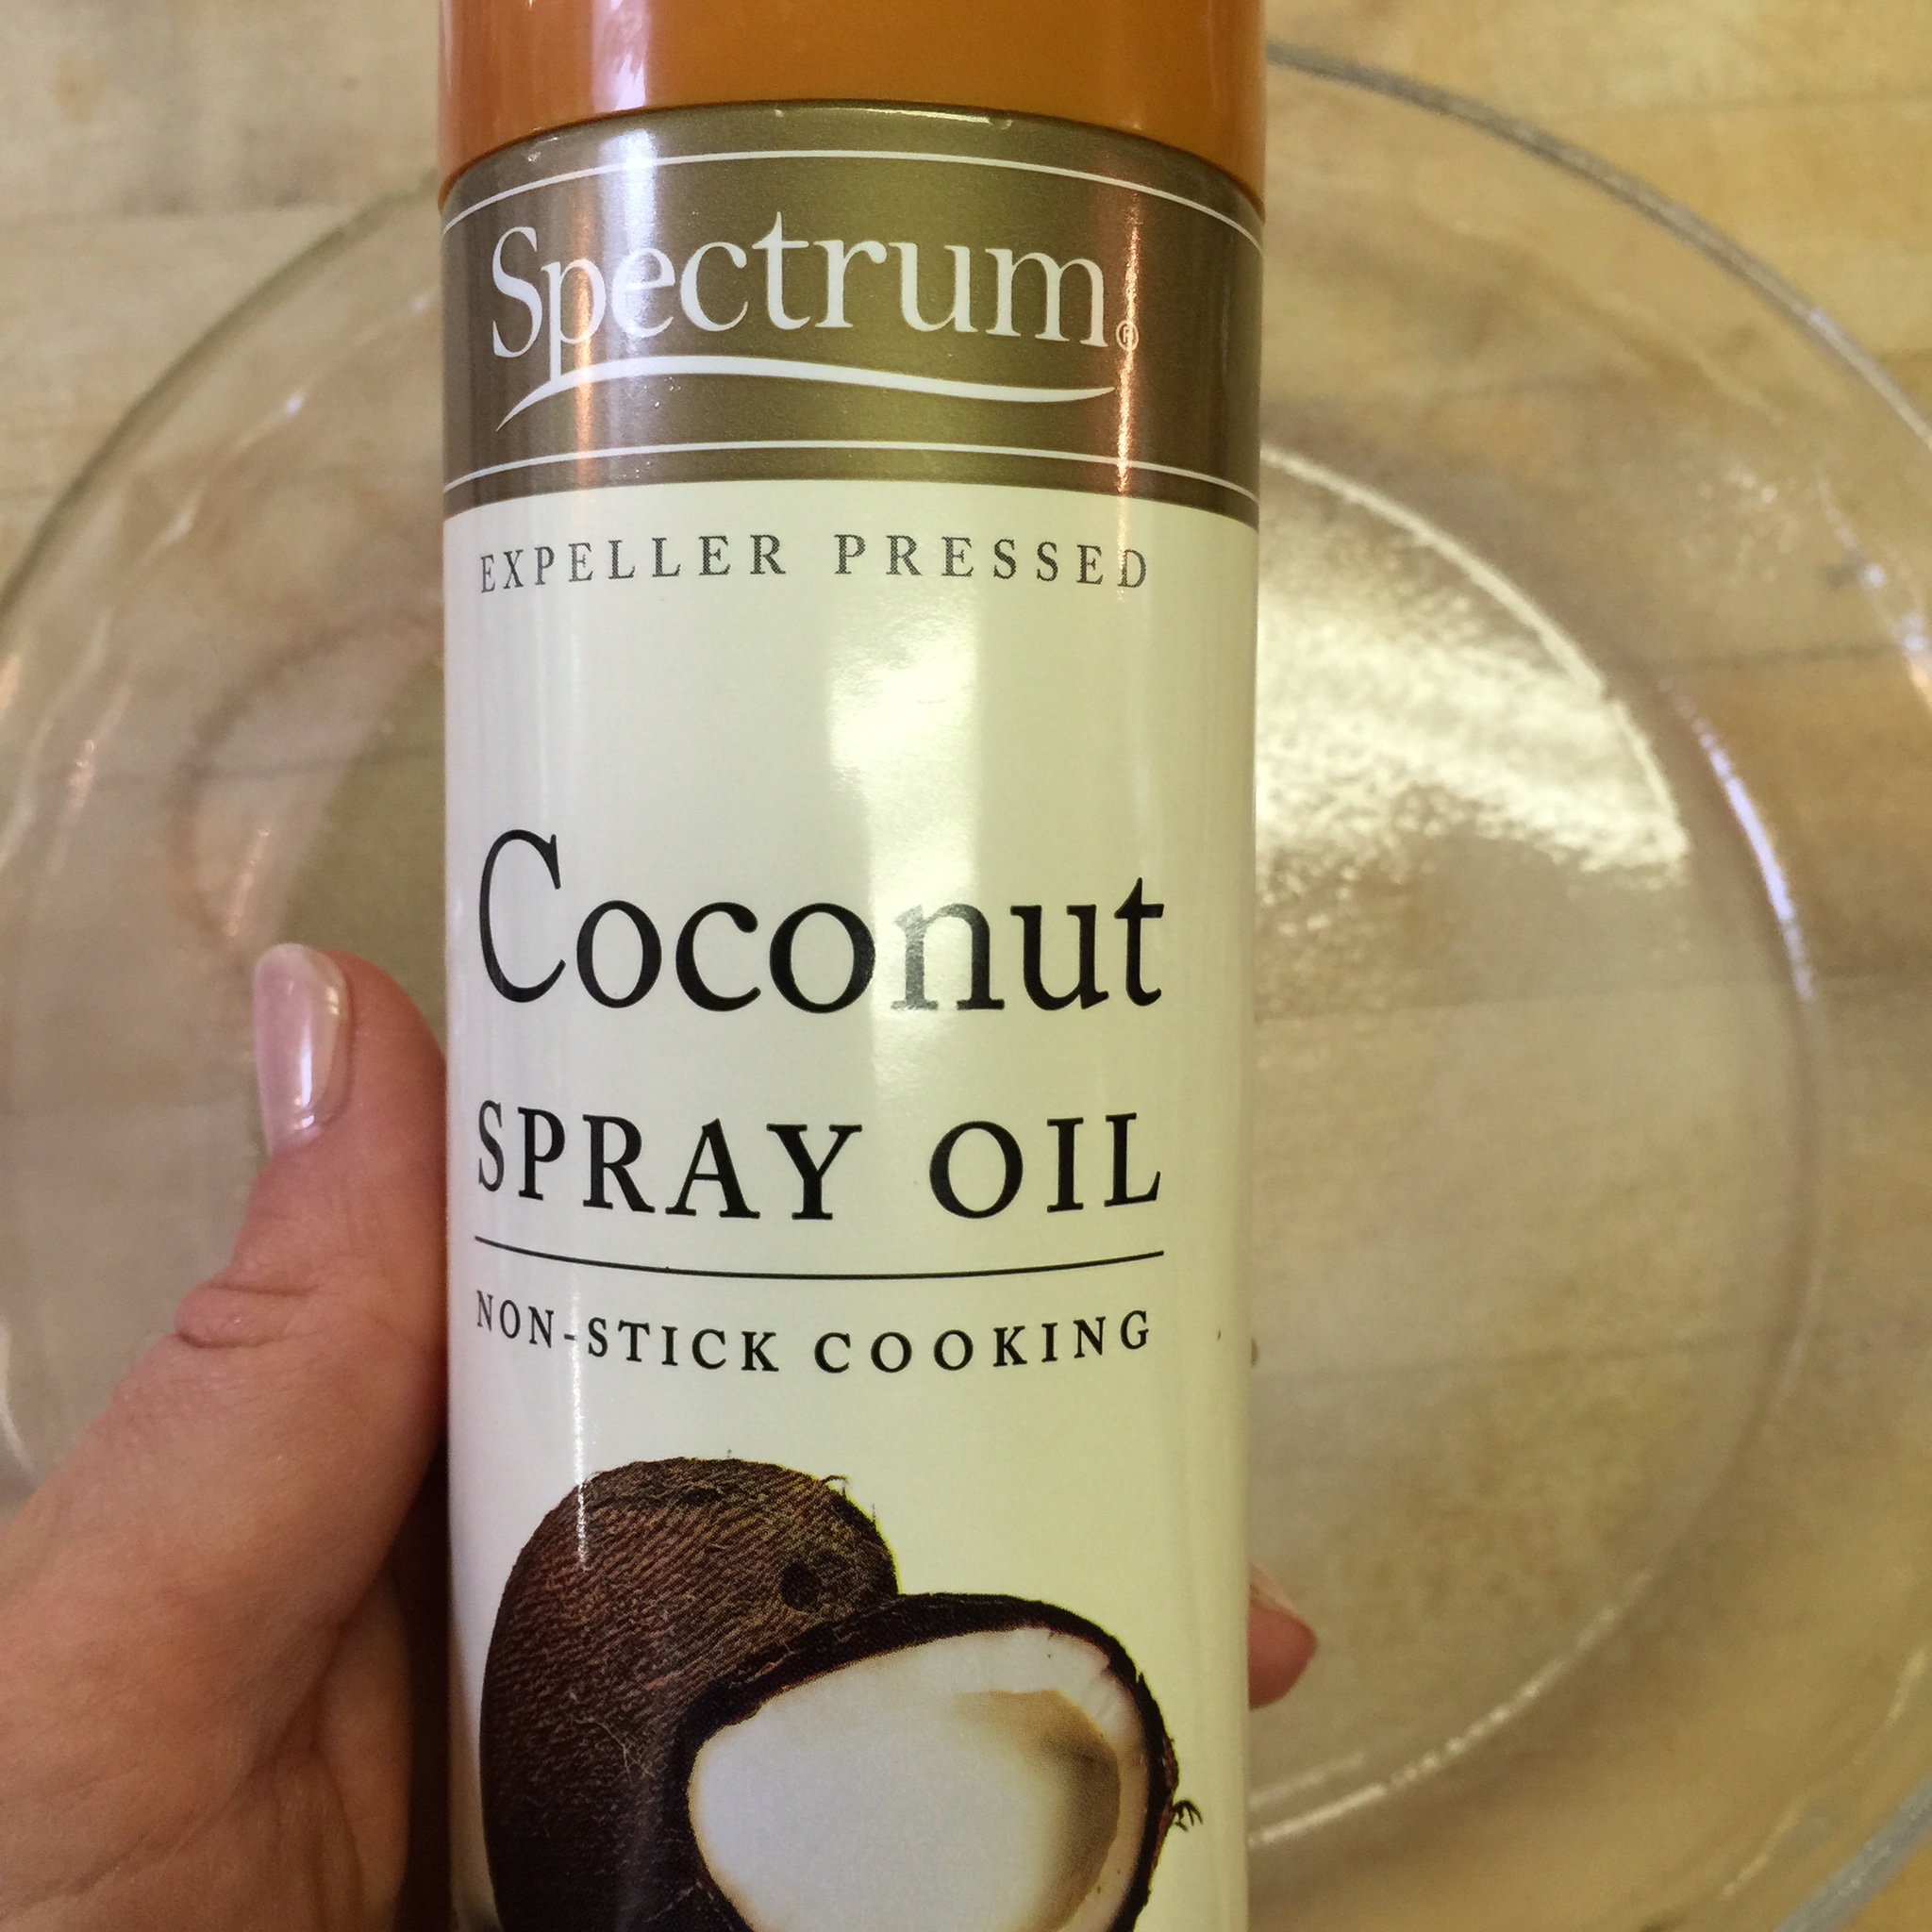
Spray your pie dish with coconut oil spray (you can find it here).
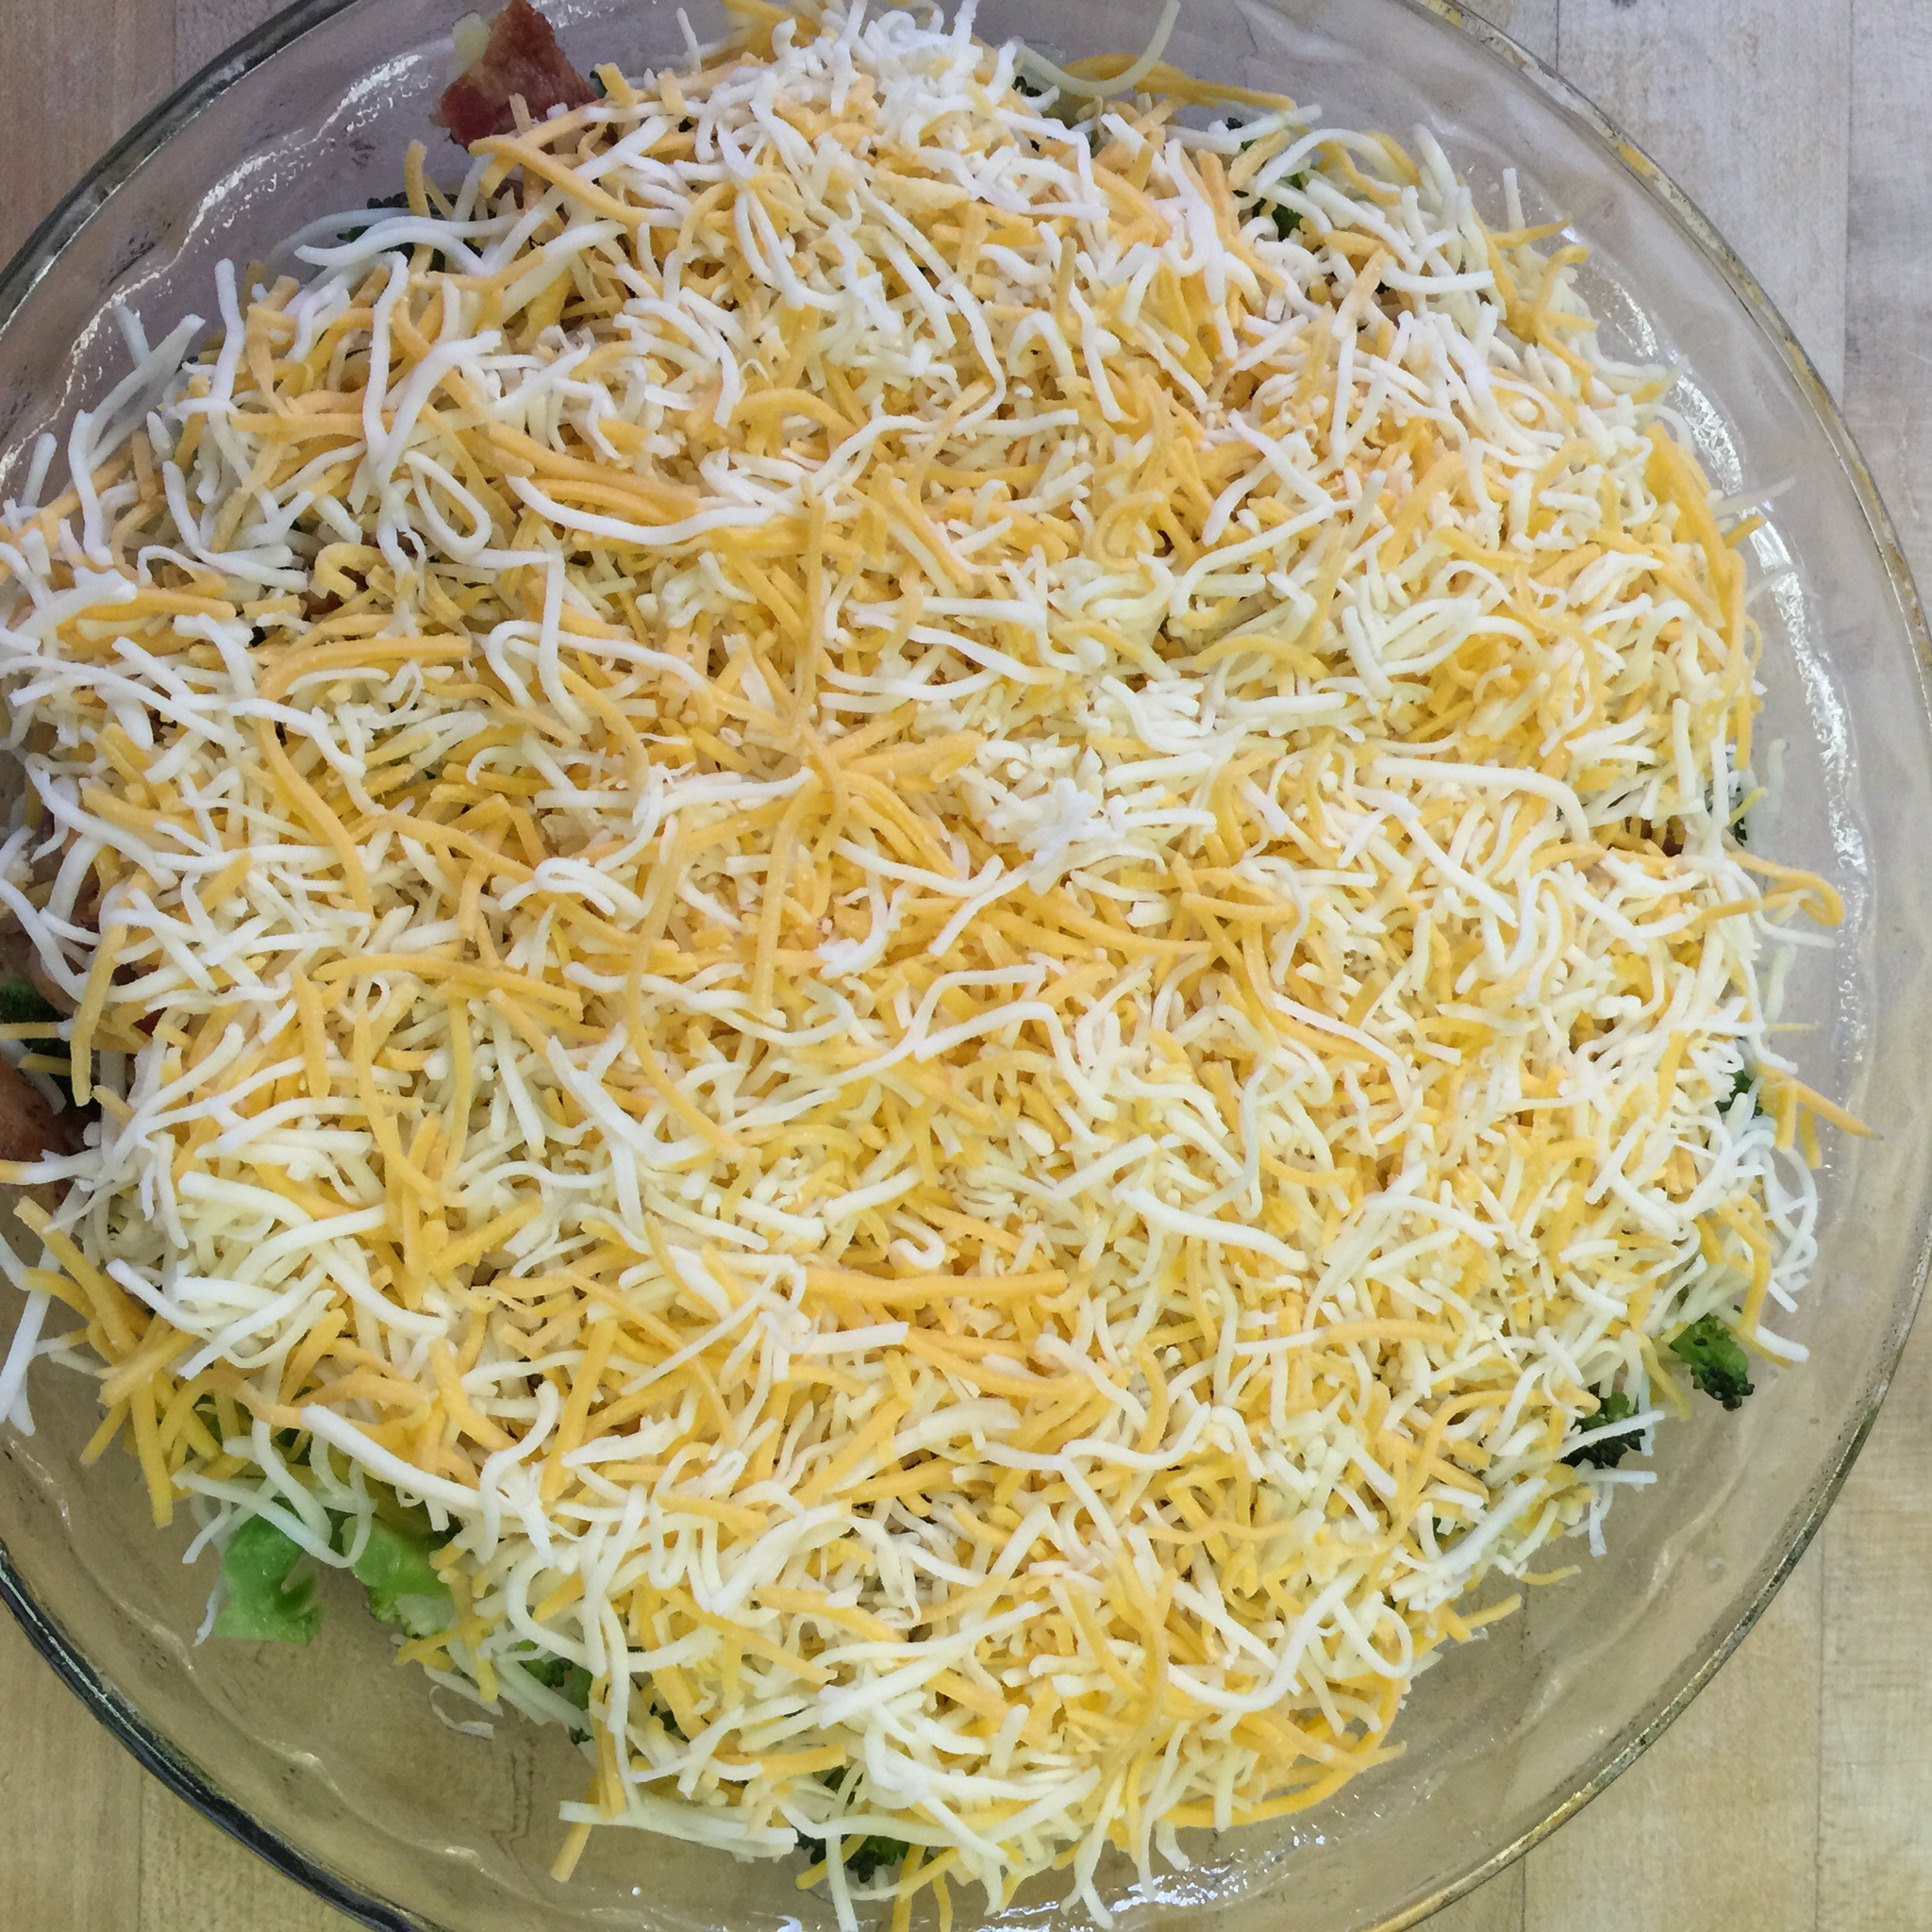
For a Quiche, you want to layer your ingredients. Start with your sautéed vegetables, and then top with bacon. This goes for any type of quiche – veggies on the bottom, then your meat, then cheese, then top with your egg mixture.
Sprinkle the cheese on top of the bacon.
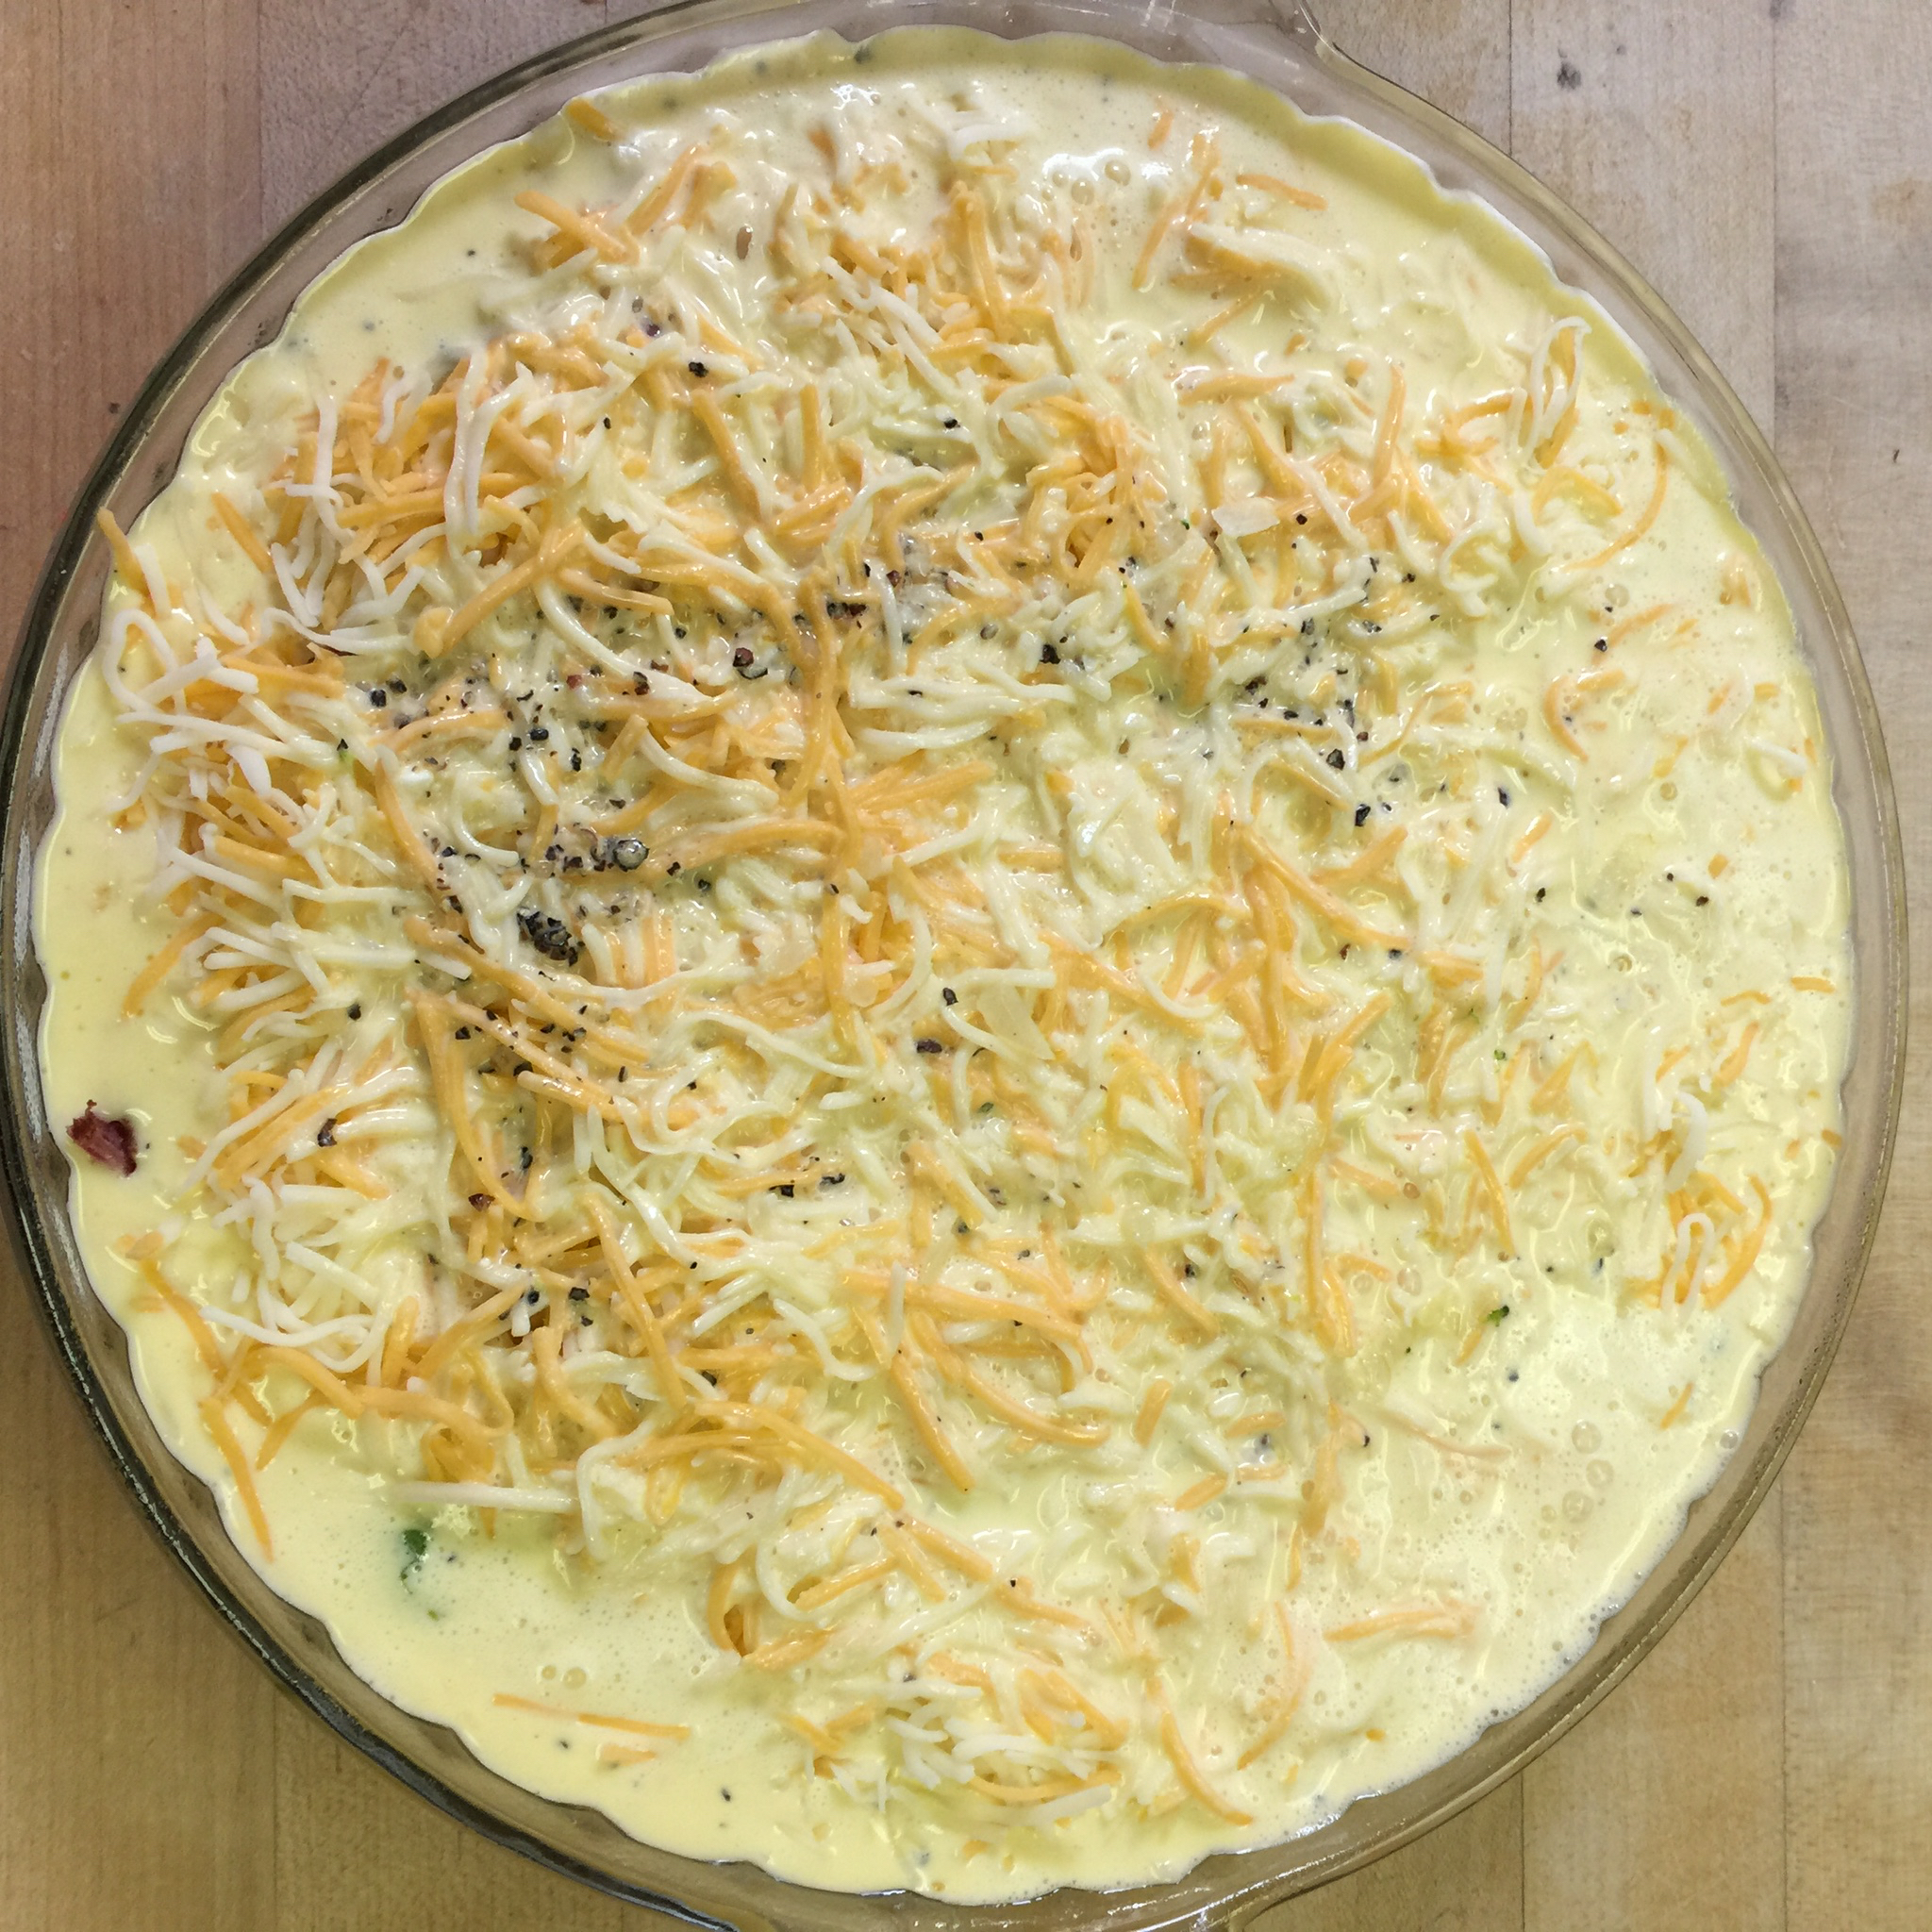
Mix your eggs, cream, nutmeg, ground mustard, cayenne, salt and pepper.
Pour over the cheese.
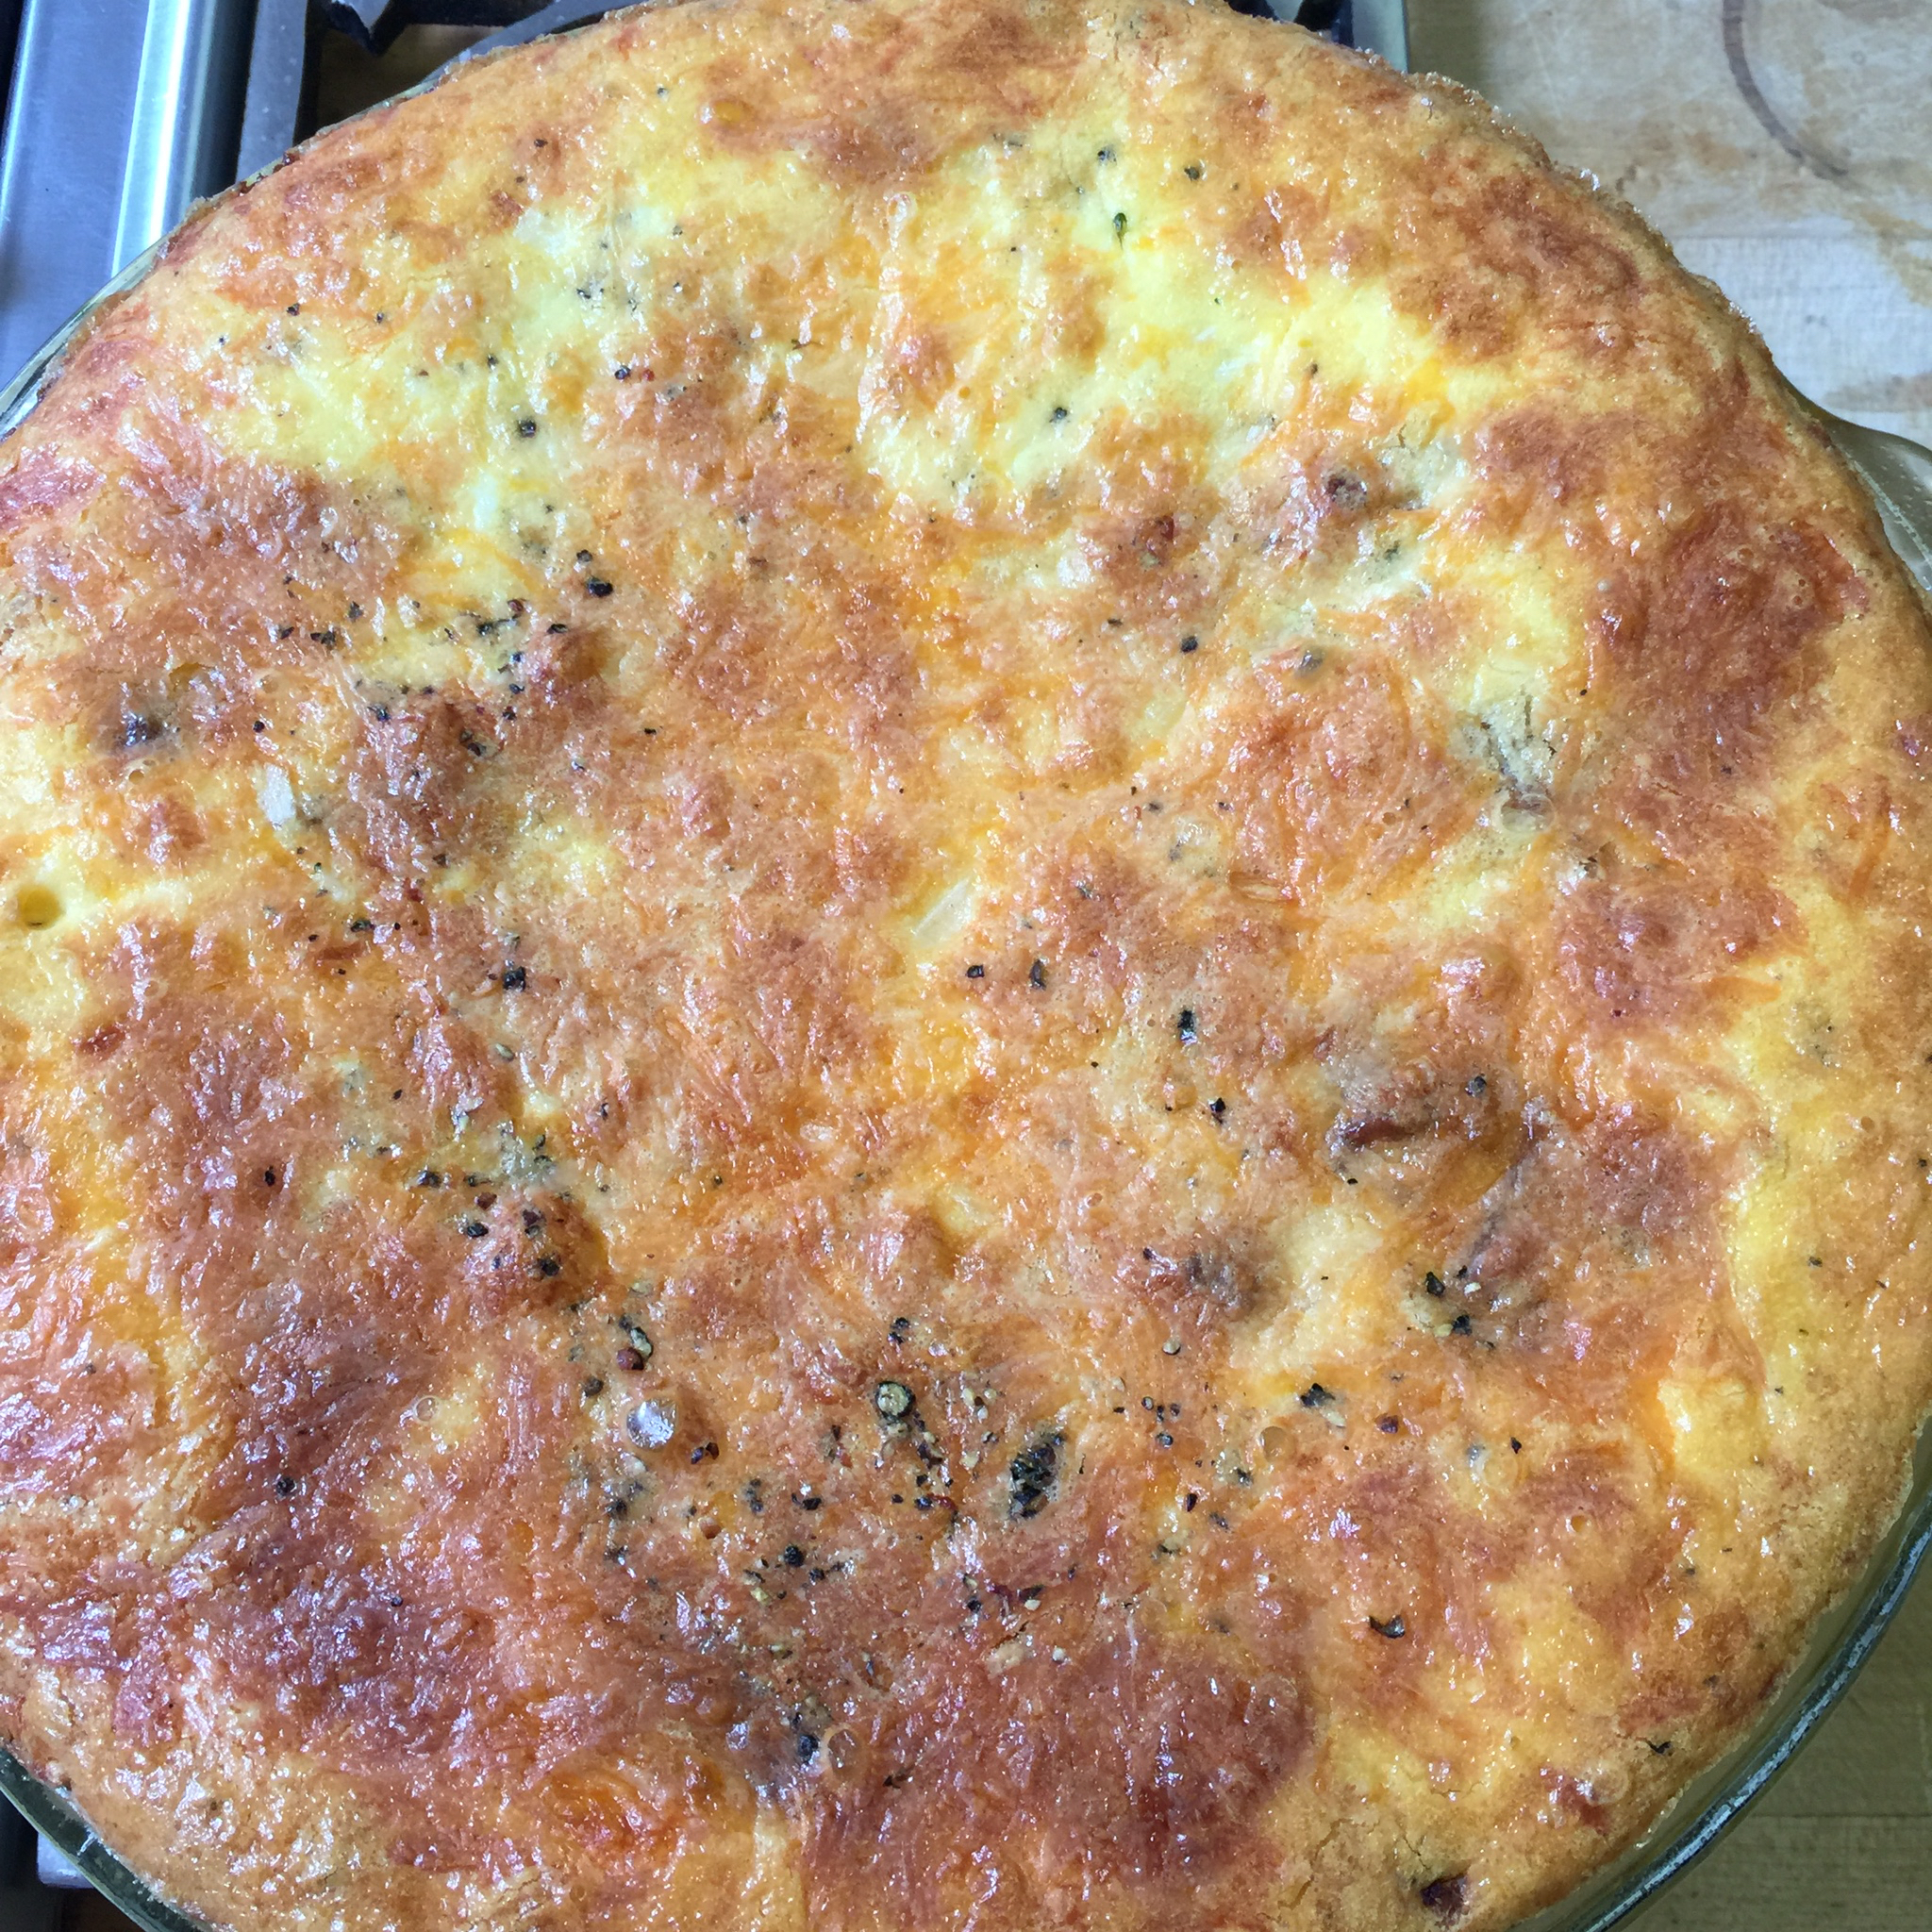
Place your quiche in your preheated 400 degree oven for 15 minutes. Reduce heat after 15 minutes to 325 degrees and bake for an additional 30 minutes.
It should look puffy and delicious when you remove from the oven:
As it cools, it will sink slightly. Allow to cool for 20 minutes or so if you want to enjoy it right away. If you are preparing ahead, allow to cool completely, cover with saran, and store in the refrigerator until ready to use. This will keep for up to 5 days in the refrigerator. Reheat in the oven or in the microwave for about 30 seconds a slice.
Be creative with your ingredients. My children have requested ham and cheese for the next one. You can do spinach and parmesan, vegetable, bacon and cheese, or any other combination you can imagine. Just remember to layer in the order above and cook accordingly! Enjoy!
So, I was ruled out on my dinner choice this evening! My husband wanted steak, and the kiddos wanted potatoes. “Hmmm,” I thought to myself. Let’s see if I can slide those cauli-mashers by them without notice.
Worked like a charm! My super picky four-year old said this was the “best dinner in the world!” She also told me that “these are the best potatoes ever!”
If you missed Erin’s post on Cauli-mashers, they are a breeze to make, even when you get outnumbered at the last minute in the kitchen.
I steamed one bag of Costco fresh Cauliflower florets until fairly soft. I don’t have the emersion mixer like Erin, so I just used my KitchenAid hand mixer, and beat them until they were the consistency of mashed potatoes. I added a half block of Kerrygold, a half block of cream cheese, and a handful of chopped parsley. I then added a generous amount of salt and pepper. Mixed it all together with the mixer, poured into an 8×8 pyrex, and topped with some Colby Jack cheese. I popped it in the oven at 350 degrees for about 20 minutes, and to the delight of everyone, it was devoured.
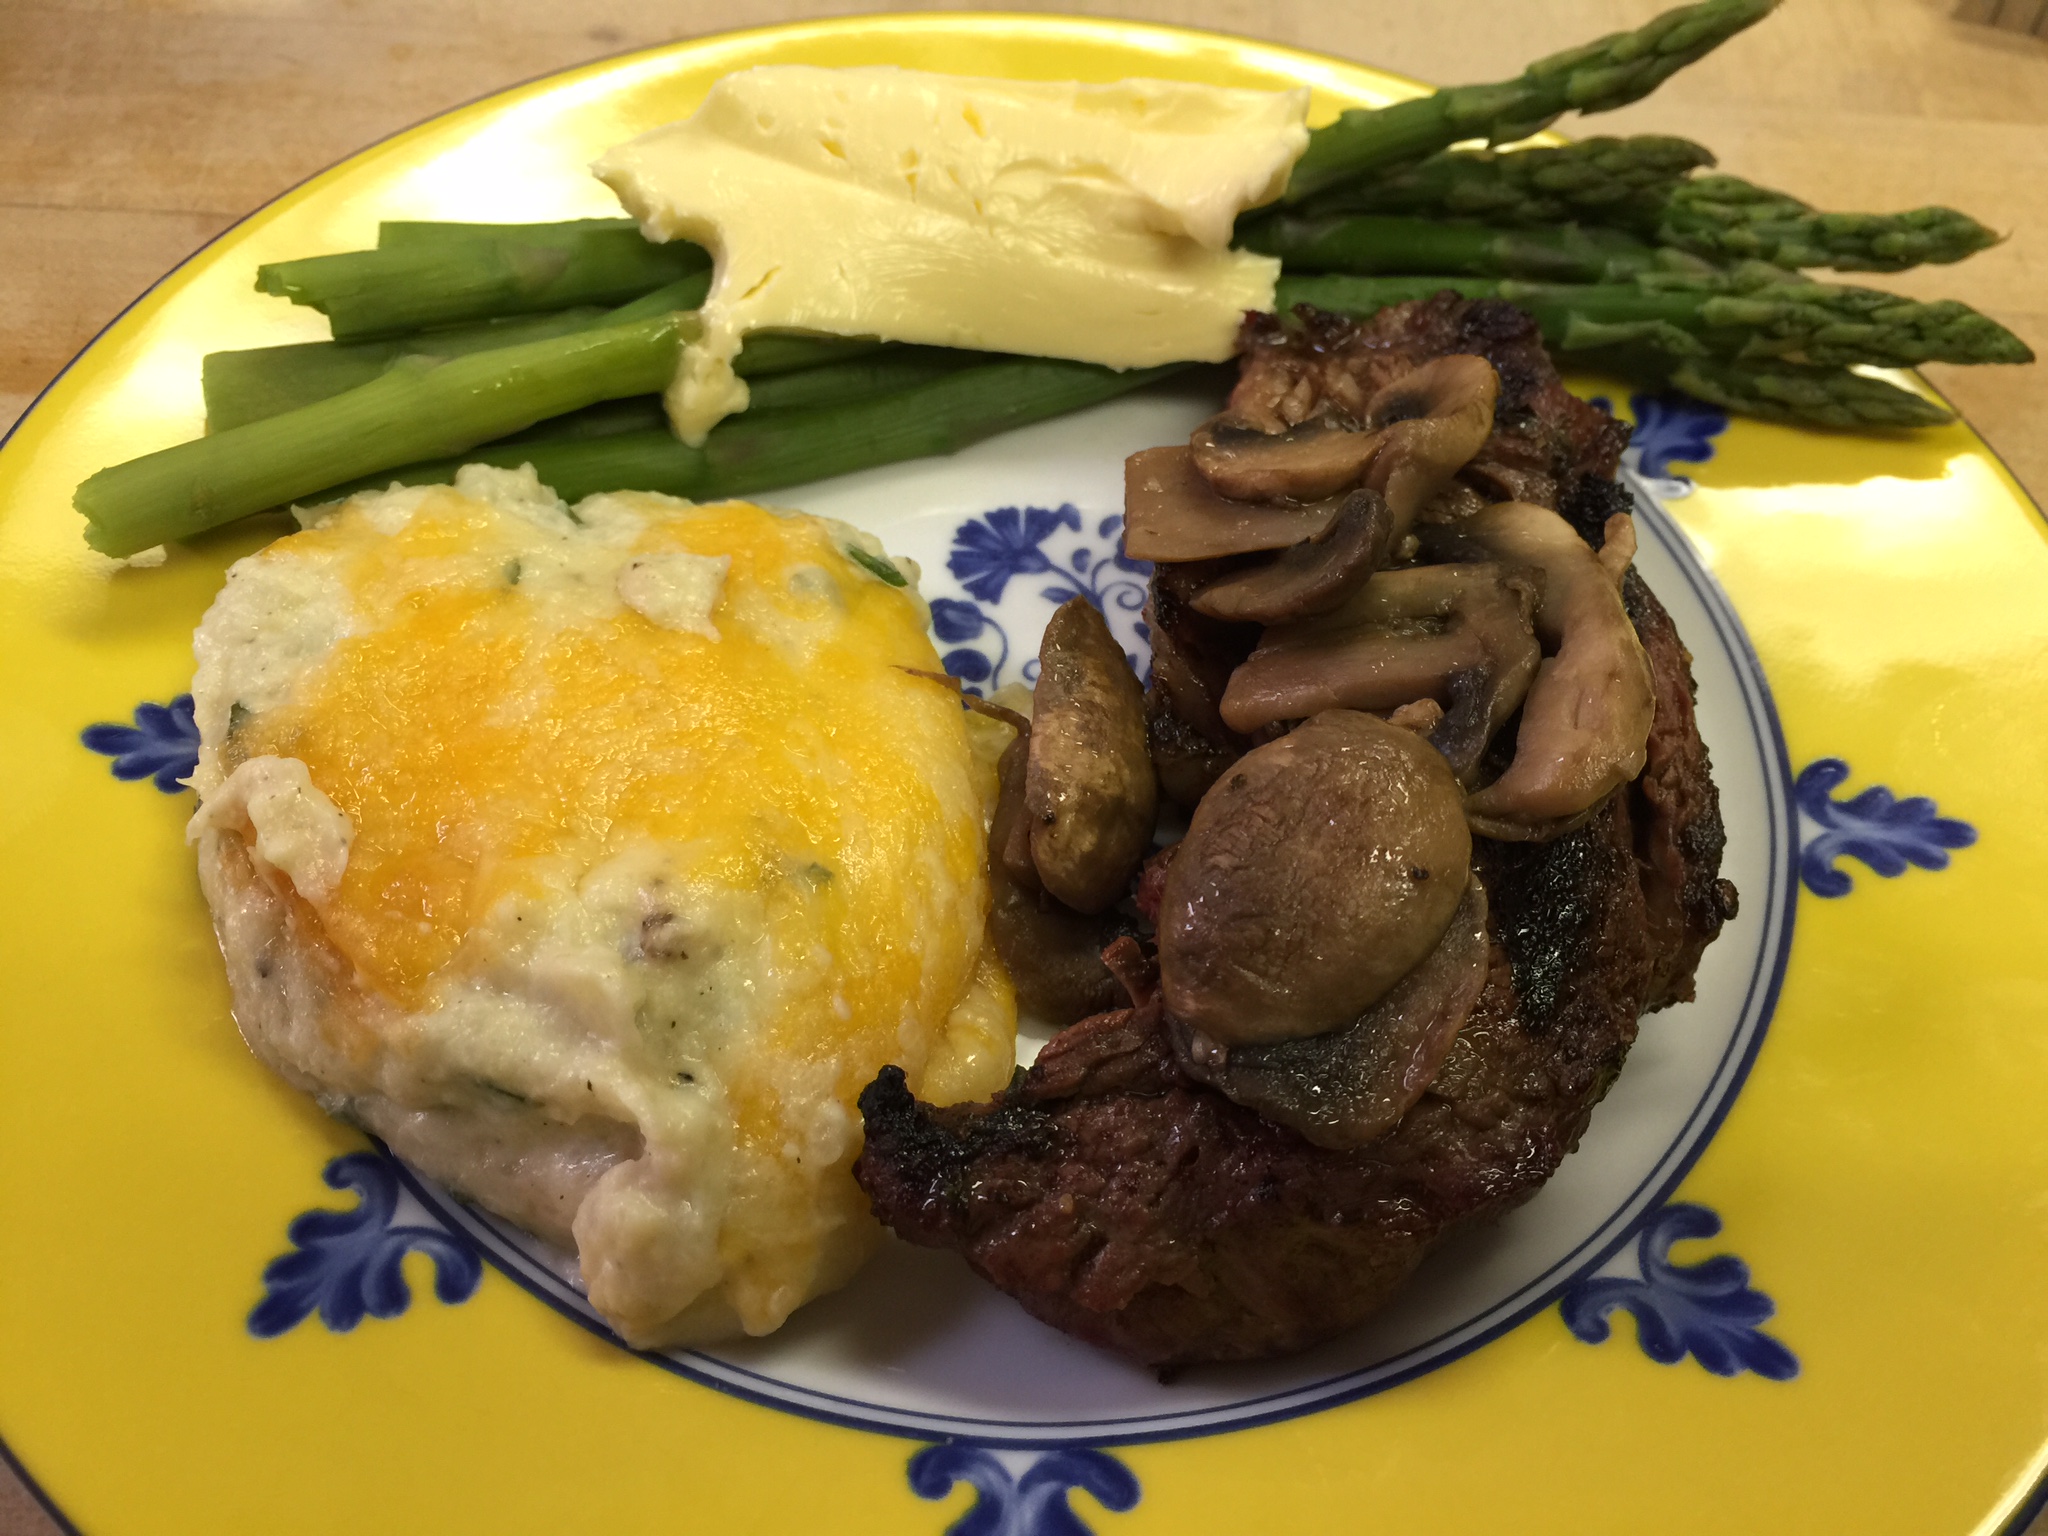
Served with grass-fed New York Strips topped with sautéed mushrooms (in Kerrygold no less), and a side of asparagus topped with Kerrygold!
Every plate was clean, and every face had a smile!
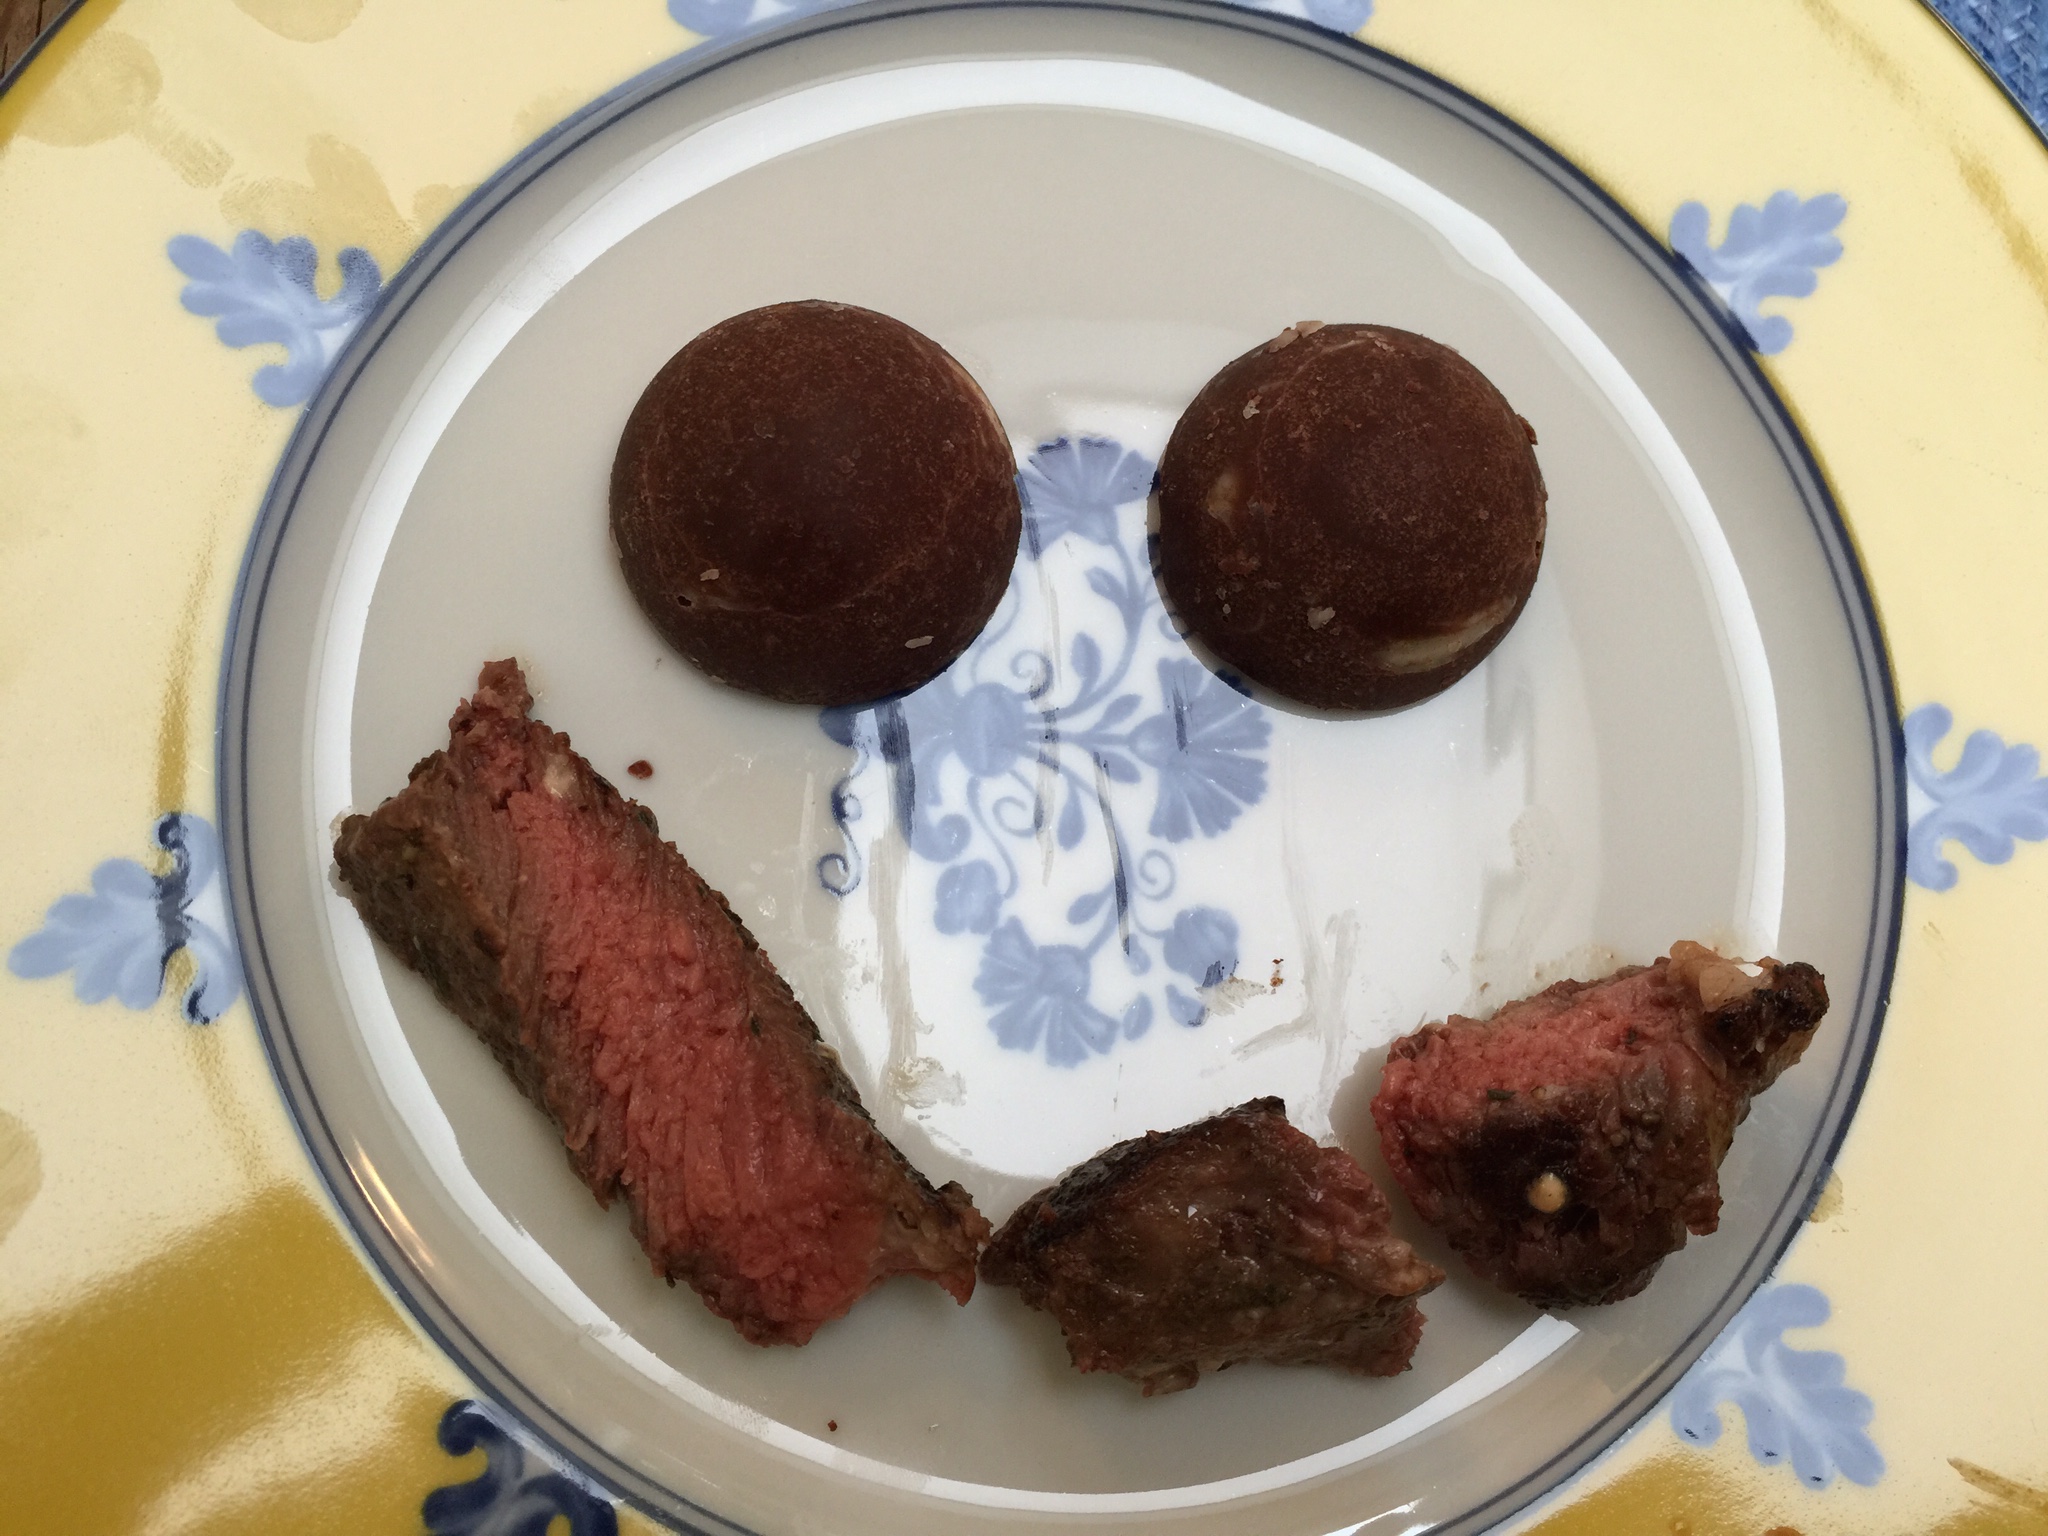
So my sweet 8 year boy (the middle child) wanted me to share his dessert with you tonight! He was very proud of his extra helping of steak and his two dark chocolate-coconut fat bombs (posted last week) that he used to make a smiley face! He said, “This will show your viewers how happy I am right now!” So, how could I refuse? Here is Colton’s sugar-free dessert!
This is super easy, and so delicious anyone in your family will love it! Even my picky 4 year old will at least eat out the stuffing!
Ingredients:
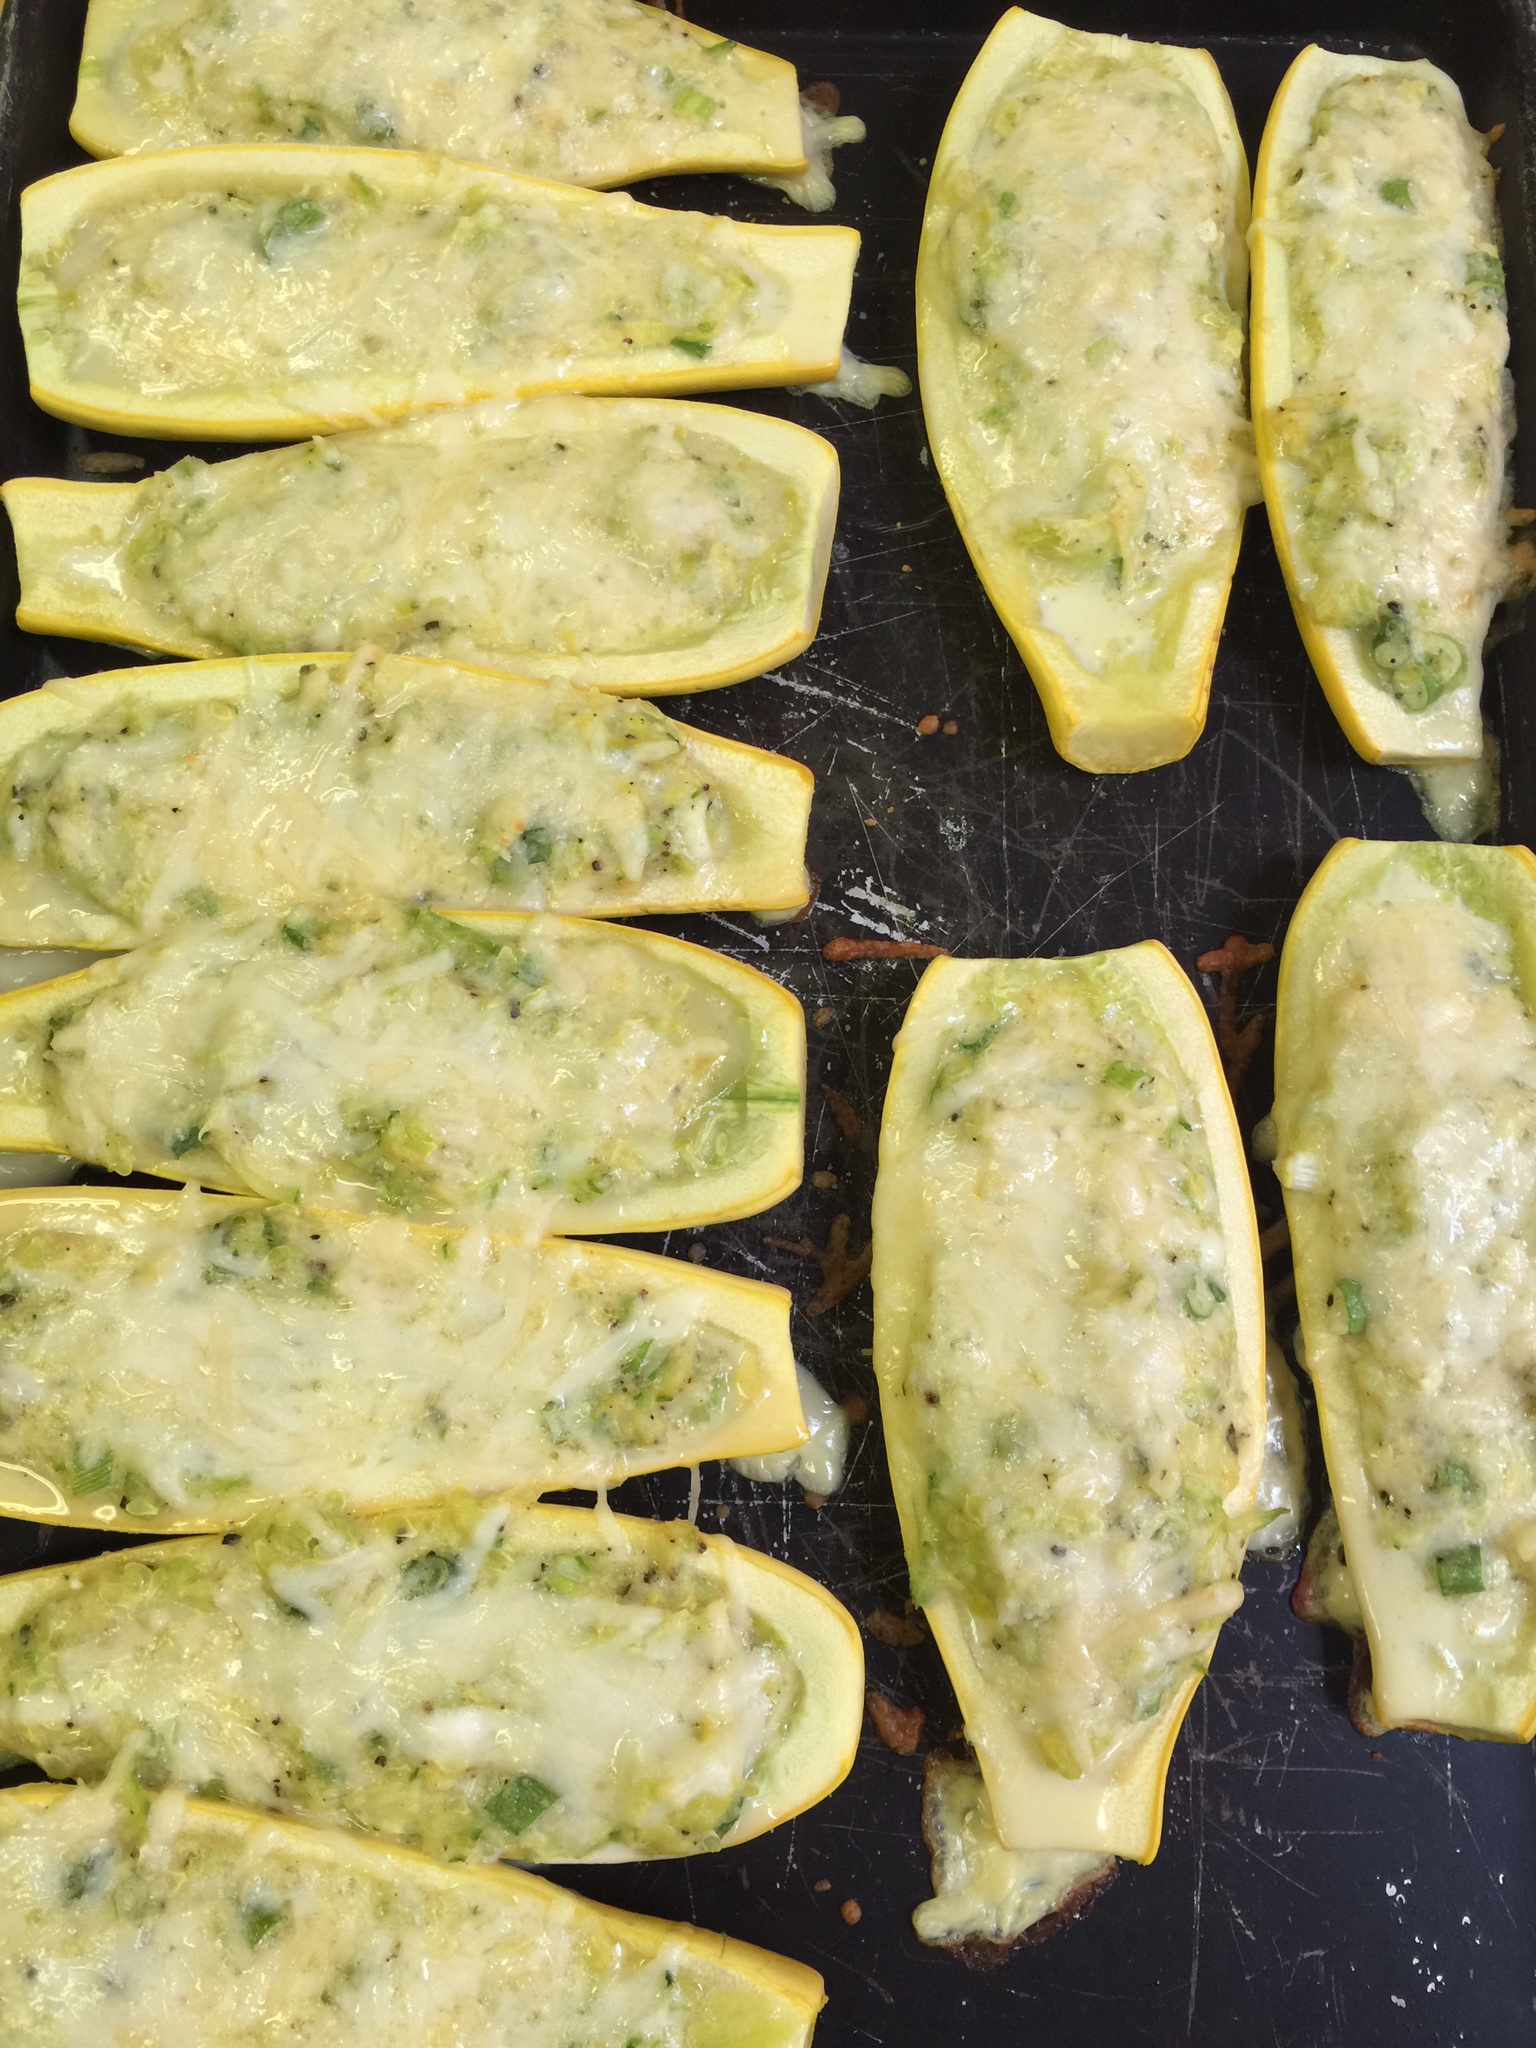
5 yellow (summer) squash
1 zucchini squash, steamed, cooked and diced
2 eggs
3/4 cup Parmesan cheese + additional to top squash
1/3 cup melted butter + 2 Tbsp (not melted)
1 bunch green onion
4 Tbsp almond flour
1 tsp oregano
1 tsp garlic powder
Salt & pepper to taste
Instructions:
Start with your yellow squash by washing and cutting off the ends. Then cut in half lengthwise.
One squash = two servings.
Lay them cut-side up in a glass pyrex baking dish. Fill the bottom of the dish with water so you can steam the squash until softened.
Microwave on high for 4 minutes. Check them after this time…if they are still hard in the middle, then keep cooking them on high in 2 minute increments until they are soft enough to scoop, but not mushy.
When they are tender, remove them and let them cool a bit or you will burn off the tips of your fingers. Maybe not, but it will hurt!
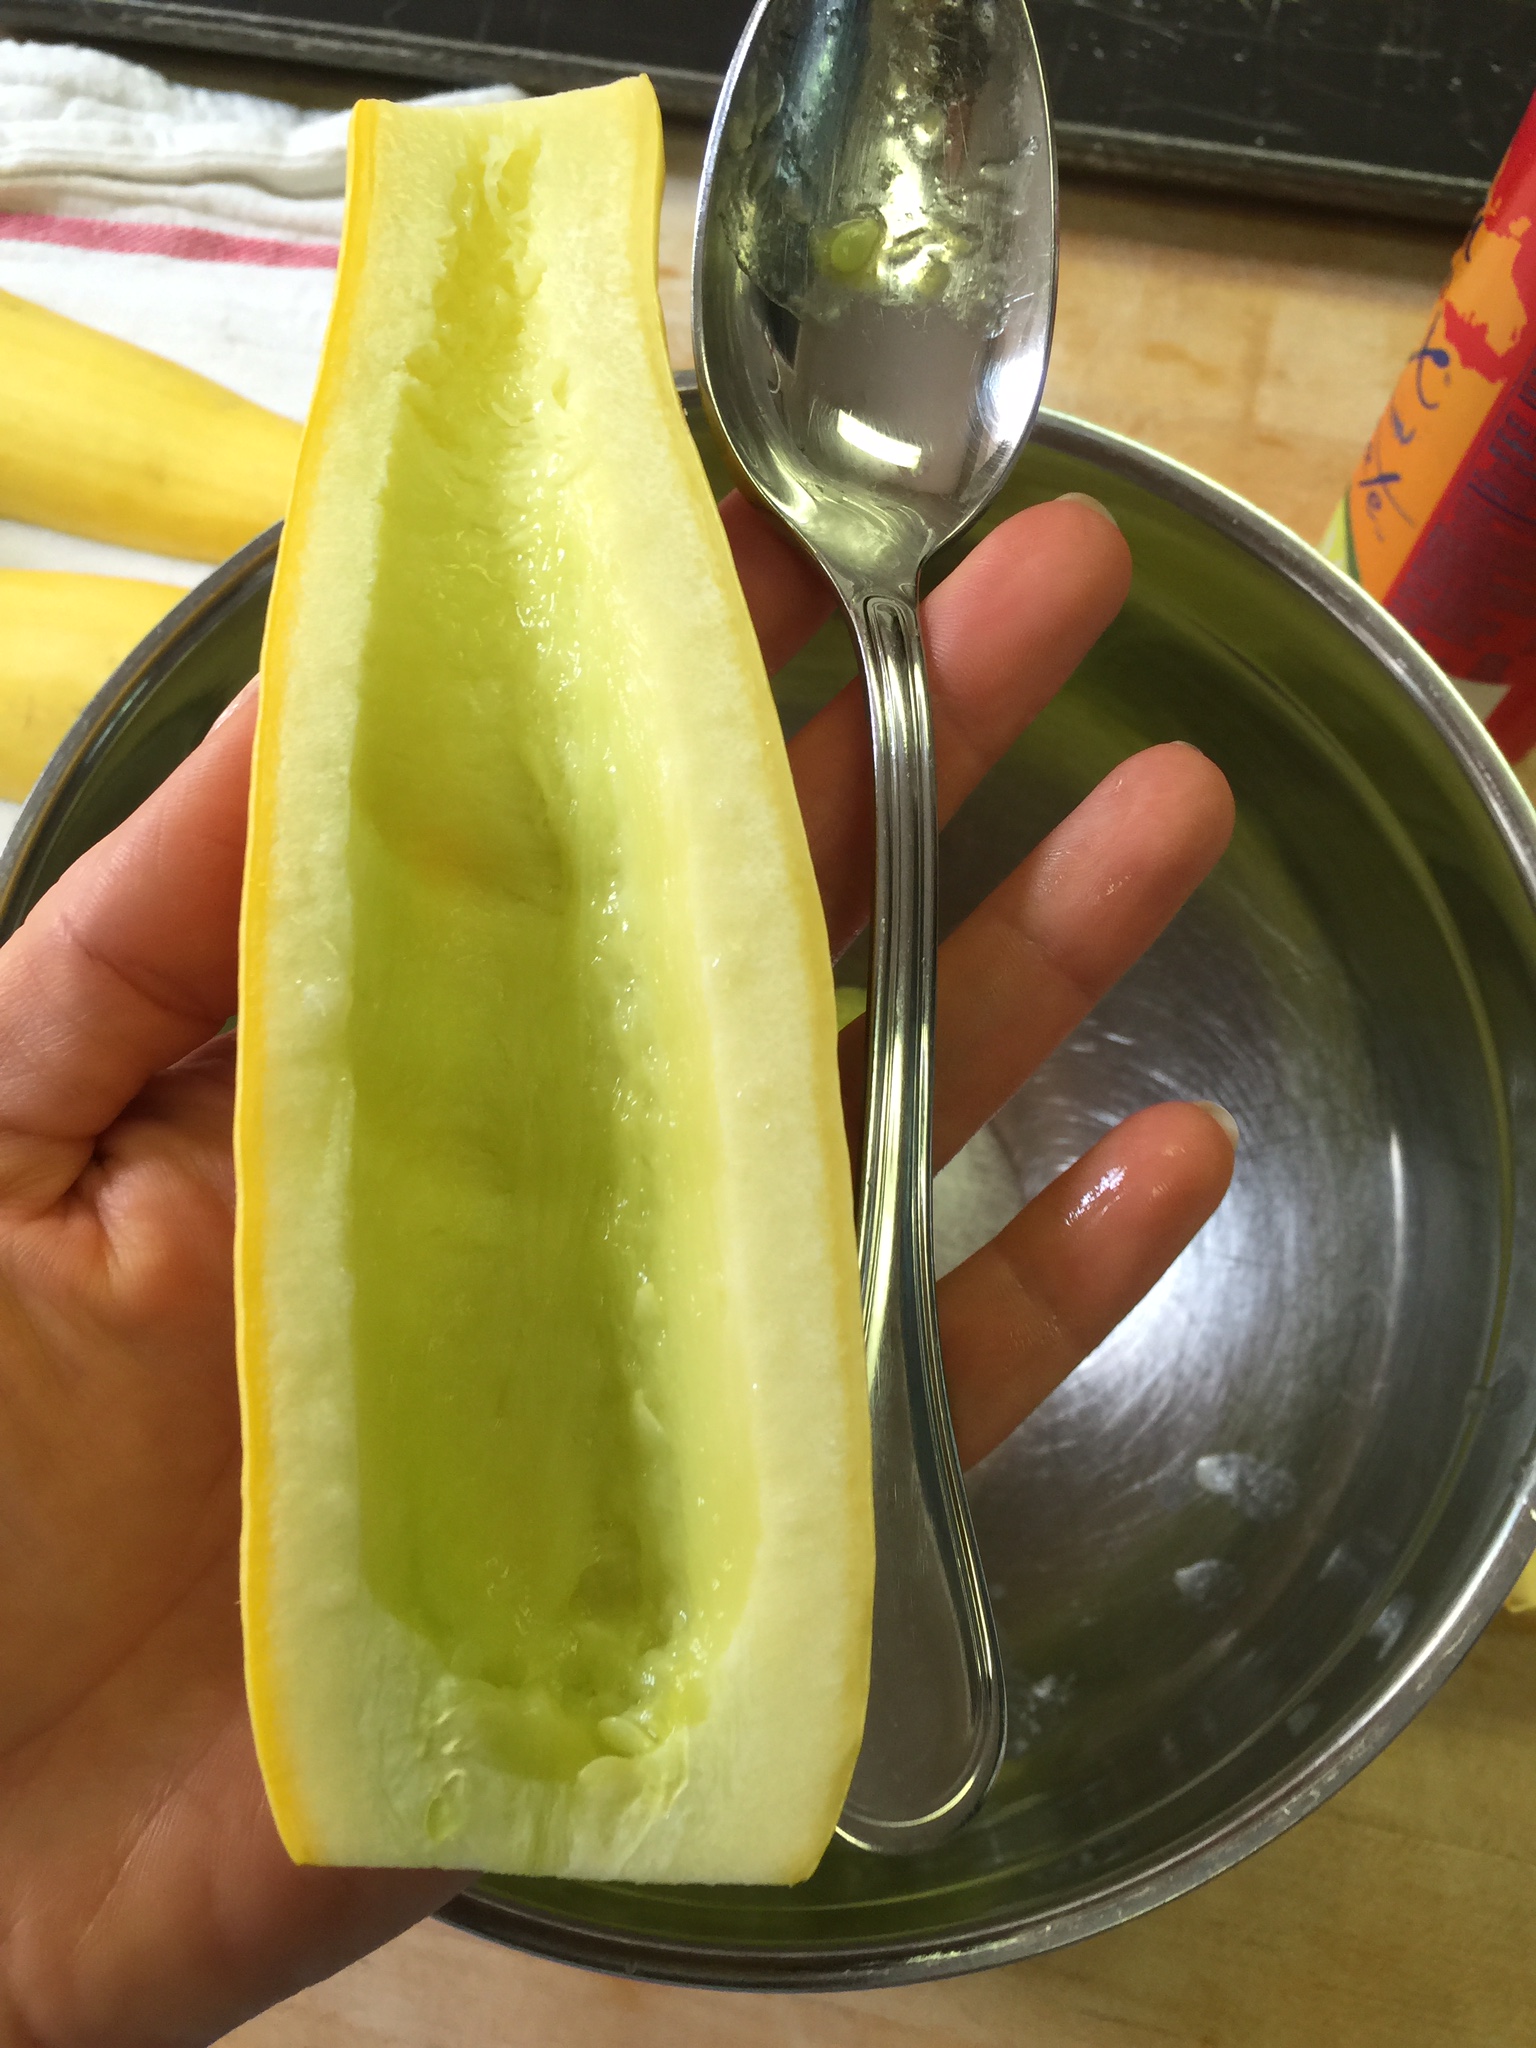
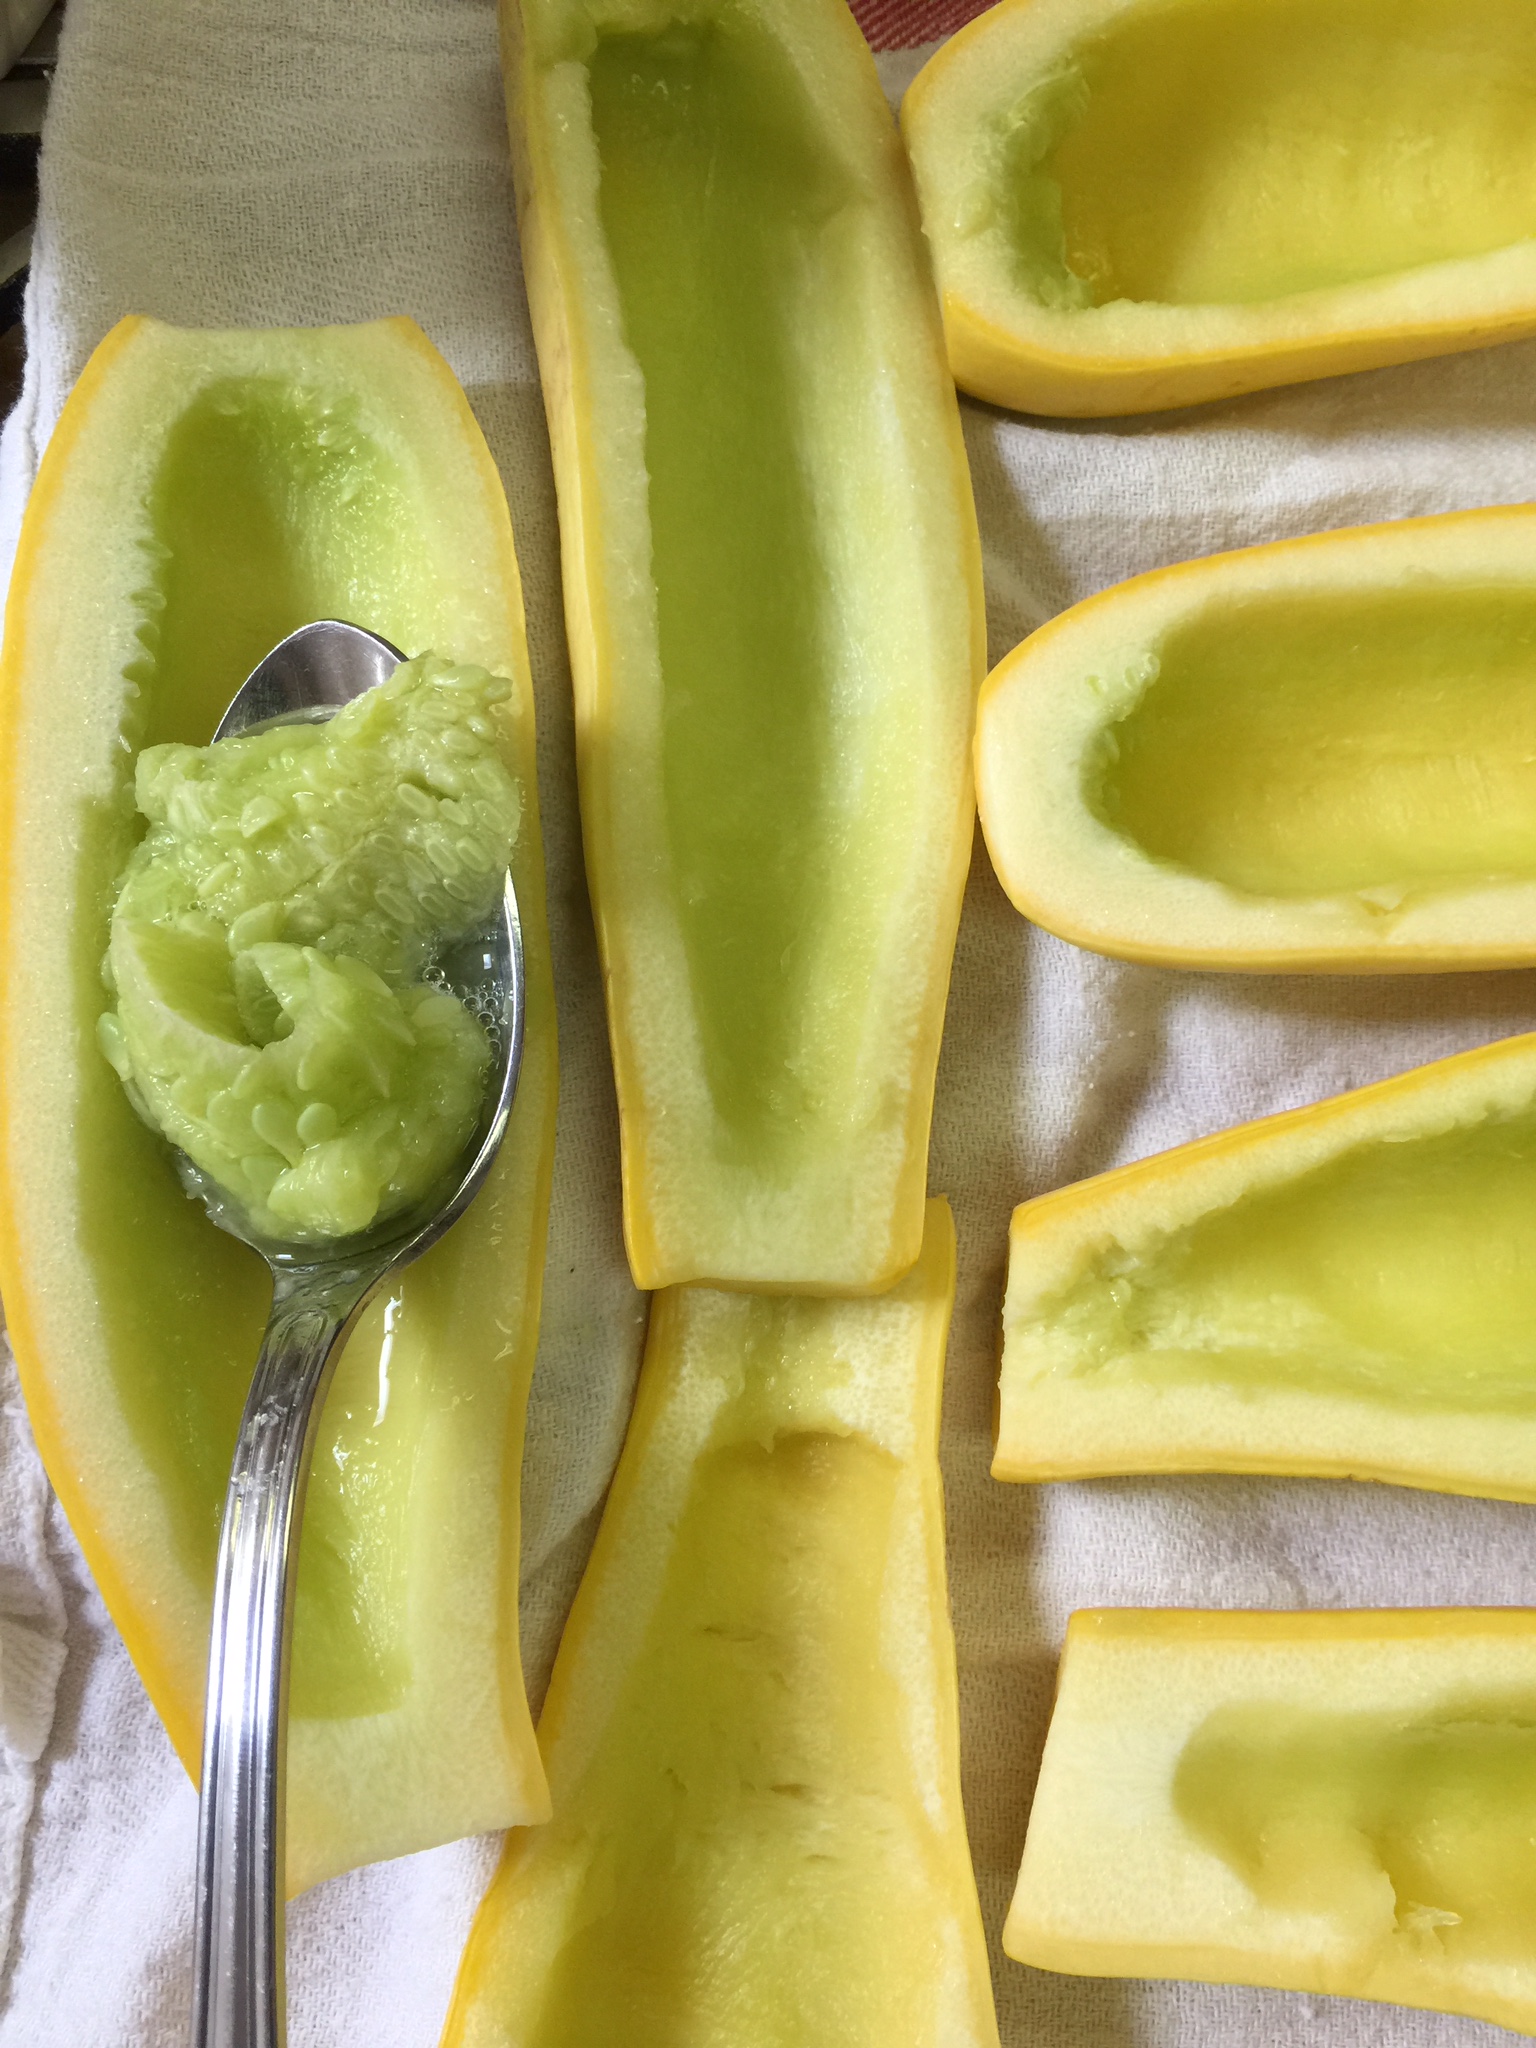
When they are cool enough to handle, use a soup spoon, and start hulling out the inside of the squash. Hull all but one half – leaving this one to chop finely. Be careful not to poke all the way through. Place the squash you have removed into a mixing bowl, and your now empty “boats” onto a cookie sheet.
Finely chop one half of one yellow squash into small bits, along with one zucchini squash that you have also steamed and finely diced. Now, you will see a lot of water in the bottom of the bowl. Try to drain as much of this as possible or it will be too runny. I press and drain 3 or 4 times. You could use a mesh colander for this also. It is okay to be moist, but you don’t want standing water at the bottom of the bowl.
Once most of the water is removed, I use a sharp knife and run it through the squash in the bowl to break up the membranes in the squash. This is not an exact science. Just break up the larger pieces that you scooped out.
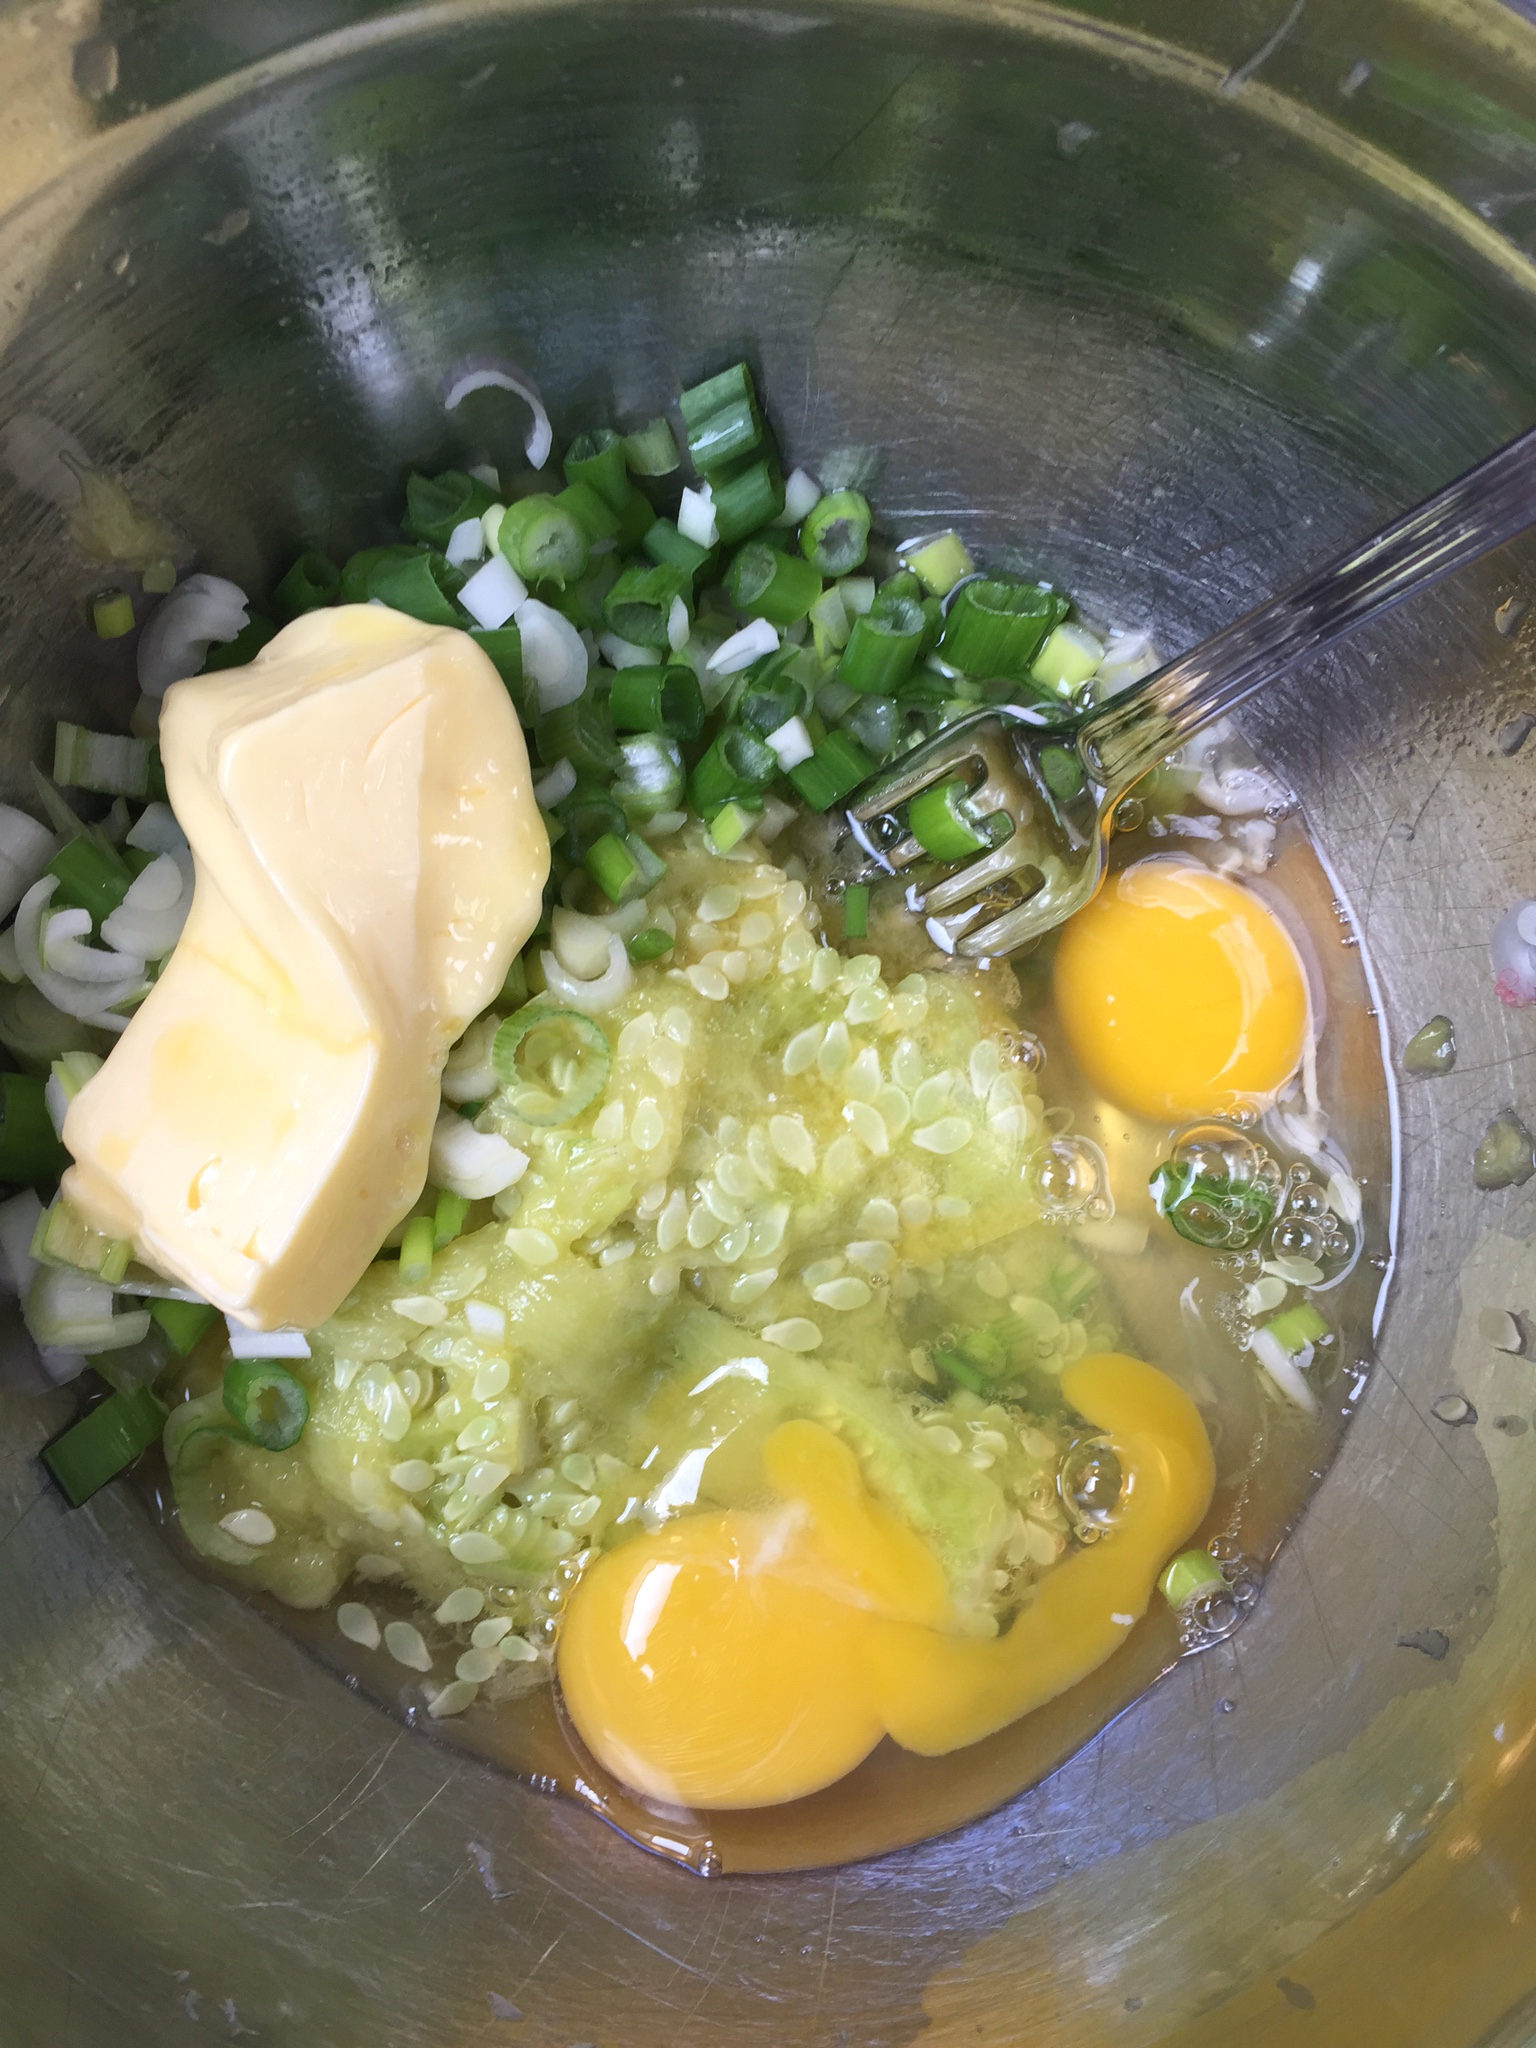
Add your eggs, 3/4 cup Parmesan cheese, 1/3 cup melted butter, finely chopped green onion with some of the green tops included. Then add 2 Tbsp of almond flour and your seasonings. Mix well!
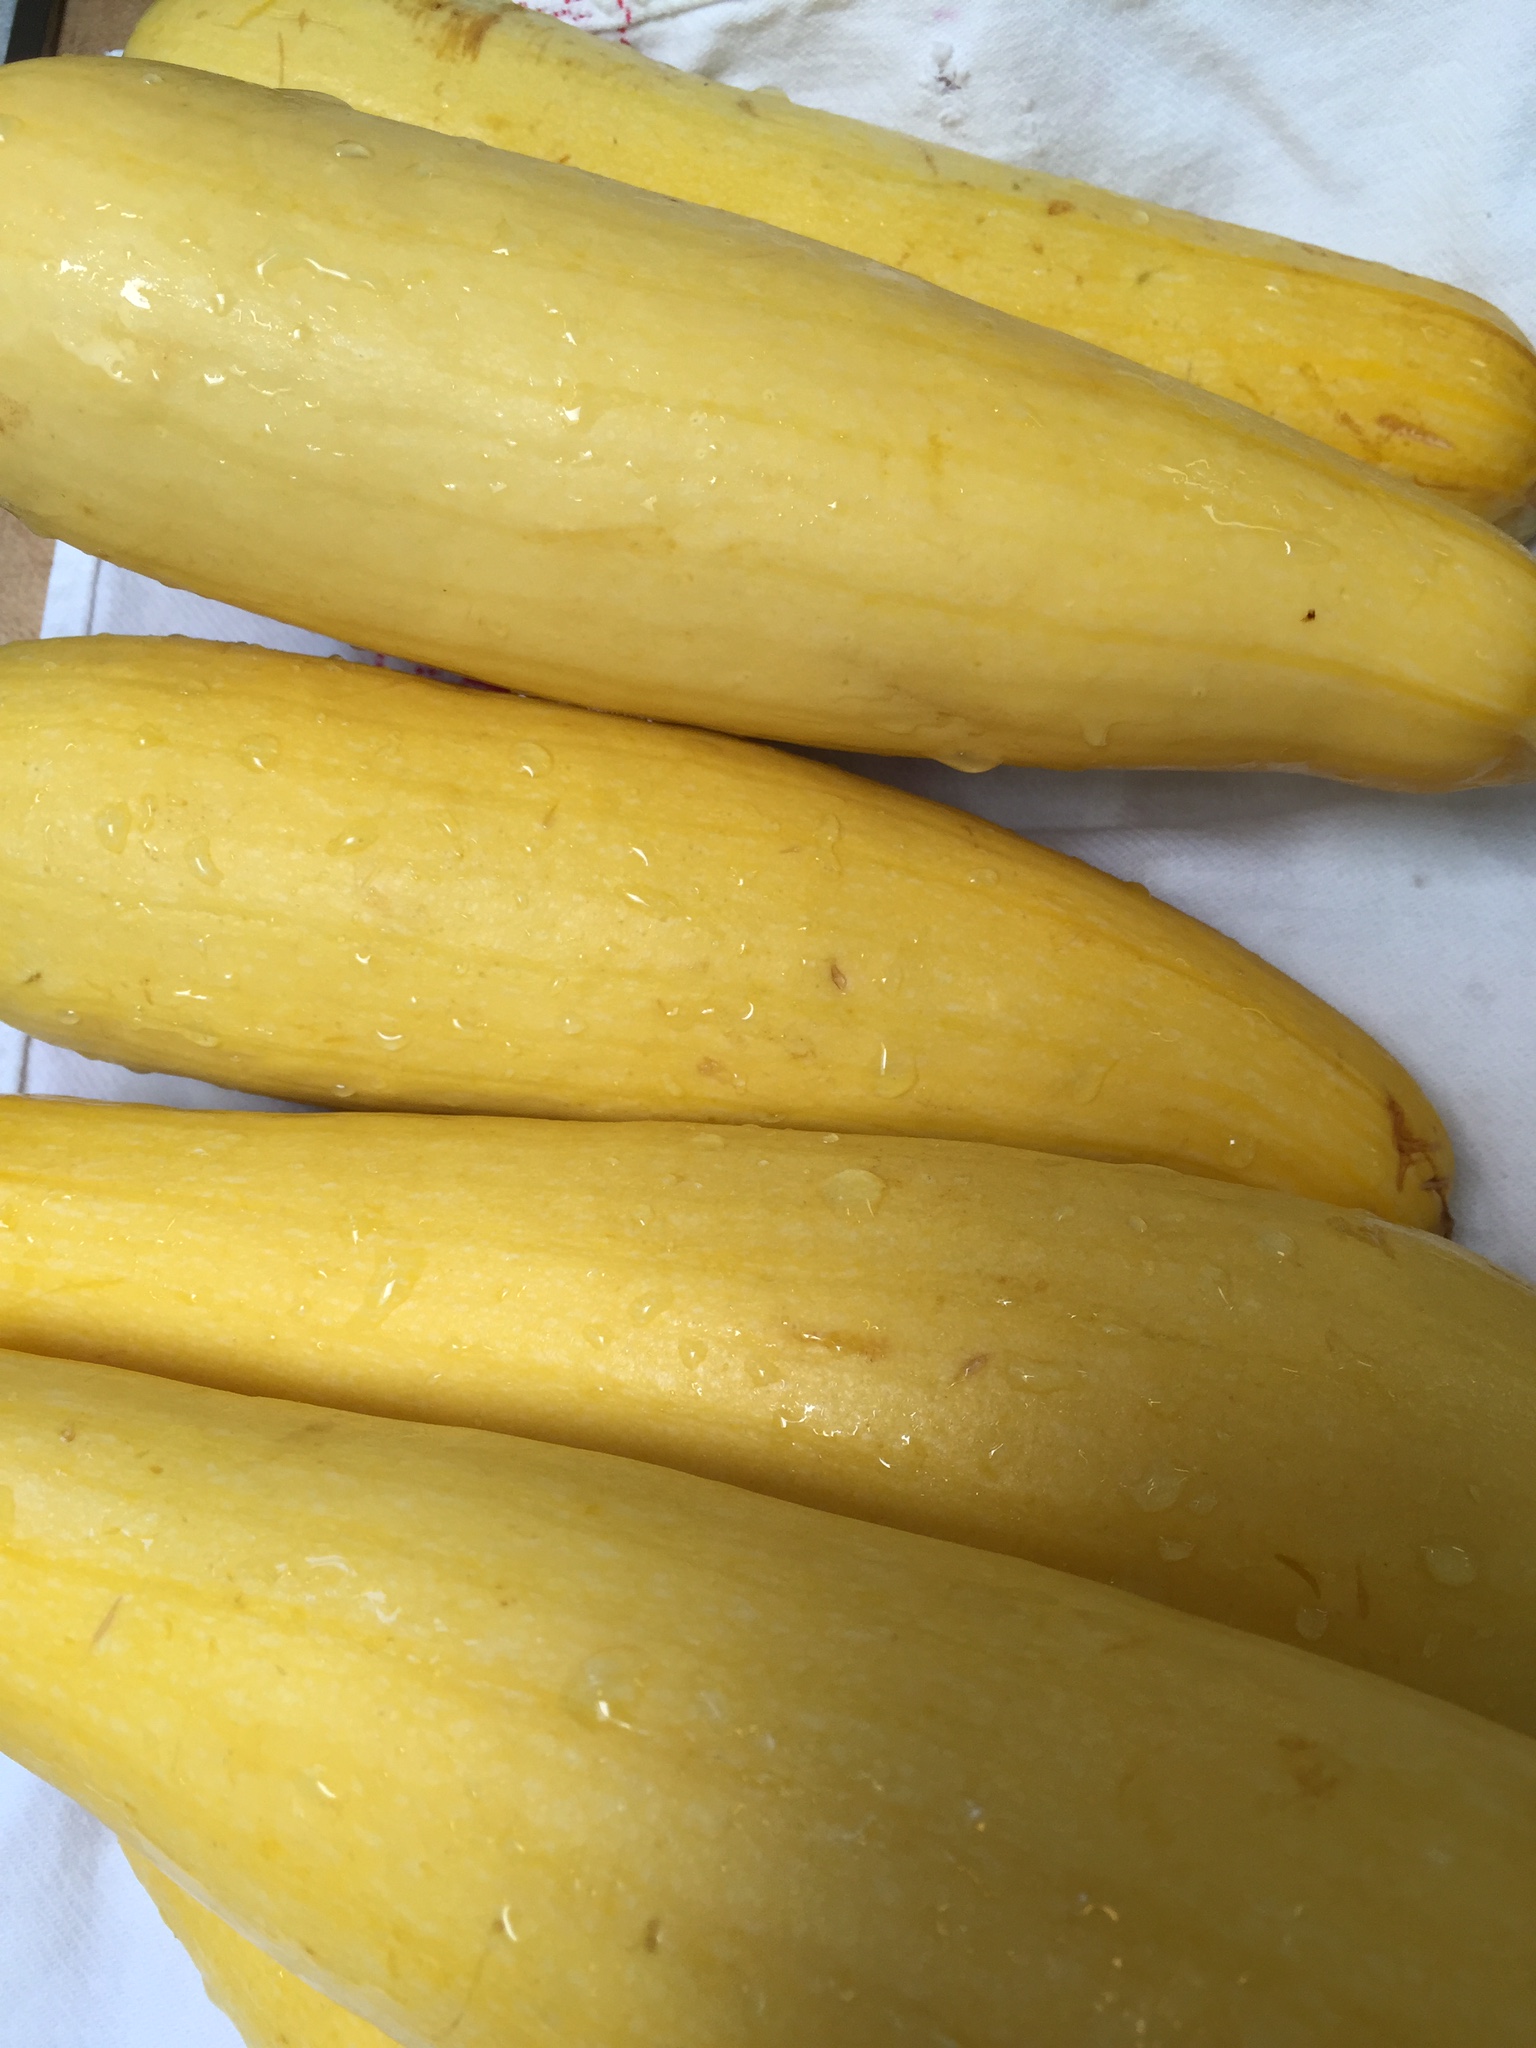
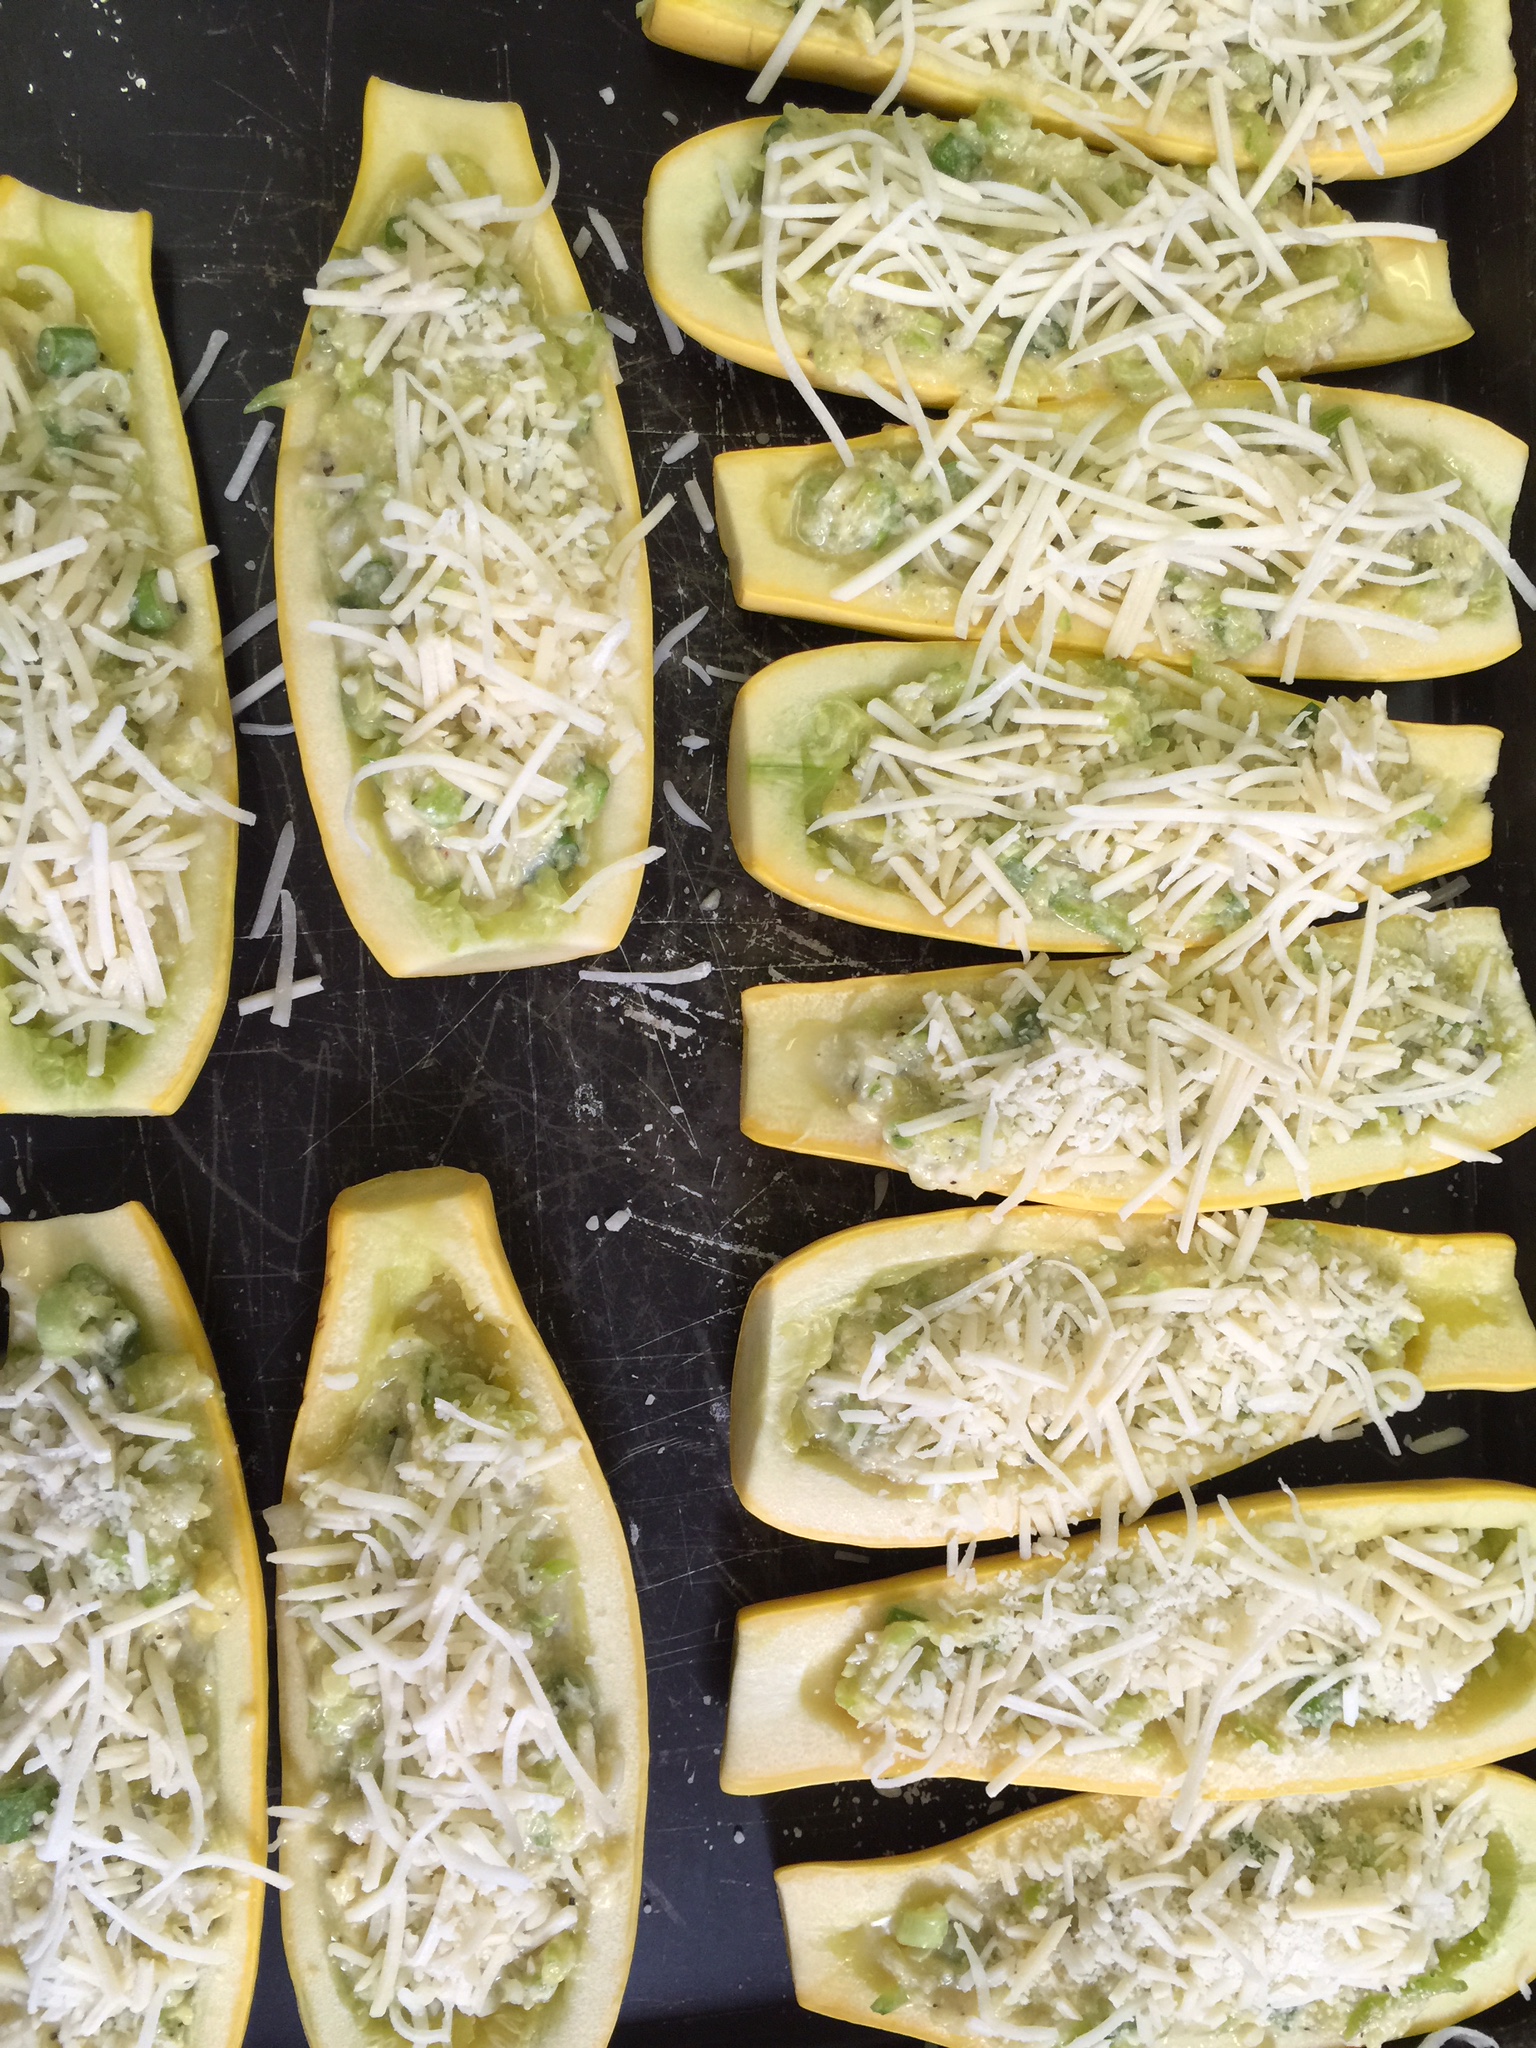
Use the mixture to fill your squash “boats” so it is slightly heaping.
Lightly sprinkle with the additional 2 Tbsp of almond flour, put a pat of additional butter on top and finish with as much Parmesan cheese as you desire. I have also topped with mozzarella cheese as well. Both are delicious!
Bake in the oven for 25 minutes at 350 degrees, and you have an amazing side dish!


