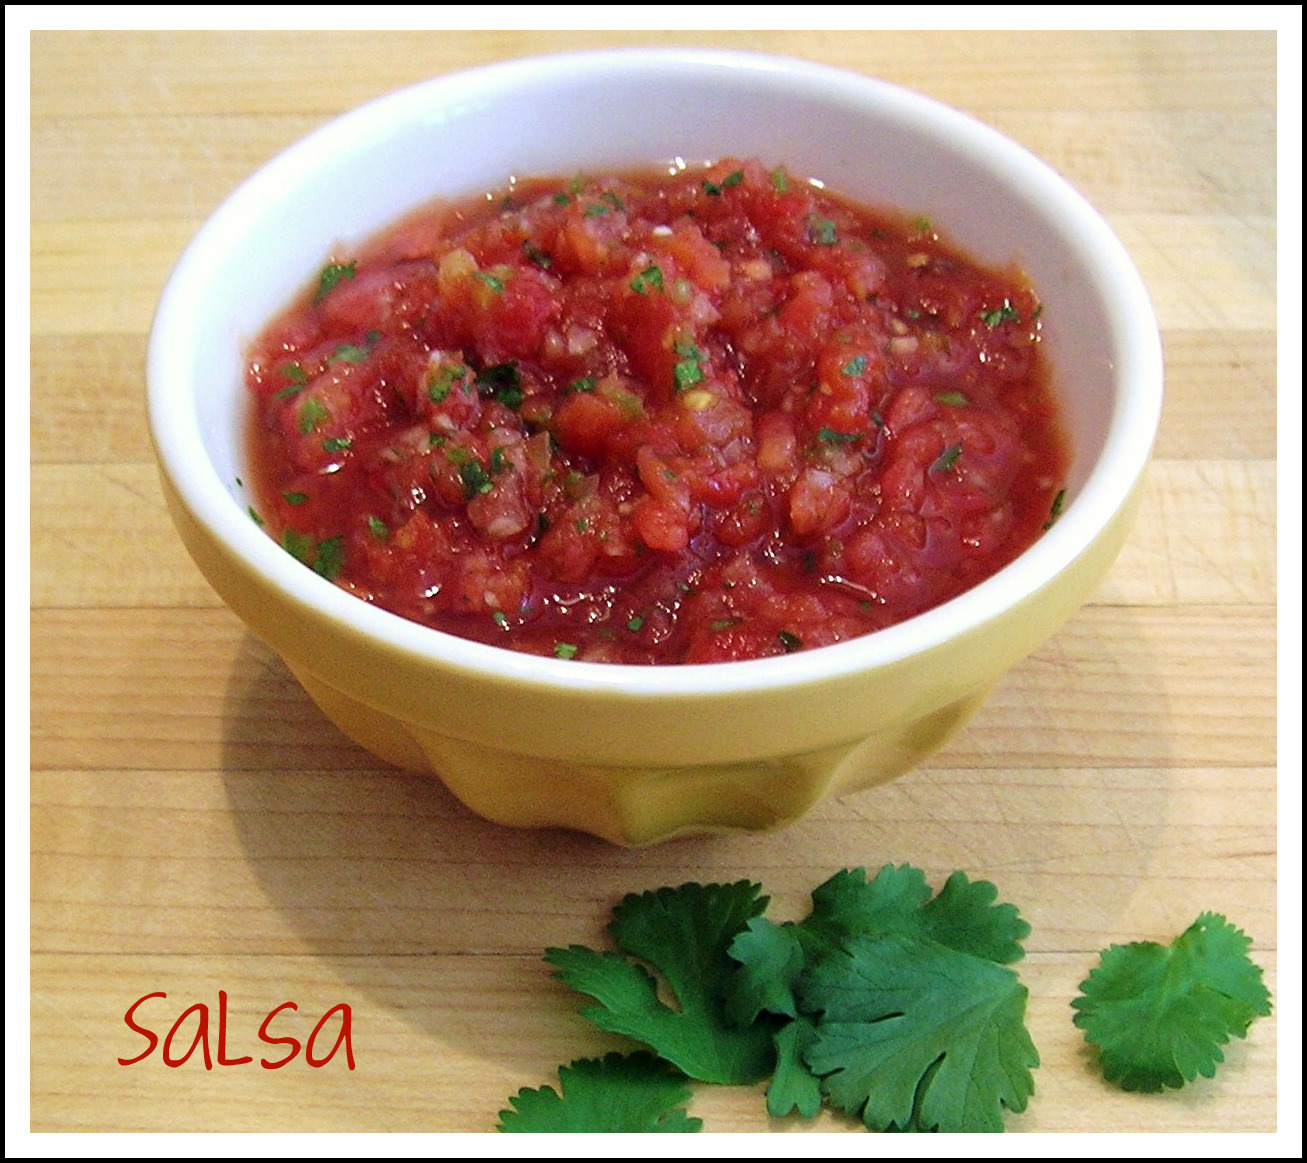
Tag Archive for salsa

Let’s Salsa!

a85563ad4817904a5e806f55e241dfb4

Salsa!

Not just a favorite in Texas, but a STAPLE!

We eat salsa on everything!  It adds an extra punch to eggs in the morning, salads at lunch, guacamole, and many other dishes throughout the day.  The mason jar was running on empty, and my husband just didn’t know what to do!  Tragedy, I tell you!

I whipped some up last night in no time.  It literally takes about 15 minutes, 5 of which are active.

Everyone has their favorite way of making salsa.  I have tried steaming the tomatoes and peppers, sautéing them, browning them, but by far, the easiest is boiling.  I used to use a hot skillet and brown the tomatoes, peppers, and onion, but it would smoke up the house to the point that I would have to open all the doors and windows to air out.  So boiling it is!  This is my newest way, and I’m sticking to it!

I don’t have a specific amount of anything, but I can tell you what I did.  It is a little different each time because the heat of peppers varies so greatly.  Always start small and add in small increments.

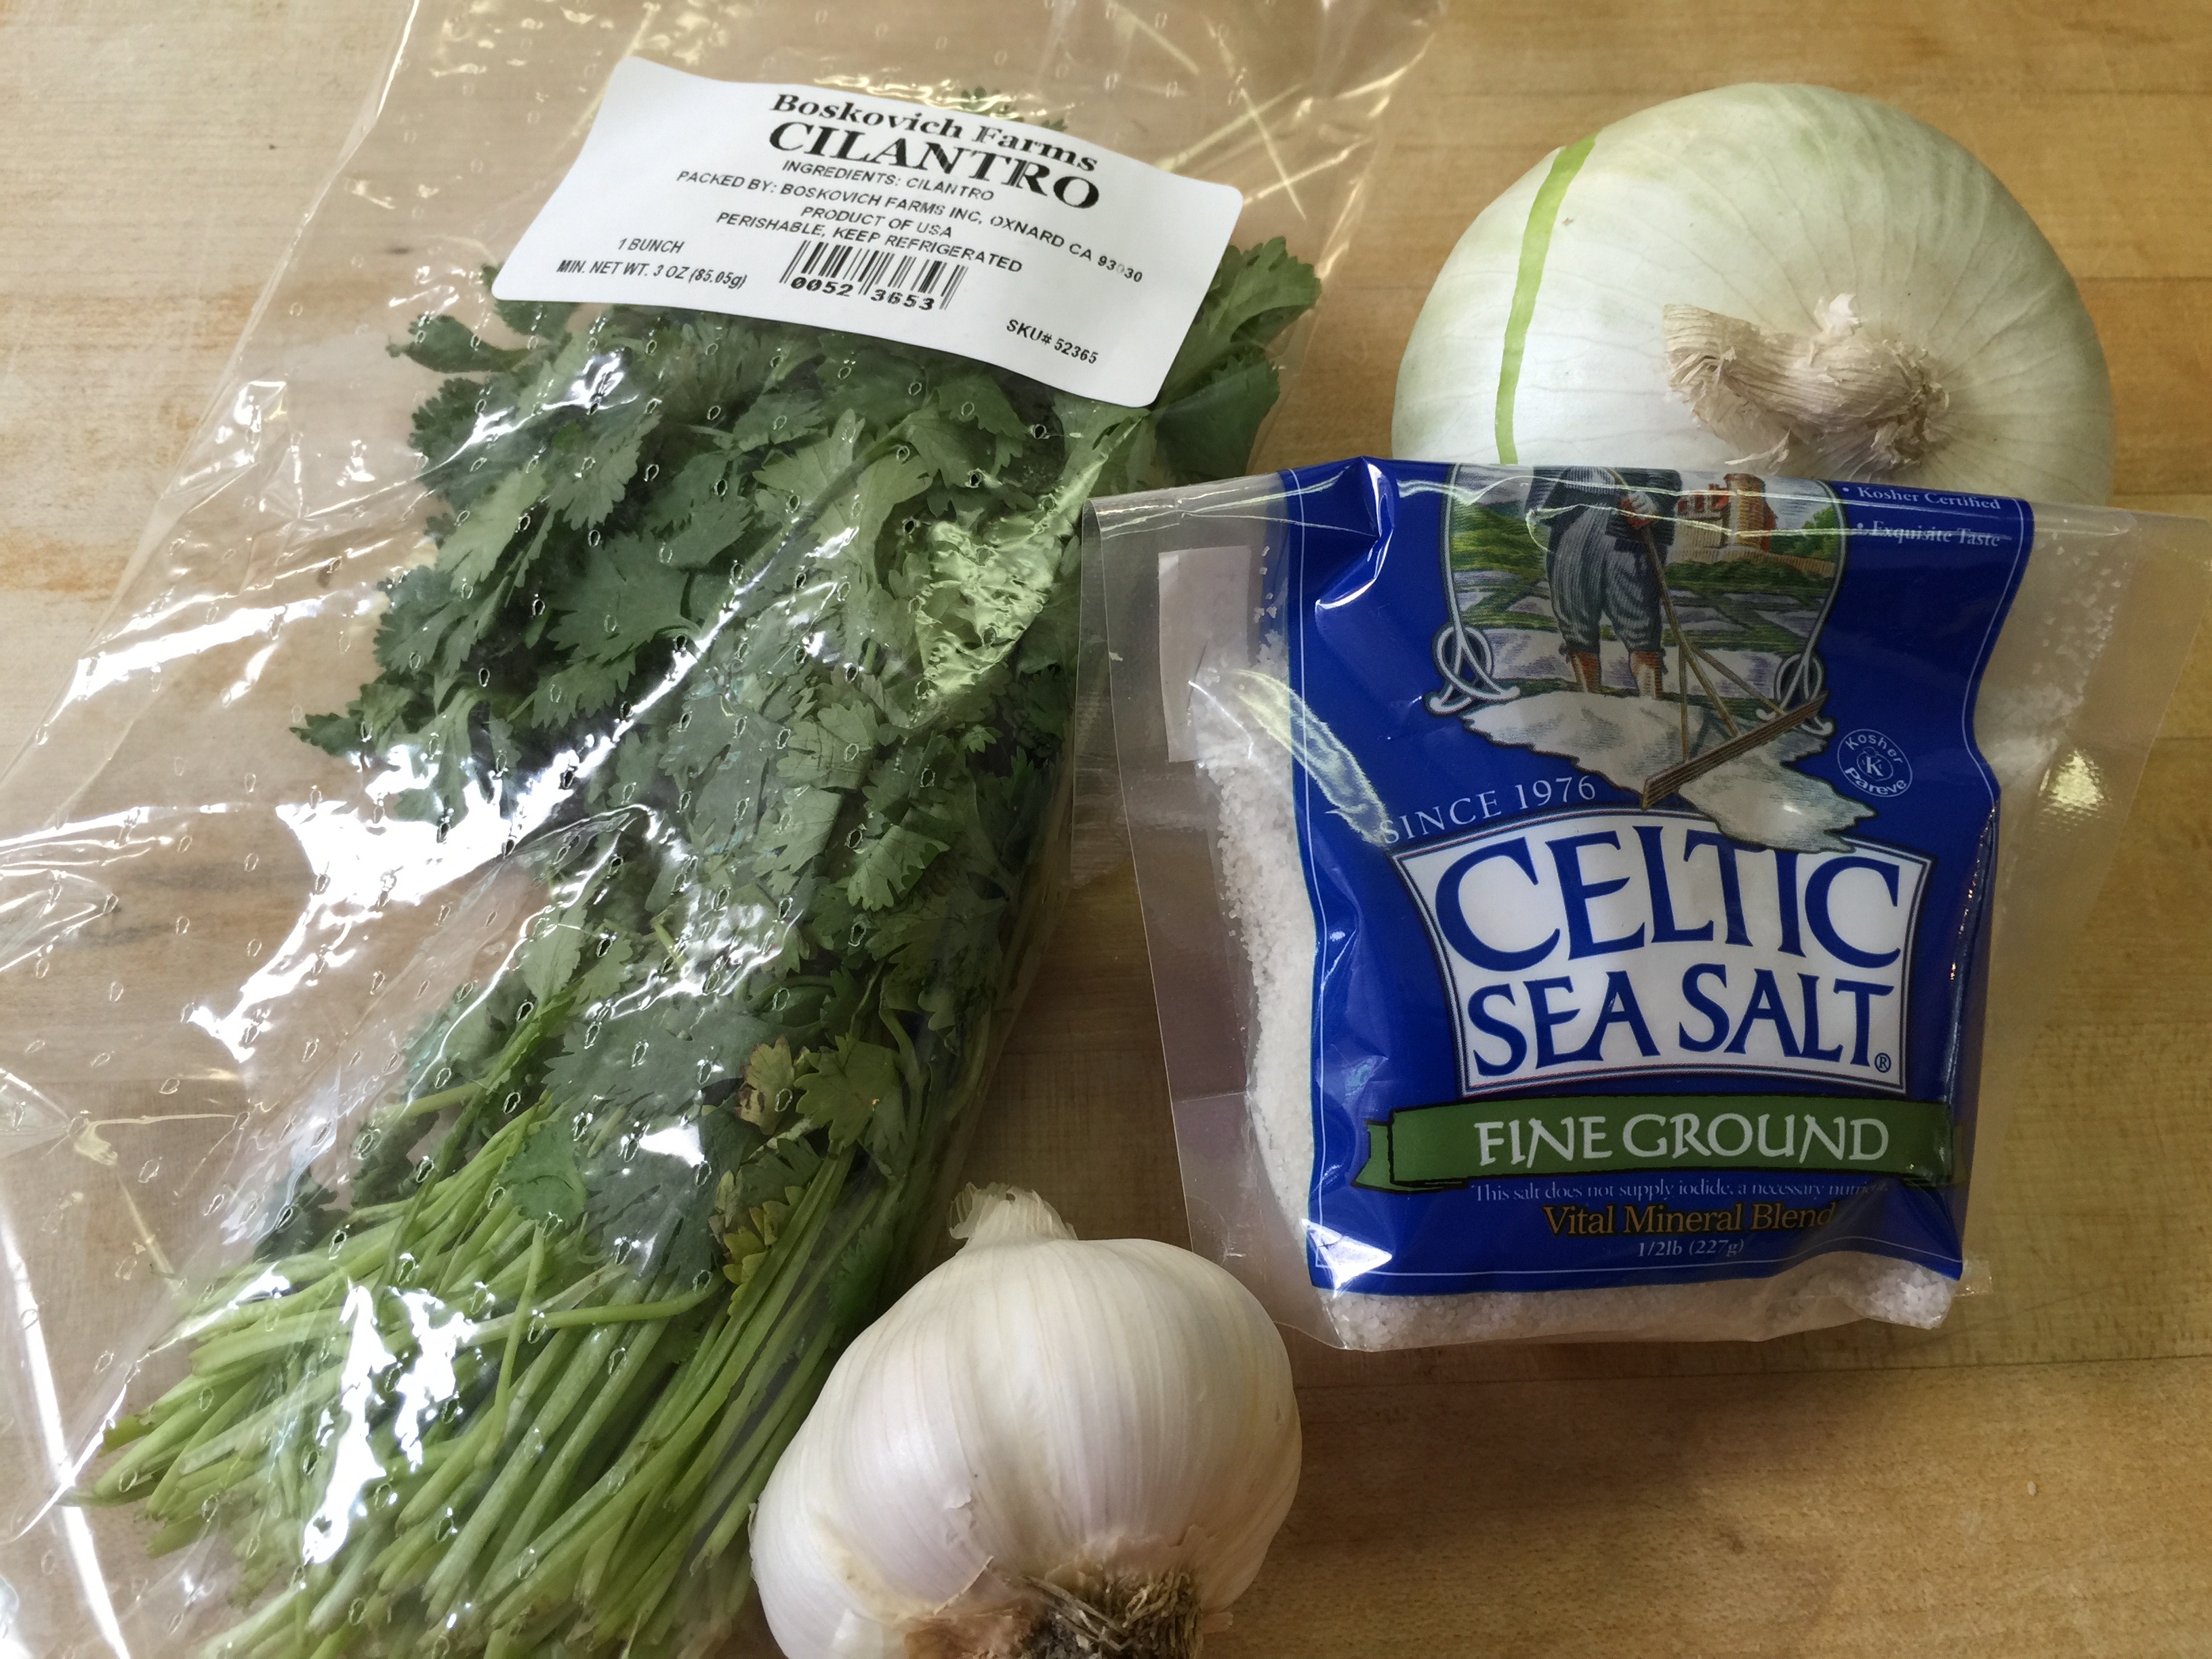
These are your basics:

Cilantro (To your liking – about 1 cup)

Onion (I used a half of an onion)

Garlic (5-6 cloves)

Celtic Salt (1 TBSP)

Jalapeño or Serrano Peppers (I only used 3)

Tomatoes (10 for this batch)


IMG_3231 IMG_3230


Directions:

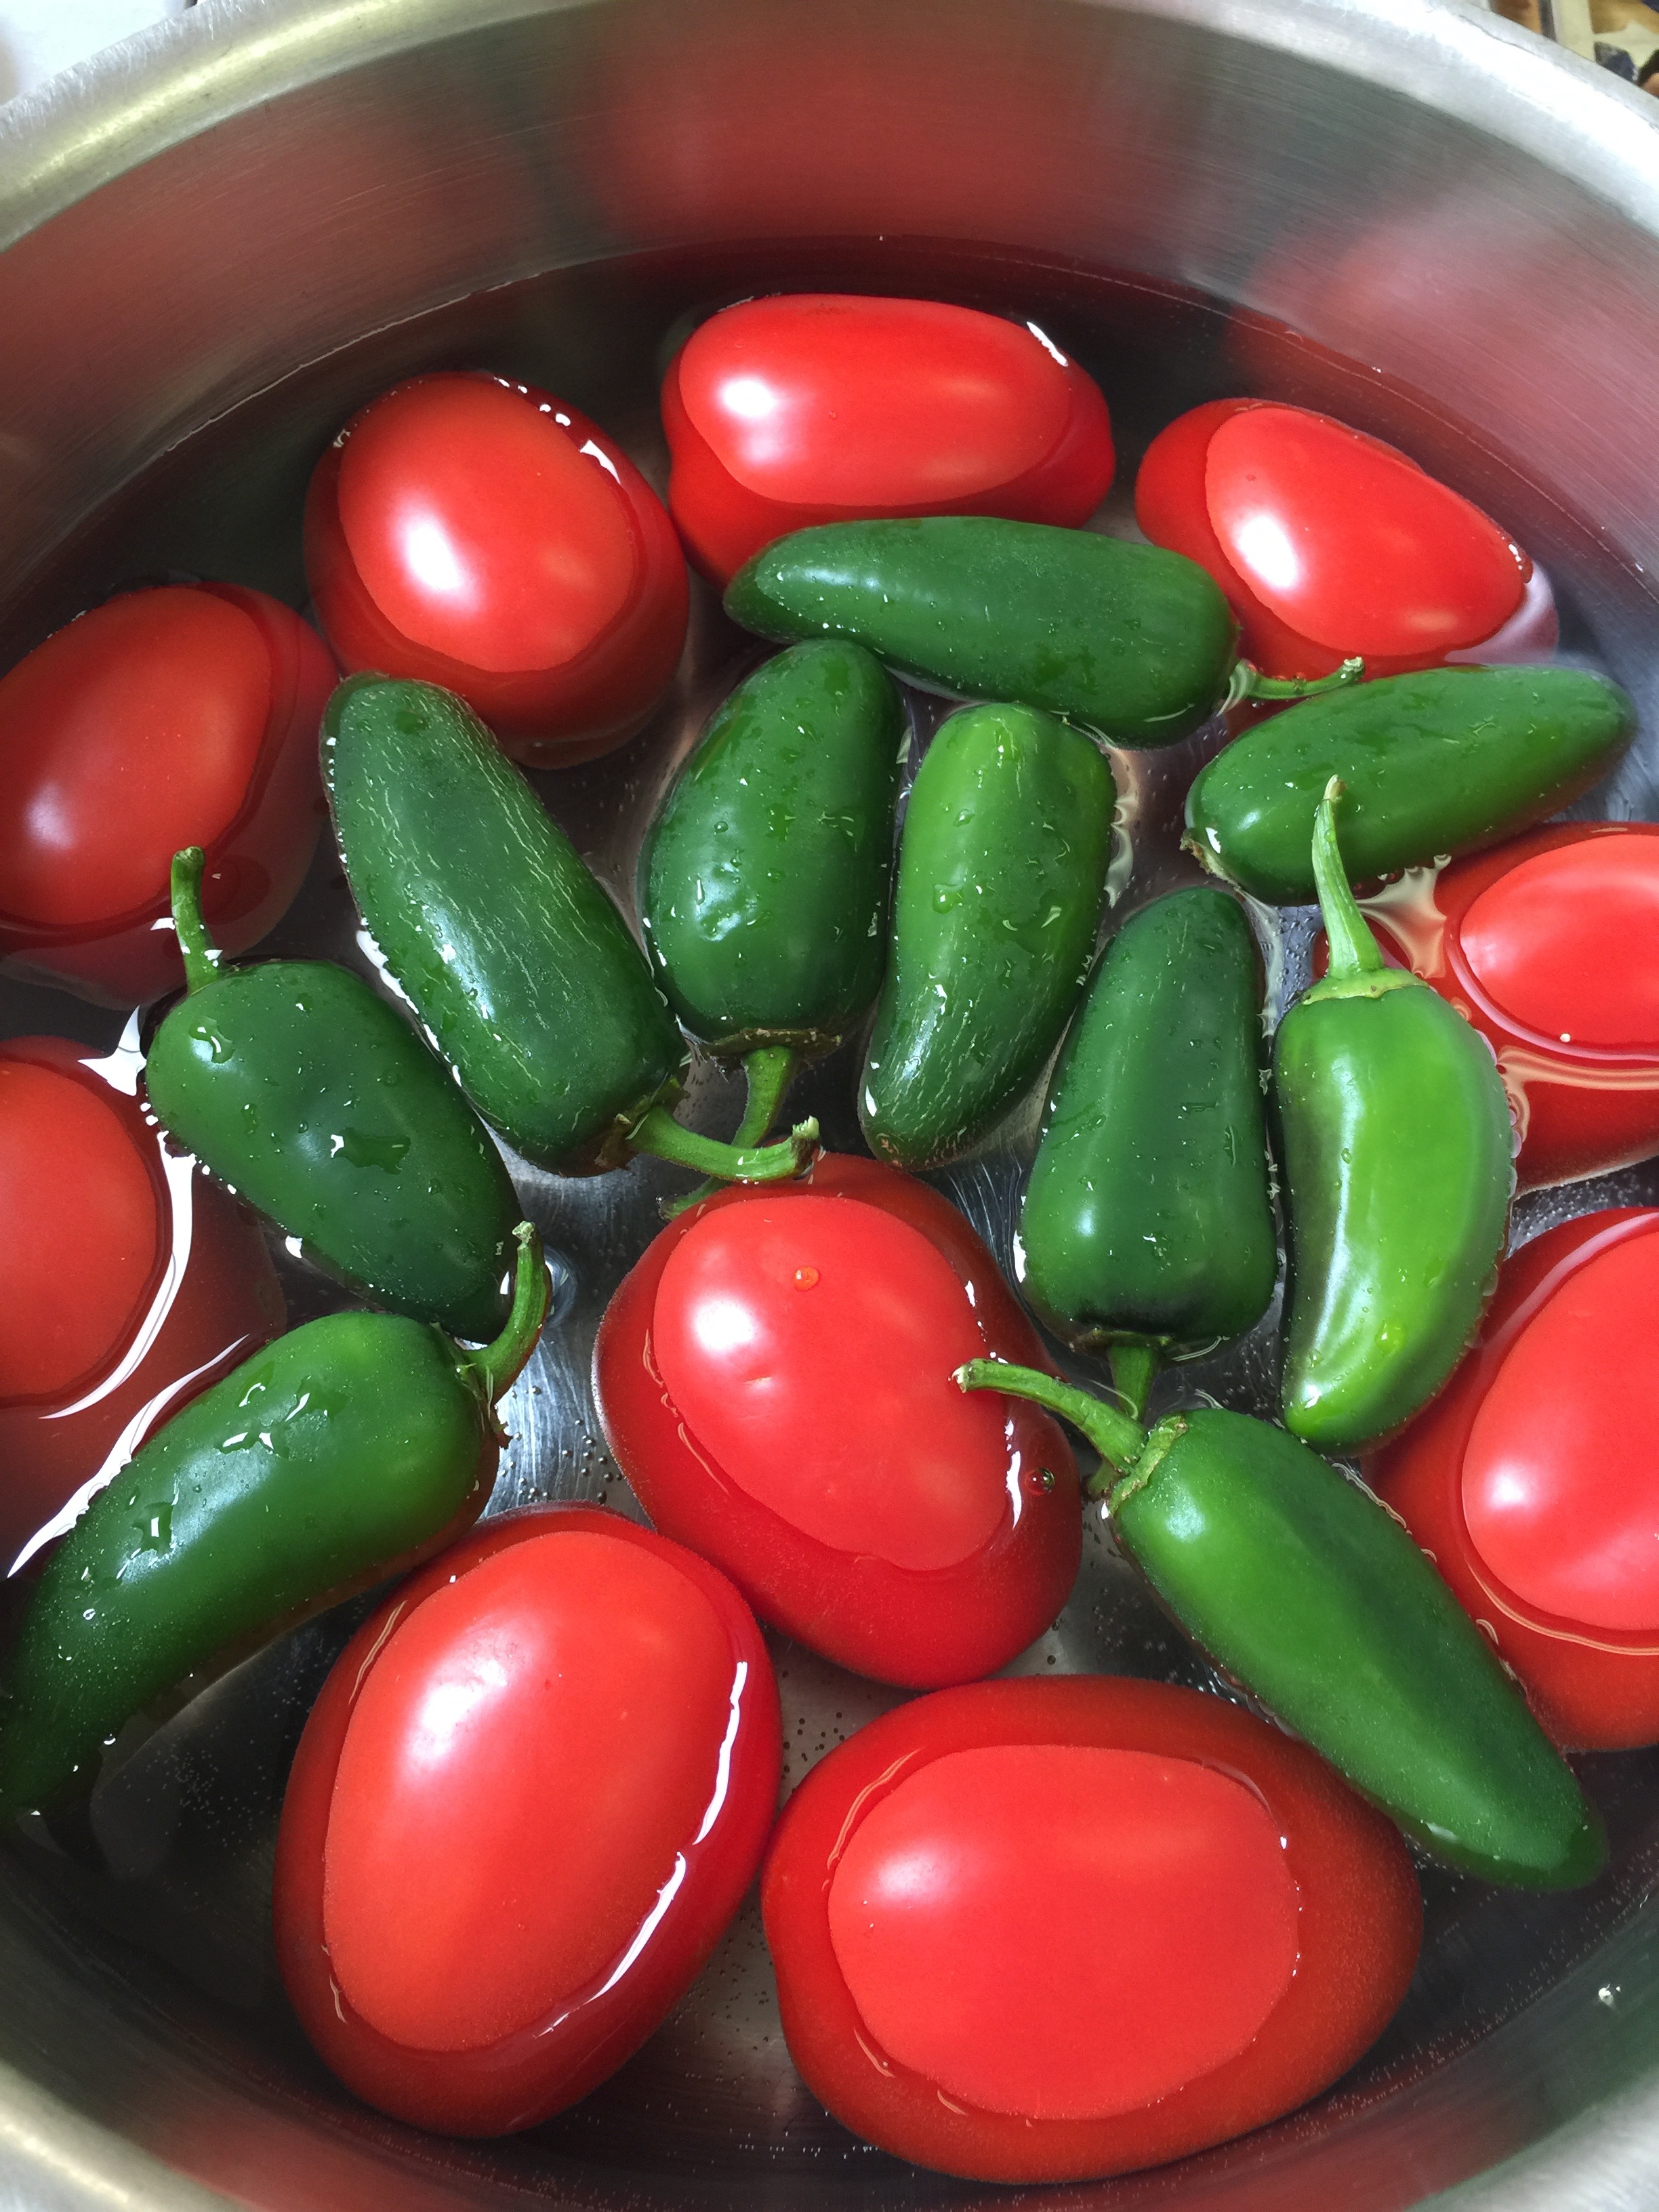
Wash your tomatoes, peppers, and cilantro well!

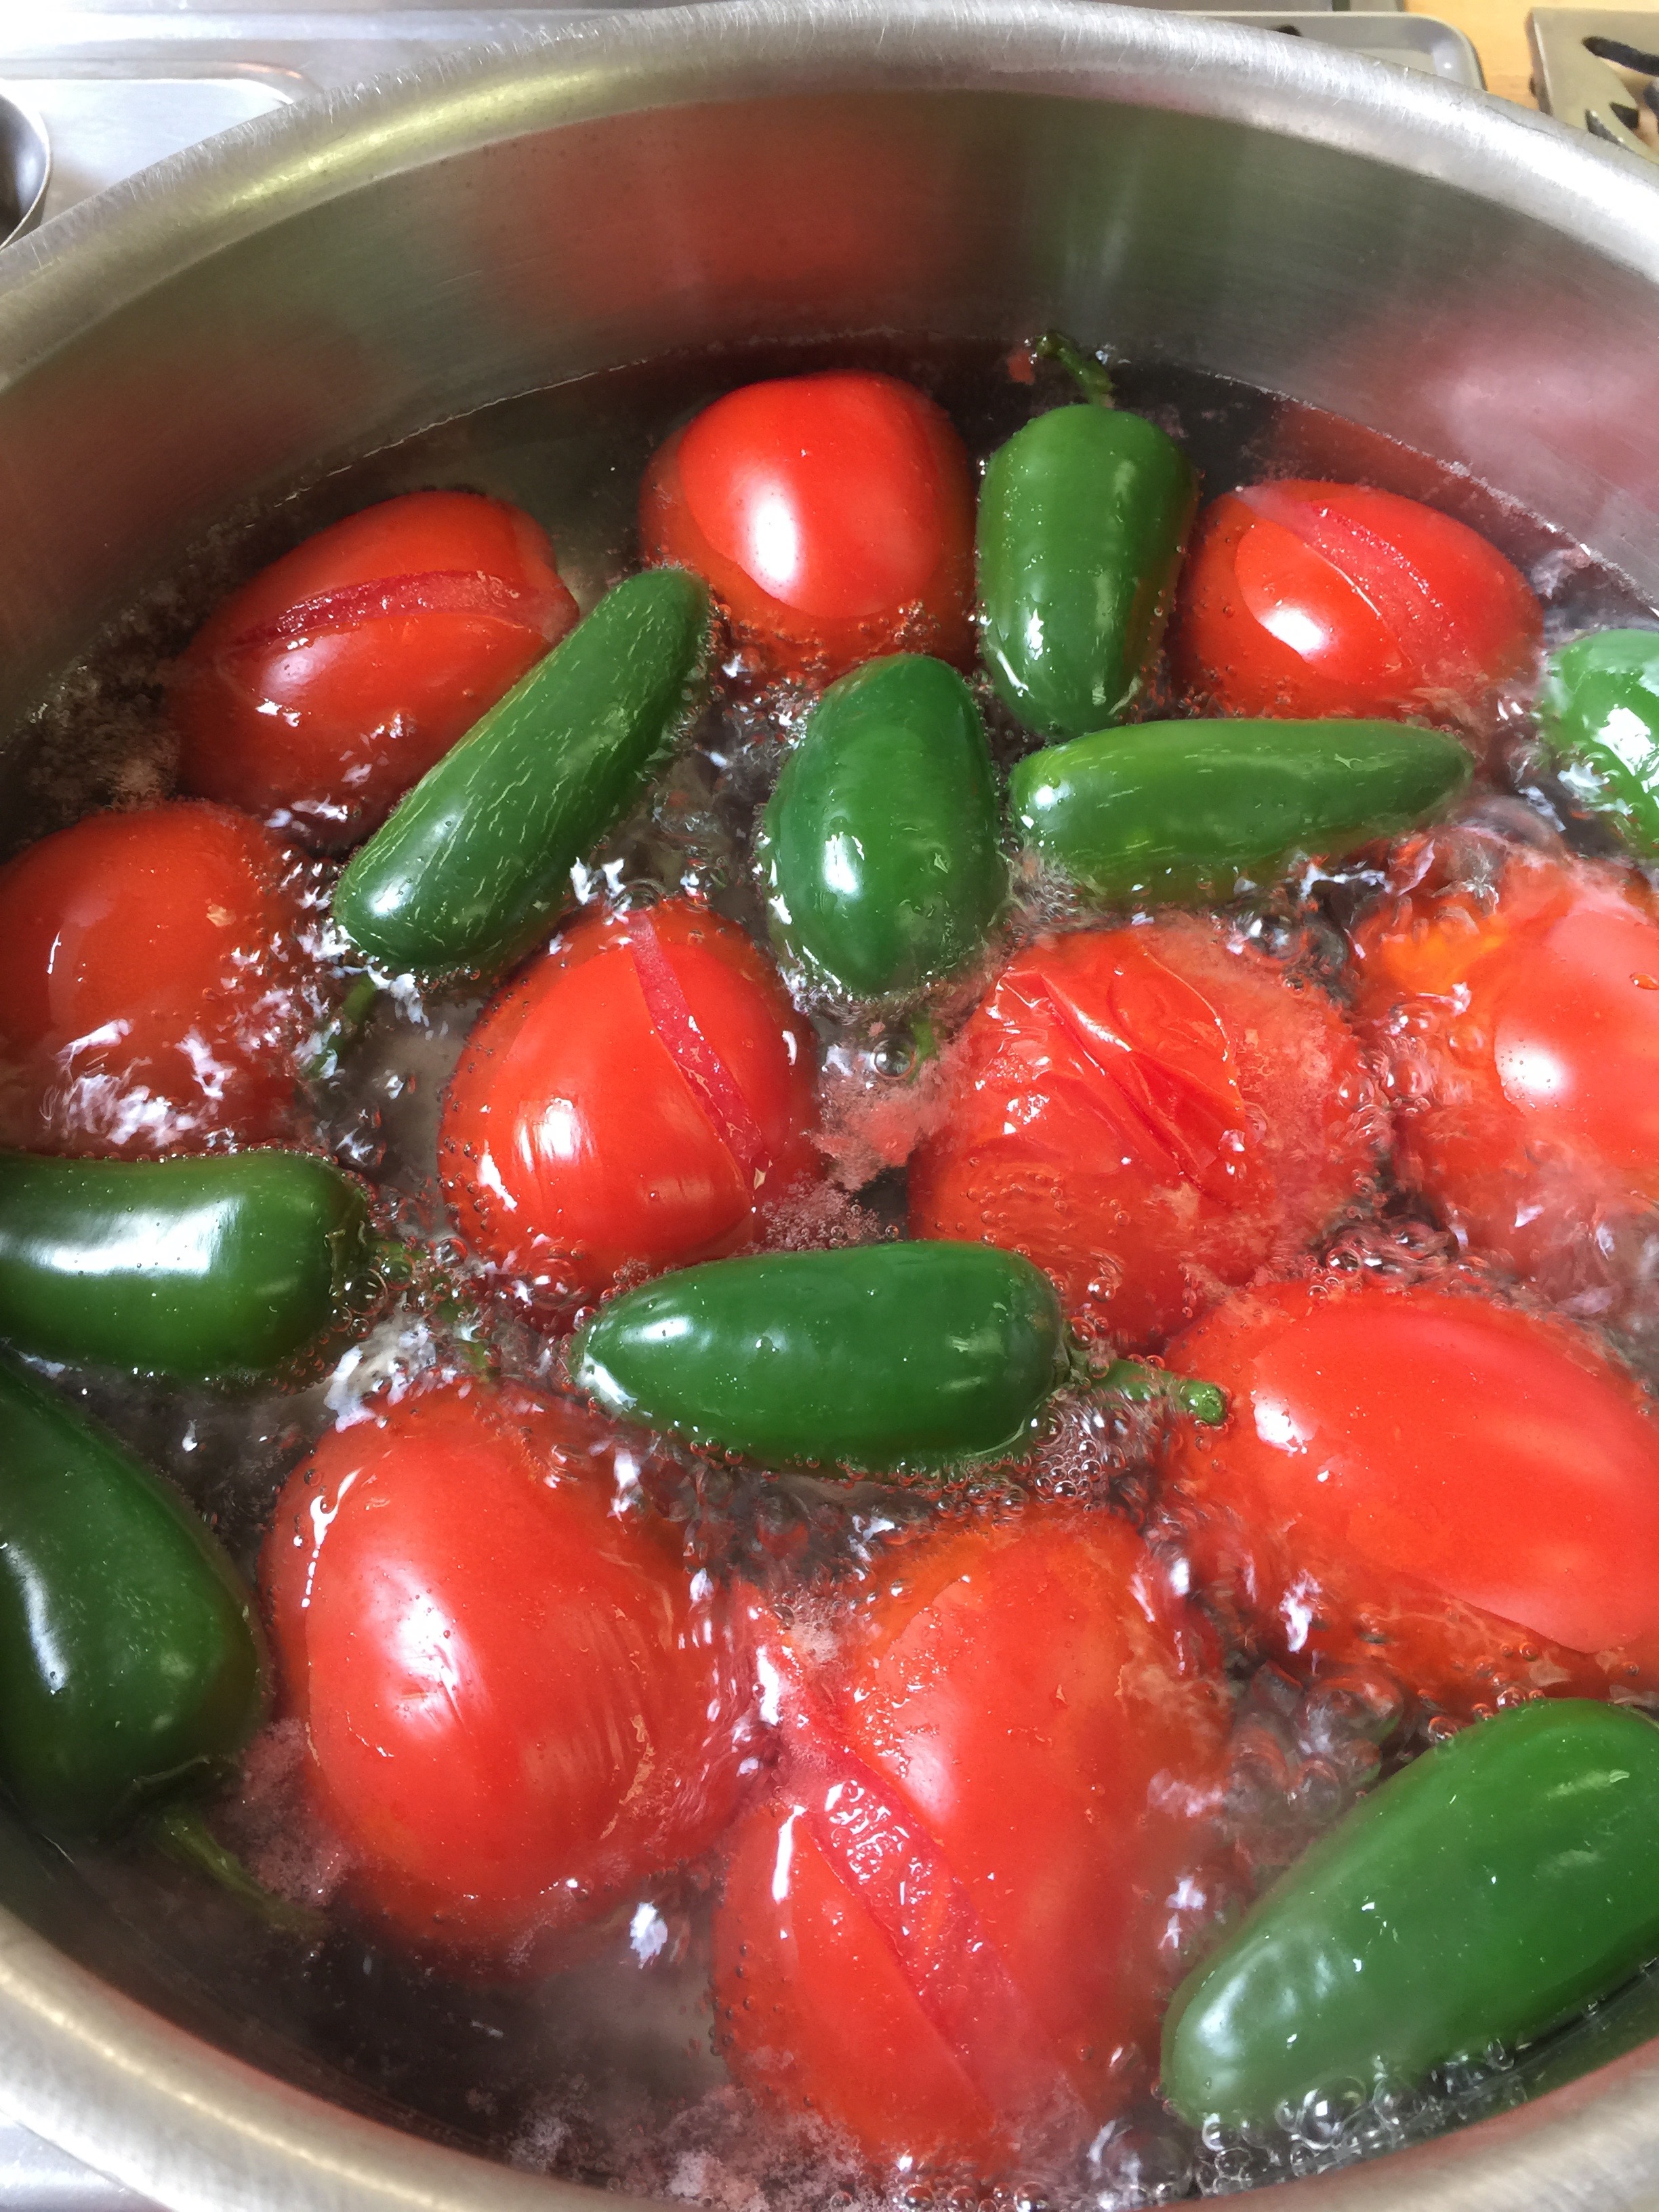
Place your tomatoes and peppers (I did wayyyy too many peppers!) in a pan and fill with water not quite covering the tomatoes and peppers.

Bring to a boil and reduce to a simmer on medium heat.  Simmer until the skins start to peel back on the tomatoes stirring frequently.

IMG_3232

IMG_3234


Remove the tomatoes with tongs and squeeze gently to release any water.  Place in your blender.

IMG_3235

IMG_3236


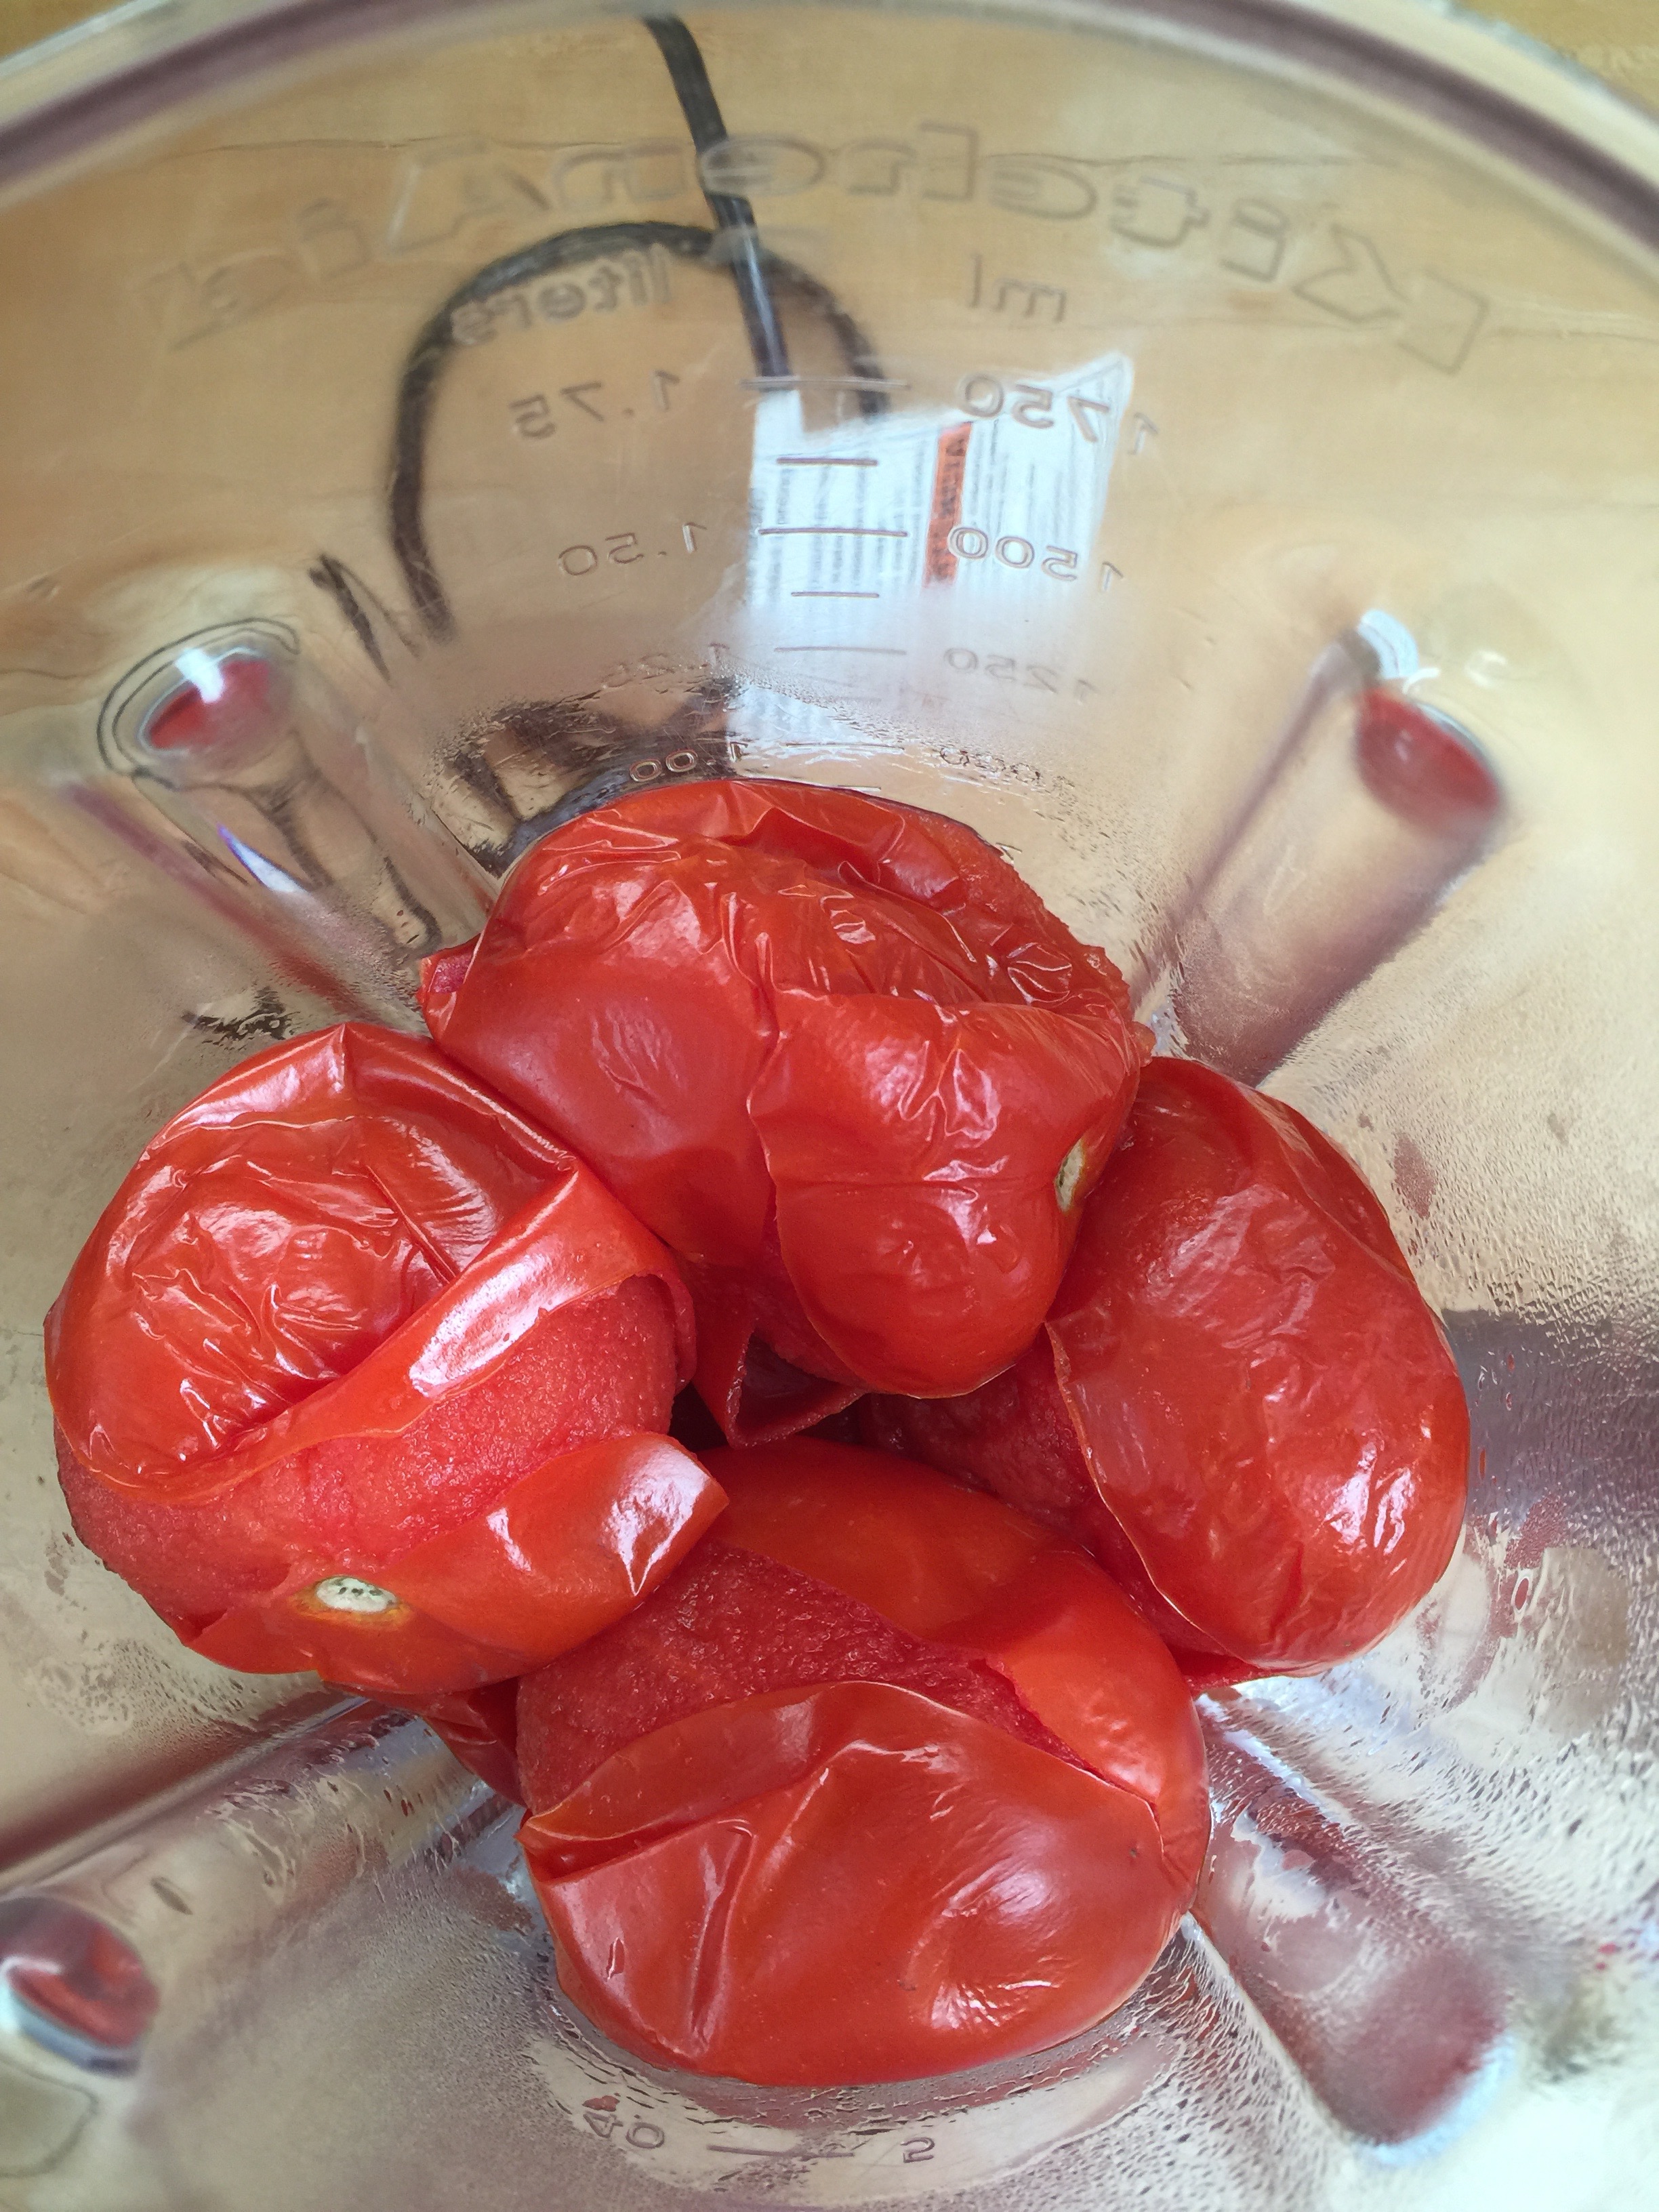
Remove the peppers from the water and detach the stems.

IMG_3233

I started with 3 peppers and it was plenty!  These little things were HOT!  I blended the tomatoes and peppers on high for a few seconds, then added the onion, garlic, and salt.

IMG_3237

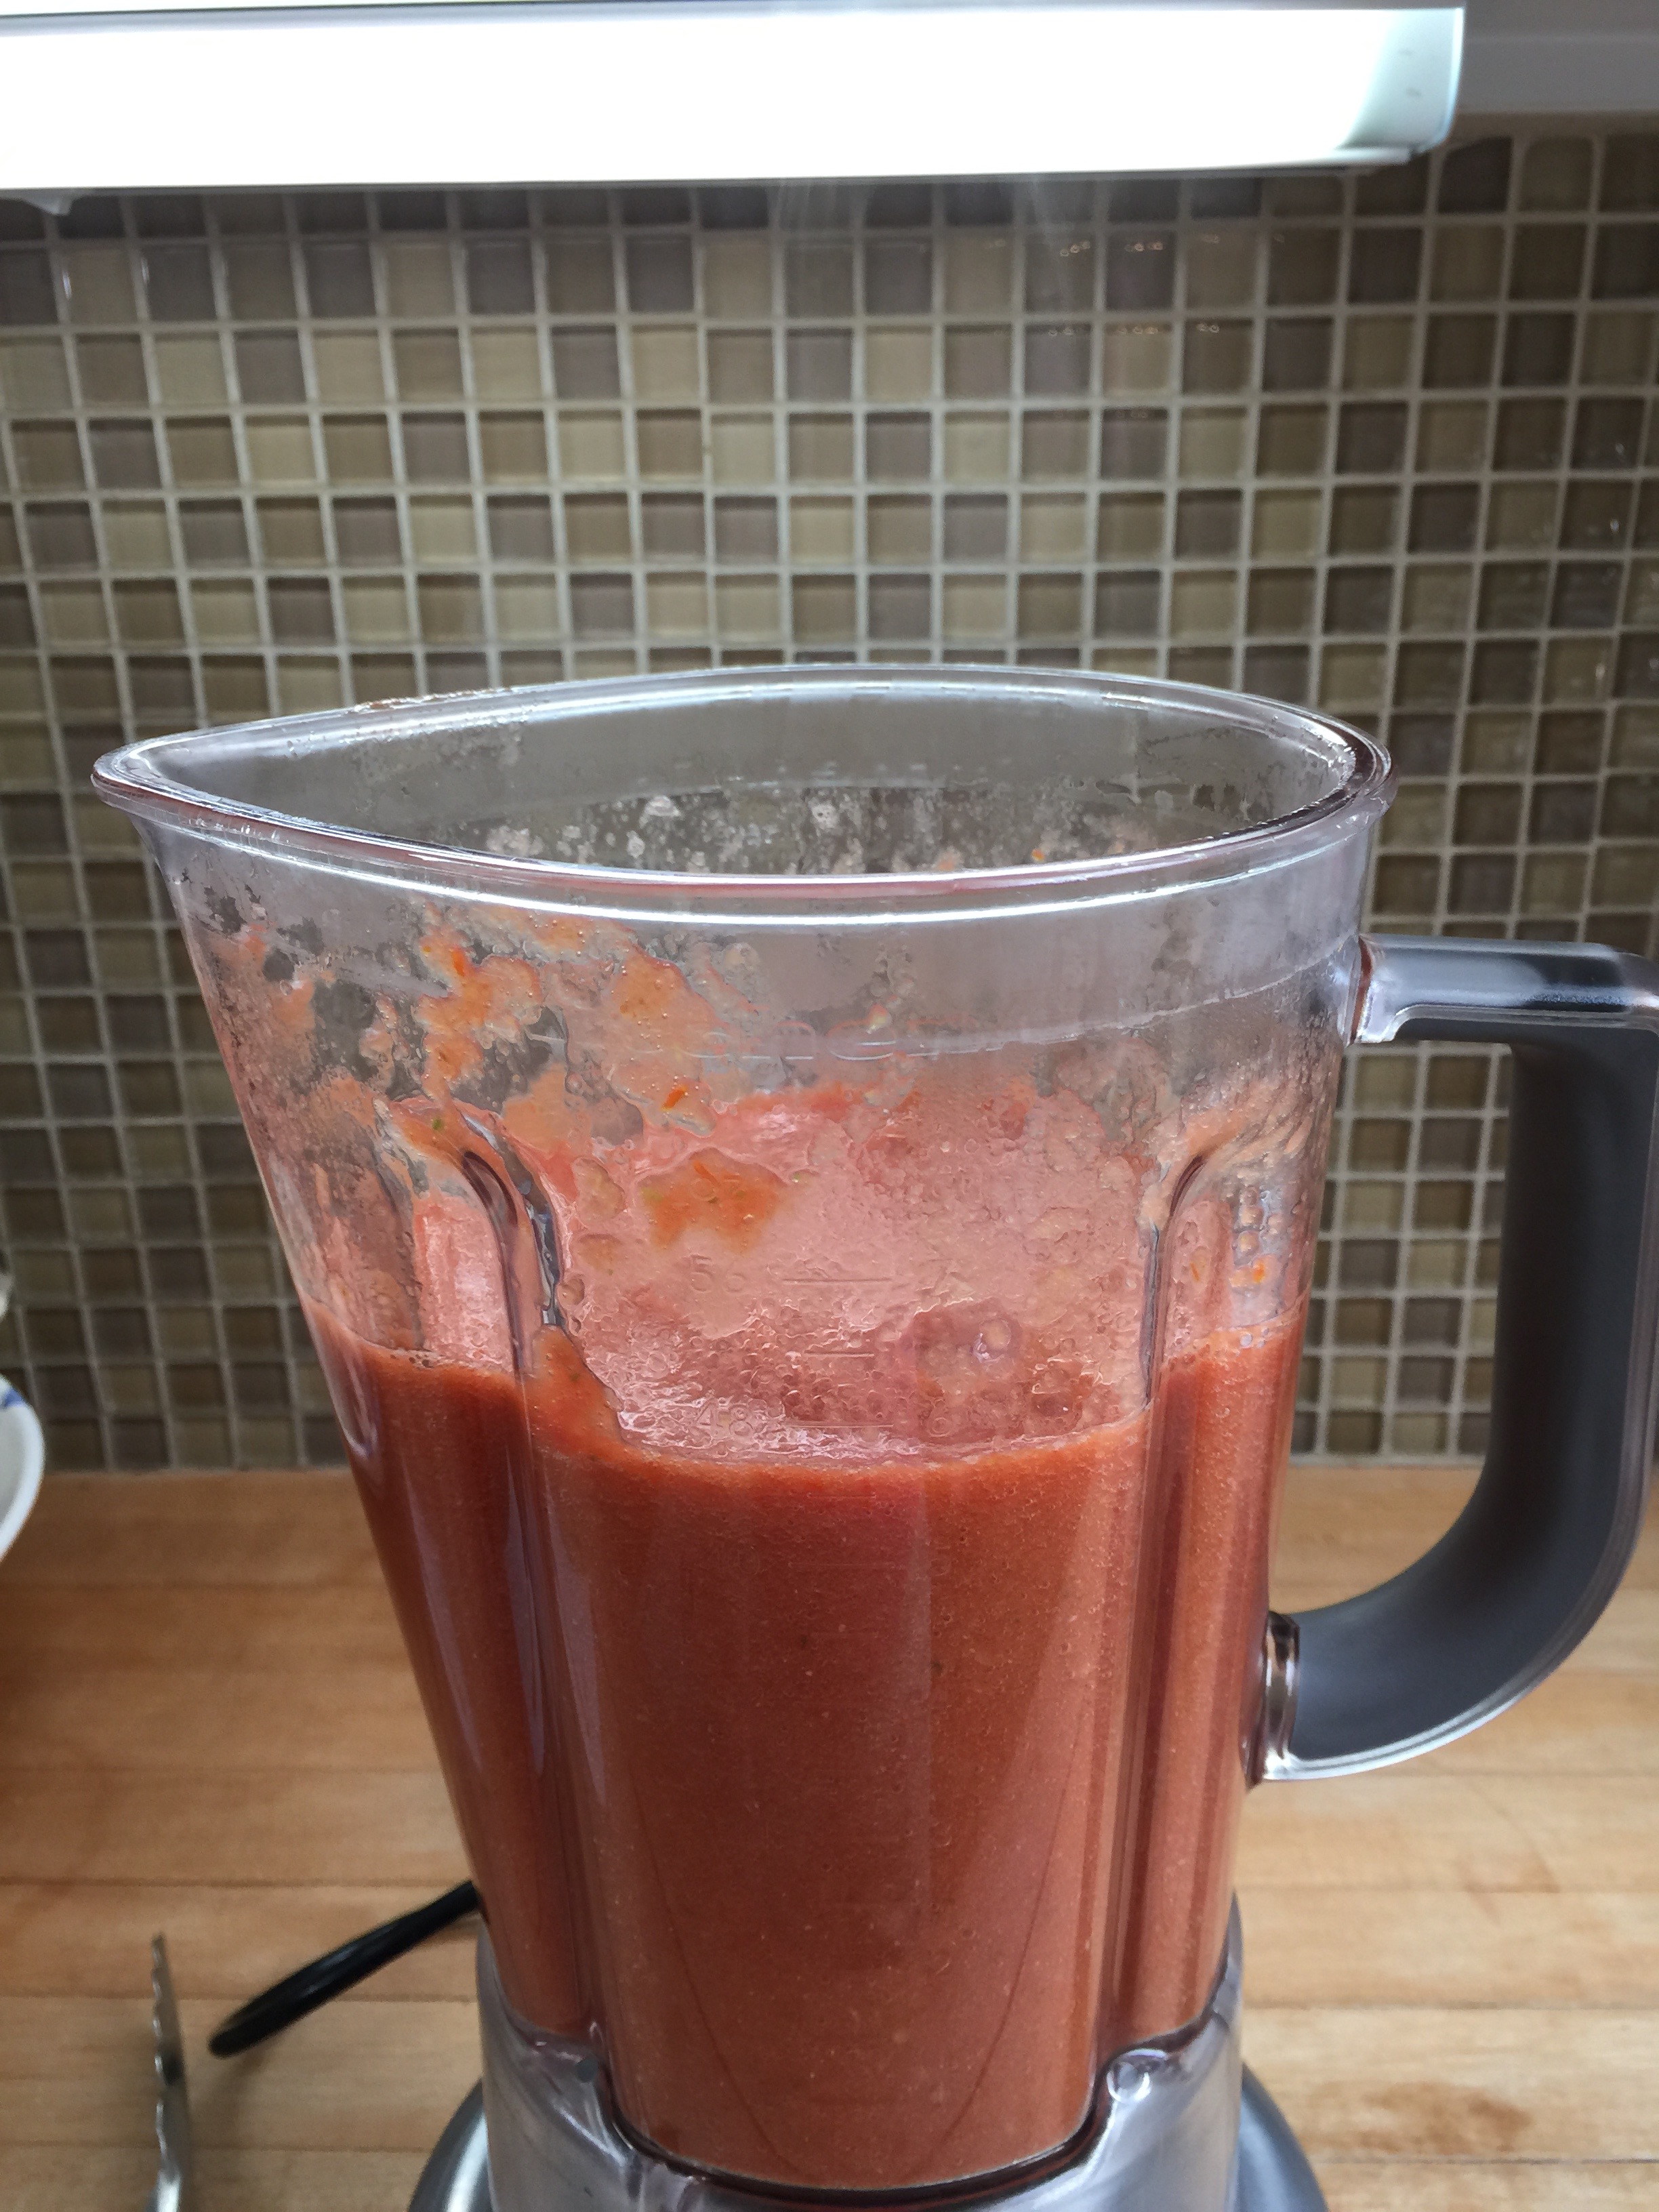
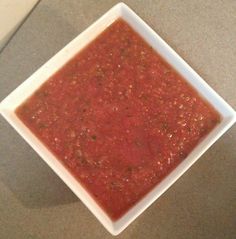
Add your cilantro last.  I blended everything together for about 10 seconds on high, and ended up with a large mason jar and medium mason jar of salsa that was some of my best!

IMG_3238 (1)


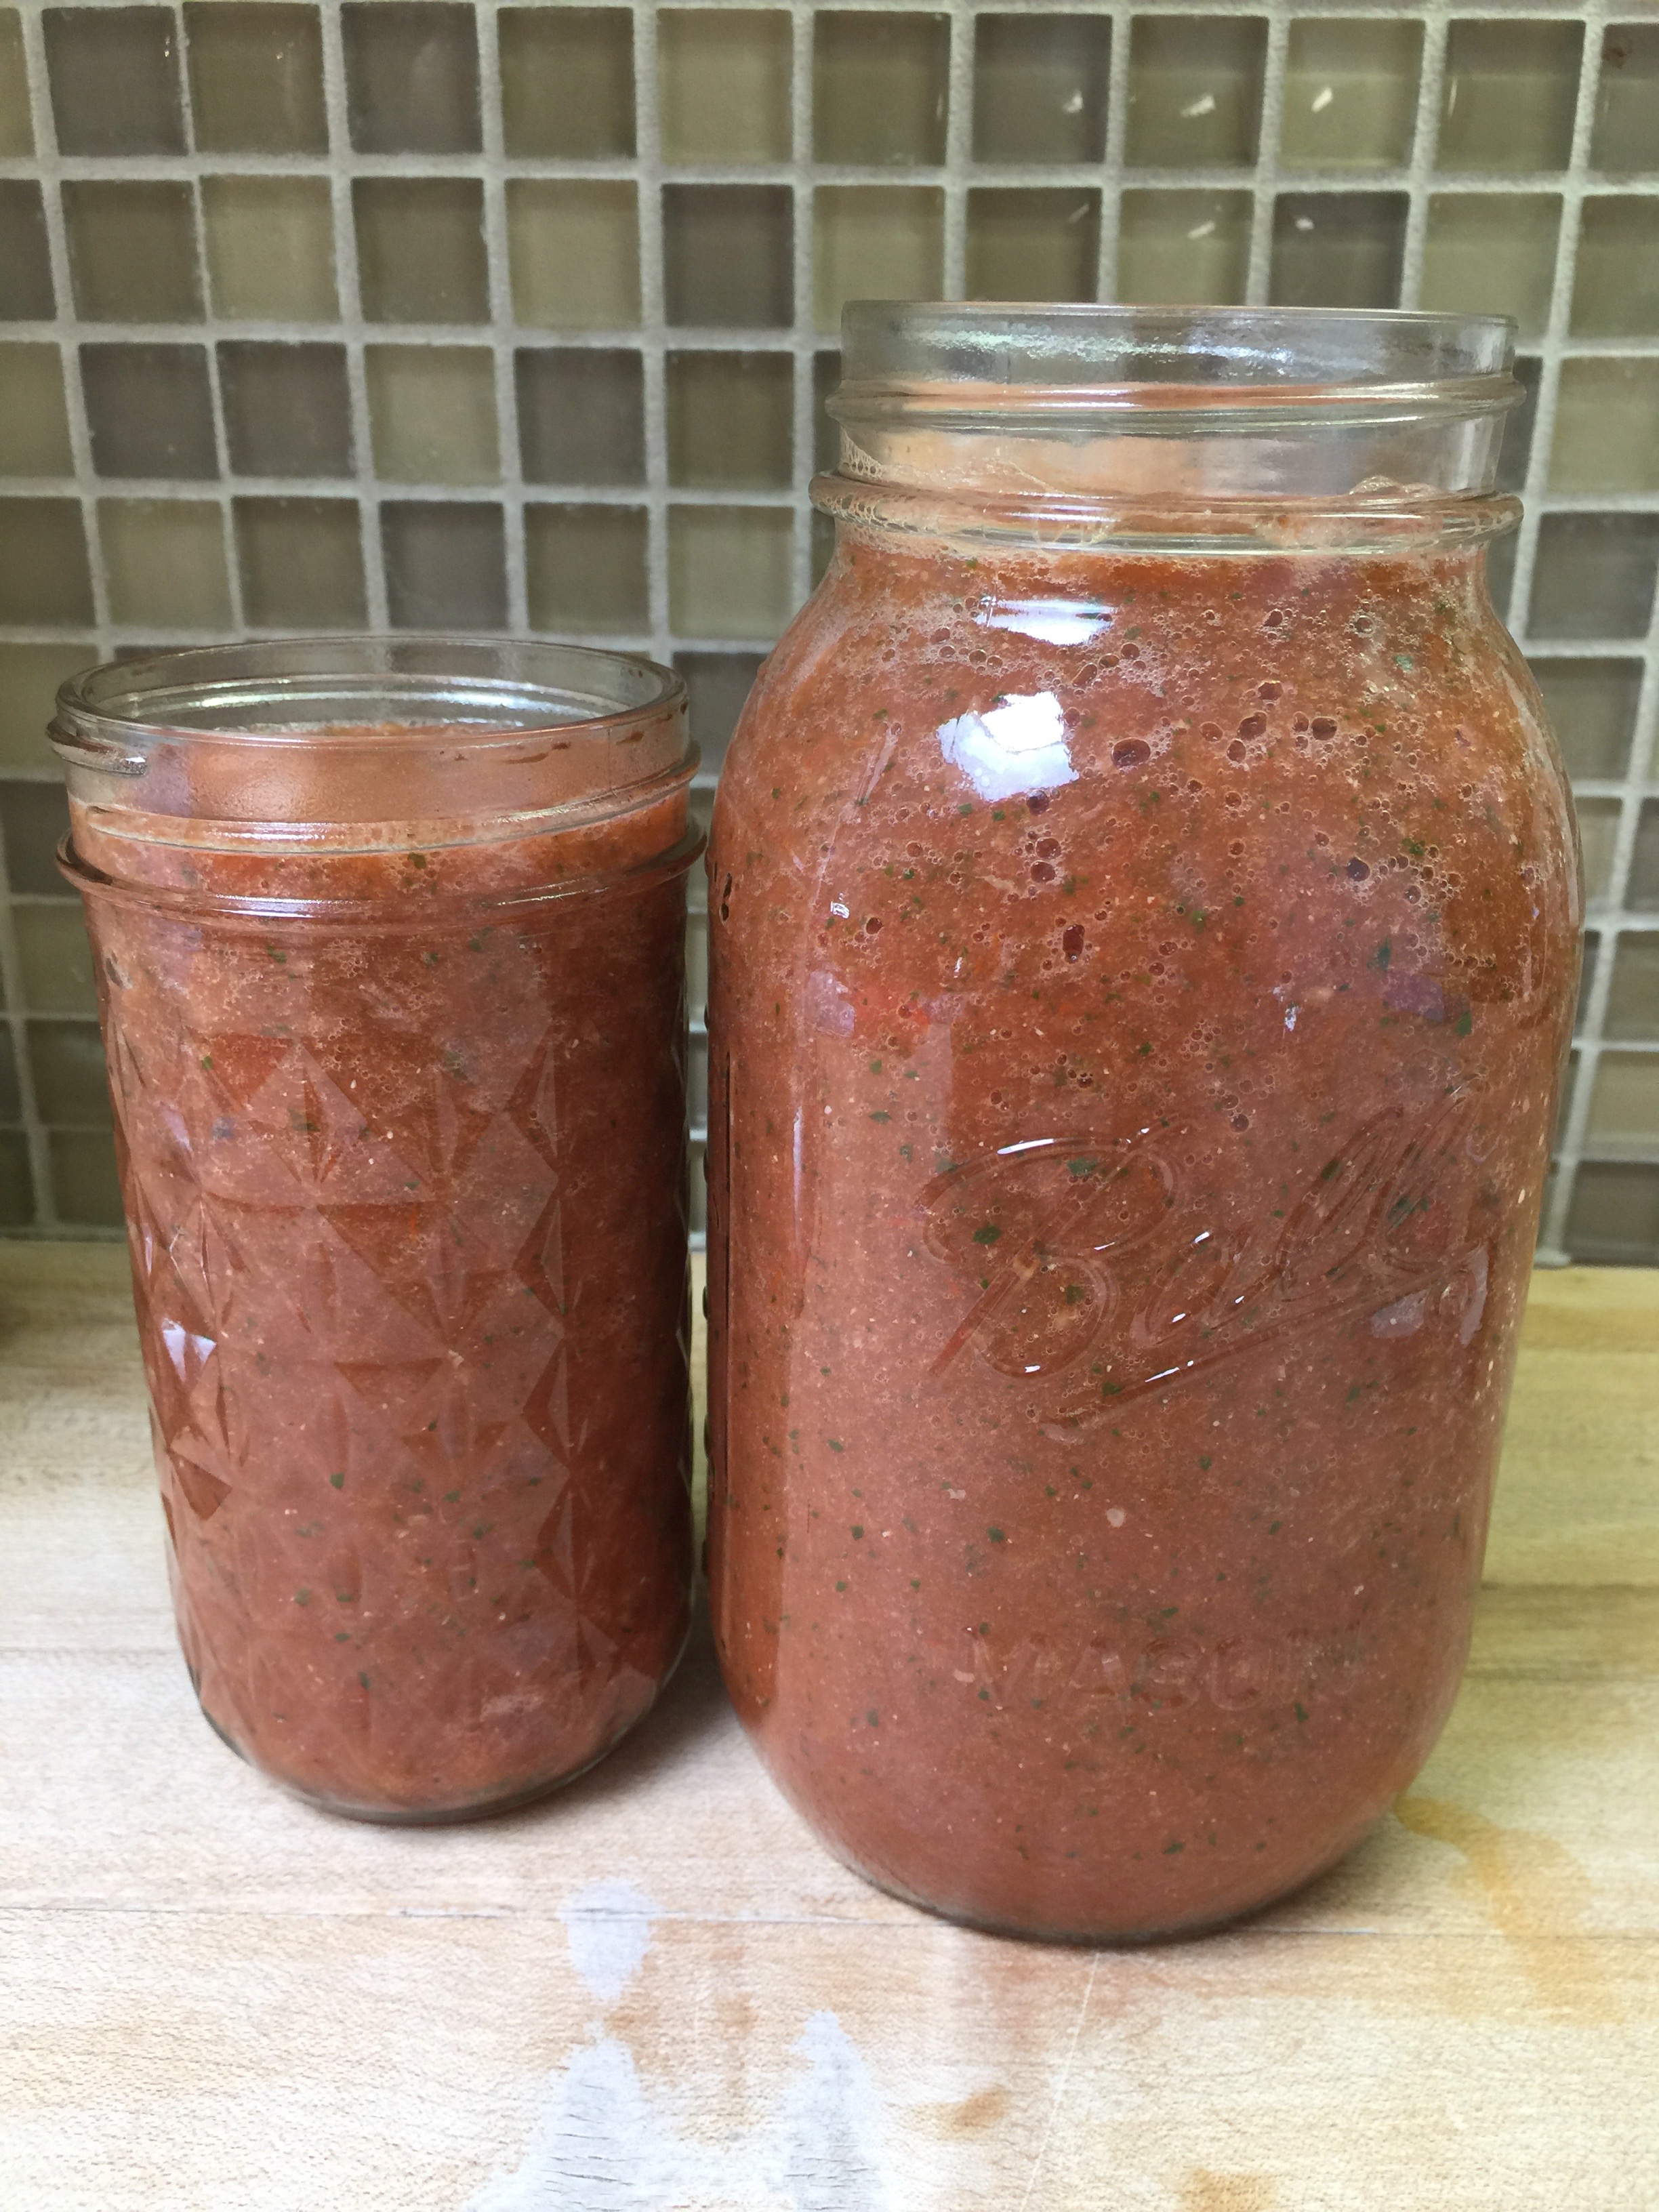
This is a great healthy sauce full of vitamins and antioxidants that will spice up your food, literally!  It will keep in your fridge for about 2 weeks.


A Snack to Crunch!

images-1

No, not that kind of crunch!

The type of crunch I am talking about is the loud tortilla chip kind of crunch!  On Keto, I think it is safe to say, that one of the things we miss the most is that crunch of a chip or cracker.  One of my summer-time favorites was corn chips and salsa.  Needless to say, the corn is gone forever, but the salsa is here to stay.  So what does one do for that crunch, scoop, or dip?

blog-salsa

For a long time, I used a ton of celery, and still do for many things.  It can scoop, it’s refreshing, full of fiber, and I can have it for all those wonderful Keto dips out there.  It is not good for salsa though.  Then I discovered the cheese crisps we posted a few weeks ago.  Love those, especially for guacamole.  The cheese is the perfect accompaniment with avocado.

But, what about the salsa?  Well…zucchini was again on sale at Sprouts last week, so I bought a bunch to experiment.  Over the weekend I tried three different recipes for zucchini crisps.  I will share two of them with you, and you can choose which you prefer.

The first is a simple chip, and when I say simple, all you need is time and a few ingredients:

Crispy Chips

Ingredients:

2 Zucchini Squash

1/2 Cup Coconut Oil

Pink Himalayan Salt

Mandoline

Parchment Paper

Jelly Roll Pans

Directions:

Wash and dry your zucchini.  When I say wash, I mean wash with soap and water!

IMG_2686

I used a Mandoline to slice my zucchini very thin.  This also makes it a fast process.  You want them very thin.  Mine were probably less than 1/8 inch thick.

IMG_2689 (1)


IMG_2690

Now, I will tell you what I did, and also how you can do it differently.

The first thing I would change is to either slice my zucchini on the diagonal or lengthwise.  The reason being, they shrink tremendously when they dehydrate so if the purpose is for dipping, these left very little surface area to do such.

Line your jellyroll pan with parchment paper.  I used a slip mat, and it was a huge chore to clean, so go with parchment on these.  Just pretend this slip mat is parchment paper.

IMG_2691

Pour your coconut oil into a small pyrex or similar bowl.  Just something shallow will do.

Dip each “chip” into the oil and place on your parchment. They can be close together.  Variation: You can lay all your zucchini out and then brush them with the oil.  You just have to flip them half way through baking.

IMG_2694

Once you have dipped or placed all your zucchini on your parchment, sprinkle a very scant amount of salt on top.  This was a huge mistake of mine.  I used a normal amount of salt, but they shrank so much, they were literally coated in salt.  A little goes a long way on these!

IMG_2695

Place in a 200 degree oven for 2 hours.  Yes, two hours.  This will dehydrate and crisp them.  I flipped my cookie sheet around about half way through so they cook evenly.

This is how much they will shrink, and why I recommend slicing the opposite direction for dipping chips:

IMG_2696IMG_2708

Place on a paper towel to absorb the remaining oil.  Once dry, seal them in a ziplock bag or they will get soggy.


Method 2:

Cheesy Chips

These were described as tasting just like a “Cheez It”.  In other words, a great snack for the kids looking for that healthy crunch without any grain!!!

These are similar to above, except for the cheese.  Follow the same directions until you finish with your oil.

Ingredients:

2 Zucchini Squash

2 Cups Parmesan Cheese

1/2 Cup Coconut Oil

Mini-Cuisinart

Mandoline

Parchment Paper

Directions:

Slice your zucchini as described above using a Mandoline.

IMG_2690

Place the Parchment paper on your jelly roll pan (make sure it has sides.)

Grind your parmesan cheese in your Mini-Prep Cuisinart (unless you have already dirtied your big one.)  The parmesan adheres to the squash much easier when it is a bit finer, but still melts well, unlike the super fine ground you buy off the shelf.

IMG_2698

IMG_2699

IMG_2701

IMG_2702


Pour your finely grated cheese into a bowl.

Take your squash one by one and dip into the oil first, and then into the cheese.  Place each on a lined cookie sheet.

IMG_2694

IMG_2707


These will not need salt because your cheese is already salty.  You can add pepper if you like for taste.  You can always add extra cheese to the top if you have extra left over.

Bake at 425 degrees for 20 to 25 minutes.  They should be a little darker than golden brown to ensure they are crisp.  Serve immediately with your favorite dip or eat just as they are.

IMG_2709

IMG_2711


Store in a sealed container or Ziplock in the refrigerator.