Archive for May 30, 2015

It’s the Weekend! Let’s Eat Out!

Another BIG question!

How do you eat out on Keto?  Well, it’s not as hard as you would imagine…

restaurant sign

When we first started cutting carbs, it was a bit intimidating to go out.  I wanted to know the exact source of my food and exactly how it was being prepared.  This is much easier to do at home, but I still wanted to socialize with my friends.  I wasn’t about to give up my few evenings of “adult time” away from the kitchen because of Keto!  I soon learned I didn’t have to give up restaurants and neither do you!

I had always considered myself an easy, low-maintenance restaurant patron.  And, if I must be honest, I was a bit embarrassed when someone at the table was the “difficult one”.  I really love all food, and am a bit of a foodie.  I love trying new things and new preparations, so eating out was always an adventure.  It still is an adventure, but I am a little more cautious when ordering.

I may not be quite as low-maintance, but I have found that restaurants are more than willing to answer questions about preparations, and even more willing to oblige on certain dietary restrictions.  While once an insult to a chef to change his/her dish, it is now all the more common as consumers have more and more dietary restrictions, whether allergies or eating preferences.  Don’t hesitate to ask!

table setting


Here are some of my general questions when asking about a dish:

Is there sugar in the sauce?

Is the dish gluten-free?

What is the side accompaniment?

Is it breaded?

May I substitute the starch for another vegetable?

May I have the protein grilled or sautéed instead of fried or breaded?

You will find that breading, sauces, and sides are the main culprits.


Here are the main things you need to do:

1. Ask for sauce on the side – every time (Unless it is a heavy cream sauce made without flour or a lemon butter sauce – if this is the case, the more the better.)

2.  Ask for extra veggies with butter instead of potatoes, pasta, rice, or risotto.

3.  First thing when you arrive – ask your waiter to hold the bread, but bring the butter (real butter) – you may get a funny look, but they will do it!

4.  Order a bottle of wine, a martini, or vodka soda.  Stay away from the sugary cocktails.

5.  Order your salad without crouton or crisps and stay away from sweet dressings.  Blue Cheese, Ranch, and Caesar are generally safe.  It gets dicey with the vinaigrettes.

6.  Read the menu carefully – learn the code words: crispy or coated usually means fried, seasoned could mean sugar so ask.  Crunchy usually means it has something on top, like fried onions, tortilla chips, panko, etc.  Sweet, glazed, or brushed are almost always code for the dreaded SUGAR.  In short, always read the description, and if you are still unsure, ask!

7.  Good things to look for are: grilled, broiled, steamed, seared, baked, and sautéed.  Savory is usually good, and seasoned is often good as long as the seasoning does not contain sugar.

8.  At the end of the meal, refrain from looking at the dessert menu.  Too much temptation.  Ask for a decaf with heavy cream if you need a little something while your friends order dessert.  They won’t be used to the heavy cream order, but almost any good kitchen has cream, so ask the waiter to check the kitchen.

I promise it is really easy after you get used to ordering Keto.  Restaurants are starting to have more gluten free dishes (I just ate at one that had a gluten-free menu – remember though that gluten-free doesn’t mean carb-free), and many are used to patrons ordering low-carb.  Most of all, don’t be afraid to ask questions.  It is not about weight at this point, it is about your health!

Good places to start are:

Bar-B-Que Restaurants (Have all the meat you want, but watch the sauce and sides)

Steak Restaurants (Steak is great – order with Béarnaise and side salad and veggies – skip the potatoes)

Seafood Restaurants (Shrimp and Fish are great – Add lemon butter and it’s even better)


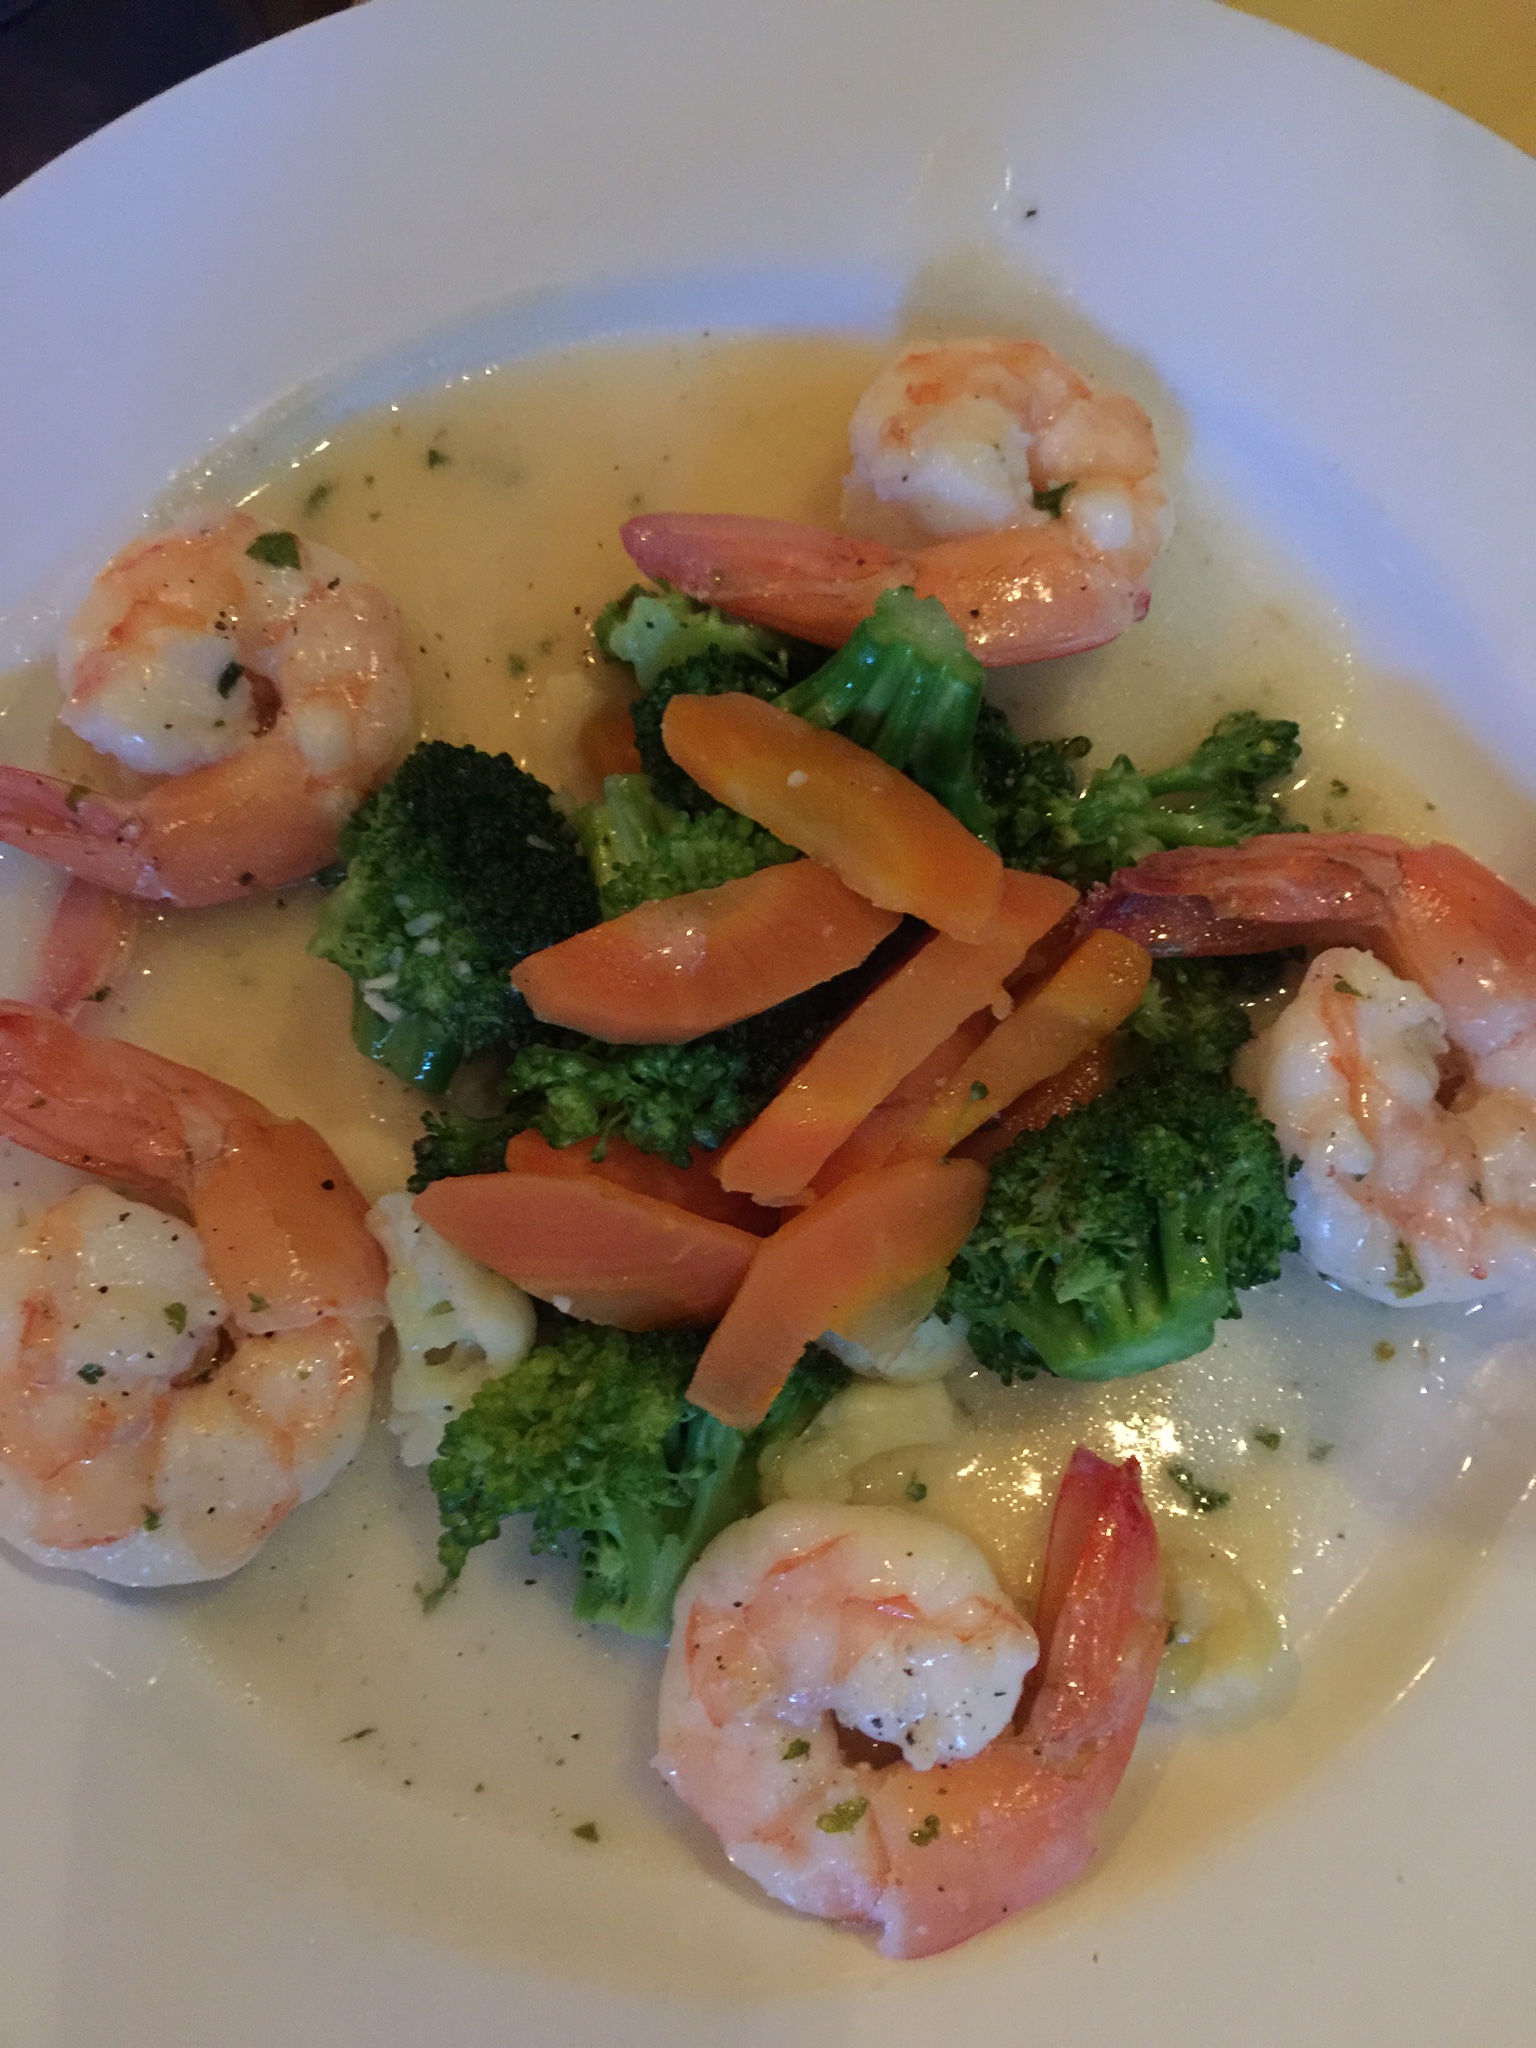
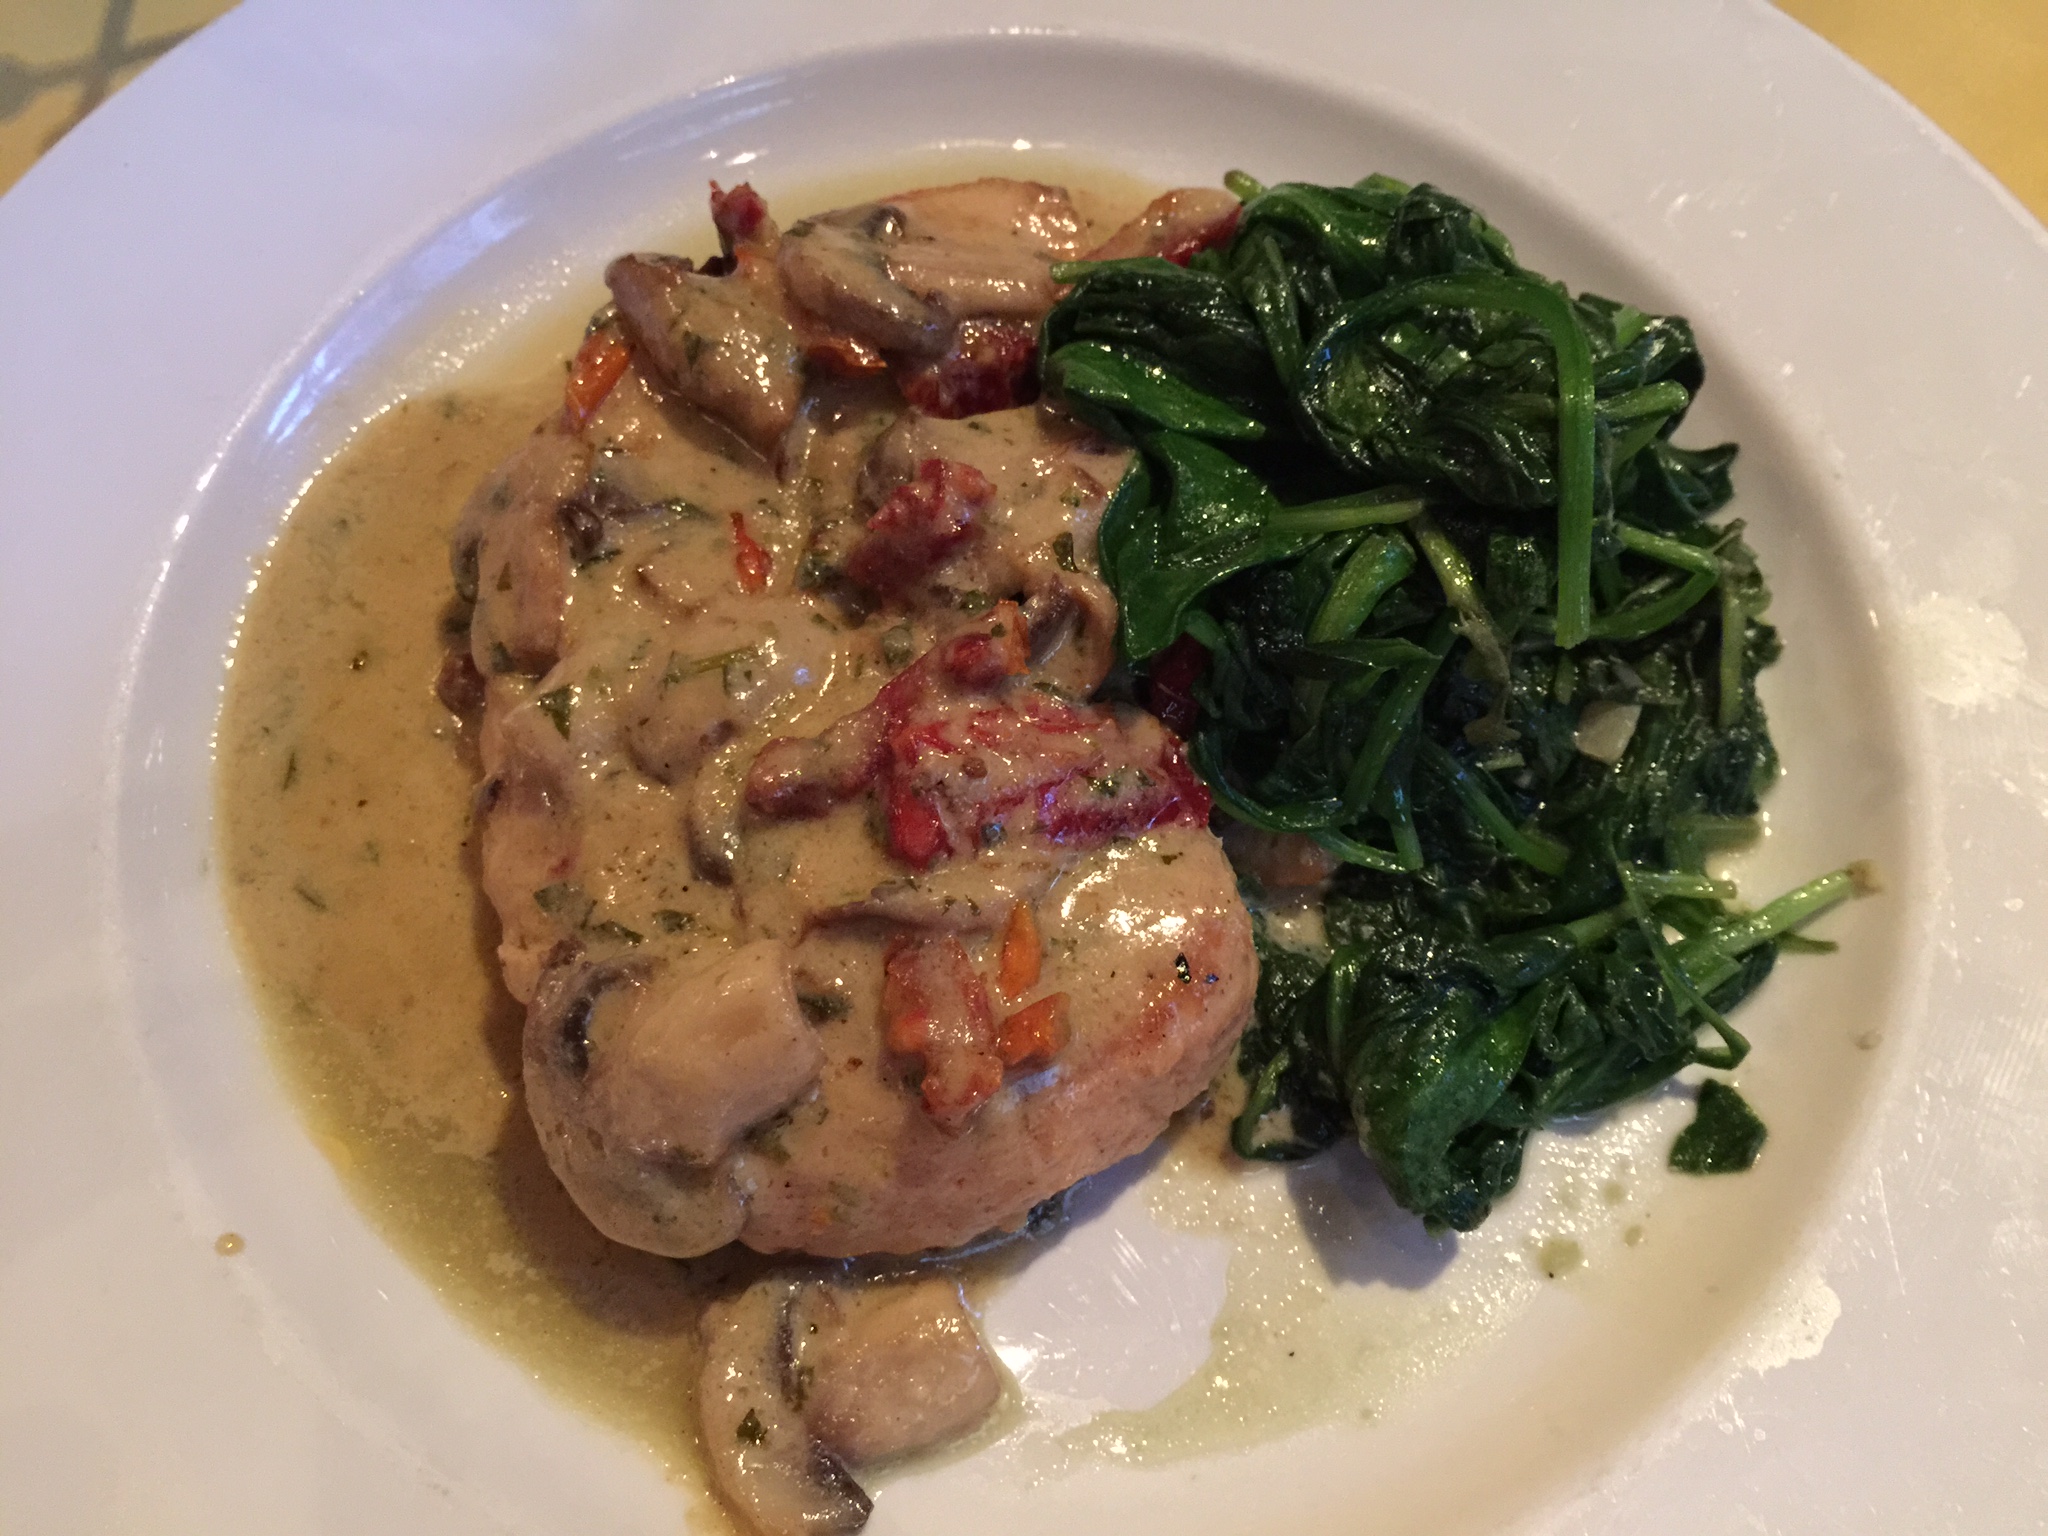
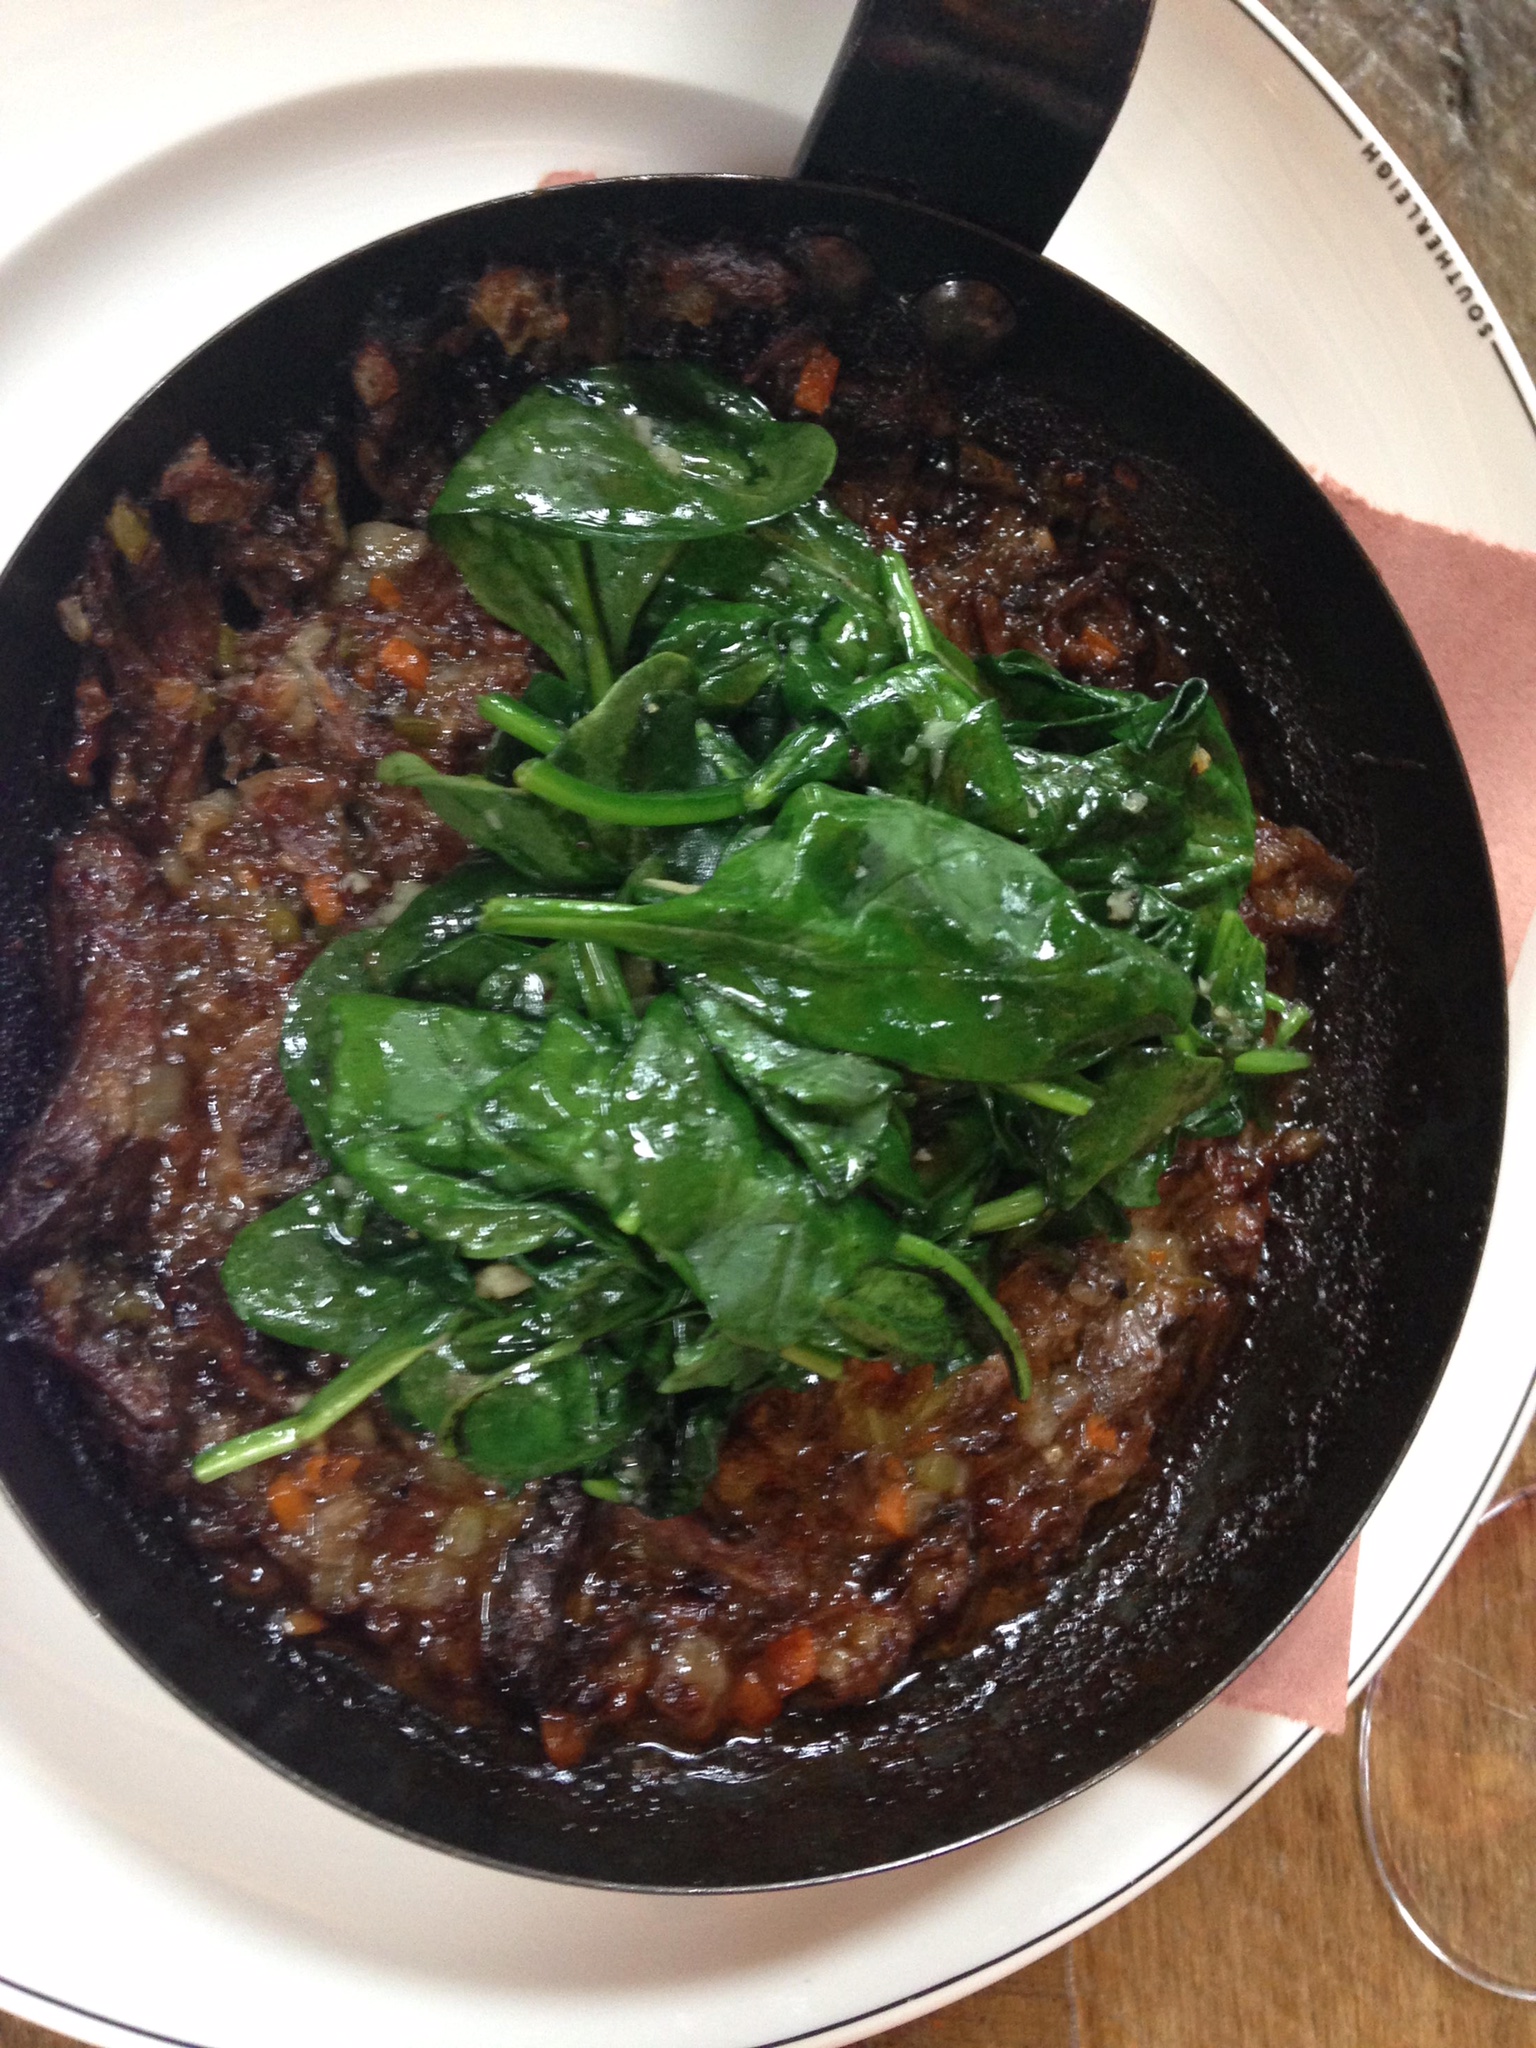
Here are a few pictures of meals we have ordered out to give you some ideas:

Both dishes below were from Houston Street Bistro.  They were wonderful about substituting the pasta that was supposed to be served with each dish with vegetables instead.  The shrimp is in a lemon butter sauce with broccoli and carrots.  The chicken and mushroom dish is in a flourless cream sauce served with a side of spinach instead of over pasta.

IMG_0664 IMG_0663


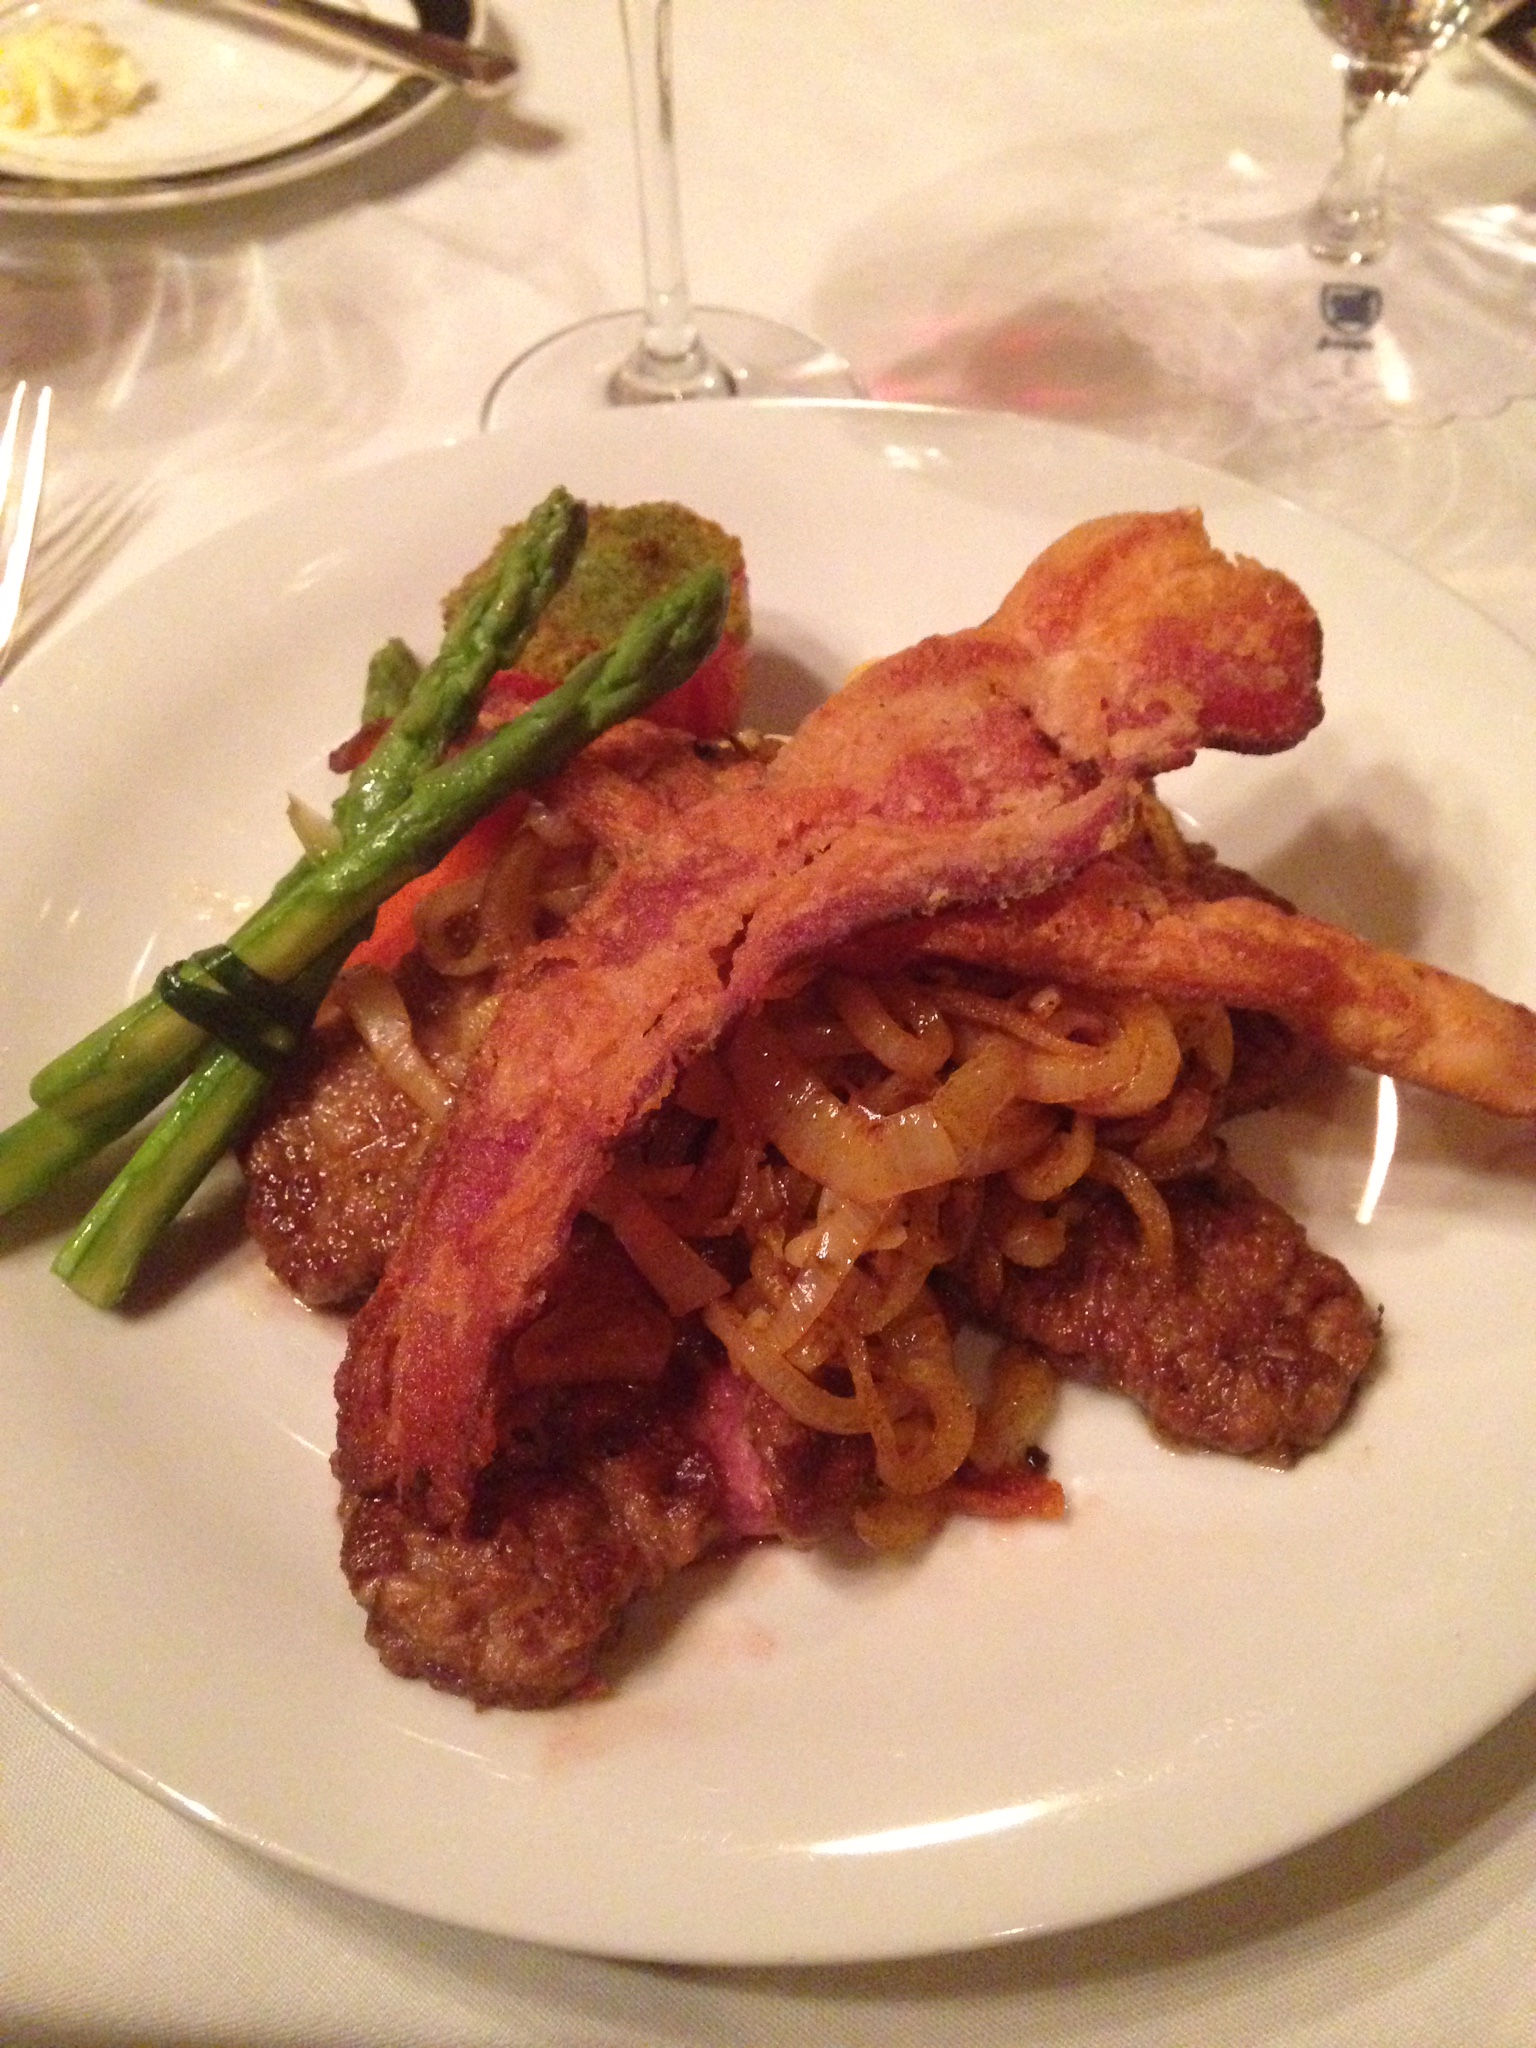
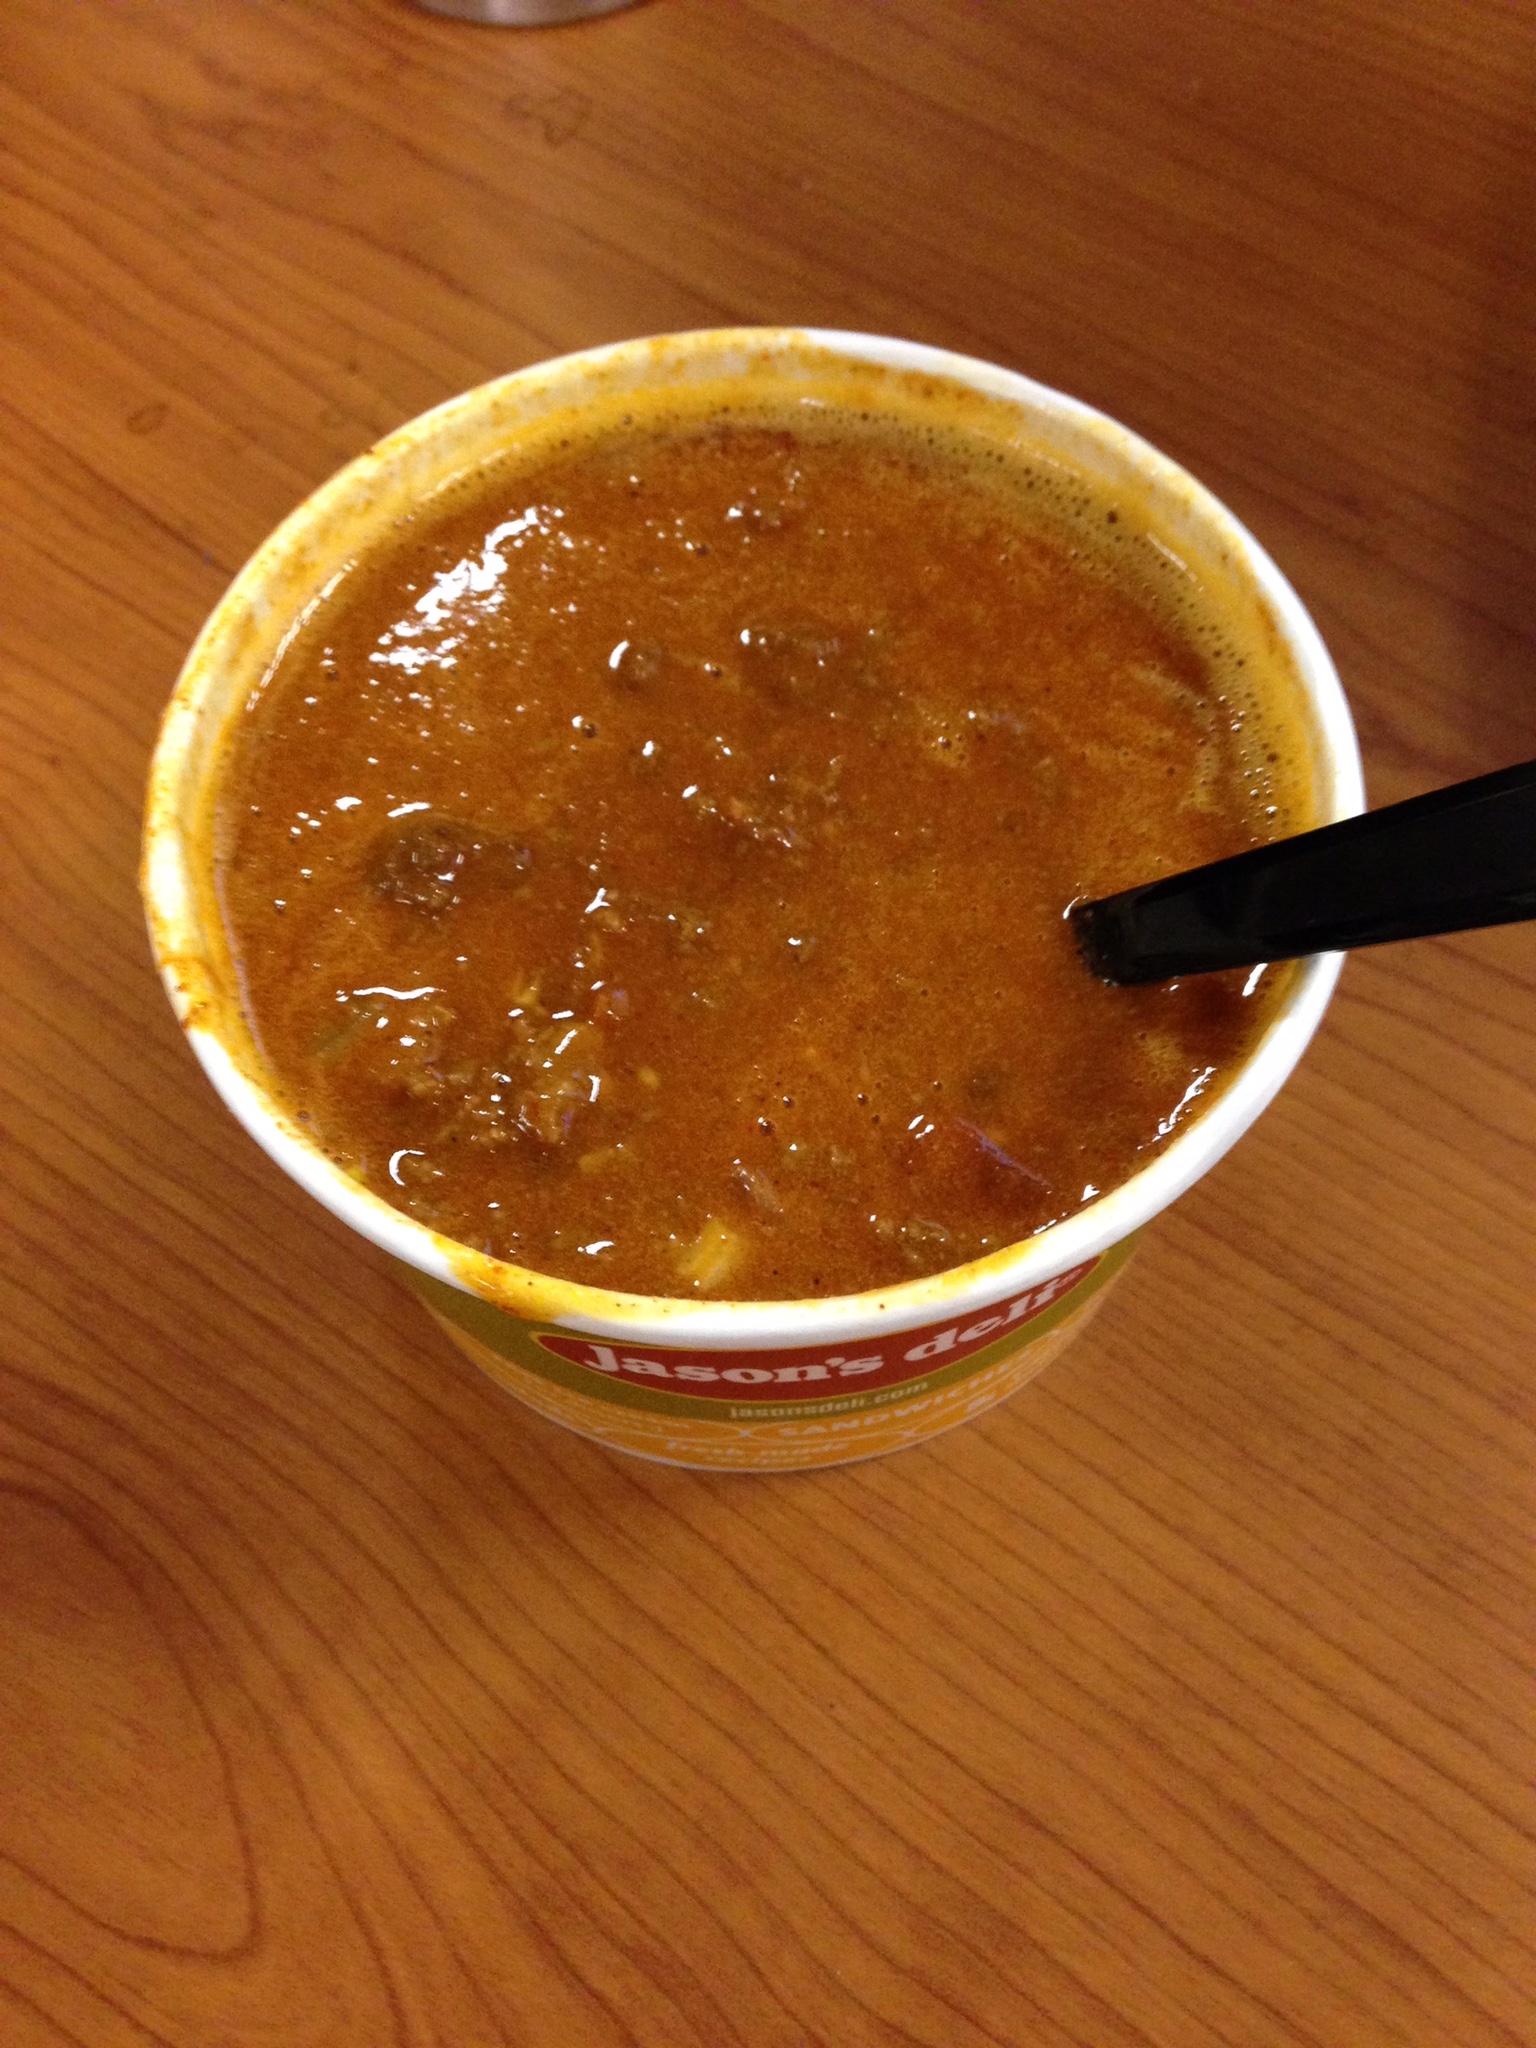
These next three are all from different restaurants.

 The first is a high-end restaurant that had calf liver on the specials menu (a top Keto food) and to top it off, it had sauted onion and BACON!

IMG_1238


This is a cup of beanless chili from a local delicatessen.

IMG_1239

Beef Cheeks from a local restaurant.

IMG_1240


This was a fantastic meal from Silo – Lamb with veggies, and they even brought hollandaise on the side.

IMG_0631


Hopefully these give you some ideas of how easy it is to order a delicious meal out on the town!  Have a great weekend!


Breakfast, Lunch, or Dinner Quiche

What else can I make besides scrambled eggs and bacon?  This is in the Top 10 list of questions we receive.

Eggs are great!  We know that, but we also get tired of the same old thing every day!

A Quiche is a great way to dress up your eggs in a beautiful way that the whole family can enjoy for any meal of the day.  It is filled with all the great nutrients that eggs provide, and anything else you wish to add to give it that special touch.  It is also a method to hide vegetables if you have picky eaters!  And…best of all, it cooks great without a crust.  No need to add carbs to something so savory and wonderful already!

These are great with the end of school approaching because you can prepare it a day ahead, and it reheats quickly and perfectly.  It is also delicious as a weekend dish straight out of the oven!  Fresh quiche just melts in your mouth.  Prepare to be creative and enjoy!


Crustless Broccoli Garlic Bacon Quiche

1 cup chopped onion

10 ounces chopped broccoli florets (approx. 3 cups)

5 cloves garlic

4 Tbsp butter

6 large eggs

1 1/2 cups cream

2 cups shredded sharp cheddar cheese (I didn’t have so I used a Colby/Monterrey Jack)

6 slices of cooked bacon

1/4 tsp cayenne

1 tsp ground mustard

1/2 tsp salt

1/2 tsp fresh ground pepper

1/4 tsp freshly ground nutmeg

9 1/2 inch deep dish pie plate

Preheat oven to 400 degrees.

Gather your ingredients, and chop your onion, garlic, and broccoli.  This is my favorite garlic chopper!

IMG_1010

IMG_1009


Sauté your onion and garlic in the butter.  Then add your broccoli to soften slightly.

IMG_1012


Spray your pie dish with coconut oil spray (you can find it here).

IMG_1014

For a Quiche, you want to layer your ingredients.  Start with your sautéed vegetables, and then top with bacon.  This goes for any type of quiche – veggies on the bottom, then your meat, then cheese, then top with your egg mixture.

IMG_1016


Sprinkle the cheese on top of the bacon.

IMG_1017Mix your eggs, cream, nutmeg, ground mustard, cayenne, salt and pepper.

Pour over the cheese.

IMG_1018

Place your quiche in your preheated 400 degree oven for 15 minutes.  Reduce heat after 15 minutes to 325 degrees and bake for an additional 30 minutes.

It should look puffy and delicious when you remove from the oven:

IMG_1020

As it cools, it will sink slightly.  Allow to cool for 20 minutes or so if you want to enjoy it right away.  If you are preparing ahead, allow to cool completely, cover with saran, and store in the refrigerator until ready to use.  This will keep for up to 5 days in the refrigerator.  Reheat in the oven or in the microwave for about 30 seconds a slice.

IMG_1021

Be creative with your ingredients.  My children have requested ham and cheese for the next one.  You can do spinach and parmesan, vegetable, bacon and cheese, or any other combination you can imagine.  Just remember to layer in the order above and cook accordingly!  Enjoy!


Quick Rule for Vegetable Picking

One of the very first questions that we get when people start wanting to go low carb is, “What do I eat?!”

The answer can be frustratingly simple because the answer is fat, protein, and vegetables.

The protein is easy enough, the fat raises most eyebrows, but the veggies end up being more difficult than people expect.

Once you start monitoring what you eat, it can be very eye opening the actual carb and sugar count on many foods that you thought were healthier than they are in actuality.

Image result for frustrated foodOf course, dark leafy vegetables are the the clear winners when it comes to the best bang for your buck on nutrients and lowest on the carb count. Side note-some of the best dark leafies are ones you have likely never considered, HERBS!

One super herb is Parsley:

Image result for parsley nutrition

% Daily Value for Parsley, dried 1 tbsp (1.6g)


Additional nutritional information on several herbs can be found here.

But after the dark leafies things get a little fuzzy, and that’s why we have employed the rule of thumb: “An above ground veggie is a good veggie.”

While the rule isn’t 100%, it is a great guideline. The high carb veggies tend to be the root vegetables such as carrots, beets, onion, parsnips, yams, turnip, radish, yucca, and of course, potatoes. While onions are on the underground list, the amount of onion people tend to eat in most recipes will not equate to a full serving size-so these can usually slide.


Image result for root vegetables

Basically, the general rule means that if it’s above the ground, you are likely okay! The exceptions include the starchy squashes, such as butternut, and of course the veggies that are not really veggies, prime example being corn. Despite being found in the fresh, frozen, and canned sections at grocery stores, corn is a grain, and a highly GMOed one at that, but that is an entire other post.


So next time you are considering what side to make, or what vegetable to pick up, just go with the general above ground rule, and you should be in the clear. Oh, and of course, don’t forget to add some healthy fat!


Image result for quality fat


Dress Up Your Summer Veggies with Bacon

IMG_0718

Just about everything is better with BACON!  It is definitely a staple in our house.  We can eat it for breakfast, lunch, and dinner!

Here is an example of eating bacon for dinner; one of many ways!  On days when I make my sheets of bacon, I try to make use of my bacon drippings by doing a dish that requires bacon AND oil.

I mean, really, what isn’t satisfyingly delicious when you cook it in bacon grease?

My Bacon Green Beans are a hit with the whole family!

Start with your sheets of bacon.  I usually try to do two to three cookie sheets of bacon at the beginning of the week.  Search for my bacon blog if you missed it!

Bake a foil lined cookie sheet of bacon on 350 to 375 for 15 minutes.  DO NOT discard your bacon drippings!  Please!

IMG_0782


You can keep going with your bacon on the same sheet to get more drippings (and more bacon).

Meanwhile, prepare your ingredients:

Wash and trim about 2 pounds of green beans.  Set aside.

Chop finely, 1 cup of white onion.

Using a garlic press, mince 5-6 cloves of garlic.  I love, love, love my garlic chopper!  You can find one here, and chop all of your cloves at one time!  My favorite kitchen tool!

Squeeze the juice of 1 lemon into a small bowl, discarding seeds.

Chop your bacon, and get your seasonings: crushed red pepper, black pepper, and Celtic or Himalayan salt.  Parmesan cheese if desired.
IMG_0778IMG_0779

Saute your onion and garlic in your bacon drippings until translucent.


IMG_0783IMG_0780

Add your green beans:


IMG_0781Once your green beans are slightly tender, but still crisp, add your bacon, lemon and seasonings.

IMG_0719

End with a sprinkle of parmesan cheese across the top!  I usually do this step on individual plates.

It’s that easy for a gorgeous, colorful, and delicious side that the whole family will enjoy.


To find items that we use in our posts, such as the All Clad sauté pan, the silicone spatulas and spoons, and cookie sheets, check out our new Amazon store here.

Fall in Love with Your Grandmother’s Cookware

Do you remember those black, HEAVY, naturally non-stick, pots and pans your grandmother or mother used every day for cooking? Do you have these relics gathering dust in your cabinet or even garage? If you do, its time to rethink and reconsider Cast-Iron.

Image result for lodge cast iron skillet


I have eliminated many of my non-stick modern pots and pans and moved to cast iron. The set of non-stick I had were very nice when I received them as a set for our wedding. But, in just over 5 years, those pans were starting to show signs of age, with definite scratches and discoloration on the workhorses in the group. So it was time for them to go.


There is nothing wrong with the non-stick pans per se, especially if you are careful with them, and don’t cook at high temperatures. However, studies have found that over very high heat, 400+, some of the non-sticks may release certain chemicals that are toxic and are known to accumulate in humans. This risk is likely small, due to the limited amount of time many of us cook at temps 400+, but the risk is there, and it’s easy enough to avoid. The more obvious risk comes from ingesting the actual coating, which can happen once it is damaged. The damage occurs from the scratching and banging that comes with the regular use in everyday cooking, cleaning, and putting away. Here are a couple articles about non-stick.

Consumer Reports Q&A

EWG-Environmental Working Group Talks Teflon


So why go back to cast iron?


Naturally non-stick. That means no added chemicals (you have already tossed the vegetable oil and Crisco, right?!?) Before using, “season”, your cast-iron, and in the beginning use a bit extra grass fed butter, ghee, or coconut oil when cooking to build up that layer of natural non-stick coating. Once that layer of seasoning is there, you are set-just don’t use soap and wash it off.


Cast-iron can actually add a beneficial nutrient to the foods you cook: Iron. That means instead of the possibility of leeching harmful chemicals, you leech Iron, a nutrient that many of us are running low on already.


Cast-irons really do not have to be babied or coddled. These guys are tough and can handle basically anything you throw at them or in them.  There is no potential of ingesting the chemical coating if you accidentally scratch it, worst case you may have to re-season, maybe.


Cast-iron is a one and done deal, and in the realm of cookware, highly cost efficient. In fact, as long as you take decent care of them, your grand-kids could possibly be using them one day. This means less to buy and even less to toss. Really, what do you do with a non-stick after its scratched?


Cast-iron pots and pans are universal cookware. Stove top to oven is no problem. We have used several of ours on the grill, and there is nothing more traditional than cast-iron on a camp fire. High heat searing is no problem-even frying. Case in point-Cindy used her grand mother’s cast-iron just last week to make Keto Tots! These guys were amazing, and she will be sharing the recipe soon!


It’s simple when you compare cast-iron to non-stick; no added harmful chemicals, sturdy, heats consistently, can go be used anywhere, can add iron to your diet, affordable, and is a built in arm workout. Win!


The best thing to do for your cast-iron is to keep it way from soap, and make sure to dry it before you put it away.  I own several of the “Lodge” brand pans in various sizes.  If you don’t see them in garage or estate sales you can find them them here and here. Lodge Cast Iron has been around way before many of the non-stick chemicals were even created in a lab, 100+ years.


Lodge-care for your cast iron


Great Side Dish for a Bar-B-Que!

Broccoli Salad

This is one of my favorite side dishes for a Bar-B-Que when you have gone Low-Carb!  Perfect for the Memorial Day holiday and filled with many of our favorite ingredients!

We hope that everyone has a safe, fun weekend filled with laughter, and time spent with loved ones and friends!  Special thanks to all who have served to protect our freedom this Memorial Day!


Bar-B-Que Broccoli Salad

8 Slices of Bacon Cooked and chopped

2 heads of Broccoli (chopped and lightly steamed-emphasis on lightly)

2 cups of Sharp Cheddar Cheese, shredded

1/2 red onion finely chopped

1/2 cup red wine vinegar

1/4 cup xylitol

3 tsp black pepper

1 1/2 tsp salt

1 1/2 cup mayonnaise

2 tsp fresh lemon juice


1.  Cook your bacon and lightly steam your broccoli.  Cool.

2. Mix together your red wine vinegar, xylitol, black pepper, salt, lemon juice, and mayonnaise.  This is your dressing!

3.  Combine your broccoli, cheese, bacon, and onion, and combine together for your salad.

4.  Slowly pour and mix your dressing with your salad, tossing to combine well.  Start with half of your dressing, and add more to your desired taste.  Let it sit in the refrigerator for 2 hours before serving.

5.  Enjoy!

Something Besides Eggs for Breakfast!

IMG_0870Yep!  You can eat something other than eggs for breakfast!

How about some buttermilk pancakes, for instance?

I know, how is it possible?  Well, when you have three kids begging you for something other than eggs for the 21st day in a row, you get creative!

I searched last Saturday for a recipe to make everyone happy.  I could not find any recipes that suited our family, so I whipped up something very special!  Most of the Paleo or Keto pancake recipes are either flavored or only make a single serving in a skillet.  I wasn’t about to make a recipe 5 times to feed all of us, and they wanted plain old pancakes like Mom used to make.

How did they turn out?  Fabulous!  The children told me that they actually liked them better than the ones I used to make, and I have to admit, they were pretty darned good.

With the long weekend coming up, I thought this an apropos time to hopefully make some other children (or adults) very happy on a relaxing weekend.


Your Ingredients:

IMG_0872

We have added several of our staple ingredients to our Amazon store, so you can click on the item and have it delivered to your door if you don’t already have it in your pantry.

Buttermilk Pancakes

Yield: 16 (Very Filling) Pancakes

1/2 Cup Coconut Flour

1/2 Cup Almond Flour

5 eggs

2/3 Cup Almond or Coconut Milk mixed with 3/4 tsp Apple Cider Vinegar

1 tsp Vanilla

1/2 tsp Baking Soda

1/4 Cup Swerve Granular

4 Tbsp Butter or Coconut Oil (Melted)

1/4 tsp Sea Salt

4 oz Cream Cheese (Softened)

Directions:

Preheat your griddle to 375 degrees.

1.  Combine your dry ingredients in a large mixing bowl: flours, soda, salt and Swerve.

2.  Add your eggs, one at a time, and mix together to form a thick batter:

IMG_0862

3.  Mix your Almond or Coconut Milk together with your Apple Cider Vinegar:

IMG_0863

4.  Pour this into your flour and egg mixture and mix.

5.  Add your remaining ingredients, and mix well with a hand mixer.

IMG_0864

6. I usually do not have to grease my griddle, but if you prefer to do so, you can use this.

7. I used a 1/4 cup measuring cup to spoon my batter evenly onto the griddle.

IMG_0865

8. Just like regular pancakes, when they start to bubble, flip them over.

IMG_0866

9. They should be a nice golden brown color when they are ready to eat!

IMG_0868

10. I just ate mine with butter, and they were plenty sweet with the added Swerve.  I will allow my children to eat a dab of honey, or pure maple syrup.  A better alternative is an all-natural sugar free syrup that you can buy here.

11. Enjoy!

IMG_0869 IMG_0870 IMG_0871Just to give you an idea on portion, we each had three pancakes, and were stuffed!  With the coconut flour and eggs, they are very filling!  One batch fed 5 very hungry people!


Holy Guacamole!

Okay, so guacamole may not be holy, but it’s pretty close in my house.  Avocados are almost the perfect Keto food, and they are loaded with potassium, folate, and vitamin K!

Avocados are ALWAYS in our kitchen!  We eat them on our green salads, and they are excellent in a tomato and mozzarella salad as well.  Our favorite way to eat avocados though, is guacamole!

We eat guacamole on almost anything.  We use is on our eggs in the morning (any kind), salads at lunch, and burgers and fajitas for dinner.  We can’t get enough!

If you missed the post the other day on the cheese crackers, now is the time to scroll down.  This is one of my favorite tricks!  We love the cheese crackers to dip in the guacamole!

It is a super easy recipe to make too!

IMG_0856

Guacomole

3-4 large avocados

1/2 bunch cilantro

1/4 red onion

juice of 1 lemon

garlic salt to taste


It took me many years to discover the best way to scoop an avocado.  Now that we eat them daily, I have the perfect tip for you.

IMG_0851

Slice the avocado lengthwise.

IMG_0852

Once open, chop down on the seed, twist and remove.

IMG_0859

Using a serving spoon, scoop the meat out of the skin.

Now you ready to get your ingredients together!

IMG_0854

Chop your onion and cilantro finely.

IMG_0855

Using a lemon/lime juicer, squeeze all the juice out of your lime.

Mix everything together and sprinkle with garlic salt.  Taste, and add more if needed.

IMG_0853


YUM!!!!

IMG_0857

One Stop Keto Shop

Daily, we are asked about what we use or where we purchased something. Be it information or a cooking gadget, often times we refer to Amazon. Due to this, we decided to put some of our favorite items together and create:


Posted by Alex Falcone on Wed, Apr 17, 2013 at 2:58 PM

The Sweet Life Sugar Free Amazon Shop


We want our store to be an excellent resource for books, vitamins, and basically everything else that doesn’t need to be refrigerated. We have books listed that vary from history, to science, some that border on beach reads, and of course, cookbooks. As of now, we have several items that you will find in our own kitchens and the kitchens of our Keto dreams (hello-programmable touchscreen crock pot.)

Crock-Pot Programmable Touchscreen Slow Cooker SCVT650-PS, 6.5-Quart, Silver
We will continue to add books, tools, pantry items, and other miscellaneous products to the store as we fall in love with them.

Please take a moment and click through the store. Every book and most products listed, we have read, used, or have come recommended to us from highly trusted sources. In the coming days, we will also be adding in supplements.
We will try to link ingredients and tools that can be found on Amazon directly in our posts, but we have a tab up and ready that will direct you straight to the store!
If you have questions or would like a suggestion please email or send us a message, and we will get back to you!

I Want Crackers!

That’s what I heard on Friday!  My kids wanted crackers, and honestly it sounded pretty good to me too.  What to do when you want a high-carb snack on a low-carb diet?  Get creative!

We were already planning on having fajitas, minus the tortilla, for dinner which meant guacamole was on the menu. What is better than plain old guacamole?  Guacamole with cheese!  What a way to Keto up guacamole – cheese, cheese, and more cheese!  And, maybe some jalapenos!

This time of year, with the end of school, planning summer vacations, packing for camps, attending recitals, baseball games, graduations, ceremonies, parties, and planning fundraisers, (Whew – makes me tired just typing about it!) we are all exhausted and out of time!  I promise this is easy, and look how delicious!!!!

IMG_0857


Cheese Crackers

First line a cookie sheet with Parchment Paper – Very Important!

IMG_0845

Start with shredded cheese.  Any kind will work – whether you buy it shredded or shred it finely yourself.  I used a Cheddar and Monterey Jack blend. Use your favorite!

Make little circles of cheese and press down so it forms a “cheese pancake”.  Don’t make them too thick or they will not crisp.

IMG_0847

If you want a little spice, add a sliced jalapeño to the middle, and press into the cheese.

IMG_0848

That’s it!  Bake in the oven at 350 degrees for 10 minutes.

IMG_0846

IMG_0850


Allow the “crackers” to cool so they crisp nicely.  Then, enjoy your carb-free snack with your favorite dip or eat them plain!  I made two cookie sheets, and they were devoured before dinner!

IMG_0849


« Older Entries