Tag Archive for vegetable

A Night Out on the Town

It’s the weekend, and what is better than taking a night off from the kitchen to have a wonderful meal out?  For those of you not local to San Antonio, you will have to make the trip down here.  We know many of our readers are local though, so we have some great tips you can try for an evening out!

The kids are off to camp this week so we decided to try some new restaurants we had heard about.  We ventured out four nights this week which I think is a record!  Of the four, two were very much post worthy.

The first one worth mention was Cured, which is located in the Pearl area near downtown San Antonio.  I went with Erin and another Keto friend, Kelley, where we decided to get three different dishes and serve them family style.

IMG_3254

We ordered a great variety.

The first was the Crabmeat Ravigote:IMG_3249

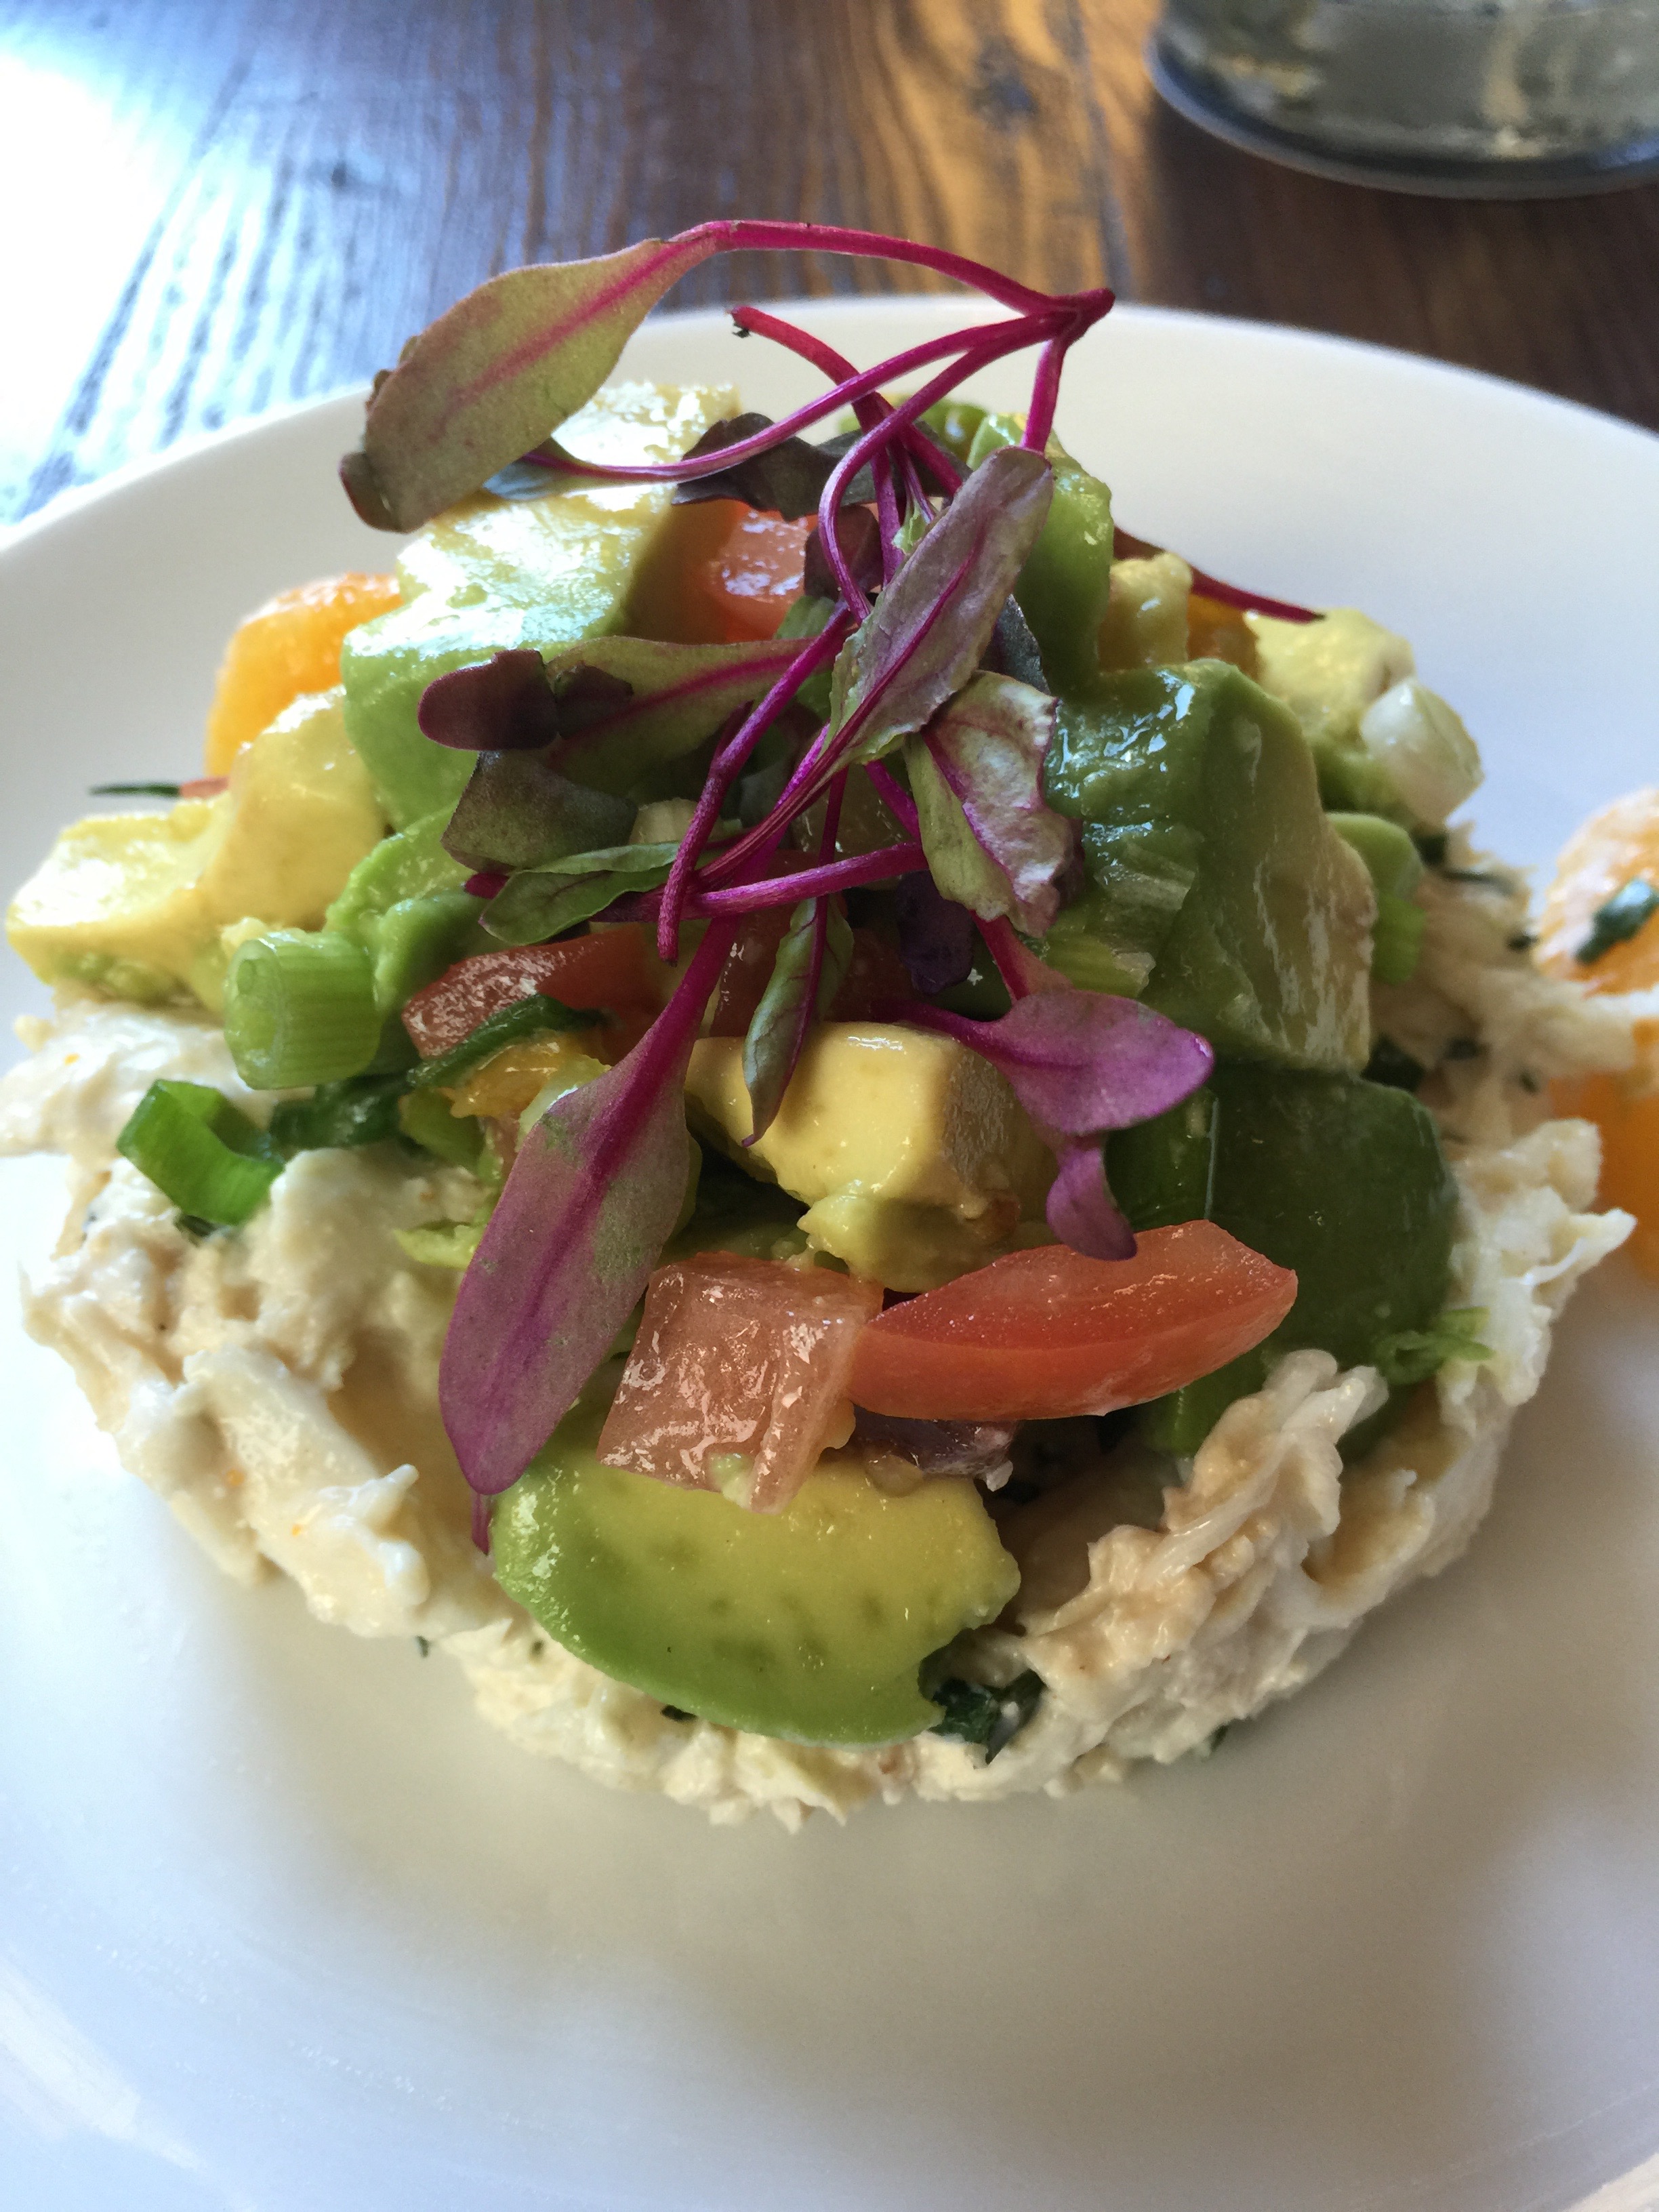
It is basically lump crabmeat in a mayonnaise base topped with a ton of avocado and salad fixings.  I asked them to leave off the beets.  It was a delightful summer dish, not to mention beautiful!

The second was the Wagyu Brisket Sandwich:

IMG_3252

Of course, without the bun!  Another delicious dish.  Look at the Herb Creme Fraiche and picked onions!  And…the wonderful natural beef fat could only help to make it perfectly KETO!

The third dish was a hands down favorite with all three of us.  Pork Cheeks Poutine:

IMG_3253

I am still salivating over this one!  I had never had pork cheeks or any kind of cheeks for that matter, but I guarantee I will have them again.  They are melt in your mouth tender with wonderful flavor.  They braise these and then slow cook them for hours.  It was topped with gobs of flavorful cheddar cheese, pickled cauliflower, and we chose to add the fried egg.  Can you say Keto, Keto, Keto!  AMAZING!!!  I can’t say it loudly enough!


Over all Cured got 5 Stars from all of us for food, atmosphere, staff, and Keto friendly!


The other restaurant we tried was The Cookhouse!  This one is located off of St. Mary’s on Mistletoe in a cute little restored house.  Make sure you have a reservation!  We went on Tuesday night and the only reservation they had left was 6:00 pm.  We probably watched them turn away 7 or 8 parties while we were there.  Another advantage of this restaurant is their corking policy.  You can bring your favorite wine to enjoy for a $20 corkage fee.


The Cookhouse is a New Orleans style restaurant so we were a little anxious going in because of all the heavy carb dishes usually associated with New Orleans.  They could not have been more friendly about substitutions here even though they had a large party that evening.  Everything is prepared fresh while you wait, and we were able to have a perfectly Keto Low-Carb meal.


We tried a lot of different dishes, and realized we ordered too much once the entrees arrived.  They are massive so go hungry!


We started with the Shrimp Remoulade Salad and Pork Cracklins:

IMG_3240


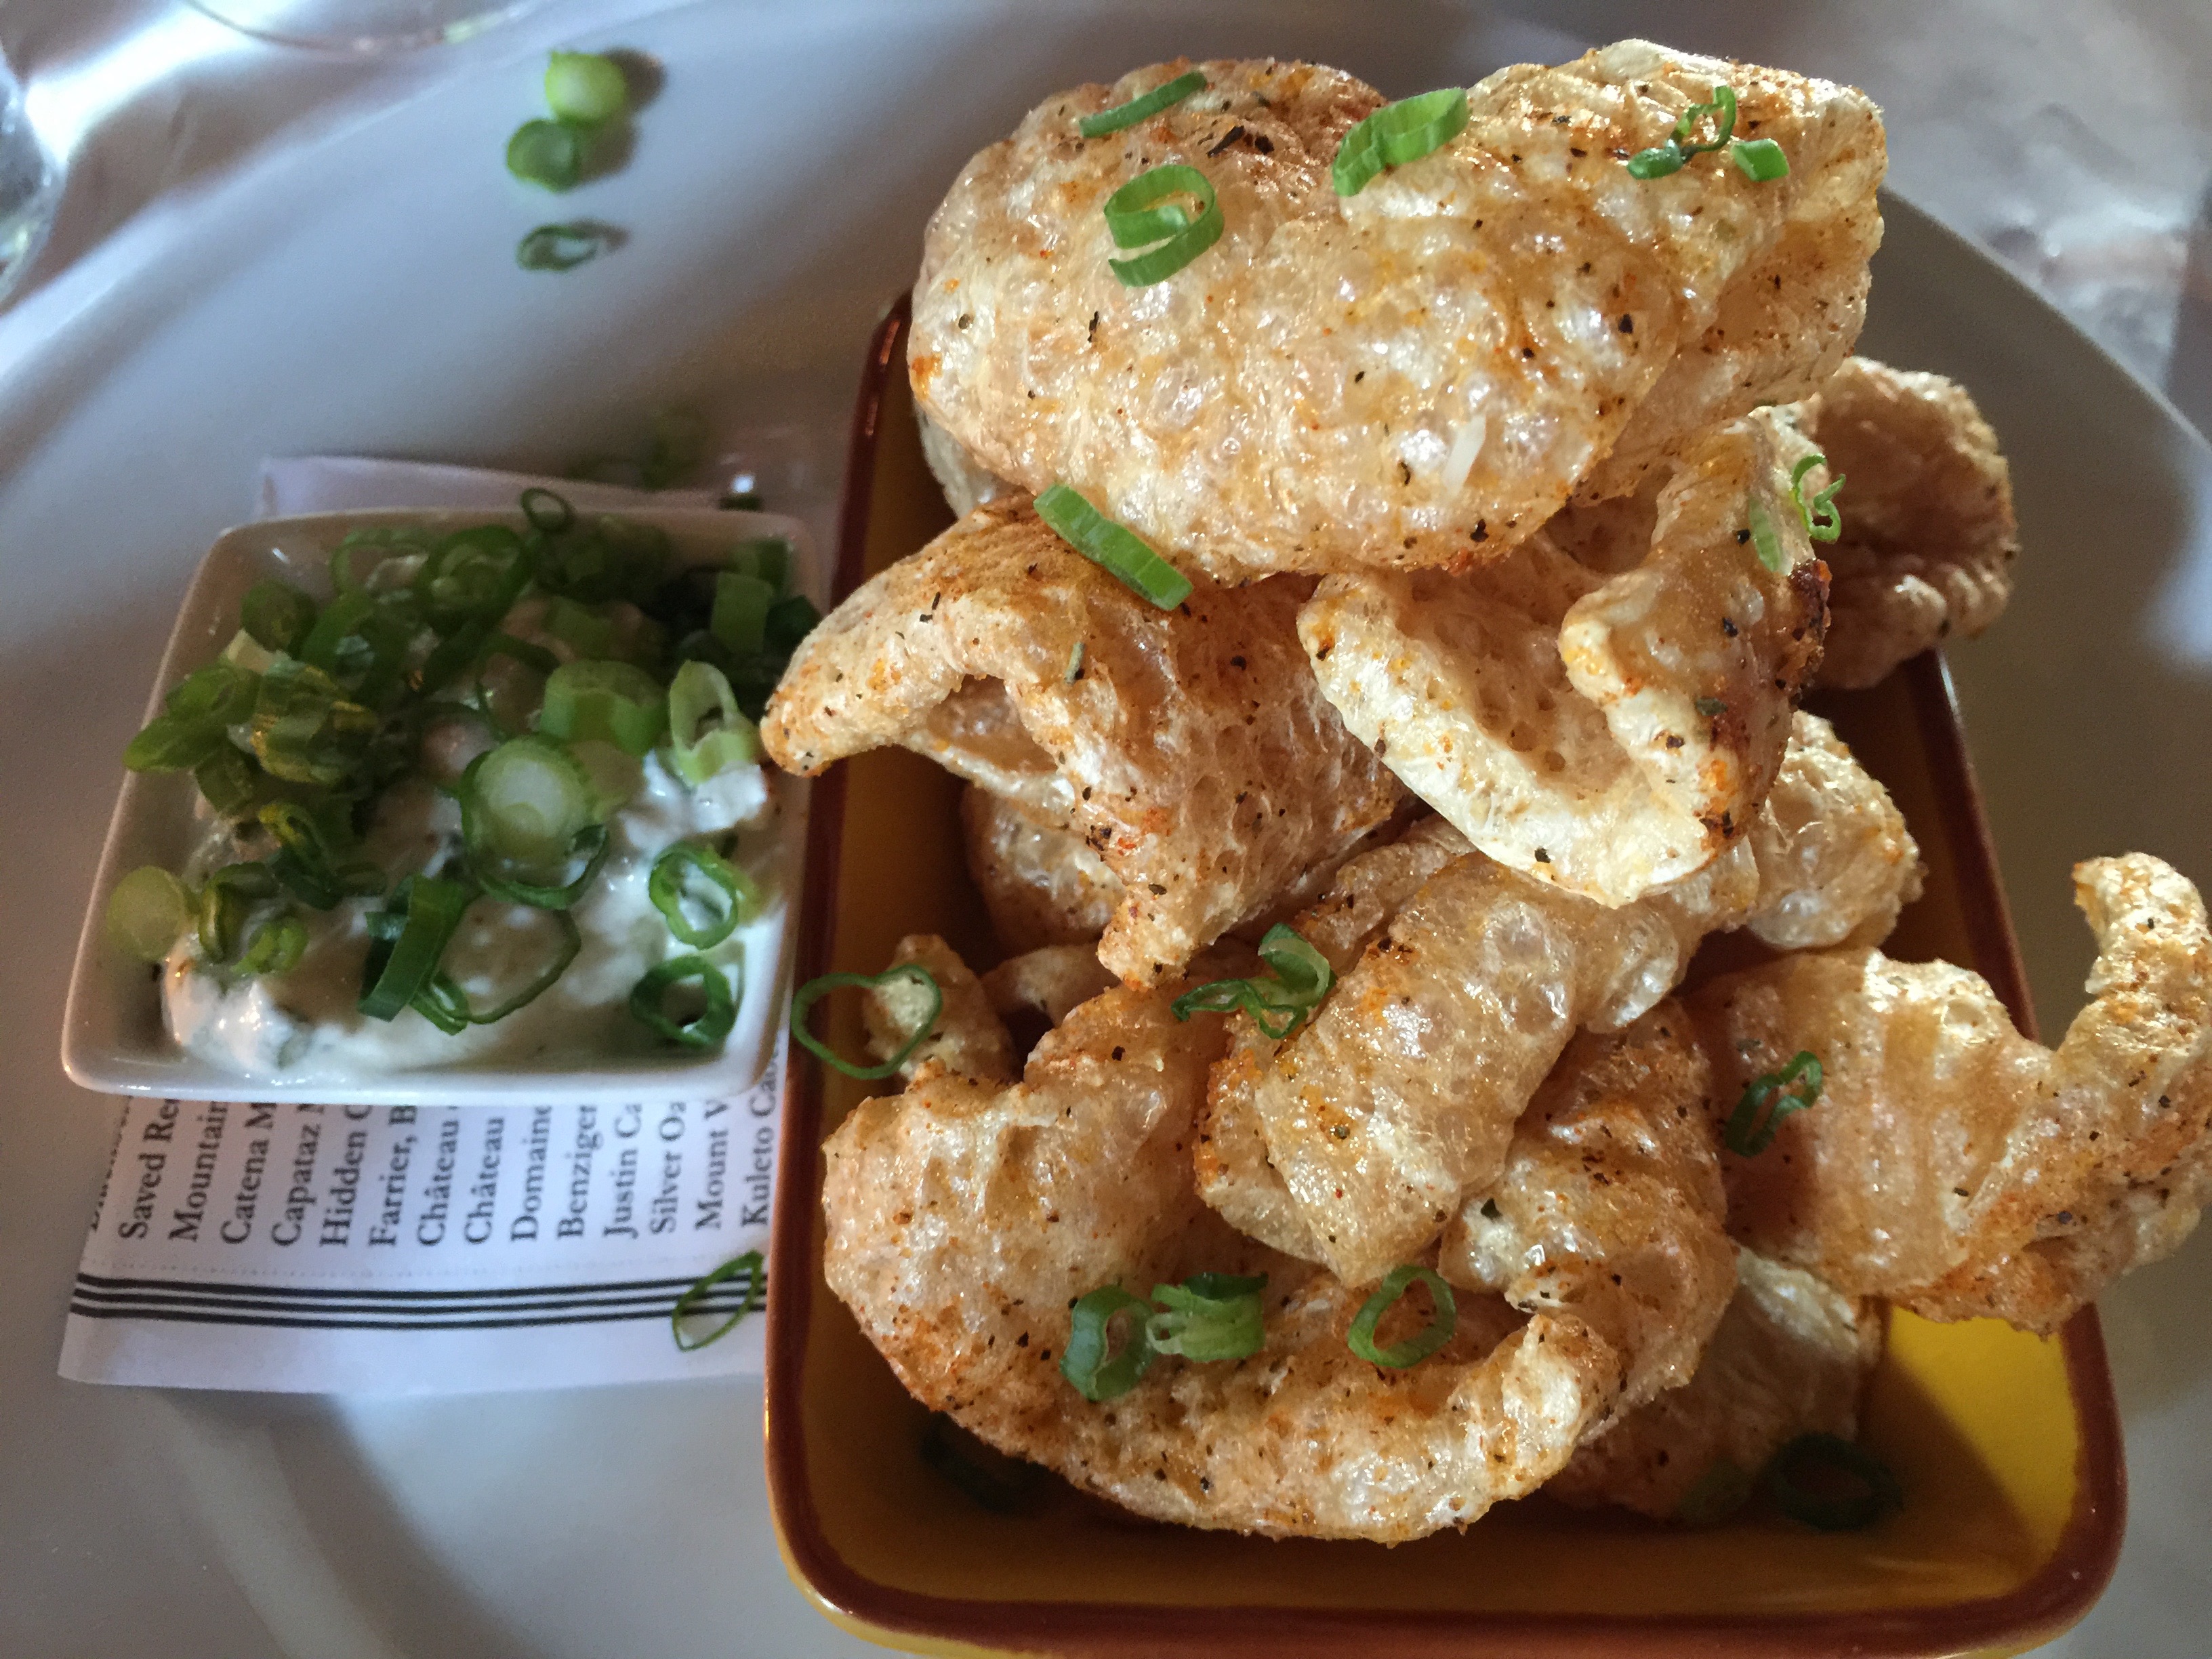
The Pork Cracklins are you guessed it, Pork Rinds served with an incredible cream cheese, sour cream and chive dip. These are a far cry from the pork rinds at the gas station!


IMG_3242

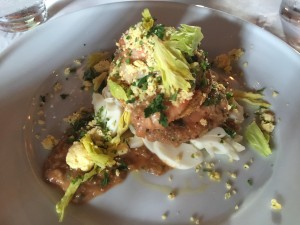
Above is the Shrimp Remoulade Salad-A meal in itself but watch out for the fried green tomatoes.


IMG_3243


Trout Almandine above


IMG_3244

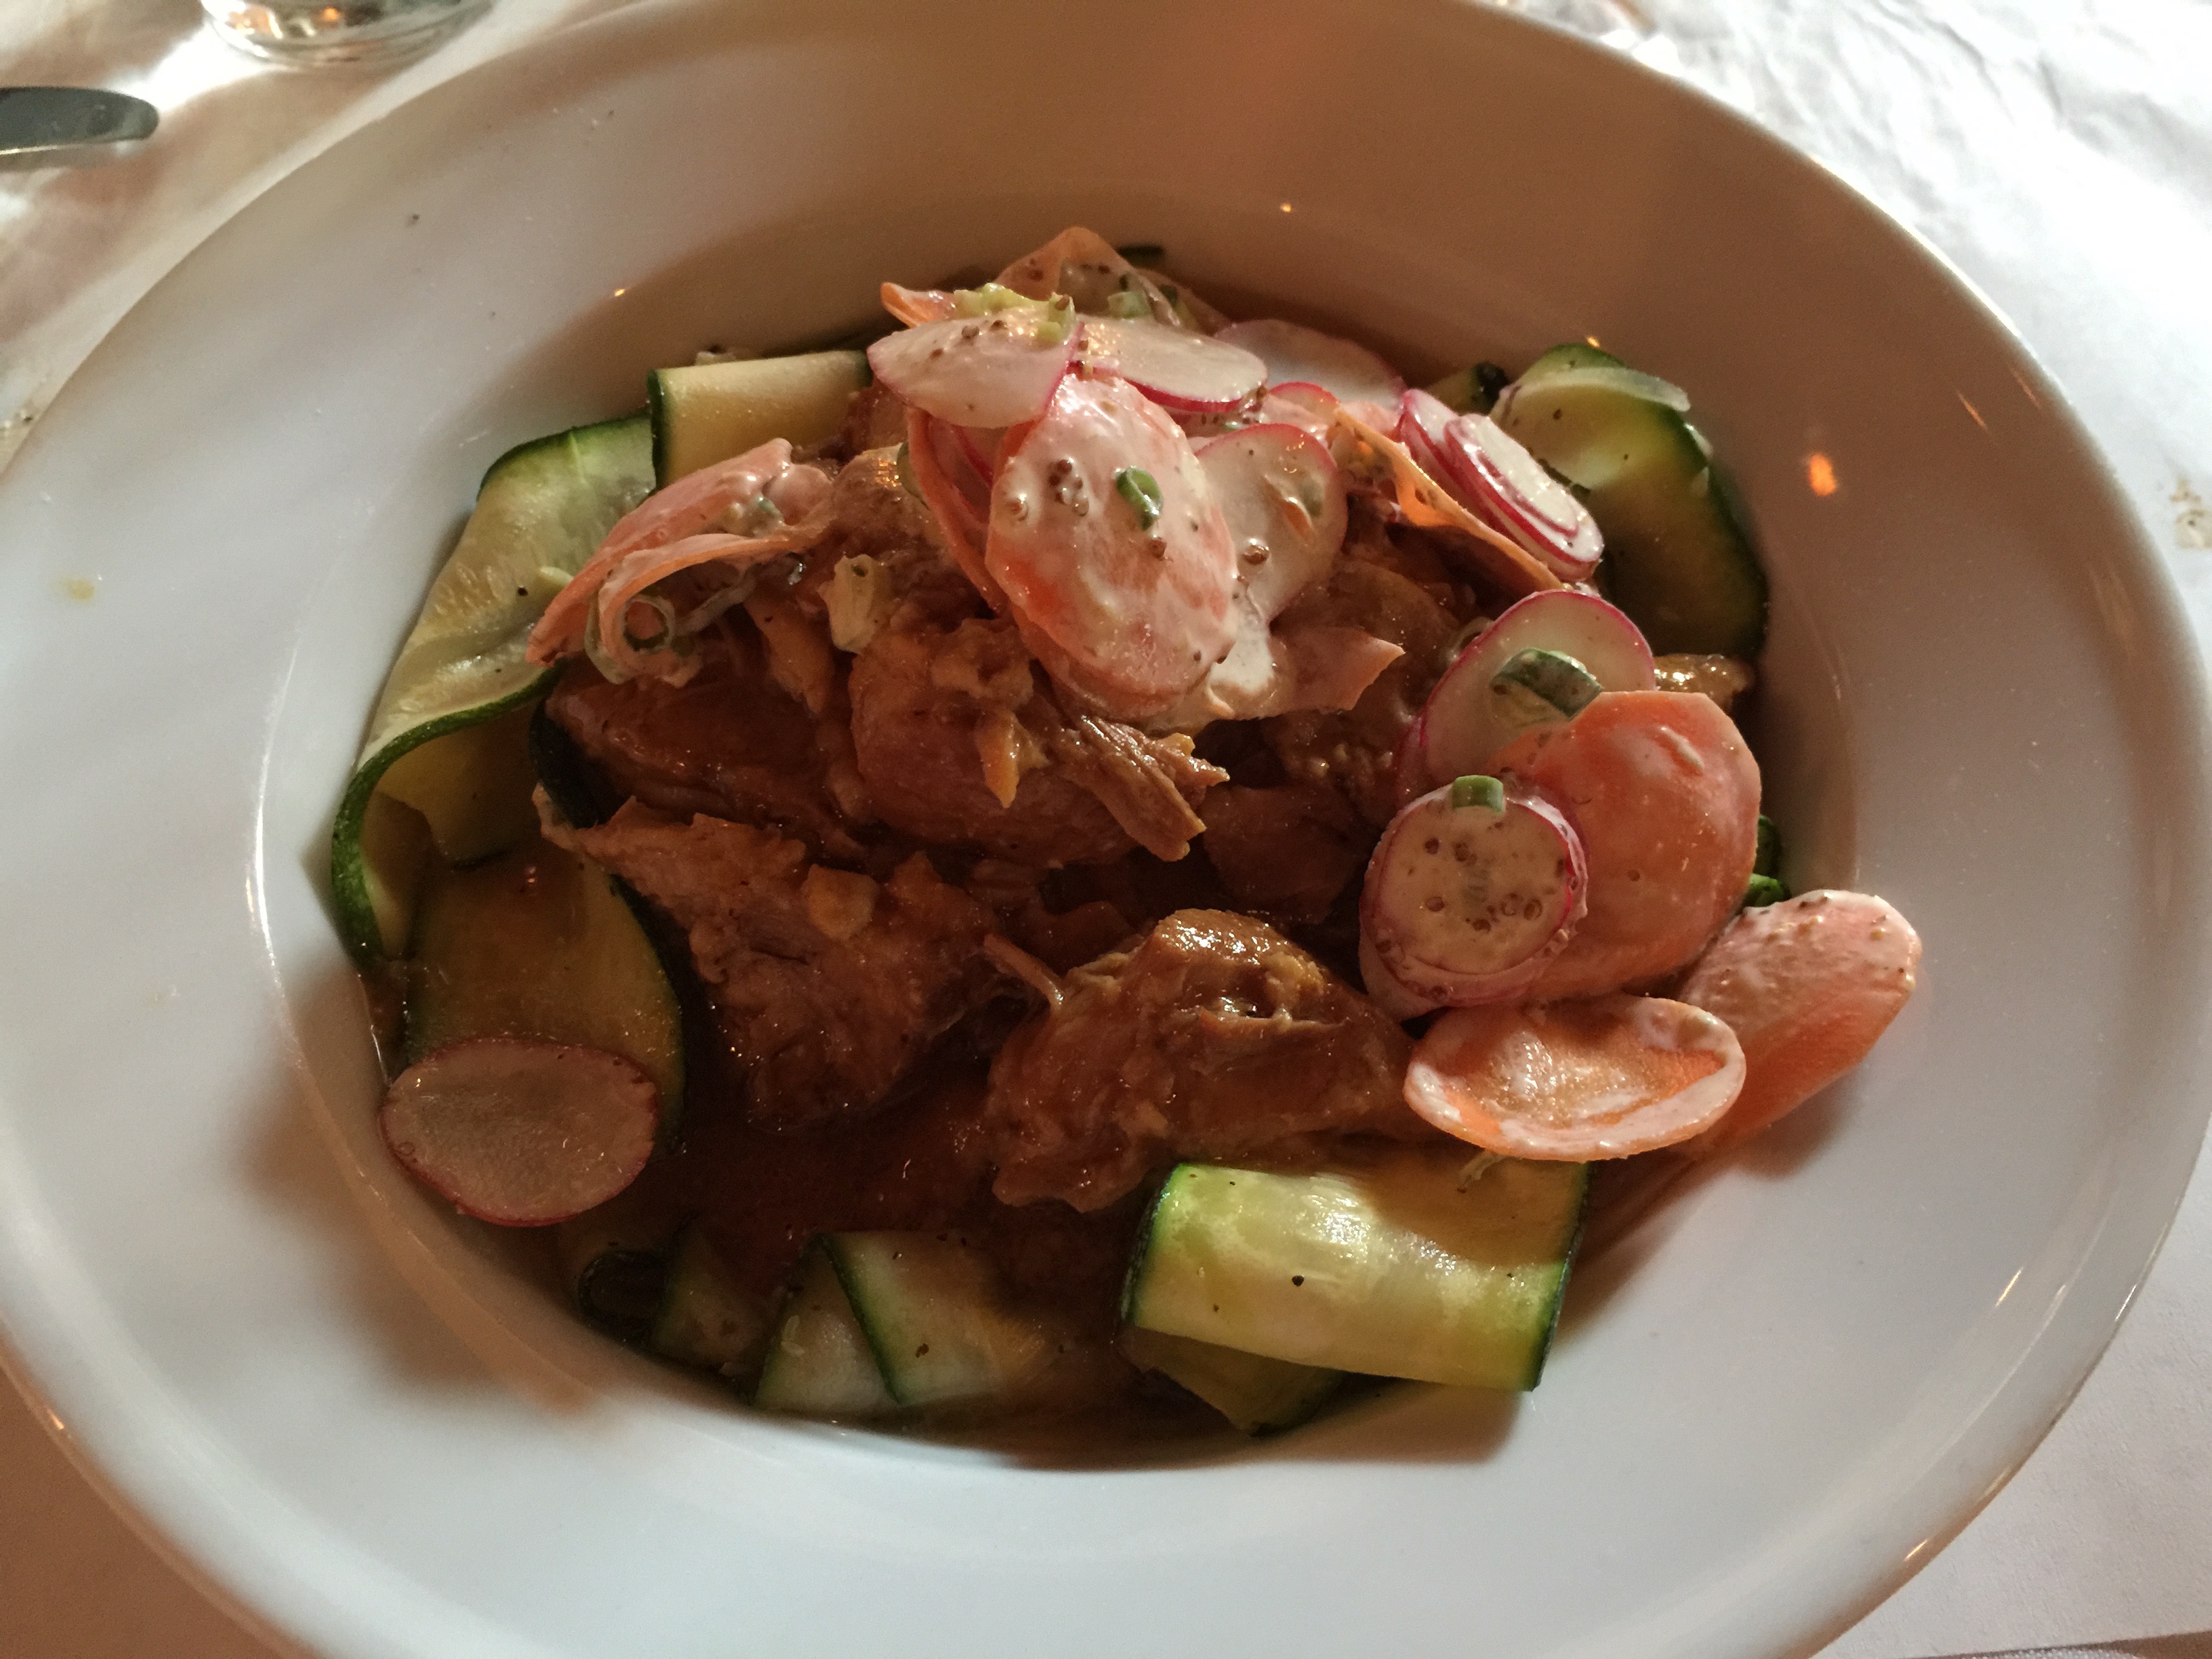
Braised Pork Shoulder with zucchini.


IMG_3247
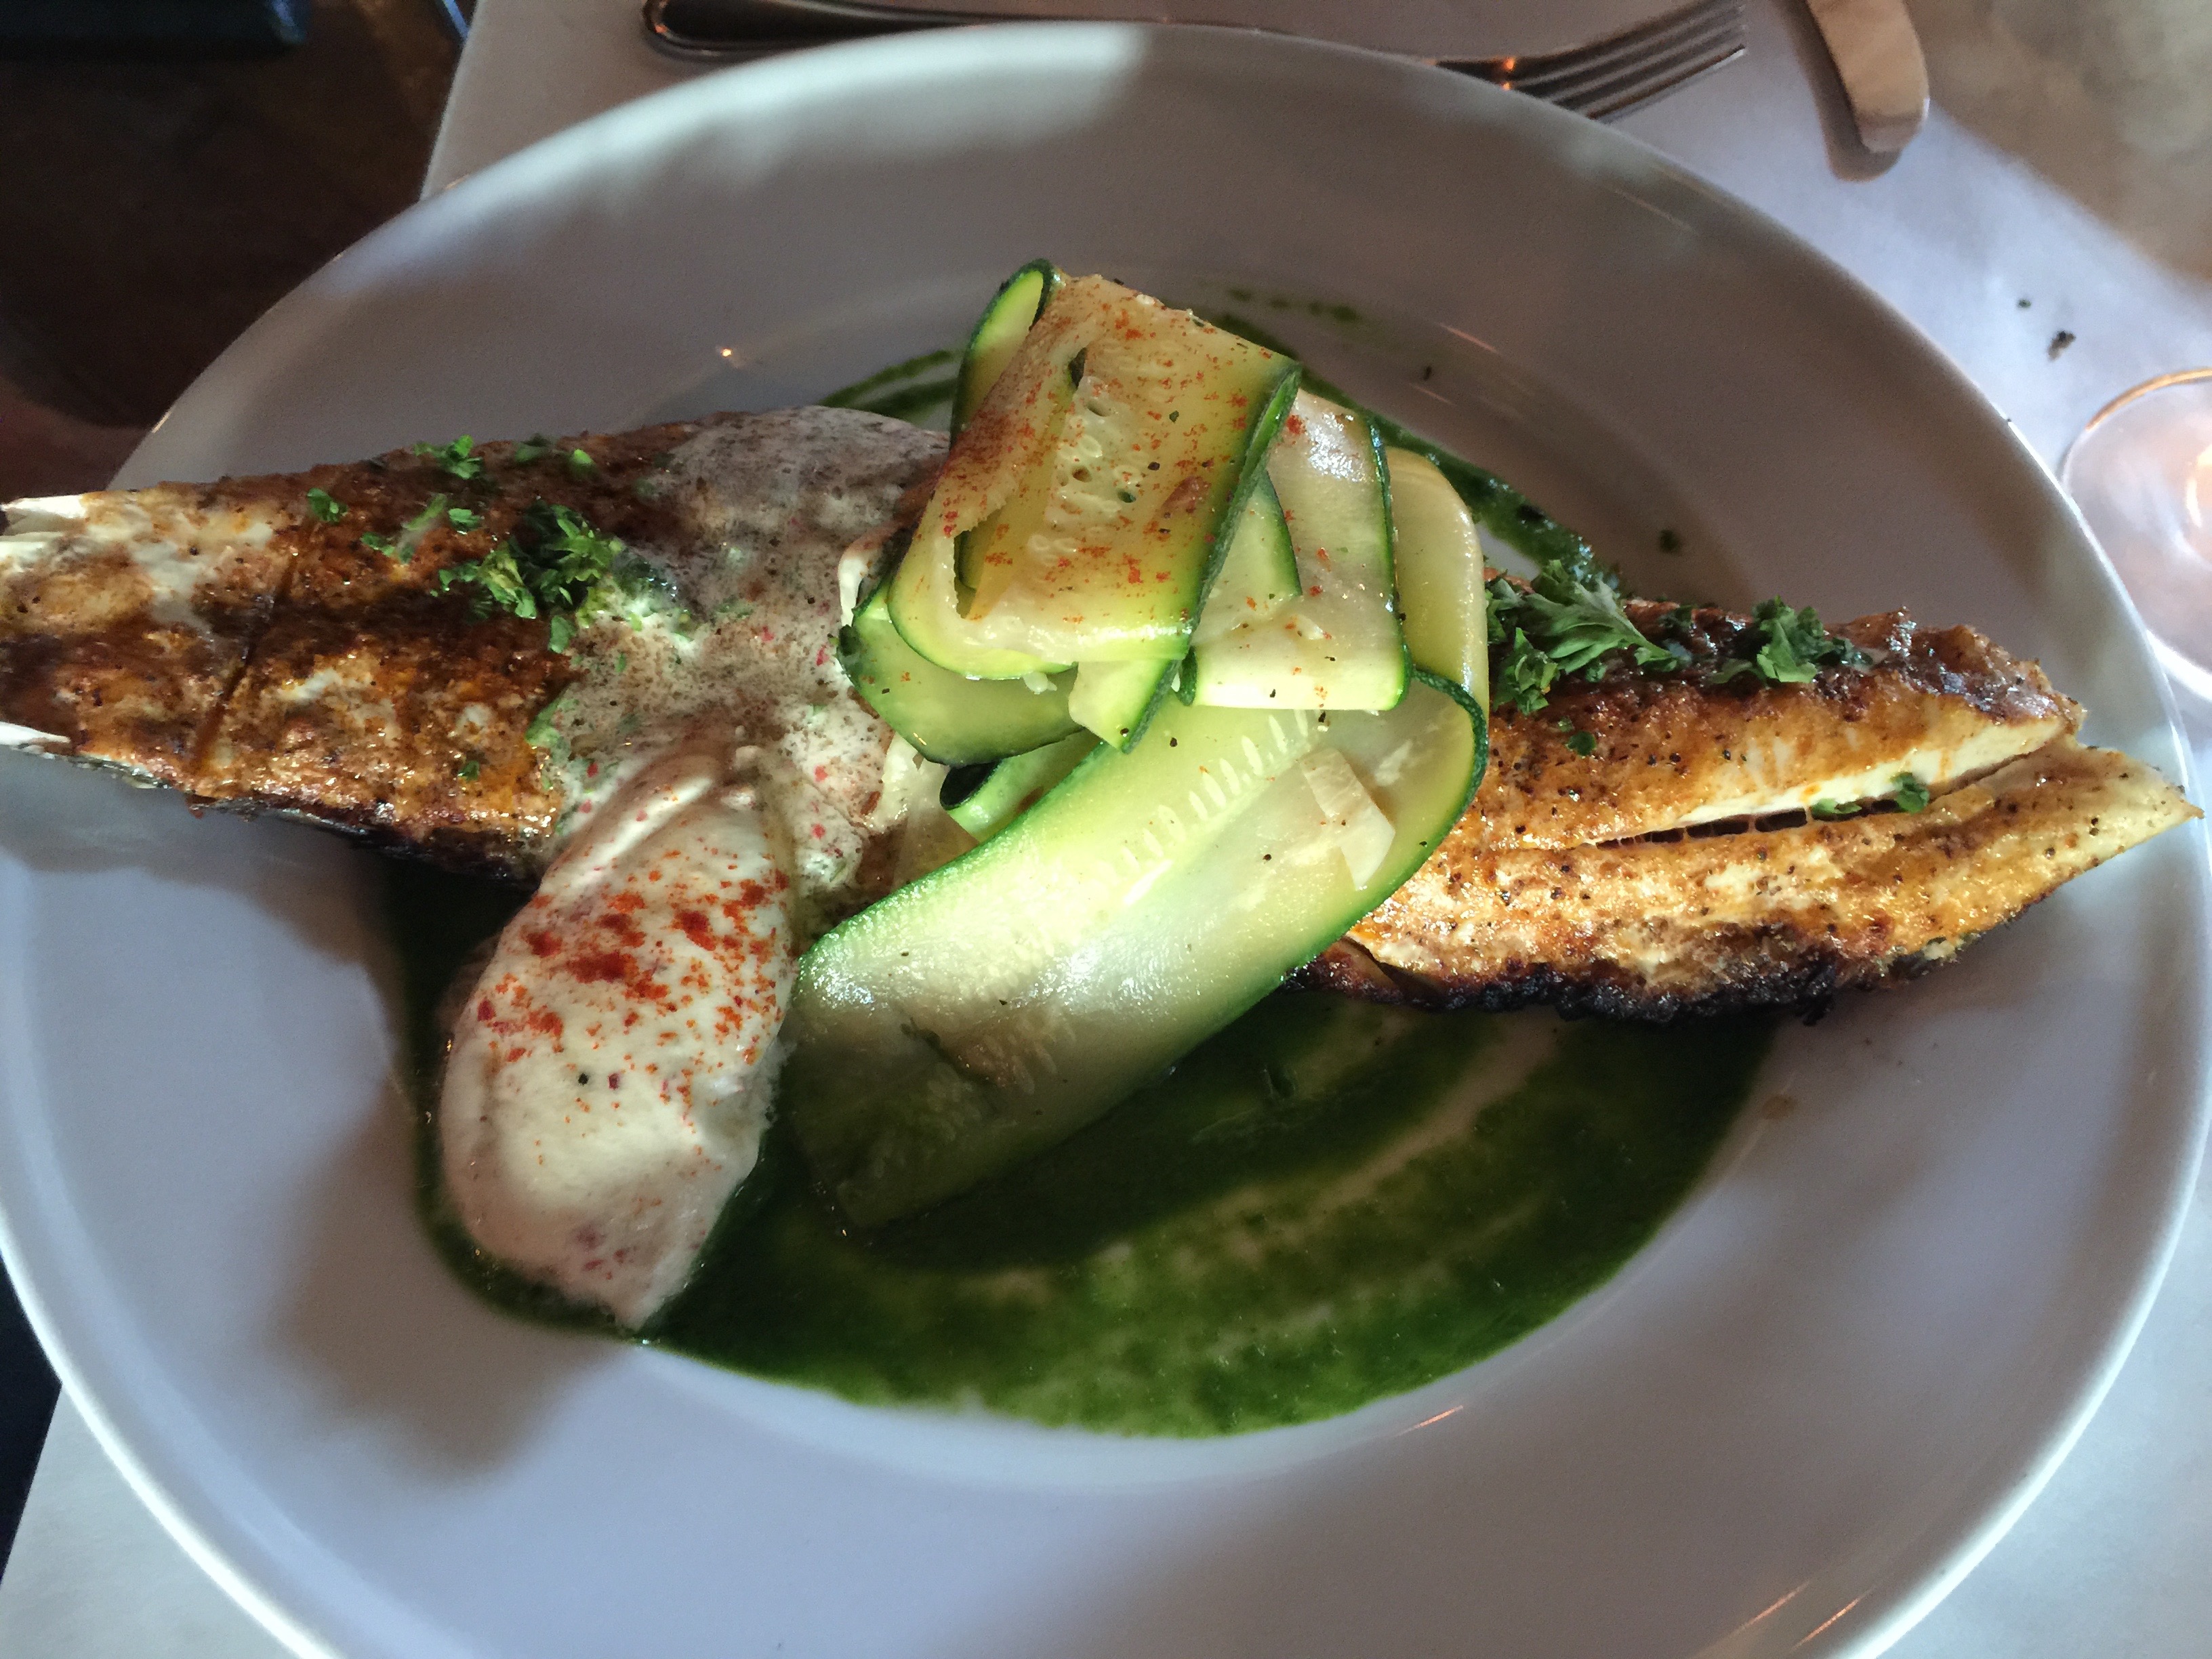
This was in place for the Blackened Drum in the menu, I believe it was a red fish.


When you think of cajun often the first thought after spicy and gumbo is grits. None of the four of us had grits and none of us missed them.


The Cookhouse was super accommodating and the objects on your screen are about three times larger than they appear. 🙂


Dress It Up!

We are thinking ahead to fireworks and celebration!  It is hard to believe that July 4th is right around the corner.  The other day I posted the “Refreshing Cukes” recipe which would be a great side dish for any Fourth of July celebration.  By the way, they just got better in the fridge for a few days!  The cucumbers were definitely a hit in our house!

Today, I have another side that is easy because all you need to do is prepare the dressing ahead, pour it in a mason jar, throw it in the ice chest, and you have a great nutritious side wherever your travels may take you!  Even better, you can use this tangy dressing as a dip or on any salad with what you have left over.

IMG_2823

Keto Broccoli Slaw Recipe

2 Tbsp Extra Virgin Olive Oil

1 Cup Mayonnaise (I used Hellman’s, but homemade is better)

3 Tbsp Apple Cider Vinegar

1 Heaping Tbsp Dijon Mustarrd

1/8 tsp Trader Joe’s Pure Stevia

1 1/2 tsp Celery Seeds

1 tsp Himalayan Salt

1/2 tsp Black Pepper

2 Bags of Trader Joe’s Organic Broccoli Slaw (I just use one at a time.)

Directions:

Start by combining your Olive Oil and Mayonnaise.  Then add your Apple Cider Vinegar and Mustard.

IMG_2824

Stir well.

IMG_2825


Add your Stevia: This is the best one I’ve found so far:

$_35

Then add the rest of your ingredients except for the slaw.

IMG_2826

Whisk well, and pour into a mason jar once it is completely combined.

IMG_2830

Now it is ready for packing or serving.  Place in the refrigerator until ready to use.  Also, shake well before each use to distribute the celery seeds.

When you are ready, empty the packet of broccoli slaw into a large bowl.  It will make more than you think, so pick a large enough bowl.  Pour about a half cup of dressing over your slaw and mix well.  You can always add more if you like.

IMG_2857

This is excellent served with Bar-B-Que, or served on its own.  Enjoy!IMG_2862


A Snack to Crunch!

images-1

No, not that kind of crunch!

The type of crunch I am talking about is the loud tortilla chip kind of crunch!  On Keto, I think it is safe to say, that one of the things we miss the most is that crunch of a chip or cracker.  One of my summer-time favorites was corn chips and salsa.  Needless to say, the corn is gone forever, but the salsa is here to stay.  So what does one do for that crunch, scoop, or dip?

blog-salsa

For a long time, I used a ton of celery, and still do for many things.  It can scoop, it’s refreshing, full of fiber, and I can have it for all those wonderful Keto dips out there.  It is not good for salsa though.  Then I discovered the cheese crisps we posted a few weeks ago.  Love those, especially for guacamole.  The cheese is the perfect accompaniment with avocado.

But, what about the salsa?  Well…zucchini was again on sale at Sprouts last week, so I bought a bunch to experiment.  Over the weekend I tried three different recipes for zucchini crisps.  I will share two of them with you, and you can choose which you prefer.

The first is a simple chip, and when I say simple, all you need is time and a few ingredients:

Crispy Chips

Ingredients:

2 Zucchini Squash

1/2 Cup Coconut Oil

Pink Himalayan Salt

Mandoline

Parchment Paper

Jelly Roll Pans

Directions:

Wash and dry your zucchini.  When I say wash, I mean wash with soap and water!

IMG_2686

I used a Mandoline to slice my zucchini very thin.  This also makes it a fast process.  You want them very thin.  Mine were probably less than 1/8 inch thick.

IMG_2689 (1)


IMG_2690

Now, I will tell you what I did, and also how you can do it differently.

The first thing I would change is to either slice my zucchini on the diagonal or lengthwise.  The reason being, they shrink tremendously when they dehydrate so if the purpose is for dipping, these left very little surface area to do such.

Line your jellyroll pan with parchment paper.  I used a slip mat, and it was a huge chore to clean, so go with parchment on these.  Just pretend this slip mat is parchment paper.

IMG_2691

Pour your coconut oil into a small pyrex or similar bowl.  Just something shallow will do.

Dip each “chip” into the oil and place on your parchment. They can be close together.  Variation: You can lay all your zucchini out and then brush them with the oil.  You just have to flip them half way through baking.

IMG_2694

Once you have dipped or placed all your zucchini on your parchment, sprinkle a very scant amount of salt on top.  This was a huge mistake of mine.  I used a normal amount of salt, but they shrank so much, they were literally coated in salt.  A little goes a long way on these!

IMG_2695

Place in a 200 degree oven for 2 hours.  Yes, two hours.  This will dehydrate and crisp them.  I flipped my cookie sheet around about half way through so they cook evenly.

This is how much they will shrink, and why I recommend slicing the opposite direction for dipping chips:

IMG_2696IMG_2708

Place on a paper towel to absorb the remaining oil.  Once dry, seal them in a ziplock bag or they will get soggy.


Method 2:

Cheesy Chips

These were described as tasting just like a “Cheez It”.  In other words, a great snack for the kids looking for that healthy crunch without any grain!!!

These are similar to above, except for the cheese.  Follow the same directions until you finish with your oil.

Ingredients:

2 Zucchini Squash

2 Cups Parmesan Cheese

1/2 Cup Coconut Oil

Mini-Cuisinart

Mandoline

Parchment Paper

Directions:

Slice your zucchini as described above using a Mandoline.

IMG_2690

Place the Parchment paper on your jelly roll pan (make sure it has sides.)

Grind your parmesan cheese in your Mini-Prep Cuisinart (unless you have already dirtied your big one.)  The parmesan adheres to the squash much easier when it is a bit finer, but still melts well, unlike the super fine ground you buy off the shelf.

IMG_2698

IMG_2699

IMG_2701

IMG_2702


Pour your finely grated cheese into a bowl.

Take your squash one by one and dip into the oil first, and then into the cheese.  Place each on a lined cookie sheet.

IMG_2694

IMG_2707


These will not need salt because your cheese is already salty.  You can add pepper if you like for taste.  You can always add extra cheese to the top if you have extra left over.

Bake at 425 degrees for 20 to 25 minutes.  They should be a little darker than golden brown to ensure they are crisp.  Serve immediately with your favorite dip or eat just as they are.

IMG_2709

IMG_2711


Store in a sealed container or Ziplock in the refrigerator.


Breakfast, Lunch, or Dinner Quiche

What else can I make besides scrambled eggs and bacon?  This is in the Top 10 list of questions we receive.

Eggs are great!  We know that, but we also get tired of the same old thing every day!

A Quiche is a great way to dress up your eggs in a beautiful way that the whole family can enjoy for any meal of the day.  It is filled with all the great nutrients that eggs provide, and anything else you wish to add to give it that special touch.  It is also a method to hide vegetables if you have picky eaters!  And…best of all, it cooks great without a crust.  No need to add carbs to something so savory and wonderful already!

These are great with the end of school approaching because you can prepare it a day ahead, and it reheats quickly and perfectly.  It is also delicious as a weekend dish straight out of the oven!  Fresh quiche just melts in your mouth.  Prepare to be creative and enjoy!


Crustless Broccoli Garlic Bacon Quiche

1 cup chopped onion

10 ounces chopped broccoli florets (approx. 3 cups)

5 cloves garlic

4 Tbsp butter

6 large eggs

1 1/2 cups cream

2 cups shredded sharp cheddar cheese (I didn’t have so I used a Colby/Monterrey Jack)

6 slices of cooked bacon

1/4 tsp cayenne

1 tsp ground mustard

1/2 tsp salt

1/2 tsp fresh ground pepper

1/4 tsp freshly ground nutmeg

9 1/2 inch deep dish pie plate

Preheat oven to 400 degrees.

Gather your ingredients, and chop your onion, garlic, and broccoli.  This is my favorite garlic chopper!

IMG_1010

IMG_1009


Sauté your onion and garlic in the butter.  Then add your broccoli to soften slightly.

IMG_1012


Spray your pie dish with coconut oil spray (you can find it here).

IMG_1014

For a Quiche, you want to layer your ingredients.  Start with your sautéed vegetables, and then top with bacon.  This goes for any type of quiche – veggies on the bottom, then your meat, then cheese, then top with your egg mixture.

IMG_1016


Sprinkle the cheese on top of the bacon.

IMG_1017Mix your eggs, cream, nutmeg, ground mustard, cayenne, salt and pepper.

Pour over the cheese.

IMG_1018

Place your quiche in your preheated 400 degree oven for 15 minutes.  Reduce heat after 15 minutes to 325 degrees and bake for an additional 30 minutes.

It should look puffy and delicious when you remove from the oven:

IMG_1020

As it cools, it will sink slightly.  Allow to cool for 20 minutes or so if you want to enjoy it right away.  If you are preparing ahead, allow to cool completely, cover with saran, and store in the refrigerator until ready to use.  This will keep for up to 5 days in the refrigerator.  Reheat in the oven or in the microwave for about 30 seconds a slice.

IMG_1021

Be creative with your ingredients.  My children have requested ham and cheese for the next one.  You can do spinach and parmesan, vegetable, bacon and cheese, or any other combination you can imagine.  Just remember to layer in the order above and cook accordingly!  Enjoy!


Quick Rule for Vegetable Picking

One of the very first questions that we get when people start wanting to go low carb is, “What do I eat?!”

The answer can be frustratingly simple because the answer is fat, protein, and vegetables.

The protein is easy enough, the fat raises most eyebrows, but the veggies end up being more difficult than people expect.

Once you start monitoring what you eat, it can be very eye opening the actual carb and sugar count on many foods that you thought were healthier than they are in actuality.

Image result for frustrated foodOf course, dark leafy vegetables are the the clear winners when it comes to the best bang for your buck on nutrients and lowest on the carb count. Side note-some of the best dark leafies are ones you have likely never considered, HERBS!

One super herb is Parsley:

Image result for parsley nutrition

% Daily Value for Parsley, dried 1 tbsp (1.6g)


Additional nutritional information on several herbs can be found here.

But after the dark leafies things get a little fuzzy, and that’s why we have employed the rule of thumb: “An above ground veggie is a good veggie.”

While the rule isn’t 100%, it is a great guideline. The high carb veggies tend to be the root vegetables such as carrots, beets, onion, parsnips, yams, turnip, radish, yucca, and of course, potatoes. While onions are on the underground list, the amount of onion people tend to eat in most recipes will not equate to a full serving size-so these can usually slide.


Image result for root vegetables

Basically, the general rule means that if it’s above the ground, you are likely okay! The exceptions include the starchy squashes, such as butternut, and of course the veggies that are not really veggies, prime example being corn. Despite being found in the fresh, frozen, and canned sections at grocery stores, corn is a grain, and a highly GMOed one at that, but that is an entire other post.


So next time you are considering what side to make, or what vegetable to pick up, just go with the general above ground rule, and you should be in the clear. Oh, and of course, don’t forget to add some healthy fat!


Image result for quality fat


Dress Up Your Summer Veggies with Bacon

IMG_0718

Just about everything is better with BACON!  It is definitely a staple in our house.  We can eat it for breakfast, lunch, and dinner!

Here is an example of eating bacon for dinner; one of many ways!  On days when I make my sheets of bacon, I try to make use of my bacon drippings by doing a dish that requires bacon AND oil.

I mean, really, what isn’t satisfyingly delicious when you cook it in bacon grease?

My Bacon Green Beans are a hit with the whole family!

Start with your sheets of bacon.  I usually try to do two to three cookie sheets of bacon at the beginning of the week.  Search for my bacon blog if you missed it!

Bake a foil lined cookie sheet of bacon on 350 to 375 for 15 minutes.  DO NOT discard your bacon drippings!  Please!

IMG_0782


You can keep going with your bacon on the same sheet to get more drippings (and more bacon).

Meanwhile, prepare your ingredients:

Wash and trim about 2 pounds of green beans.  Set aside.

Chop finely, 1 cup of white onion.

Using a garlic press, mince 5-6 cloves of garlic.  I love, love, love my garlic chopper!  You can find one here, and chop all of your cloves at one time!  My favorite kitchen tool!

Squeeze the juice of 1 lemon into a small bowl, discarding seeds.

Chop your bacon, and get your seasonings: crushed red pepper, black pepper, and Celtic or Himalayan salt.  Parmesan cheese if desired.
IMG_0778IMG_0779

Saute your onion and garlic in your bacon drippings until translucent.


IMG_0783IMG_0780

Add your green beans:


IMG_0781Once your green beans are slightly tender, but still crisp, add your bacon, lemon and seasonings.

IMG_0719

End with a sprinkle of parmesan cheese across the top!  I usually do this step on individual plates.

It’s that easy for a gorgeous, colorful, and delicious side that the whole family will enjoy.


To find items that we use in our posts, such as the All Clad sauté pan, the silicone spatulas and spoons, and cookie sheets, check out our new Amazon store here.

Stuffed Low-Carb Yellow Squash

A Savory Summer Side!

IMG_0743


Perfect for the summer time veggie season!

This is super easy, and so delicious anyone in your family will love it!  Even my picky 4 year old will at least eat out the stuffing!

Ingredients:

5 yellow (summer) squash

1 zucchini squash, steamed, cooked and diced

2 eggs

3/4 cup Parmesan cheese + additional to top squash

1/3 cup melted butter + 2 Tbsp (not melted)

1 bunch green onion

4 Tbsp almond flour

1 tsp oregano

1 tsp garlic powder

Salt & pepper to taste

Instructions:

Start with your yellow squash by washing and cutting off the ends.  Then cut in half lengthwise.

IMG_0735

One squash = two servings.

Lay them cut-side up in a glass pyrex baking dish.  Fill the bottom of the dish with water so you can steam the squash until softened.

IMG_0736Microwave on high for 4 minutes.  Check them after this time…if they are still hard in the middle, then keep cooking them on high in 2 minute increments until they are soft enough to scoop, but not mushy.

When they are tender, remove them and let them cool a bit or you will burn off the tips of your fingers. Maybe not, but it will hurt!

IMG_0738 IMG_0739

When they are cool enough to handle, use a soup spoon, and start hulling out the inside of the squash. Hull all but one half – leaving this one to chop finely.  Be careful not to poke all the way through.  Place the squash you have removed into a mixing bowl, and your now empty “boats” onto a cookie sheet.

Finely chop one half of one yellow squash into small bits, along with one zucchini squash that you have also steamed and finely diced.  Now, you will see a lot of water in the bottom of the bowl.  Try to drain as much of this as possible or it will be too runny.  I press and drain 3 or 4 times.  You could use a mesh colander for this also.  It is okay to be moist, but you don’t want standing water at the bottom of the bowl.

Once most of the water is removed, I use a sharp knife and run it through the squash in the bowl to break up the membranes in the squash.  This is not an exact science.  Just break up the larger pieces that you scooped out.

Add your eggs, 3/4 cup Parmesan cheese, 1/3 cup melted butter, finely chopped green onion with some of the green tops included.  Then add 2 Tbsp of almond flour and your seasonings.  Mix well!

IMG_0740 IMG_0741

Use the mixture to fill your squash “boats” so it is slightly heaping.

IMG_0742Lightly sprinkle with the additional 2 Tbsp of almond flour, put a pat of additional butter on top and finish with as much Parmesan cheese as you desire.  I have also topped with mozzarella cheese as well.  Both are delicious!

Bake in the oven for 25 minutes at 350 degrees, and you have an amazing side dish!

IMG_0743

Enjoy!


Low Carb Rice?

IMG_0648

Yes, low carb rice indeed!

This is one of our favorite tricks for sprucing up dishes with a little extra texture.

I have to admit that I was skeptical at first, but it really works, and the kids love it, while getting their veggies at the same time.  Mine can’t tell the difference!


Cauliflower Rice

Start with a large head of cauliflower, a nice sharp knife, a food processor and a foil lined baking sheet.

IMG_0659Cut your cauliflower into small florets and rinse in a colander.

IMG_0658Let the cauliflower dry for a bit and then add to your food processor a little at a time.  If you do too much at once you will get some clumps.

IMG_0650Then PULSE your food processor until the cauliflower resembles snow.  Don’t over pulse or you will get a puree.

IMG_0649After each batch, scrape the pulsed cauliflower out onto your cookie sheet.  If you have larger pieces, just throw them back in with the next batch.

When it is all “snow” you should have a nice full cookie sheet of “rice”!

IMG_0648Bake in the oven on 350 degrees until the top is just starting to turn golden.  I take it out a few times and toss it around to make sure it is all getting cooked through.  This will remove the rest of the moisture and you will have a great side dish in about 25 to 30 minutes.

We generally use the rice under Indian dishes like Tiki Marsala or Curry, but we also serve as a side topped with Kerrygold!

Enjoy!IMG_0647

Cancer Fighting and Alzheimer’s Preventing Delicious Side Dish

IMG_0687

What do you think when you hear the words “Brussel Sprouts”?

I used to think, “Yuck!”

Now our entire family devours these nutrient dense veggies in just a few seconds.

Believe it or not, Brussel Sprouts are in the cruciferous family and one the healthiest vegetables on the planet.

They are also one of the best vegetables for Cancer and Alzheimer’s prevention containing loads of Vitamin K and Vitamin C.

Check out this link for all the health benefits of Brussel Sprouts:

http://www.whfoods.com/genpage.php?tname=foodspice&dbid=10

So how do I cook these so they are Keto and the kids inhale them?  It is super simple!

I always make these on a day that I cook a lot of bacon for breakfast!


Bacon Brussels

2 lbs Brussel Sprouts

1/2 white onion chopped

4-6 cloves garlic

8-10 pieces of bacon with drippings

Salt and Pepper


Cook a foil lined cookie sheet of bacon on 375 degrees for 15 to 20 minutes.  I can usually cook 10 to 12 large pieces on a sheet.  You can do more batches of bacon to get more drippings if you like.  I did two batches for 2 pounds of Brussels.  This way you have bacon for breakfast, and the rest left over for dinner!

Remove bacon to a paper towel after it is cooked, and leave all drippings on the cookie sheet.

Rinse and drain your Brussel Sprouts in a colander.

IMG_0695

Cut off ends, and throw in the trash.  Quarter the sprouts and place in a large mixing bowl.  These Brussels were huge so I had to cut some of them into eighths.

IMG_0694Dice your onion and peel and mince your garlic.  We like a lot of garlic, but you can adjust to your taste.

IMG_0693Add onion and garlic to your Brussel Sprouts and mix well.

IMG_0692Pour your mixture over your bacon drippings on your cookie sheet and toss to coat.

IMG_0691Add salt and pepper to taste.

IMG_0690IMG_0689Place in the oven at 400 degree for about 15 minutes.

Crumble cooked bacon and toss into the Brussel Sprouts.  Cook an additional 5 minutes, and serve.

IMG_0687YUM!!!