Archive for Sauces and Dressing

What to do with all those EGGS?

easter-wallpaper-1

We love Easter in our home!

We love the reason behind it, and the celebration of Christ’s resurrection. We love the excitement of the Easter egg hunt, the wonderment, the family, the traditions, and yes, the FOOD.

What oh what to do with all those eggs you dyed?  We used to hunt those dyed eggs as kids until the dog got sick on them :-).

Our children just hunt the plastic kind, but I still love the tradition of dying the boiled eggs on Good Friday!  They love it too!  But what do you do with all of them?  This is where I can help!  They are just sitting in your fridge, right?  Well, don’t let them go bad.  I have ideas for you!  And, yes, they are still good to eat!

basket-of-easter-eggs-A

Take those beautiful pastel eggs and use them – ketofy them!

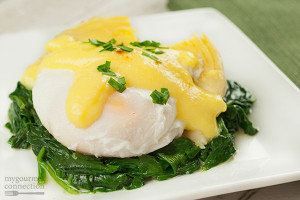
There are numerous uses for boiled eggs such as adding them to salads, (especially tuna salad and cobb salad), deviled eggs (an Easter favorite), add them to sautéed spinach or asparagus with hollandaise, or even just eat them for breakfast or a snack with a little salt and pepper.

My favorite Easter memory is creamed eggs though!  Creamed eggs just scream Easter morning breakfast for me, and this is how my mom used our dyed eggs on Easter morning.  She literally just used a Béchamel sauce and added the chopped boiled eggs.  Of course she served it over well-buttered toast, and it was delicious, but when you are eating against the grain you need to modify.  What do you do when you can’t use flour in your Béchamel?  Did you know that if you simmer cream long enough, it will naturally thicken?  This trick I did not know until I went Keto!

This is what I did:

Peel and cut up your boiled eggs and set aside.

images

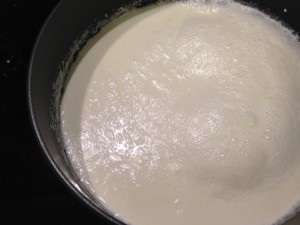
Allow about 45 minutes for your cream to thicken.

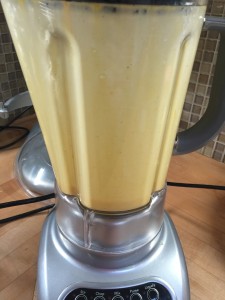
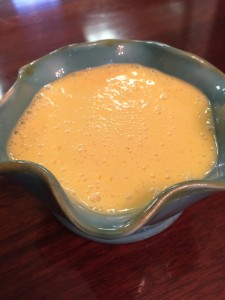
Using 4 cups of heavy whipping cream, (add a Bay Leaf if you like), and bring to a rolling boil over medium-high heat.  Keep an eye on it because it will make a mess if it boils over, and it does have a tendency to do this.  Keep the cream at a low boil for about 45 minutes stirring frequently over medium heat.  When it reaches the consistency of a cream sauce, turn it off.  It can take a little longer, but not more than an hour.  (Yes, I would say this is a weekend treat unless you get up really early.)

starburst-sauce-and-dilly-bars-068-1

Now, you can add salt (1 tsp Pink Himalayan) and pepper (1/2 – 3/4 tsp freshly ground) and keep it as it is or add some more flavor.

Now, plain is delicious, but I took it a step further:

I added a couple of Tbsp of fresh chopped parsley and 1/2 cup of fresh parmesan.  Stir until melted.  Lastly, add your eggs and gently mix them in.  You can also add a few TBSP of butter for extra decadence.

My family loved it, but couldn’t figure it out the new taste with the cheese until I told them what I added.  It was deliciously creamy and decadent.  You don’t even need bread!  Spoon it into a bowl and enjoy your new tasty, gluten free treat!
Unknown


Easiest Dinner Ever!

8f13089806ded9dc49d92b71e26bac58

Well life just got super crazy in our house!  We were just getting into the swing of basketball season, and the craziness of baseball season smacked us upside the head.  Little did we know that baseball started the day after the draft and looks to be 7 days a week between the two boys.

Pile that onto 3 ongoing basketball teams and a move!  My head is spinning.  We are regrouping to some very easy, fast meals that can be prepped ahead and thrown into the oven at go time.

This is something I made on a ski trip on the fly so I pulled it out today.  It doesn’t get much easier than chicken, sauce and cheese!

Green Enchilada Casserole

2 Chickens or 6 Chicken Leg Quarters

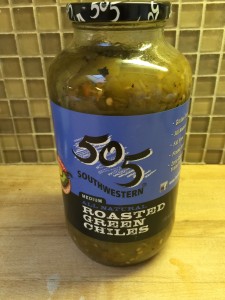
1 jar of 505 Roasted Green Chili Sauce

3 cups Monterrey Jack Cheese

Sour Cream

Hot Sauce

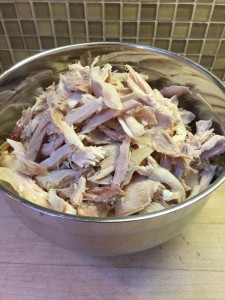
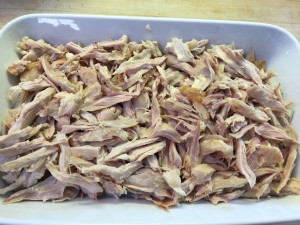
Yes!  It is that easy.  I bought the precooked chicken quarters at Costco (Not the best quality, but as well as I could do in a pinch) and just peeled the chicken.  We prefer the fattier dark meat chicken, but you can also use a rotisserie chicken, chicken breasts or boil or roast a couple of chickens.  I was able to get about 5 -6 cups of chicken out of the Costco pack.  I used 4 in my casserole dish and saved the rest for chicken salad.

IMG_5946

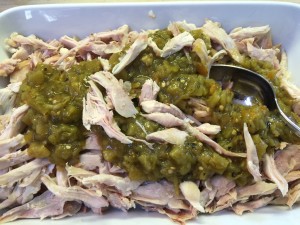
Pile the chicken in your dish and cover with about 2 to 3 cups of the green chili sauce and mix throughout the chicken. (I used 1/2 a large jar)  I even mixed it in the baking dish.

IMG_5949 IMG_5947 IMG_5950


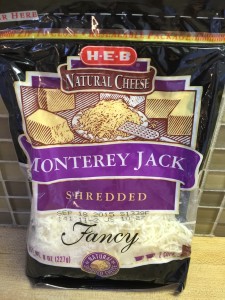
Top with cheese!


IMG_5948

That is it.  Now you can either throw it in the oven or cover and refrigerate until you are ready to cook.
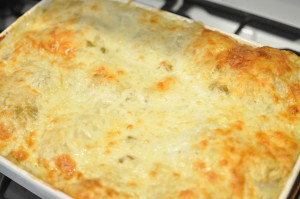
I cooked it on 325 degrees for 45 minutes.  You could do 350 degrees for 30 minutes, but I had carpool and needed the time!

DSC_0033

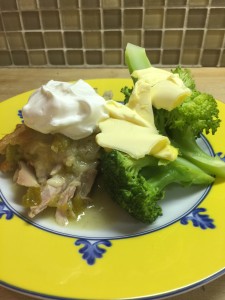
We like to top it with a healthy portion of sour cream, and if you like it spicy, add some hot sauce too.

It goes beautifully with broccoli and Kerrygold.

IMG_5961


There you have it!  A hot great dish in less than an hour!

Enjoy!

Happy Thanksgiving! Gravy Anyone?

Happy Thanksgiving!  I hope you are with those that you love this year.  It is one of my favorite holidays for so many reasons: family, friends, cooking, eating, games, and time to thank God for all of our precious and often overlooked gifts in life!  We are all so blessed in countless ways!

thanksgiving-dinner


How do we do this time of year?  It is a production!  Lots of food, lots of prep, and LOTS of modification on my part.  The menu is planned, I know what I am taking (both by request, and by Keto necessity).  I just panicked though, when I realized I didn’t have a plan for the gravy!  What to do?  I have been researching, and I have two ideas for you folks!

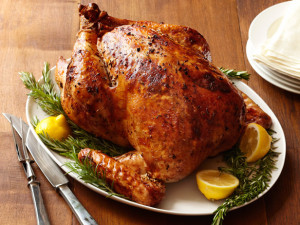
YK_072611_FNM_Turkey_032.tif

If you are doing the turkey, this is the preferred method:

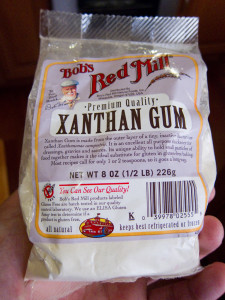
Use your pan drippings!  Do NOT use flour.  Instead use Xanthan Gum.  Just add a little at a time until it had reached the thickness of a roux.  Whisk quickly.  This is the one I use:
4398034471_ca968b9c6b_b

This will act as your thickener and then you can add broth, wine, butter, you choose slowly, all while whisking.  Add a few herbs, whisk, and you should have a traditional gravy.


I, however, am not doing the turkey and will prepare the gravy at home because we have all heard the saying, “Too many cooks in the kitchen”.  There is so much going on already, and it’s not my kitchen, so I am modifying!  Now, I haven’t tried this, so if you are just looking at this after Turkey Day, this would be a go-to for the leftovers, and I will definitely let you know if it doesn’t work.

  1. Sauté an onion and a few cloves of garlic in LOTS of butter – a whole block of Kerry Gold will do.  Keep sautéing until the onions are very limp.
  2. Next, add your herbs: I like fresh rosemary, thyme, parsley, and a bay leaf.  Salt and pepper to taste.
  3. Now add stock, preferable homemade chicken or bone broth.  You can add a bit of white wine too.  Simmer over medium low heat until mixture is reduced.
  4. Transfer to a food processor, and process until you have a smooth gravy texture.
  5. If it still needs thickening, add a touch of Xanthan Gum and you should have a delicious flavorful gravy!

a713bda8-6dba-4997-9a87-a12b0778a5fd

I’m  keeping my fingers crossed because I really like gravy on my turkey!


So what else am I making?  That has been the question of the week.

Everything I am taking is listed on this blog except for the veggie tray!

I am taking:

Cauliflower Mashed Potatoes with garlic and cream cheese

Bacon Brussel Sprouts

A vegetable tray with cilantro dip, ranch dip and spinach dip

Pumpkin Muffins that I have modified into cupcakes by adding cream cheese frosting to the top.

Pumpkin Pie with Whipping Cream

Kerry Gold and Pink Himalayan salt


We will enjoy the turkey, salad, squash and other veggies that other family members are preparing as well.  Needless to say, we will have full bellies, full hearts, and count our many blessings!

God bless each of you, and have a safe, happy and very healthy Thanksgiving!


A Fast and Delicious Weeknight Favorite!

winterfriday food frenzy

‘Tis the season for crazy weeknights!  We are all in the thick of school and sports, but add the holidays to the mix, and you are about ready to pull out your hair.  Let’s just say, dinner sometimes becomes a hassle, more than a featured event this time of year!

Before I give you the recipe, I need to preface it with the fact that I used to detest salmon.  I LOVE fish, but never ever wanted salmon if I saw it on the menu.  I don’t know if I had it poorly prepared in the past or if my tastes have changed, but it is now a staple around here.  Not only is it perfectly amazing in healthy fats, but it is SO tasty and E-A-S-Y!!!  Many are afraid to cook fish at home, but this one is a no brainer.  Up until last night, we were a split family on the salmon.  Three of us can’t get enough, but the daddy and one middle child (who shall remain nameless) would eat it, but didn’t love it.  Things have changed due to one simple addition: Herb Butter!  The best news; you can make it ahead, and you can have dinner on the table in less than 20 minutes!  I kid you not!!!

Herbed Butter Salmon

Prepare your butter ahead of time and wrap it up for later.

1 cup butter (I used one block of Kerry Gold – yes, it makes a difference)

1 lemon zested (just the zest)  you can save the lemon juice for later.

1 TBSP dried dill (or 3 TBSP fresh)

5 cloves garlic, minced

1/4 tsp ground pepper

1/4 tsp pink Himalayan salt

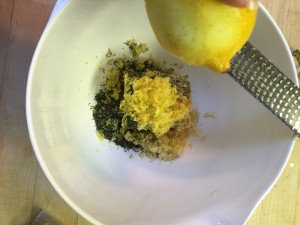
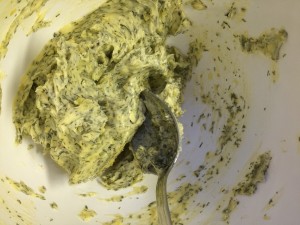
Bring your butter to room temperature.  Zest your lemon and mince your garlic.  Combine all of your ingredients.

IMG_5220 IMG_5219

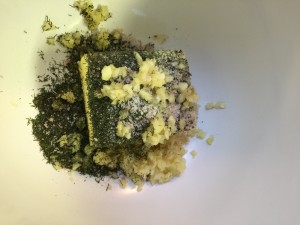
Stir and mash everything together.

IMG_5221

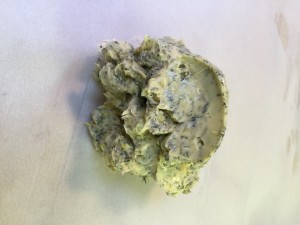
Scrape onto a piece of waxed paper or parchment paper.

IMG_5222 IMG_5223

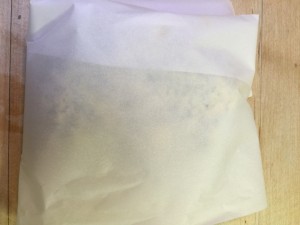
Form it back into a block on parchment, seal in a bag, and keep in the refrigerator until ready to use.

Now for the Salmon:

I used a wild caught whole filet. There are many many kinds from farm raised to the cold waters of Alaska.  I always ask for the fattiest version of salmon at the seafood counter.  Just like everything else, the food industry is actually trying to make salmon “low fat” because of our fat phobic society.  I figure the fatty one is the most natural since salmon IS a fatty fish!

Preheat your oven to 425 degrees.

On a cookie sheet sprayed with coconut oil, lay out your filet skin side down.

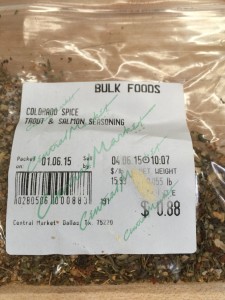
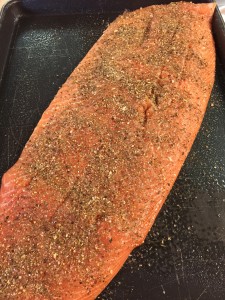
Sprinkle your salmon with your favorite seasoning.  There are several that I love, but this was a favorite last night:

IMG_5231

You know how I love my bulk spices!  They are such a bargain, and so many from which to choose!  This one is the Colorado Spice from Central Market, but take a stab at something new!  This is the fun part of grocery shopping!

IMG_5224

Once you have your fish seasoned, place in a preheated 425 degree oven.  Watch it carefully!  Depending on the size, cook for 10 to 15 minutes until the fish flakes.  I did this one for 12 minutes.  It is always best to ere on the less done side for fish.

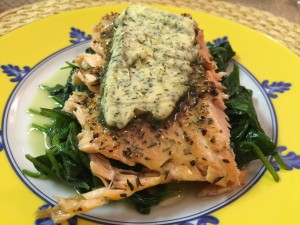
I sautéed a box of fresh spinach in butter to go under the salmon while the fish was in the oven, and in under 20 minutes, dinner was served.  Top with your fun new herb butter, and it is just perfect!

IMG_5225


Enjoy!!!


Two Questions Answered…

When we meet with clients, we most often hear, “Where do I buy that?” and “What can I pack in the kids’ lunch boxes?”

These are both very good questions, and ones that we struggled with for quite some time.  Like everyone, we get stuck in our ruts with our favorites, both grocery shopping and lunch planning.

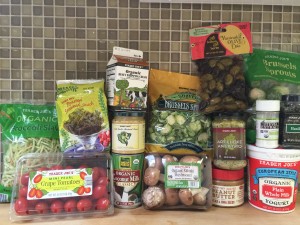
I have posted before about Costco, but after the children started back at school, I decided to go on a little adventure at Trader Joe’s.  They have some fantastic deals there and some fun and different items.  This is my most recent haul from TJ’s:

IMG_4473

From left to right:

Organic Broccoli Slaw (you can find the recipe on our blog – the dressing is Keto fabulous!), Tomatoes, Seaweed “crackers” (these are great for soft cheeses – just spread and wrap), Coconut Milk, Aioli Garlic Mustard Sauce, Organic Heavy Whipping Cream, Mushrooms, Sliced Brussel Sprouts, Crunchy Salted Peanut Butter with Flax and Chia Seeds (for the kids), Artichoke Antipasto, Marinated Olives, Whole Milk Yogurt, REAL Stevia, Basil (their spices are a bargain), Whole Brussel Sprouts.

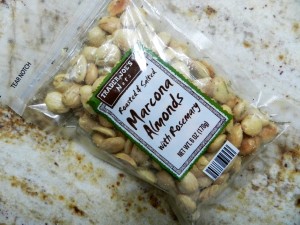
The whole reason I went to Trader Joe’s was to get our favorite snack though:

almonds_bag

2e14ccf9c19baa59581deb92b0031ec6

YUM!!!!  The Rosemary are our favorite!!!


Other great finds at TJ’s are produce, meats, cheeses – lots of cheeses – we especially like the marinated fresh mozzarella, other nuts and seeds – love the pumpkin and sunflower seeds, other items I have yet to find!  Please share your favorites with us!


All of my kids are back in school!  It is a jolt after a long summer, but we all love to be back in a routine.

Here are our first day shots:

IMG_4330

Carolyn is doing her first round of Kinder this year, and loving every minute!  She just turned 5 years old.

IMG_4499Colton is on the left – he is our middle child (and loves to tell us about it).  He just started third grade, and is 8 years old. Chaz is now in 5th grade (where does the time go?).  He is 10 years old and our most Keto-adapted of the three.

I only share them so that you know, I am, where many of you are, in this adventure and blessing of parenthood.  It is a challenge, but oh so rewarding!  They have adapted very well to our Keto lifestyle, although I do not force it on them when they are not under our roof.  Generally, as their mother, I can control most of what they eat, but it is important to us (my husband and I) that they do not feel singled out, denied or forbidden.  We do not want to create that “forbidden fruit” syndrome where as soon as they are away from us they run to the nearest donut or candy shop.  They know how they feel when they eat healthy, and the they know how they feel when they eat sugar, so we advise – not demand.  Our hope is, that through our constant example, they will learn to make healthy eating decisions on their own.  I have not heard one complaint about the lunch box yet!!!


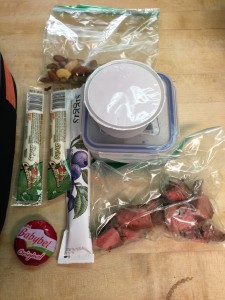
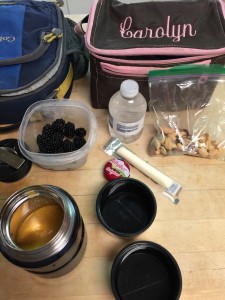
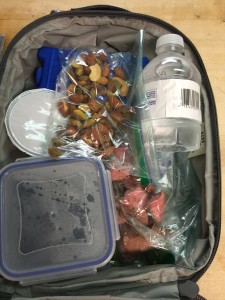
I thought it would be helpful to share how we have been packing lunch over the past week since we started back to school.

Staples in the lunch box always include:

A Protein – Steak, Fajita Meat, Pepperoni, Salami, Nut Butter, Lettuce Tacos, etc.

Cheese – Mozzarella Cheese Sticks, Baby Bels, Sliced Cheese, Cheese Cubes

Nuts – Mixed Nuts, Cashews, Almonds, Macadamias

A Drink – Milk, Water, Sparkling Water

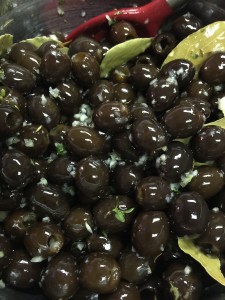
Other Add-Ins: Olives, Whole Milk Yogurt, Chia Squeeze (a little high in sugar for everyday, but good fiber and a treat for the kiddos), Dark Chocolate (85% or higher), Berries.

Leftovers are great, and often their favorite.

I suggest a quality thermos and decent ice packs.  I always warm the thermos for hot food items by filling the cavity with simmering water for about 5 minutes.  Discard the water and fill with hot food.  It will stay hot until lunch this way.

This is what lunch looked like for my children today:

IMG_4530


IMG_4529


The blue ice pack is on the bottom.  The white foil is a cup of sliced salami, mixed nuts, water, leftover steak, and blackberries.  There is some cheese in there too!

IMG_4527

This is the Thermos I use above, and the two types of cheeses I packed.  They will usually eat one for lunch and save the other for snack on the way home.

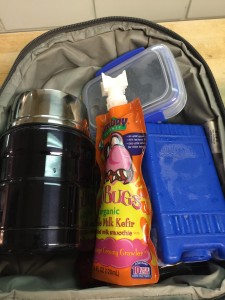
IMG_4528


The last of the lunch boxes – this is the whole milk kefir on top (yes – it has added sugar, but is a treat filled with great healthy fat just for the KIDS), blackberries, and yummy hot leftover chicken curry in the thermos!

Each child is a little different, and we are always coming up with new things we like and they like.  Stay connected, and we will try to send out our newest, greatest ideas.  We would love to hear from you too!  What low-sugar healthy foods do your kids love?


Back to School – Snack Time!

back-to-school

It is hard to believe that school has arrived once again!

I have one that started today and two that start in a couple of weeks.  It is funny how that same old routine starts immediately.  The one thing that stumps people the most in this rut of a routine is SNACK time!  What do you serve for snacks when you don’t eat carbs?  This one was tough at first, but it is much of the same foods that I pack in a low-carb lunchbox, so you can use this article as a means for both.

First off, toss the juice boxes – PLEASE!  Those are loaded with sugar!

What about just water?  If your child refuses plain water, try infusing it with fruit or cucumbers, or see if they like a sparkling water like La Croix.  Mine think it is a treat!  There are a ton of flavors from which to choose, so your family will never get bored.
Next, go through your pantry (or call us to do it) and toss the chips, cookies, crackers, pretzels, and goldfish – yep, I said it – even the goldfish.  They are all carbs and carbs = sugar!

Your body doesn’t even know the difference between the two!


So, what do you feed the kiddos when you don’t have goldfish?


There are a ton of options, many of which we have posted before, but we will remind you!

This is the number one favorite in the Lutz household:

Veggies with Ranch Dip

IMG_1694

Obviously, mine love the mini-peppers!

Other great dips to serve with vegetables are spinach dip, artichoke dip and pimento cheese.  The later is a great lunch option as well!


Cheese crackers with salsa or guacamole is another favorite in our house.

IMG_0857


Don’t forget about the yummy olives we posted last week too!

IMG_3695


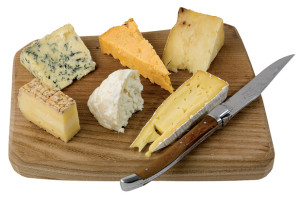
Sometimes if I want to dress things up a bit, I will do a nice cheese sampler tray.  This is great for the little tastebuds too and fancy enough for company!

cheese board

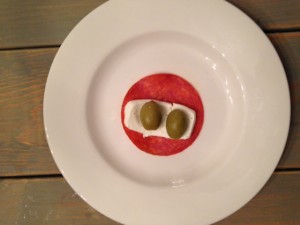
Another fun snack is the savory fat bombs.  I was able to find some great snacks at Costco that were cheese and meat wrapped up together similar to a fat bomb.  They are cute and would work great in a lunchbox as well.

IMG_4617


A few other great options:

Cheese sticks or Baby Bells

Lunch meat (or the two together!)  Choose your meat carefully.  Stay away from the pre-sliced – get the quality meat (Such as Boar’s Head) in the deli and have it sliced thinly for wrapping.  Watch for Nitrates and other additives.

Pickles

Refreshing Cukes

Celery and Queso

Whole milk yogurt (for the kids)

Jerky or beef sticks

A variety of nuts (w/out peanuts)

Stuffed mushrooms

Celery and nut butter

Deviled or Boiled Eggs

Sausage on a Stick


These are just a few of many options!  Hopefully this will get you started in this back-to -school rush time!  Don’t be afraid to try new things and push your kiddos to expand their palates a little.  We hope everyone has a great beginning to the school year.  Remember to be strong and eat right!  You (and your children) need to eat healthy to be healthy!  Happy Back-to-School week!


HEALTH. Word cloud concept illustration. Wordcloud collage.


Feel free to drop us a note in the comments section if you have a question about lunch or snacks.  Chances are, someone else is wondering the same thing!  Also, feel free to share some of your favorites!


A Dip to Rival Hidden Valley Ranch

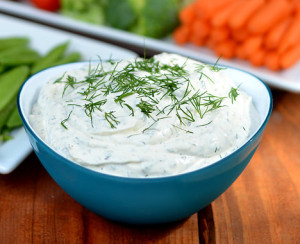
ranch image

Well, by now, if you have been following us, you know how we feel about artificial sweeteners and those other sneaky names used so you won’t know that sugar is in the ingredient list.

Believe it or not, those sneaky names are in the fine print of many pantry items you never would have imagined.  For instance, my family used to love it when I mixed in the little seasoning packet of Hidden Valley Ranch Dip and Dressing mix with sour cream for a yummy dip to serve with vegetables.  One of the main ingredients I discovered, as soon as I went Keto and started looking at the back of packages, is Maltodextrin.

hidden valley

A little about Maltodextrin: It is a food additive derived from corn, rice, potatoes, or wheat and therefore a carbohydrate.  It ranks higher than table sugar on the glycemic index – 106 to 136 depending on the derived source and is in a TON of packaged foods!  This means that it will spike your blood sugar levels so beware and read those labels.

It became a mission of mine and that of a few of our followers to find a better way to make ranch dressing and dip.  One of the best parts of Keto is freeing yourself from all of those tasteless, chemical ridden low-fat salad dressings!  You actually get to eat the real thing as long as it is real food.  The Maltodextrin kind of ruined that for us though.  Thanks to one of my friends and fellow ketoers, Kelley, we have found the solution!  This may be even better than Hidden Valley Ranch, and it is a seasoning blend that can be used in other sauces or dressings as well.  I did some minor tweaking, and we all think it is delicious.  We hope you enjoy!

Ranch Dip Picture

Ranch Dressing Seasoning

1 1/4 tsp Celtic sea salt

1/2 tsp black pepper

1 TBSP Onion Powder

1 tsp garlic powder

1 TBSP dried parsley

1/4 tsp celery seed

1/2 tsp dried dill weed (with a little extra for garnish)

1/2 tsp dried mustard seed

To mix into a dressing or dip, the possibilities are endless.

For a dip, I use the traditional 1 cup mayonnaise and 1 cup sour cream.

If you want to make it into a dressing, you can put all of the above ingredients into a blender and add some half and half or cream to liquify it slightly.

Modifications you can make are to add some fresh parsley instead of the dry, add some cilantro to the dressing, or even spice it up with some jalapeños or your favorite peppers.  This is super easy if you use the blender!  The possibilities for making this your own are endless, nutritious, and beautifully Ketogenic! Have fun with it, and enjoy!

IMG_1694

These are Cindy’s boys!  This dip with mini peppers is one of their favorite after school snacks!


Let’s Salsa!

a85563ad4817904a5e806f55e241dfb4

Salsa!

Not just a favorite in Texas, but a STAPLE!

We eat salsa on everything!  It adds an extra punch to eggs in the morning, salads at lunch, guacamole, and many other dishes throughout the day.  The mason jar was running on empty, and my husband just didn’t know what to do!  Tragedy, I tell you!

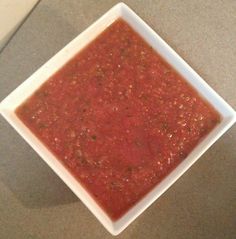
I whipped some up last night in no time.  It literally takes about 15 minutes, 5 of which are active.

Everyone has their favorite way of making salsa.  I have tried steaming the tomatoes and peppers, sautéing them, browning them, but by far, the easiest is boiling.  I used to use a hot skillet and brown the tomatoes, peppers, and onion, but it would smoke up the house to the point that I would have to open all the doors and windows to air out.  So boiling it is!  This is my newest way, and I’m sticking to it!

I don’t have a specific amount of anything, but I can tell you what I did.  It is a little different each time because the heat of peppers varies so greatly.  Always start small and add in small increments.

These are your basics:

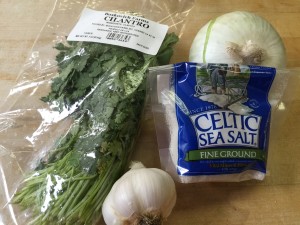
Cilantro (To your liking – about 1 cup)

Onion (I used a half of an onion)

Garlic (5-6 cloves)

Celtic Salt (1 TBSP)

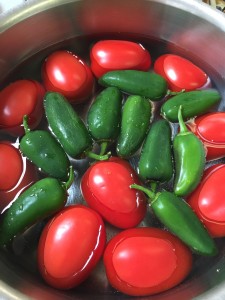
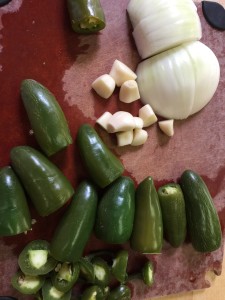
Jalapeño or Serrano Peppers (I only used 3)

Tomatoes (10 for this batch)


IMG_3231 IMG_3230


Directions:

Wash your tomatoes, peppers, and cilantro well!

Place your tomatoes and peppers (I did wayyyy too many peppers!) in a pan and fill with water not quite covering the tomatoes and peppers.

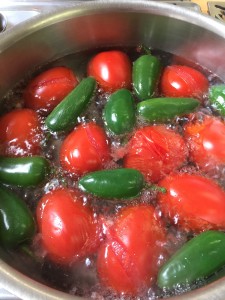
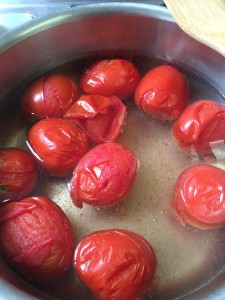
Bring to a boil and reduce to a simmer on medium heat.  Simmer until the skins start to peel back on the tomatoes stirring frequently.

IMG_3232

IMG_3234


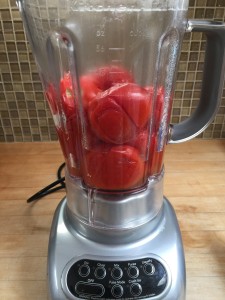
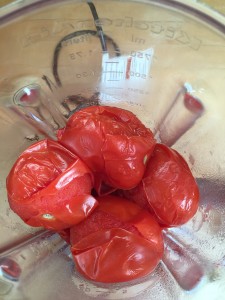
Remove the tomatoes with tongs and squeeze gently to release any water.  Place in your blender.

IMG_3235

IMG_3236


Remove the peppers from the water and detach the stems.

IMG_3233

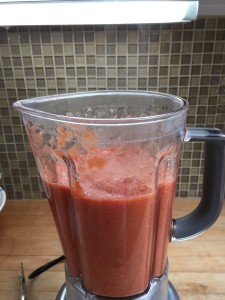
I started with 3 peppers and it was plenty!  These little things were HOT!  I blended the tomatoes and peppers on high for a few seconds, then added the onion, garlic, and salt.

IMG_3237

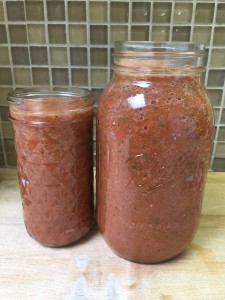
Add your cilantro last.  I blended everything together for about 10 seconds on high, and ended up with a large mason jar and medium mason jar of salsa that was some of my best!

IMG_3238 (1)


This is a great healthy sauce full of vitamins and antioxidants that will spice up your food, literally!  It will keep in your fridge for about 2 weeks.


The Golden Sauce

There is a golden sauce so delicious, it is worth the price of gold!

It was just yesterday that I mentioned the amazingly delectable Hollandaise Sauce as a favorite of mine on poached eggs.  The best part – it is easier than you can ever imagine!

One of the things we have to be mindful of while living in a state of nutritional ketosis is our intake of protein.  We all know that carbs will take us down, but did you know that protein can as well?

When there is a significant intake of protein, the body converts the protein into sugars during a process called Gluconeogenesis.  This is a metabolic process that makes glucose, a simple sugar, that provides the body with energy from non-carbohydrate sources when you are a carb burner.

This is why it is super important to make sure you are getting ample healthy fats when you are consuming meats and vegetables in order to stay a fat burning machine.  We don’t want those proteins turning into carbs in our body so make sure you have the fat to counteract the carbs and proteins.

And…this is why I love Hollandaise!  You can put it on your veggies, your meat, your eggs – pretty much anything your heart desires!  My favorites are eggs, spinach and asparagus.  It is wonderful tasting, and as long as you are using our favorite grass-fed butter, it is a great source of fat!  You can also ask for it at many restaurants that will gladly bring you a side of this delicious sauce.


Blender Hollandaise

IMG_2930

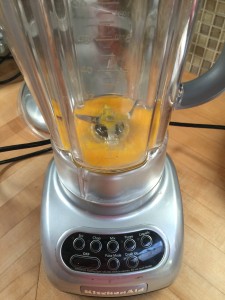
Place in your blender:

2 Egg Yolks

1 TBSP Lemon Juice

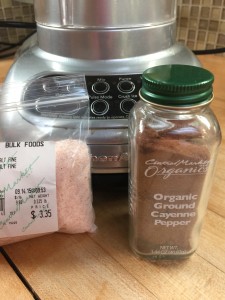
Salt and Cayenne to taste

IMG_2932

Turn your blender on low for 5 seconds.

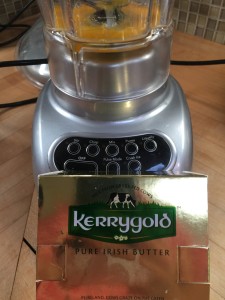
Melt 1/2 cup butter (Kerrygold) in a pyrex glass measuring dish.

IMG_2931 IMG_2934

In a very low stream on the lowest speed, gently pour your butter into your egg yolk mixture.

IMG_2935

As soon as it is combined – you have hollandaise.

IMG_2937

I have never had it curdle, but if it does, add two egg yolks on high speed with whipping cream one TBSP at a time.

Enjoy!

IMG_2939


The Easiest Way to Cook an Egg!

So many of us that follow the Ketogenic Lifestyle often eat eggs for breakfast.  It is easy to quickly become tired of plain old scrambled eggs.  We can mix them with chorizo, serve them with bacon or cheese, but underneath, they are still the same old scrambled eggs.  Anytime you eat the same thing over and over again, it becomes tiresome.  So what to do?

Mix it up with different cooking methods.  This one is especially easy and fast with little mess, so it is a staple on busy weekday mornings.  You can also gourmetify it with a little extra effort on the weekend.

Today, I am going to show a family favorite, and it only takes 7 minutes from start to finish with one dirty pan.  By the way, the pan is extremely important unless you are only cooking for one, in which case, you can just use boiling water.

How to cook a poached egg:

Start with an egg poaching pan and great eggs from pasture raised and fed hens.  I have two pans, one with 4 inserts and another with 6, just depending on how many want one or two eggs.  You can buy the larger 6 egg poacher here where I purchased mine.


img16l


6-egg_poacher


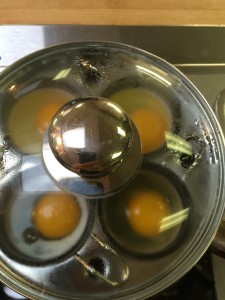
Today I used the four egg poacher.  I purchased this one years ago from Williams Sonoma.  Lift one cup out and pour about a 1/4 inch layer of water to cover the bottom of the pan to create the steam.


IMG_3218


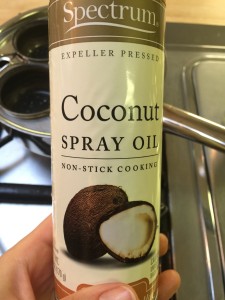
Spray each cup with coconut oil spray.


IMG_3219


Place the lid on the pan, and turn your heat to high.  It should start steaming with boiling water in no more than two minutes.

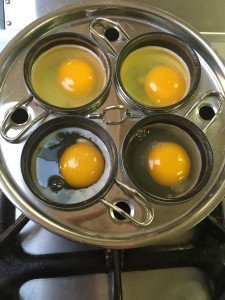
Once it is boiling, turn your heat down to Medium, and crack eggs one at a time, placing them in a cup insert.


IMG_3220


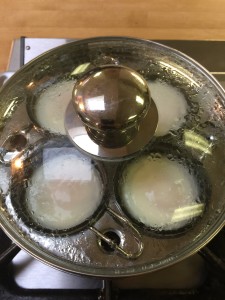
Place your lid on, and set your timer for 4 1/2 to 5 minutes.  Depending on how you like your yolk, you may need to adjust your time.  This time gives us a nice somewhat runny center but firm white.


IMG_3221


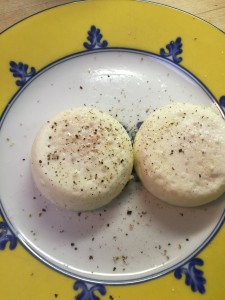
Once the eggs are set, and don’t jiggle if you nudge the pan a little from side to side, remove from heat and empty each egg onto your plates.  Be sure to use a hot pad to protect your finger tips.  I usually run a knife along the outside edge of the insert, but it is not always needed.


IMG_3222


My husband likes his plain with salt, pepper and sometimes a little homemade salsa.


IMG_3223 IMG_3224


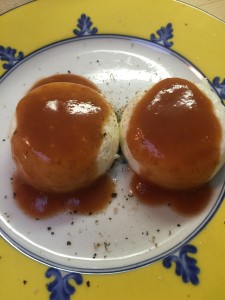
I love mine with a little hollandaise.  Stay tuned this week for this awesome recipe!


hqdefault


Poached eggs are so versatile.  Here are a few other ideas that I love to try when we have a bit more time:

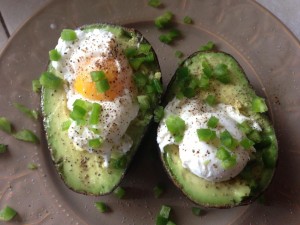
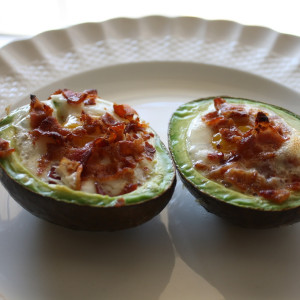
Place in an avocado with or without bacon:


avoegg IMG_2524


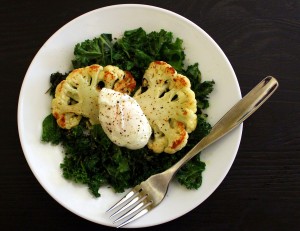
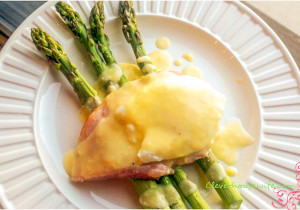
Get your greens too by serving over spinach or asparagus:


cauliflower-with-poached-egg-4 hollandaise1 eggs-sardou Asparagus with a Poached Egg and Hollandaise Sauce 1 500


You can even eat them over a salad!


4886


Enjoy your wonderful healthy eggs!


« Older Entries