Tag Archive for recipe

Home Cooking on a Cold Winter’s Eve

I don’t know about you, but getting back into the swing of things has been tough this week.

mombalancing-act

We returned from vacation, had another Christmas at home, entertained family, Happy New Year, undecorated, reorganized, and now back to school and after-school activities!  It’s a lot to jump into after a couple of weeks off!

The last thing I always want to do when we return from vacation, is go to the dreaded grocery store.  This means a lot of experimenting and improvisation in our house because my crew expects three hot meals a day out of me, and Mom is pooped right now.

What to do?  The freezer!  This is a word I rarely use because really, all we use our freezer for is ice and meat.  We purchased a half of a grass-fed cow in August, and we still have quite a bit left.  We always crave red meat when we have been traveling which was obviously the case, because I went to the freezer and pulled out stew meat, a roast, and some steaks.  The steaks we grilled right away, but the others required a little more effort.  Not much though.  On undecorating day, I knew I would be busy so I pulled out an old recipe, made a few changes, and prayed we would have something tummy warming good for dinner.

61nGZkpNKNL._SL1500_

It was amazing! In fact, my ten year old has asked for stew in his thermos for lunch every day since that he has needed a lunch.  We have had some moist bone-chilling days in South Texas recently, and there is nothing better than good, warm you up from within, home-cooked meals from the heart!

This takes a little forethought, but get it going, and forget about it all afternoon.  Before you know it, it is dinner time and it’s ready to go.  Perfect for those basketball practice nights when everyone is coming home at different times.

Hearty Beef Stew

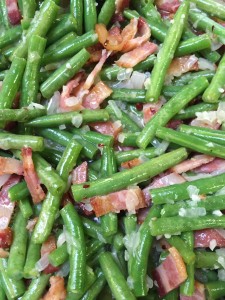
3 lbs Stew Meat chopped

16 oz bacon

2 cups beef broth

14.5 oz can petite diced tomatoes, drained
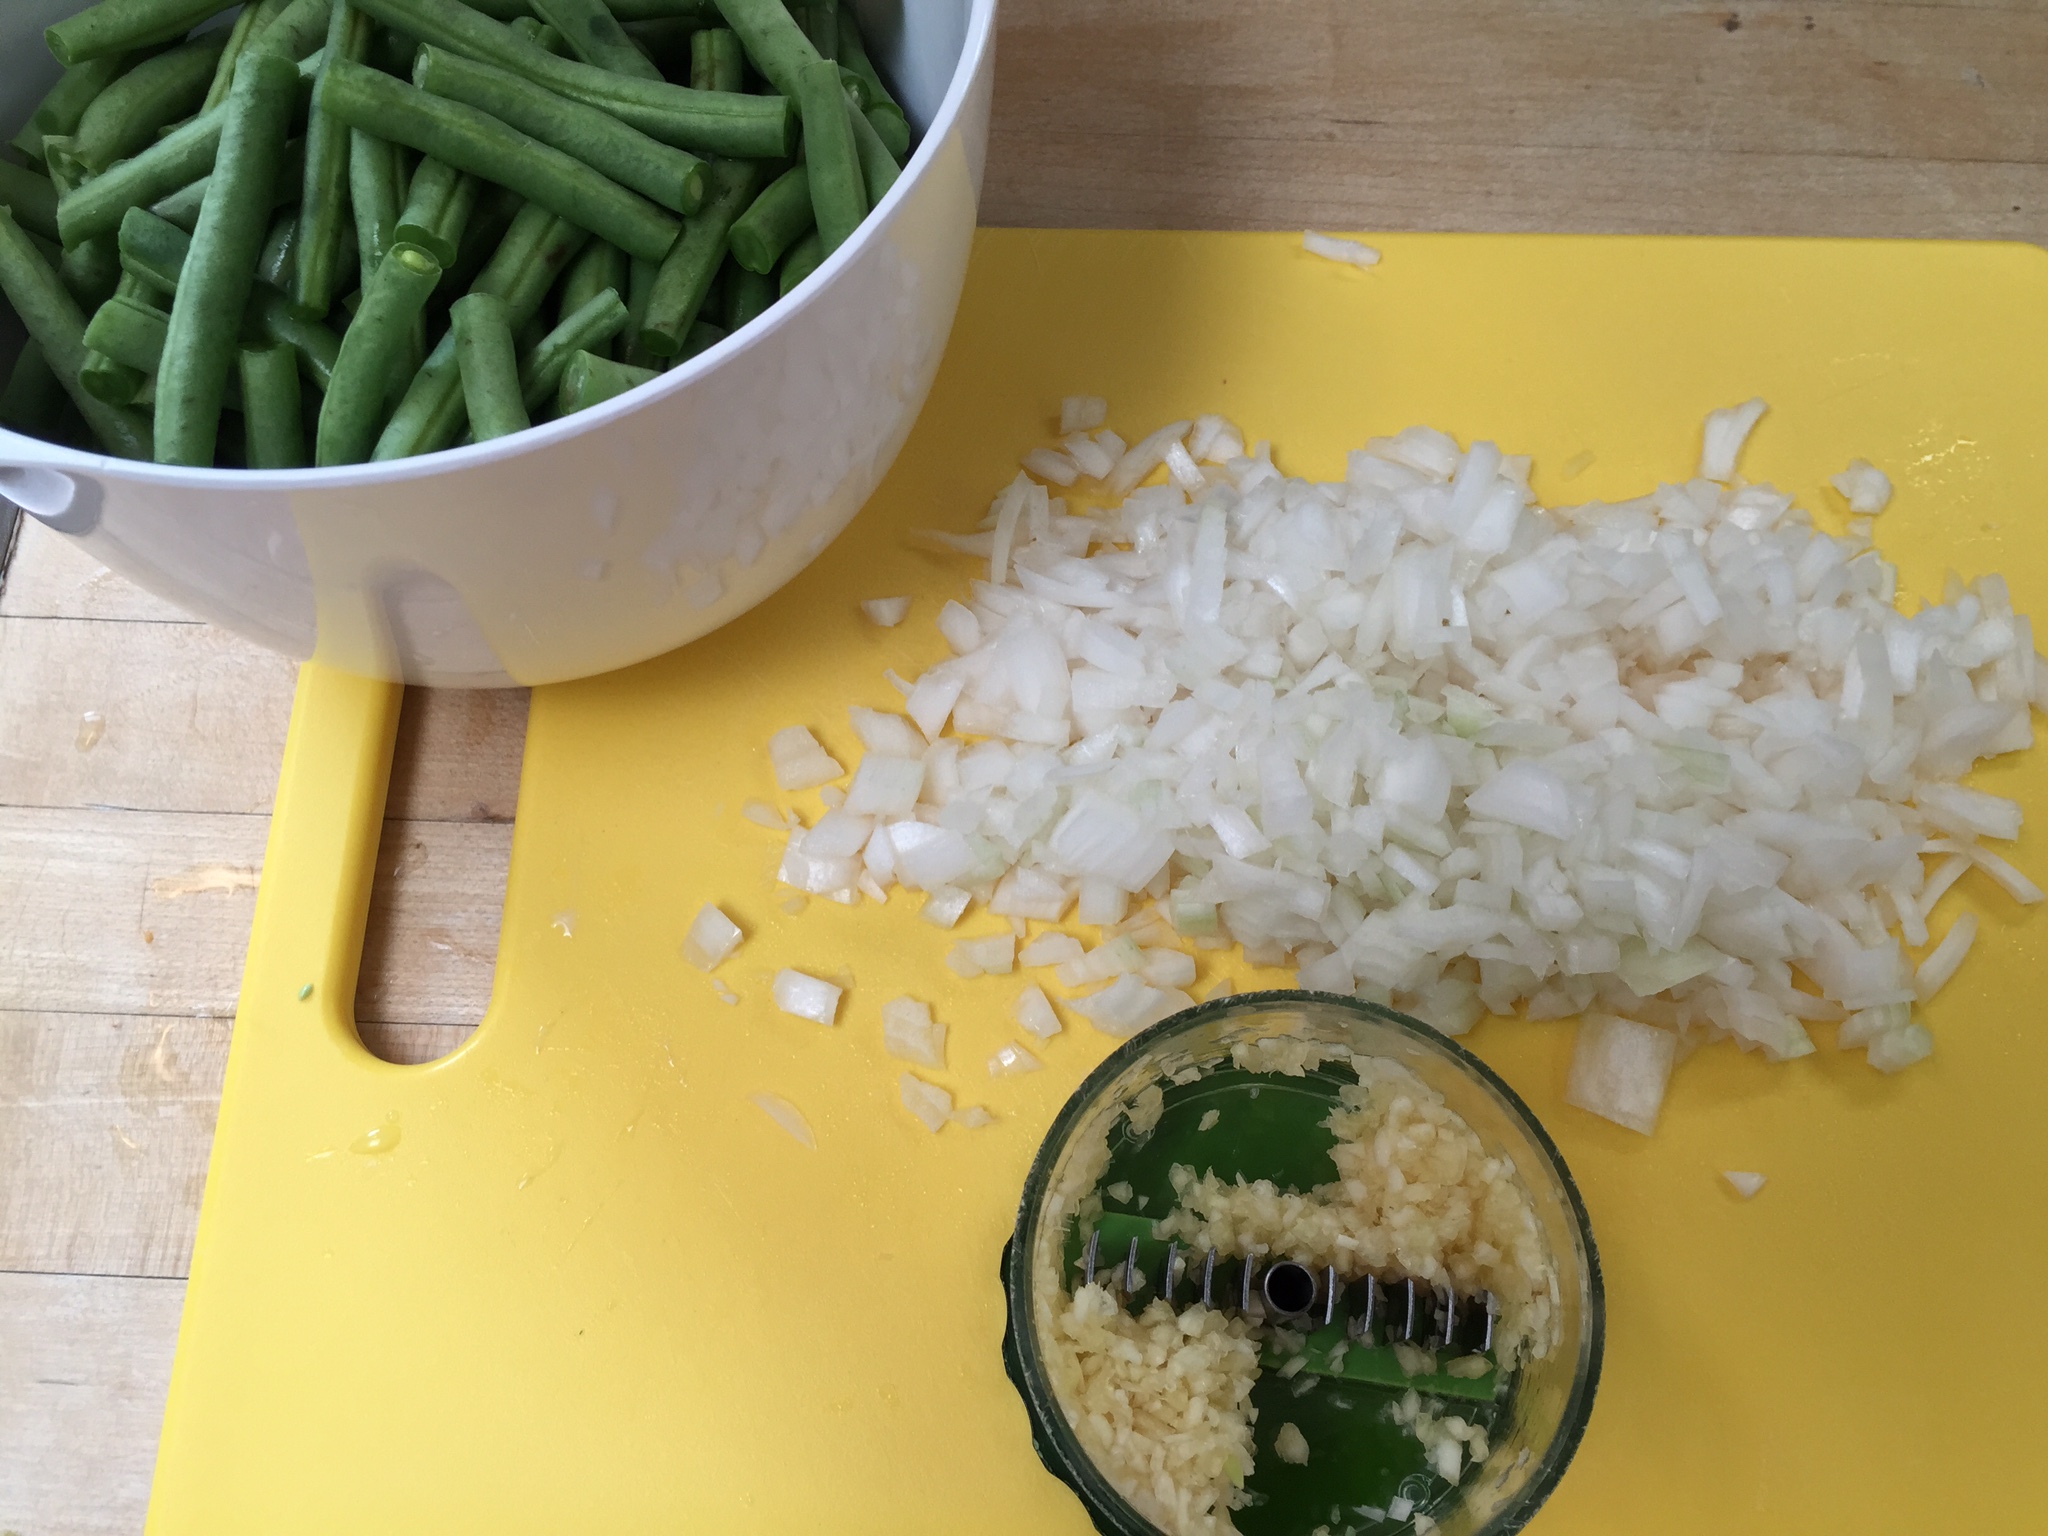
1 green bell pepper

1 cup baby carrots

1 small onion

6 cloves garlic, minced

2 Tbsp tomato paste

2 Tbsp Worcestershire Sauce

2 tsp pink Himalayan salt

2 tsp black pepper

1 tsp garlic powder

1 tsp onion powder

1 tsp dried oregano


Instructions:

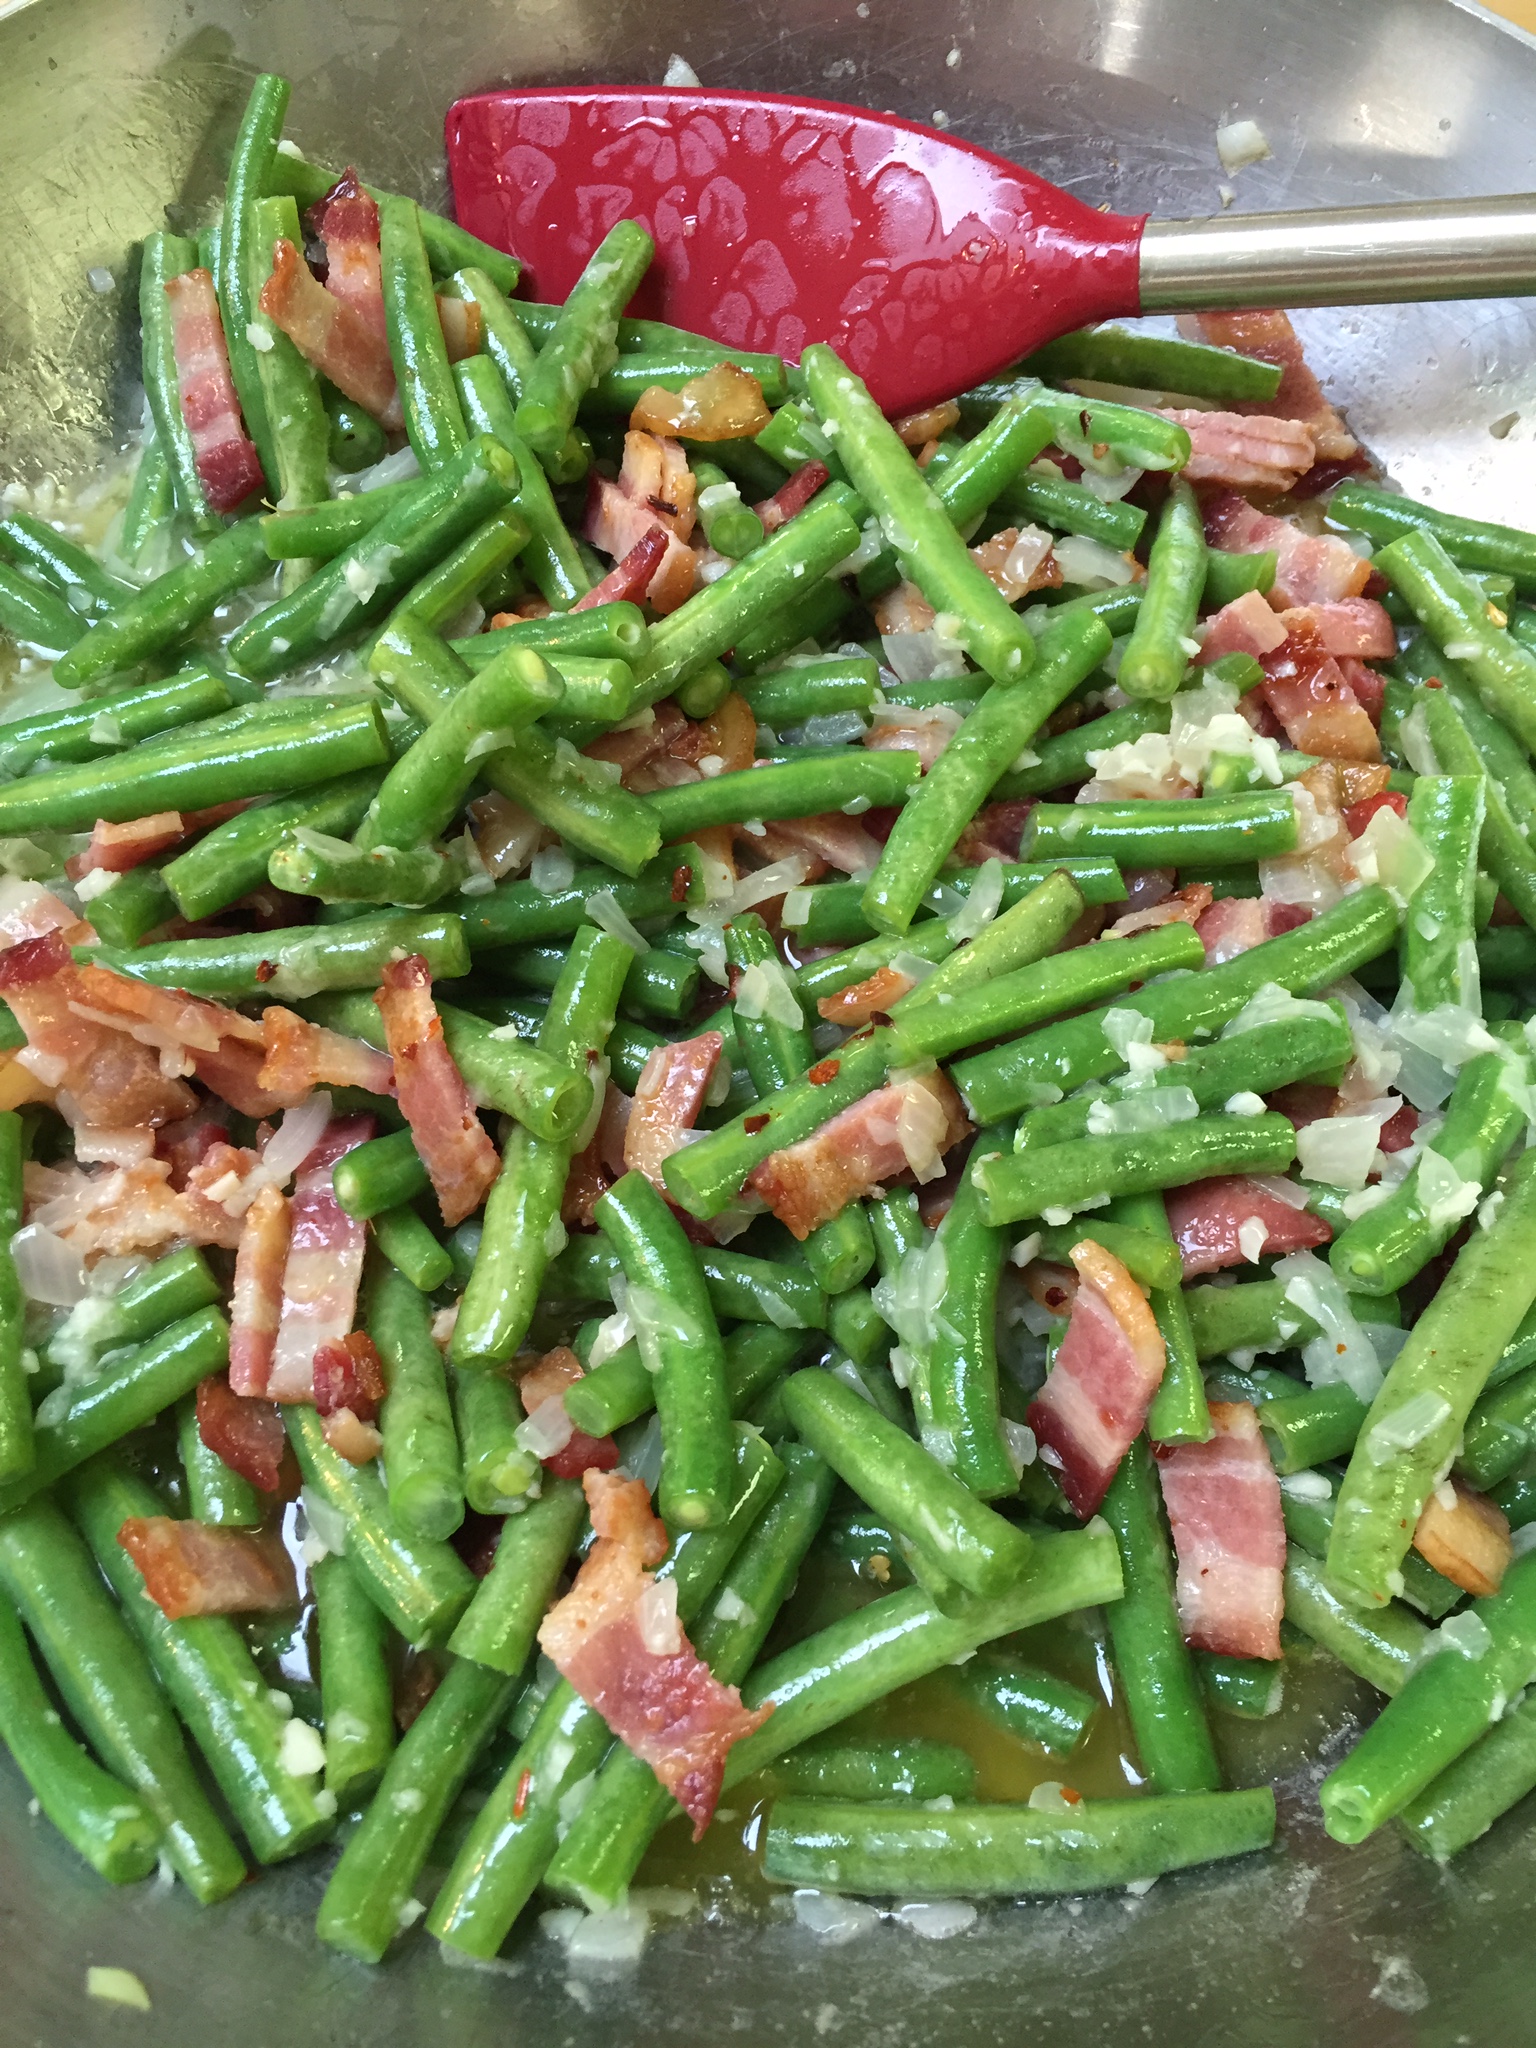
Slice your bacon into small pieces and cook in a large dutch oven.

20131121_203219

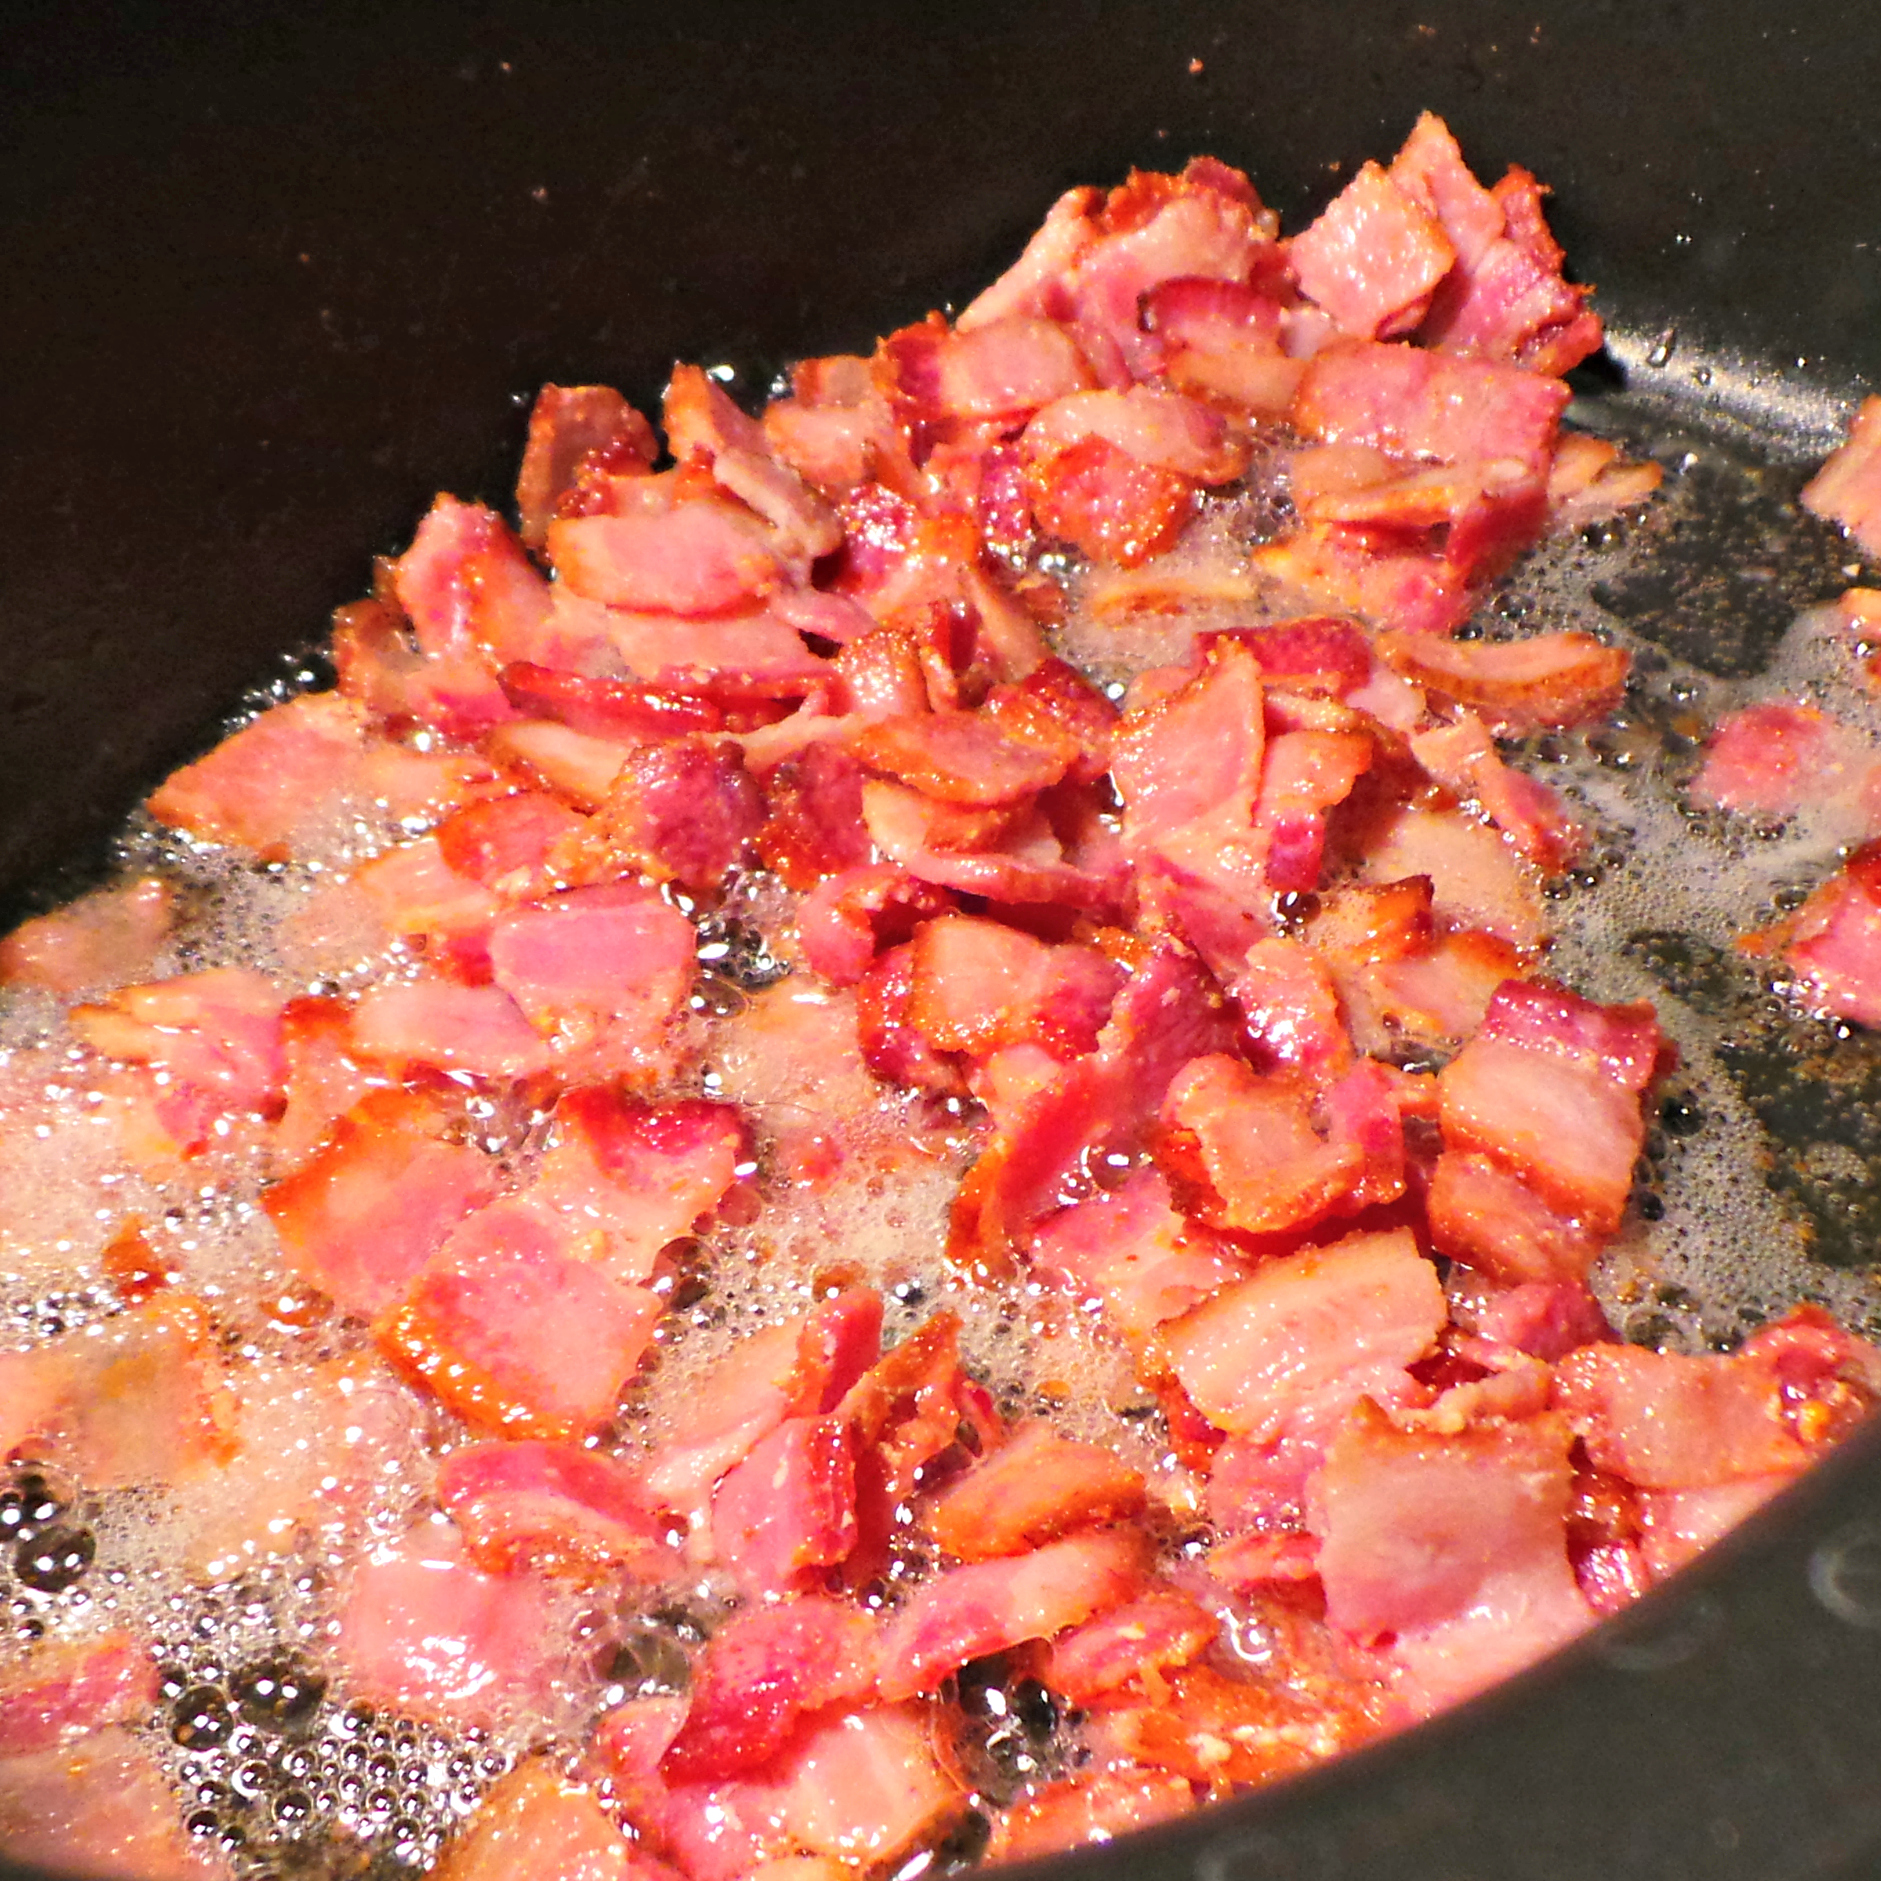
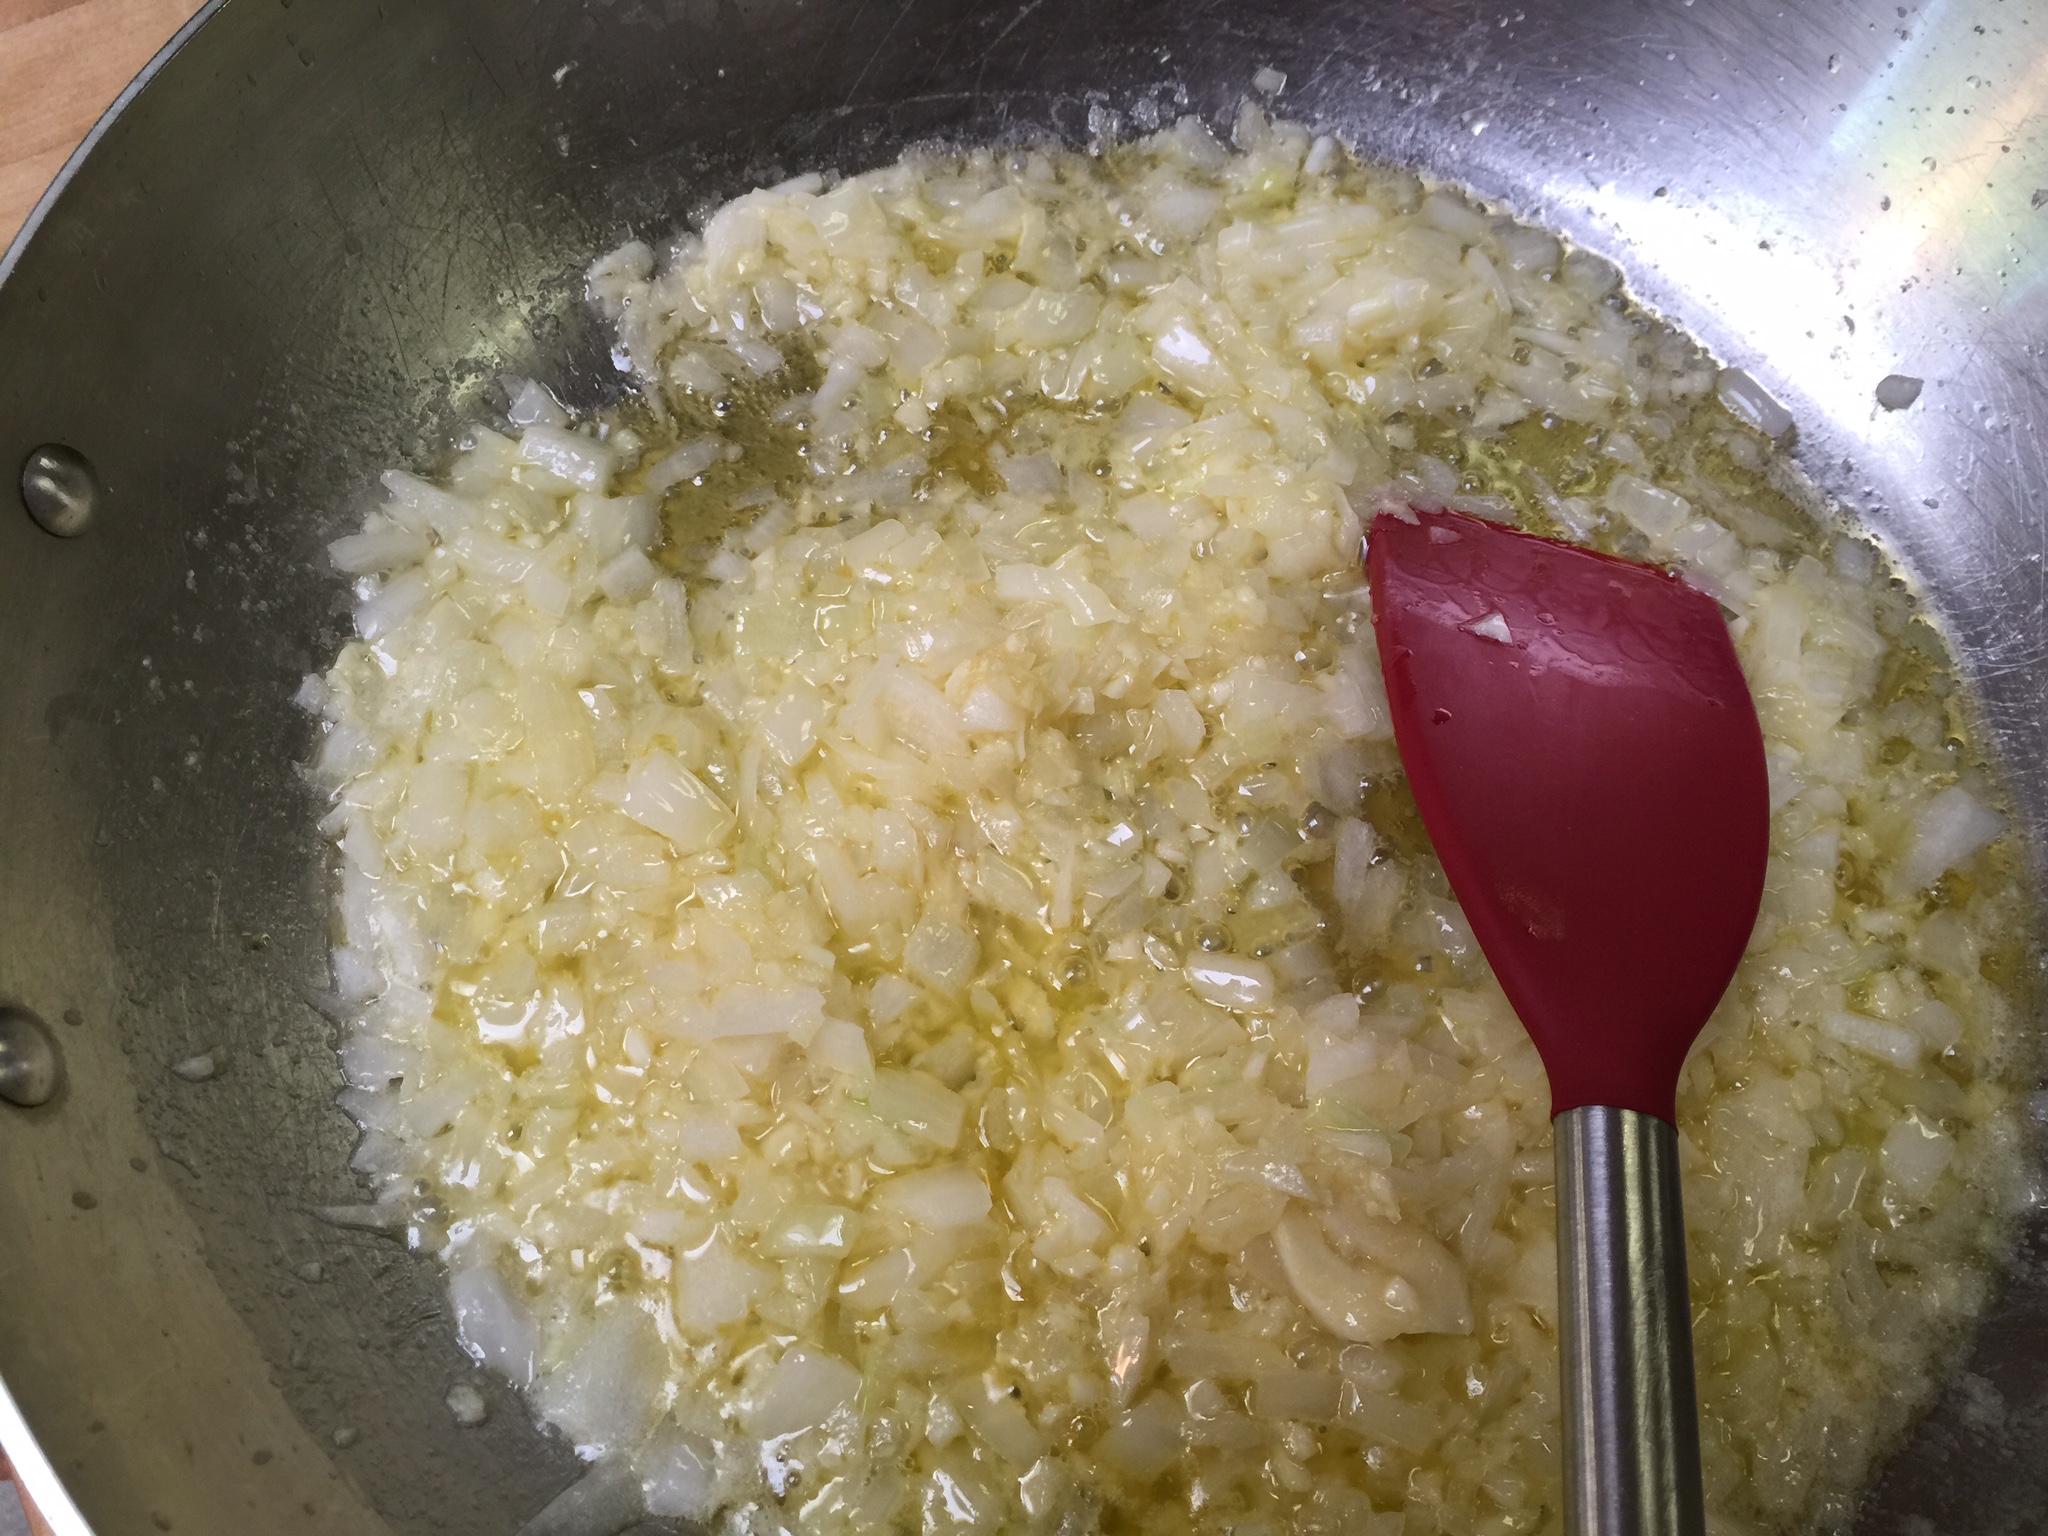
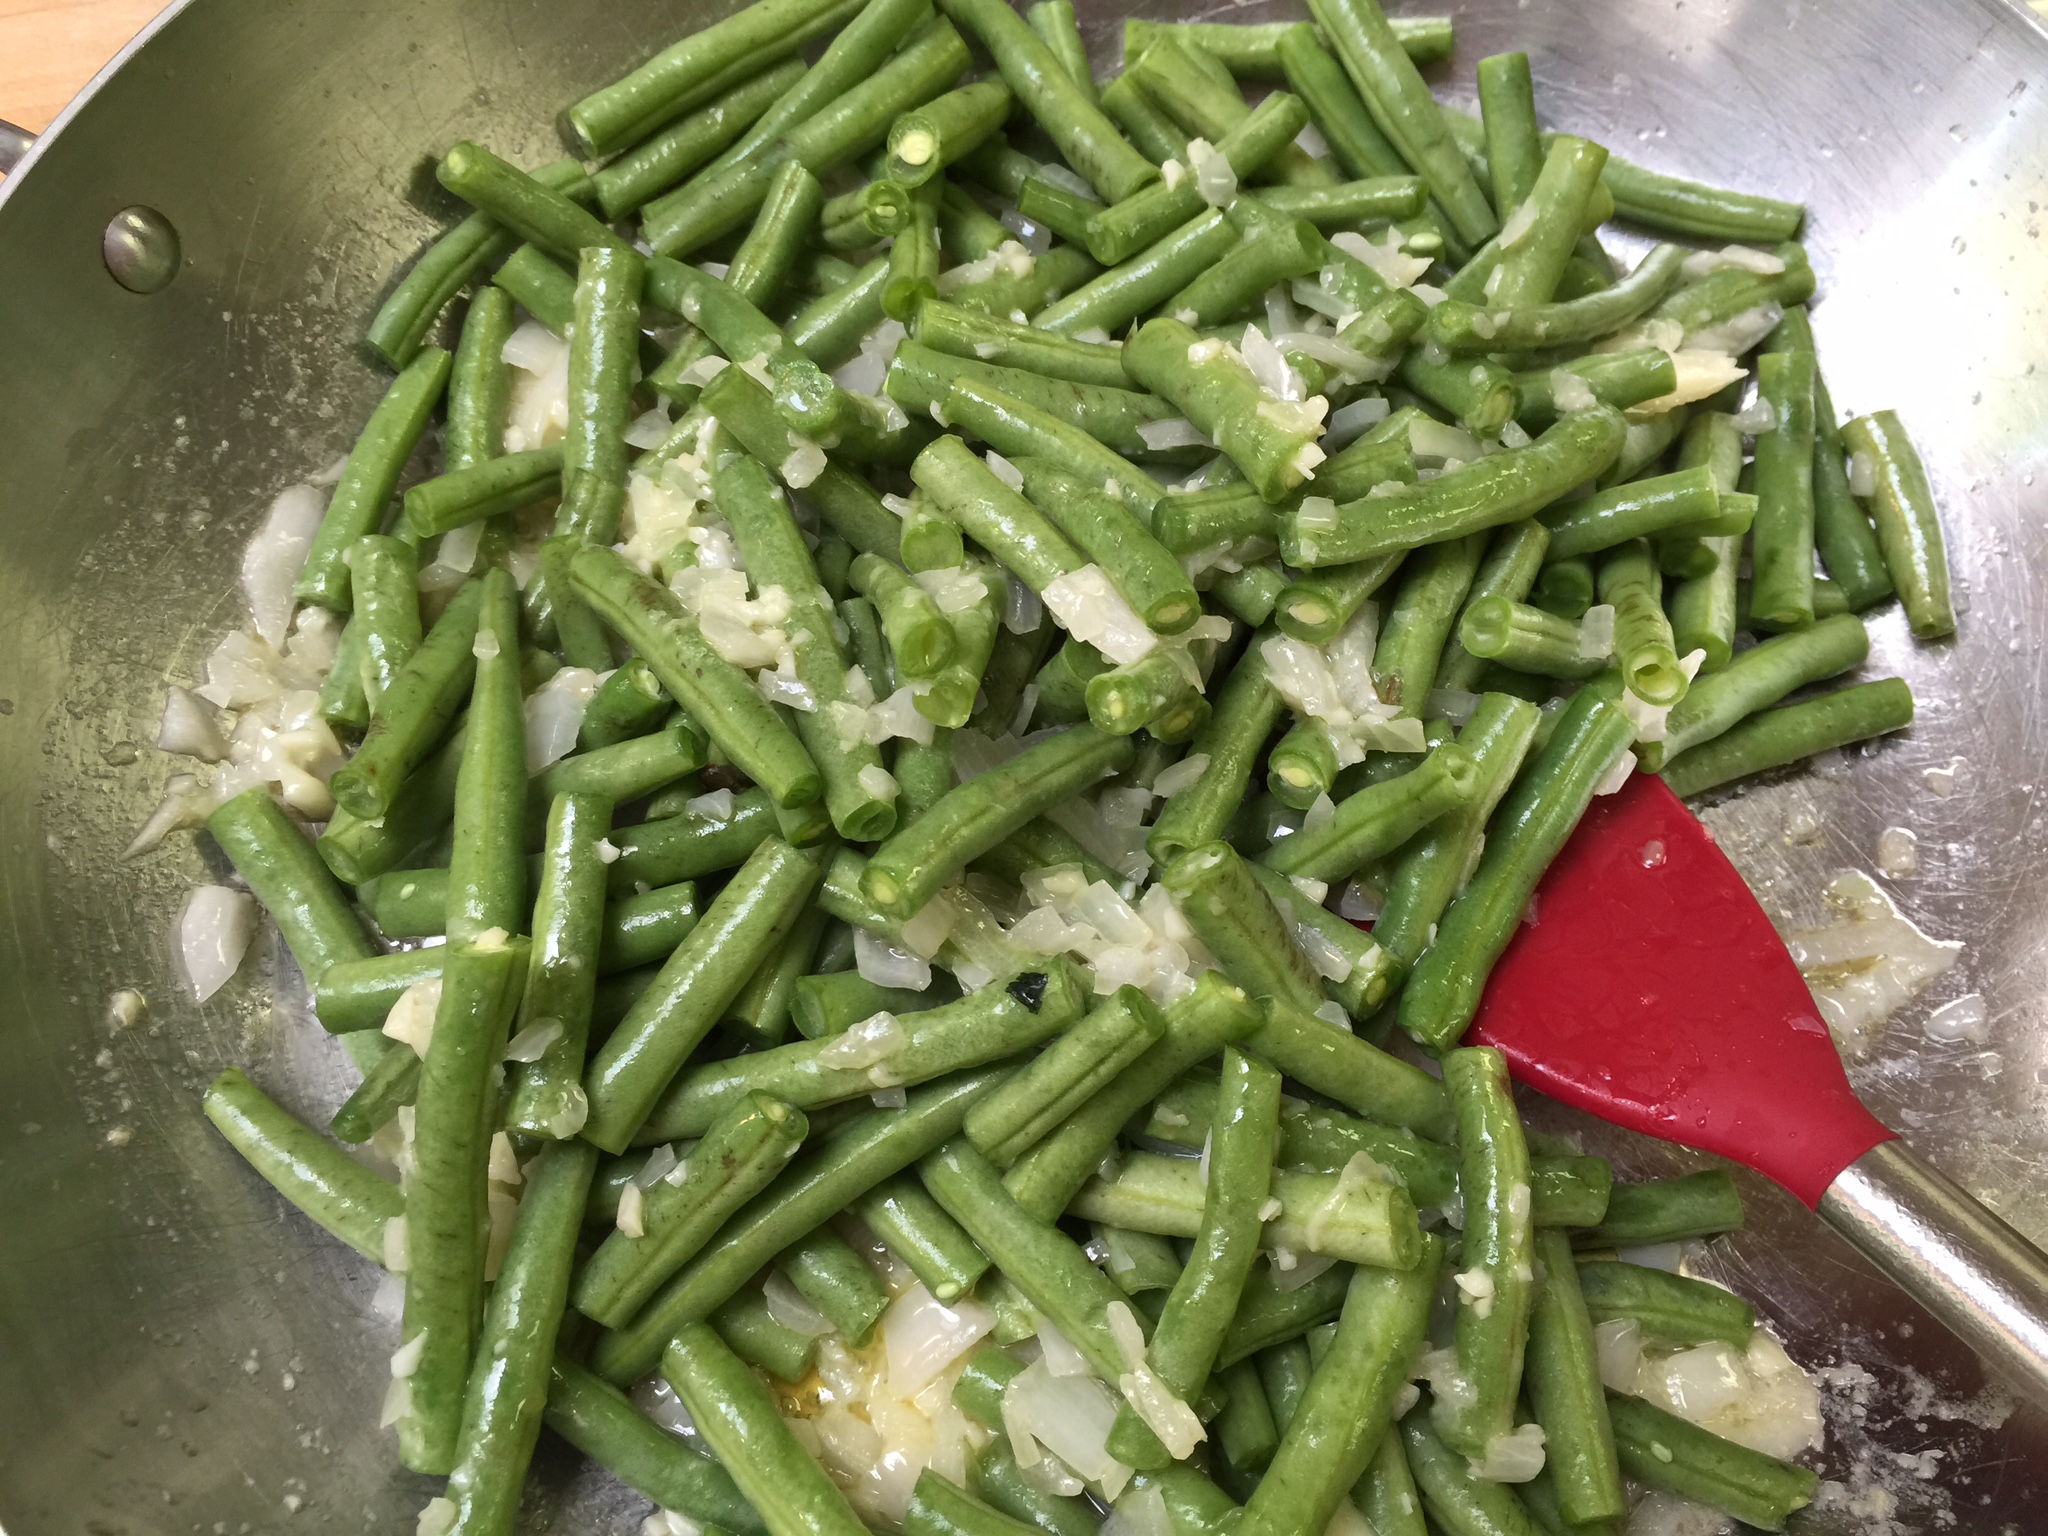
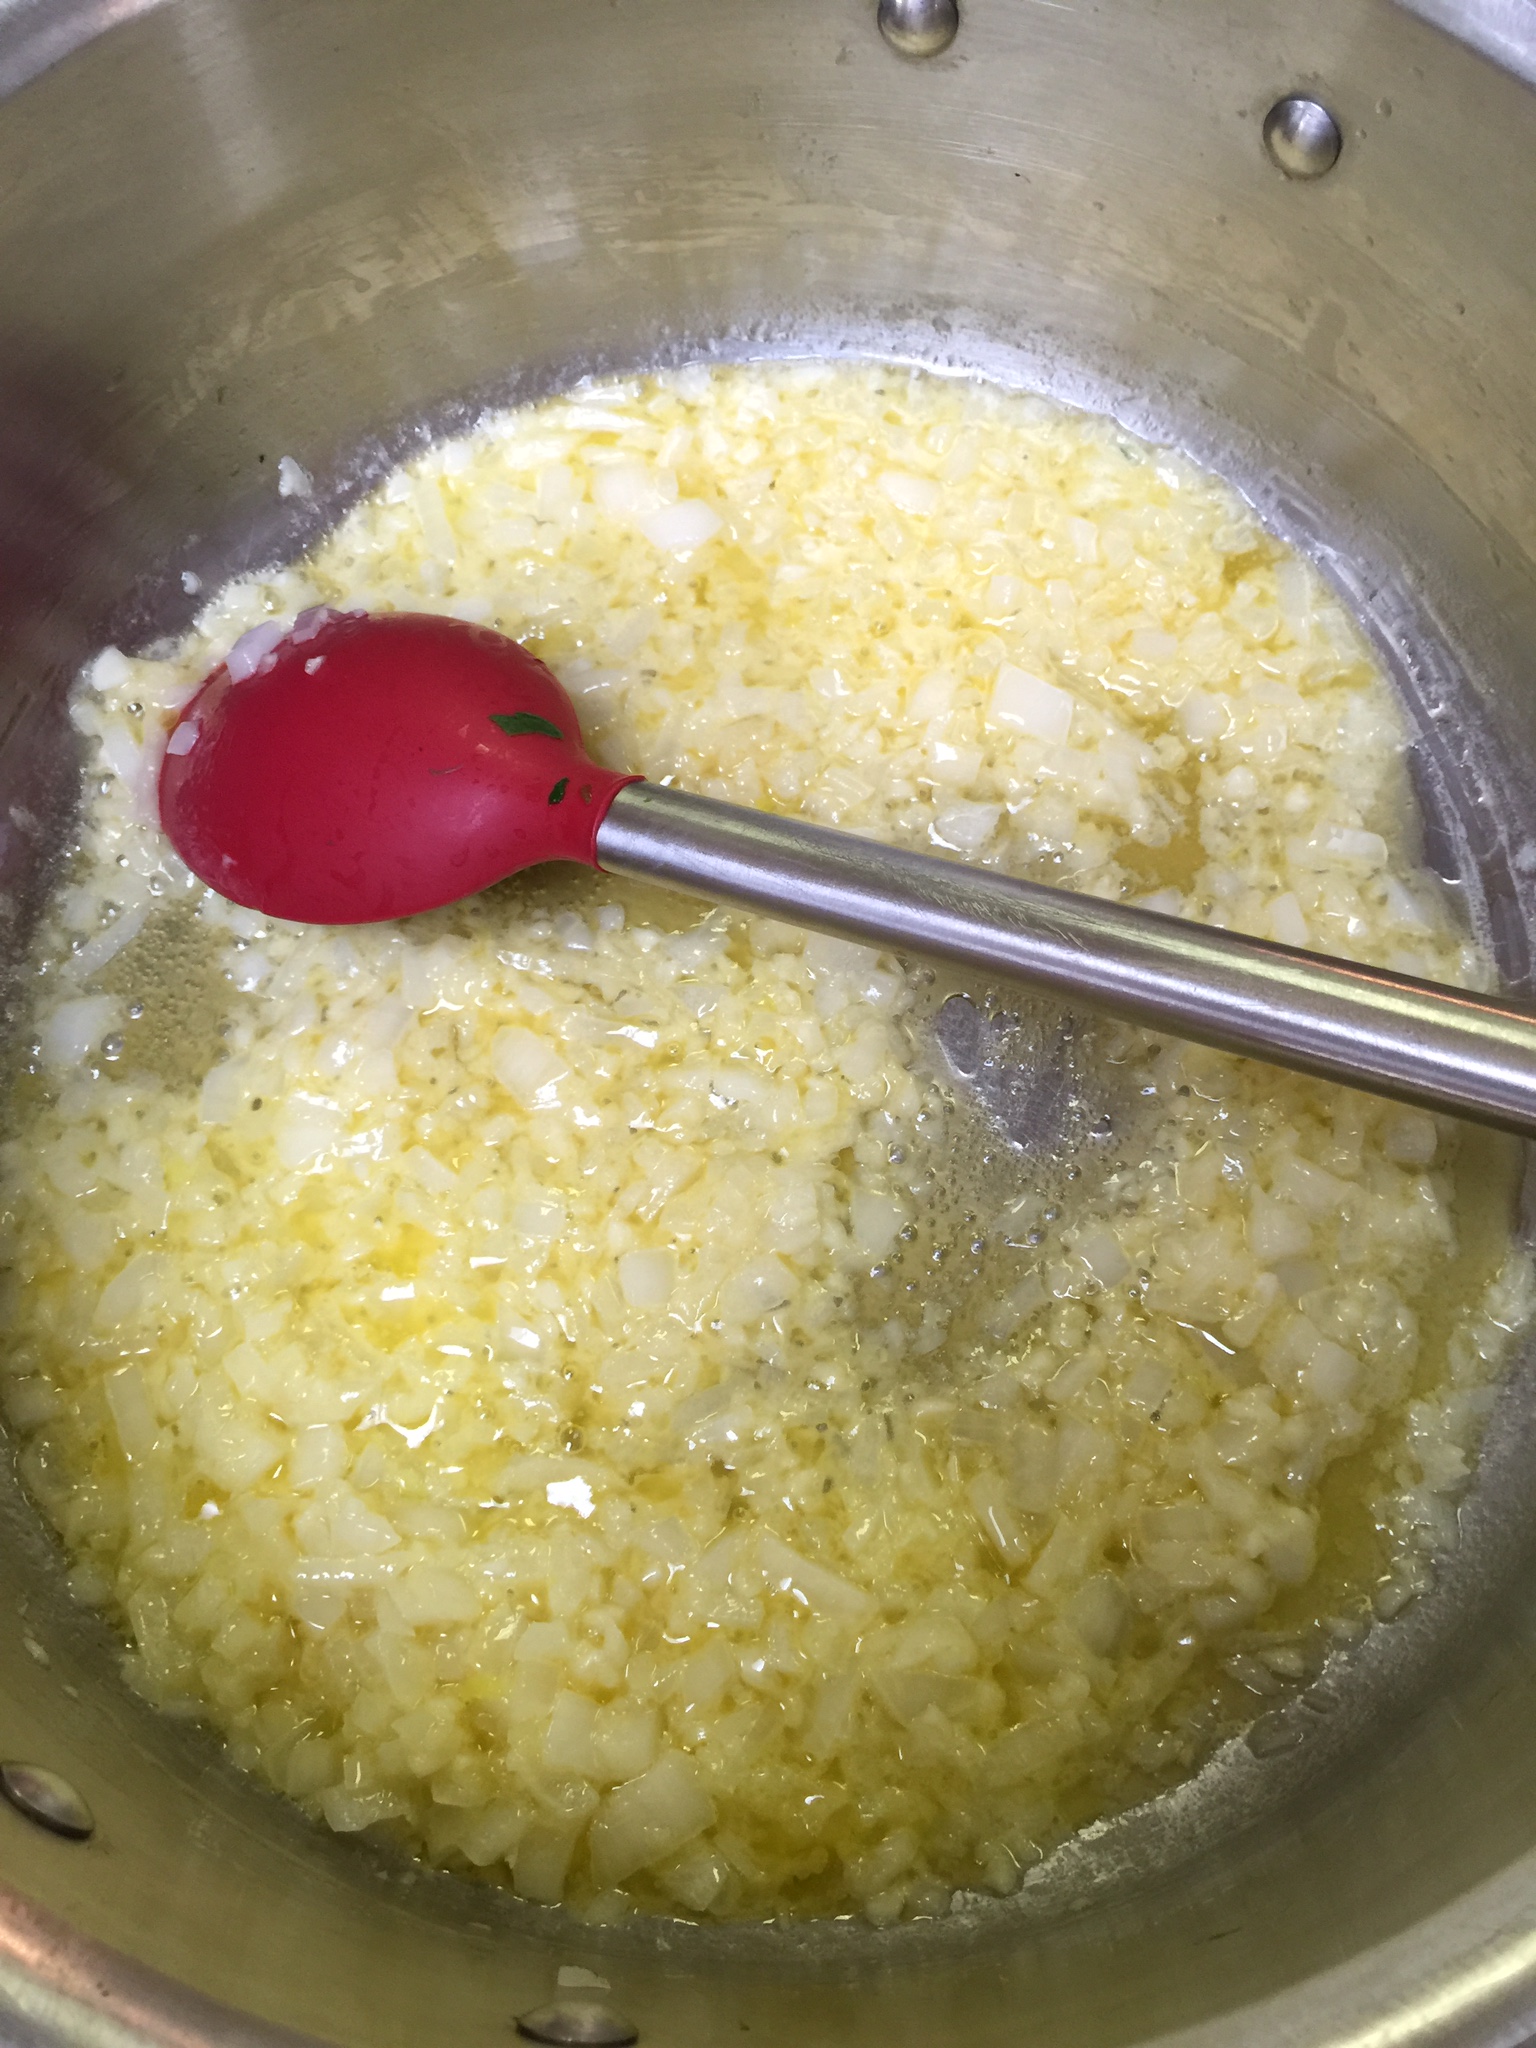
Once your bacon is cooking and you have a nice layer of grease, add your stew beef.  Cook until browned, and then add your onion, pepper and garlic.

cooking-beef-300x225

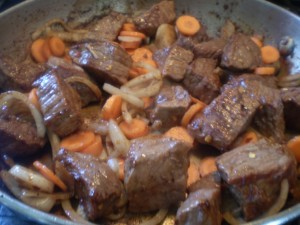
Cook these for about 5 minutes.  Add your remaining ingredients, stir, and bring to a boil.  Once boiling, reduce the heat to low.  Cover and simmer for 3 hours or until you are ready to serve.

spicy-beef-stew_andrew-mccaul

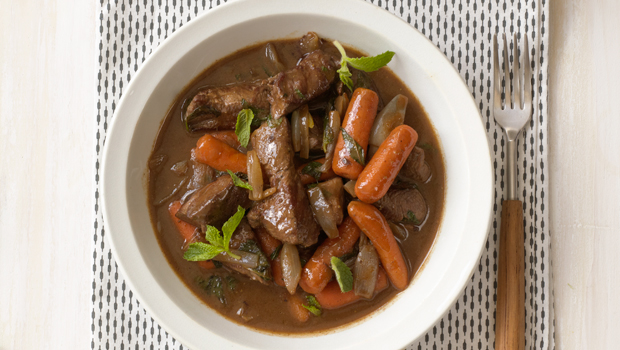
My family prefers their stew runny, almost like a beef soup.

If you are used to a stew with potatoes and a thicker sauce, this will not turn out like that.  If your family likes the thicker stew, dust the top of your stew with just a pinch of xanthan gum.  As it sits and you stir, it will slowly thicken.  This will give you a more stew like consistency.

Enjoy!


Christmas Morning Traditions

large_christmasmorning

It is hard to believe that Christmas is only a week away.  We are all busy preparing for the day, and I have had questions about what to serve for Christmas morning breakfast.  Growing up, we always had the same thing.  We started with grapefruit that my grandfather bought at the produce market.  Then, we moved on to breakfast casserole and either coffee cake or cinnamon roles.  I carried on this tradition with my own family, but need to revamp the pastry portion.

You can always make the breakfast casserole which is a favorite around here!  Check out that recipe here.  You can use any meat…bacon, chorizo, crumbled browned breakfast sausage or grilled links.  They are all delicious.  You can use many breakfast casserole recipes.  Just swap out the milk for cream and do not add any bread.  I promise it will cook just as well.

PB1305H_breakfast-casserole-recipe_s4x3

Now for the pastry!  I have dabbled around with a few recipes, and we have found a winner for a special occasion.  It takes a little time, and is a little different, but it turned out “amazing”, and that quote is coming from the kiddos!  I hope you enjoy it!

Cream Cheese Coffee Cake

Crust:

2 cups almond flour

2 T coconut flour

3 T Swerve granular

6 T butter softened

6 egg white whipped very stiff (you want those mountain tops)

1/4 tsp salt

1 tsp baking powder

1 tsp xanthan gum


Filling:

12 oz cream cheese

3/4 cup Swerve confectioners

1 egg

2 tsp vanilla extract


Topping:

1 1/2 tsp ground cinnamon

1/4 cup Swerve granular

2-3 T melted butter


Instructions:

Preheat oven to 350 degrees.

Combine all your dry crust ingredients:

IMG_5312

Cut in your butter:

IMG_5314

IMG_5315

Meanwhile, beat your egg whites:

IMG_5313

They should be very stiff!

Once beaten, fold in your eggs whites.  Losing the volume is normal as you fold, but be gentle.  You want it even and fluffy.

IMG_5317

Place half of your “dough” in a parchment lined 8×8 pyrex or other baking dish.

Bake for 10 minutes, just until it is slightly firm.

IMG_5316

IMG_5319

To prepare your filling:

Combine your softened cream cheese, vanilla and Swerve. Beat until it is smooth and creamy.

After your crust has baked 10 minutes, remove and let cool for 5 minutes.

Spread your cream cheese filling on top of your crust.

Then add the rest of your “dough” and smooth over the top.

Finally, sprinkle the cinnamon sugar topping over the dough, and drizzle the butter over the top.

IMG_5326

Bake at 350 for 30 to 40 minutes until you have a deep golden brown crust.  It should get dark and crispy.  The “sugar” will caramelize!  YUM!!!!

IMG_5327

Let cool for 30 minutes before serving or it can sit overnight at room temperature.

IMG_5328

Slice and serve!


Just as a note, we will be taking the next two weeks off to spend time with our families.  We wish you each a safe, joyous, and blessed Christmas filled with lasting memories, new family traditions, and most of all, love!  God bless, and Merry Christmas!

Merry_christmas-8


‘Stock’ Pile Your Health Arsenal!

I have started hearing some sounds of fall, football, leaves crunching,squirrels scurrying all across my roof, way too early Christmas commercials, and those raspy sniffly coworkers.

That’s right.

It’s that time of year! 


Dealing with those under-the-weather-friends is similar to most everything else; meaning that the best offense, is a great defense.


Image result for go broncos

Sorry, I had to throw in some football.


One of the absolute best ways to take care of yourself this time of year is to regularly drink grass-fed bone broth. The vitamins, minerals, and overall good health feeling of this wonder drink can really make a difference in your immune system function.

I usually have a solid stock pile of my broth as well bones in my freezer. I have purchased ‘just’ bones before from a grass-fed farmer as well as buffalo bones from Whole Foods. Yes I am that serious about my broth. But more recently, when Cindy and I had our cow butchered, we had them box the bones for us as well. These bones are AMAZING!

Right now, we have enough bones to last us a very long time. Annnddd provide us with ample to share with friends and family that might need help getting over one thing or another.  I love sharing this stuff.  Plus, here in south Texas, we are predicted to have a nice wet fall this year, so really you can’t have too much in your keeping healthy arsenal!


Making broth/stock is SUPER simple, and not at all, labor intensive. The hardest part is finding storage space once you realize how great this stuff makes you feel.


Here is my super simple Bone Broth recipe:

Image result for bone broth

Bone Broth

Ingredients:

  • 3 to 5 pounds grass-fed beef bones (soup bones) and/or knuckle bones
  • ½ cup raw apple cider vinegar (ACV)
  • filtered water
  • 3 celery stalks,
  • 3 carrots, halved
  • 3 onions, quartered
  • Sachet of herbs (parsley, peppercorns, thyme, rosemary, Bay leaf, etc)-you can also omit here and just add to your mug when you drink.

Method:

  1. Roast Bones at 400 for 30 minutes to 1 hour until fragrant
  2. In a large stock or crock pot, place roasted bones, and pour in cool filtered water to cover.  Add your apple cider vinegar.  Do not heat yet.
  3. Allow mixture to rest for 30 minutes to an hour.  This will allow the vinegar to pull the nutrients from bones.
  4. Bring the pot to a boil, and add more water if needed
  5. Reduce to a low simmer, cover, and cook for 24-72 hours – just leave it going!
  6. With about four hours remaining, add the vegetables
  7. During the last 30 minutes of cooking, toss in the herb sachet-or omit and add as you drink.
  8. Remove bones, veggie, and herb sachet (knock out any remaining marrow back into broth)
  9. Pour broth through a strainer or cheese cloth into a glass container

Drink with generous amounts of quality Himalayan or Celtic salt, or use in any recipe calling for broth, stock, or added water.

The broth can be consumed immediately and stored in the fridge up to 5 to 7 days.  You can also store in the freezer up to 6 months.  We like to freeze into ice cubes so we can pop them in a mug to reheat when needed.

When reheating, bring broth back up to boiling for one minute.

Enjoy!


Image result for keep healthy


A Tasty Snack for All Occasions

Family gatherings are so fun, and a great way to pick up new recipes.  At every family event over at Erin’s house her mother would bring these amazing olives.  I finally asked for the recipe and have made them several times now.  Her mom gave us permission to use this recipe in our catalog of many.  They are a great Keto/Paleo appetizer or snack.  Everyone is always looking for snack ideas, and this is a great one you can leave out on the counter after school if you have olive eaters in the house!

IMG_3695

Marinated Olives

2 cans medium to large (not jumbo) black, green, or a mixture of olives (Drained)

2 tsp red wine vinegar

1/2 cup extra-virgin olive oil

8 cloves garlic, minced

2 tsp fresh thyme or 1 tsp dried

4 bay leaves

Directions:

Mix together your oil and vinegar.

IMG_3688

Mince or chop your garlic and thyme.  I really prefer the fresh thyme on these.

IMG_3689

IMG_3691


Add all your spices to your oil mixture and combine well.

IMG_3692


Drain and add your cans of olives.

IMG_3693

These are beautiful and yummy to serve.  The garlic gives them a nice kick.  Bring them to room temperature before serving.  You can also invert the jar occasionally to let the spices cover all the olives.

IMG_3695

We store these in a mason jar for a couple of weeks in the fridge if they last that long.


A Natural Way to Settle a Tummy

We have all been there – you know you’re not sick but your stomach is just… off.

Image result for feeling unwell stomach

I remember when growing up, the go-to would be 7-Up. Not exactly Keto Friendly.


There are a TON of medicinal remedies, and back before being diagnosed with the Big C, I would have reached for the “pink stuff.” But these days I’m trying to be nicer to my insides and make healthier and more natural choices.

Today has been one of those days, and I have been sipping on Ginger Tea. There are MANY varieties that can be found in the coffee and tea aisle, but it is also incredibly easy to make at home.


What you need for a single serving of super simple Ginger Tea:

  • 1 12 cups boiling water
  • 1 12 teaspoons freshly grated or sliced ginger root

Boil your water, add the grated ginger, and let it steep for roughly 10 minutes.

Strain out the ginger, and you are ready to sip!Image result for ginger tea  images


**This is a starting point – adjust the amount of ginger to your taste.


Ginger is great for you, and while for some it can be an acquired taste, it’s ability to settle a tummy is amazing. I absolutely loved ginger ale, but once I cut out sugar, it had to go.


The source of my recent onset of nausea is related to my radiation treatment. I was told that due to the location of the radiated tumor I would likely experience nausea and vertigo. This is all new territory for me! I was extremely lucky to not experience morning sickness, but I have several friends who are dealing with not just morning but all day sickies. Y’all are troopers!! This is NO FUN!  The ginger tea is great for that too though.


I will post more about my treatment in the future. I have completed radiation but have several other balls still in the air about the next steps.


http://dailynaturalremedies.com/10-health-benefits-of-ginger/


Dress Up Your Summer Veggies with Bacon

IMG_0718

Just about everything is better with BACON!  It is definitely a staple in our house.  We can eat it for breakfast, lunch, and dinner!

Here is an example of eating bacon for dinner; one of many ways!  On days when I make my sheets of bacon, I try to make use of my bacon drippings by doing a dish that requires bacon AND oil.

I mean, really, what isn’t satisfyingly delicious when you cook it in bacon grease?

My Bacon Green Beans are a hit with the whole family!

Start with your sheets of bacon.  I usually try to do two to three cookie sheets of bacon at the beginning of the week.  Search for my bacon blog if you missed it!

Bake a foil lined cookie sheet of bacon on 350 to 375 for 15 minutes.  DO NOT discard your bacon drippings!  Please!

IMG_0782


You can keep going with your bacon on the same sheet to get more drippings (and more bacon).

Meanwhile, prepare your ingredients:

Wash and trim about 2 pounds of green beans.  Set aside.

Chop finely, 1 cup of white onion.

Using a garlic press, mince 5-6 cloves of garlic.  I love, love, love my garlic chopper!  You can find one here, and chop all of your cloves at one time!  My favorite kitchen tool!

Squeeze the juice of 1 lemon into a small bowl, discarding seeds.

Chop your bacon, and get your seasonings: crushed red pepper, black pepper, and Celtic or Himalayan salt.  Parmesan cheese if desired.
IMG_0778IMG_0779

Saute your onion and garlic in your bacon drippings until translucent.


IMG_0783IMG_0780

Add your green beans:


IMG_0781Once your green beans are slightly tender, but still crisp, add your bacon, lemon and seasonings.

IMG_0719

End with a sprinkle of parmesan cheese across the top!  I usually do this step on individual plates.

It’s that easy for a gorgeous, colorful, and delicious side that the whole family will enjoy.


To find items that we use in our posts, such as the All Clad sauté pan, the silicone spatulas and spoons, and cookie sheets, check out our new Amazon store here.

Rich and Delicious Creamed Spinach

I don’t know about you, but when we go to a nice steak restaurant, one of our sides is always creamed spinach.  Well, I was determined to duplicate this rich satisfying side dish, and mission accomplished!  Behind my fat bombs, this is my second most requested recipe, and is delicious alongside any meal, but it is our favorite with grass-fed beef!  This dish is good enough for company!


IMG_0790

Ingredients:

Organic Baby Spinach (I used two large containers)

Kerrygold Grass Fed Butter (1/4 to 1/2 stick)

Full Fat Cream Cheese (I package)

Heavy Whipping Cream (1/4 to 1/2 cup)

White Onion (Quartered)

Garlic (4-5 cloves)

Salt and Pepper

Whole Nutmeg


Preparation:

Bring a full pot of water to a boil.  Add spinach and cook for 3 to 5 minutes.  You want it cooked down, but not completely wilted.

IMG_0791

Drain in a colander, and let it sit while you prepare the rest of the ingredients.

IMG_0792


Back in the same pot, melt your butter over medium heat.  I used a half of a Kerrygold brick.  If you are using a regular stick of butter, you will need 1 whole stick.

Add a quarter to a half of a white onion, finely chopped with 4-5 minced garlic cloves, and sauté until translucent.  (We like a bit more onion and garlic which is higher in carbs so take that into account.)

IMG_0793


Turn your heat down to low.  Add your cream cheese cubed and stir well until incorporated with the butter. It may separate slightly and this is okay.  When you add your spinach it will combine well.

IMG_0794

Press all the remaining water out of your spinach.  Dump it out on a cutting board and chop roughly.  Then add it to your butter mixture on the stove.

IMG_0795


Next, add your heavy cream.  This is up to you.  Start with 1/4 cup, and if you want it creamier, add a little at a time.  It will thicken slightly after about 5 minutes over low heat.

IMG_0798


Now, all you have left is your seasoning!  Spinach is amazing with nutmeg, especially freshly grated.  I also add freshly ground Himalayan salt and black pepper.

IMG_0796 IMG_0797

Mix all your seasonings in and let it simmer over low heat for about 5 minutes.  Then serve and enjoy!  It is just as good left over for lunch too!

IMG_0799

Cancer Fighting and Alzheimer’s Preventing Delicious Side Dish

IMG_0687

What do you think when you hear the words “Brussel Sprouts”?

I used to think, “Yuck!”

Now our entire family devours these nutrient dense veggies in just a few seconds.

Believe it or not, Brussel Sprouts are in the cruciferous family and one the healthiest vegetables on the planet.

They are also one of the best vegetables for Cancer and Alzheimer’s prevention containing loads of Vitamin K and Vitamin C.

Check out this link for all the health benefits of Brussel Sprouts:

http://www.whfoods.com/genpage.php?tname=foodspice&dbid=10

So how do I cook these so they are Keto and the kids inhale them?  It is super simple!

I always make these on a day that I cook a lot of bacon for breakfast!


Bacon Brussels

2 lbs Brussel Sprouts

1/2 white onion chopped

4-6 cloves garlic

8-10 pieces of bacon with drippings

Salt and Pepper


Cook a foil lined cookie sheet of bacon on 375 degrees for 15 to 20 minutes.  I can usually cook 10 to 12 large pieces on a sheet.  You can do more batches of bacon to get more drippings if you like.  I did two batches for 2 pounds of Brussels.  This way you have bacon for breakfast, and the rest left over for dinner!

Remove bacon to a paper towel after it is cooked, and leave all drippings on the cookie sheet.

Rinse and drain your Brussel Sprouts in a colander.

IMG_0695

Cut off ends, and throw in the trash.  Quarter the sprouts and place in a large mixing bowl.  These Brussels were huge so I had to cut some of them into eighths.

IMG_0694Dice your onion and peel and mince your garlic.  We like a lot of garlic, but you can adjust to your taste.

IMG_0693Add onion and garlic to your Brussel Sprouts and mix well.

IMG_0692Pour your mixture over your bacon drippings on your cookie sheet and toss to coat.

IMG_0691Add salt and pepper to taste.

IMG_0690IMG_0689Place in the oven at 400 degree for about 15 minutes.

Crumble cooked bacon and toss into the Brussel Sprouts.  Cook an additional 5 minutes, and serve.

IMG_0687YUM!!!

Did she say FAT BOMB?!

This is an example of a savory Fat Bomb and a prime example of my ability to arrange foods. This will not be the last time I say this, Cindy is the chef. 🙂


IMG_4616


Super Simple and Super filling All Natural Pepperoni, Cream Cheese, and olive.


The pepperoni’s are giant! This was not a one bite snack.

IMG_4618(1)

Fat Bombs are basically little bites and pick me ups when you may need a little extra fat in your life. These can be so nice when you are trying to get a million things done and just need a little bit as you are running out the door or are planning on eating a large dinner and just want something small to tie you over after breakfast.


Fat bombs are also great for people transitioning off of a high carb diet where they may have been used to the “5 meals a day” plan or just used to “grazing.”


There are tons of variations of fat bombs and they can be savory and sweet.


We realize we haven’t posted much sweet stuff but we will!


-Erin