Dress Up Your Summer Veggies with Bacon

IMG_0718

Just about everything is better with BACON!  It is definitely a staple in our house.  We can eat it for breakfast, lunch, and dinner!

Here is an example of eating bacon for dinner; one of many ways!  On days when I make my sheets of bacon, I try to make use of my bacon drippings by doing a dish that requires bacon AND oil.

I mean, really, what isn’t satisfyingly delicious when you cook it in bacon grease?

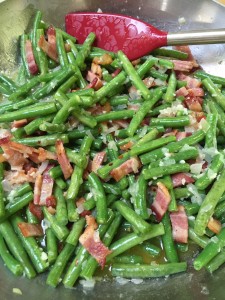
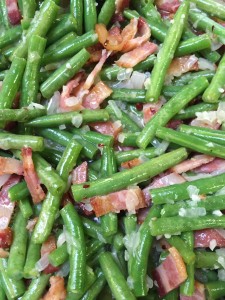
My Bacon Green Beans are a hit with the whole family!

Start with your sheets of bacon.  I usually try to do two to three cookie sheets of bacon at the beginning of the week.  Search for my bacon blog if you missed it!

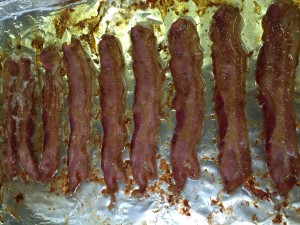
Bake a foil lined cookie sheet of bacon on 350 to 375 for 15 minutes.  DO NOT discard your bacon drippings!  Please!

IMG_0782


You can keep going with your bacon on the same sheet to get more drippings (and more bacon).

Meanwhile, prepare your ingredients:

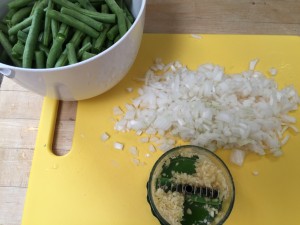
Wash and trim about 2 pounds of green beans.  Set aside.

Chop finely, 1 cup of white onion.

Using a garlic press, mince 5-6 cloves of garlic.  I love, love, love my garlic chopper!  You can find one here, and chop all of your cloves at one time!  My favorite kitchen tool!

Squeeze the juice of 1 lemon into a small bowl, discarding seeds.

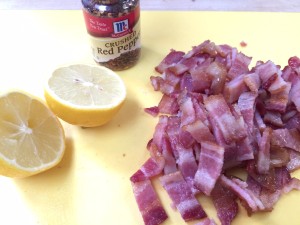
Chop your bacon, and get your seasonings: crushed red pepper, black pepper, and Celtic or Himalayan salt.  Parmesan cheese if desired.
IMG_0778IMG_0779

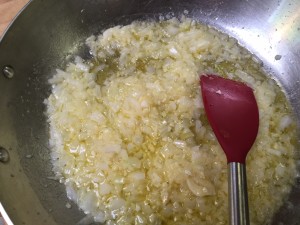
Saute your onion and garlic in your bacon drippings until translucent.


IMG_0783IMG_0780

Add your green beans:


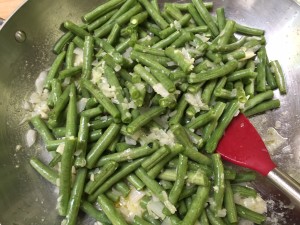
IMG_0781Once your green beans are slightly tender, but still crisp, add your bacon, lemon and seasonings.

IMG_0719

End with a sprinkle of parmesan cheese across the top!  I usually do this step on individual plates.

It’s that easy for a gorgeous, colorful, and delicious side that the whole family will enjoy.


To find items that we use in our posts, such as the All Clad sauté pan, the silicone spatulas and spoons, and cookie sheets, check out our new Amazon store here.
Fall in Love with Your Grandmother’s Cookware

Do you remember those black, HEAVY, naturally non-stick, pots and pans your grandmother or mother used every day for cooking? Do you have these relics gathering dust in your cabinet or even garage? If you do, its time to rethink and reconsider Cast-Iron.

Image result for lodge cast iron skillet


I have eliminated many of my non-stick modern pots and pans and moved to cast iron. The set of non-stick I had were very nice when I received them as a set for our wedding. But, in just over 5 years, those pans were starting to show signs of age, with definite scratches and discoloration on the workhorses in the group. So it was time for them to go.


There is nothing wrong with the non-stick pans per se, especially if you are careful with them, and don’t cook at high temperatures. However, studies have found that over very high heat, 400+, some of the non-sticks may release certain chemicals that are toxic and are known to accumulate in humans. This risk is likely small, due to the limited amount of time many of us cook at temps 400+, but the risk is there, and it’s easy enough to avoid. The more obvious risk comes from ingesting the actual coating, which can happen once it is damaged. The damage occurs from the scratching and banging that comes with the regular use in everyday cooking, cleaning, and putting away. Here are a couple articles about non-stick.

Consumer Reports Q&A

EWG-Environmental Working Group Talks Teflon


So why go back to cast iron?


Naturally non-stick. That means no added chemicals (you have already tossed the vegetable oil and Crisco, right?!?) Before using, “season”, your cast-iron, and in the beginning use a bit extra grass fed butter, ghee, or coconut oil when cooking to build up that layer of natural non-stick coating. Once that layer of seasoning is there, you are set-just don’t use soap and wash it off.


Cast-iron can actually add a beneficial nutrient to the foods you cook: Iron. That means instead of the possibility of leeching harmful chemicals, you leech Iron, a nutrient that many of us are running low on already.


Cast-irons really do not have to be babied or coddled. These guys are tough and can handle basically anything you throw at them or in them.  There is no potential of ingesting the chemical coating if you accidentally scratch it, worst case you may have to re-season, maybe.


Cast-iron is a one and done deal, and in the realm of cookware, highly cost efficient. In fact, as long as you take decent care of them, your grand-kids could possibly be using them one day. This means less to buy and even less to toss. Really, what do you do with a non-stick after its scratched?


Cast-iron pots and pans are universal cookware. Stove top to oven is no problem. We have used several of ours on the grill, and there is nothing more traditional than cast-iron on a camp fire. High heat searing is no problem-even frying. Case in point-Cindy used her grand mother’s cast-iron just last week to make Keto Tots! These guys were amazing, and she will be sharing the recipe soon!


It’s simple when you compare cast-iron to non-stick; no added harmful chemicals, sturdy, heats consistently, can go be used anywhere, can add iron to your diet, affordable, and is a built in arm workout. Win!


The best thing to do for your cast-iron is to keep it way from soap, and make sure to dry it before you put it away.  I own several of the “Lodge” brand pans in various sizes.  If you don’t see them in garage or estate sales you can find them them here and here. Lodge Cast Iron has been around way before many of the non-stick chemicals were even created in a lab, 100+ years.


Lodge-care for your cast iron


Great Side Dish for a Bar-B-Que!

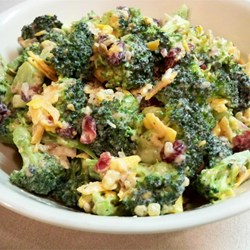
Broccoli Salad

This is one of my favorite side dishes for a Bar-B-Que when you have gone Low-Carb!  Perfect for the Memorial Day holiday and filled with many of our favorite ingredients!

We hope that everyone has a safe, fun weekend filled with laughter, and time spent with loved ones and friends!  Special thanks to all who have served to protect our freedom this Memorial Day!


Bar-B-Que Broccoli Salad

8 Slices of Bacon Cooked and chopped

2 heads of Broccoli (chopped and lightly steamed-emphasis on lightly)

2 cups of Sharp Cheddar Cheese, shredded

1/2 red onion finely chopped

1/2 cup red wine vinegar

1/4 cup xylitol

3 tsp black pepper

1 1/2 tsp salt

1 1/2 cup mayonnaise

2 tsp fresh lemon juice


1.  Cook your bacon and lightly steam your broccoli.  Cool.

2. Mix together your red wine vinegar, xylitol, black pepper, salt, lemon juice, and mayonnaise.  This is your dressing!

3.  Combine your broccoli, cheese, bacon, and onion, and combine together for your salad.

4.  Slowly pour and mix your dressing with your salad, tossing to combine well.  Start with half of your dressing, and add more to your desired taste.  Let it sit in the refrigerator for 2 hours before serving.

5.  Enjoy!

Something Besides Eggs for Breakfast!

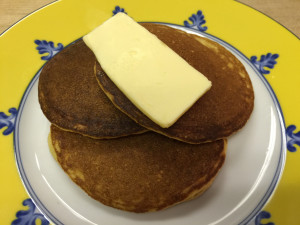
IMG_0870Yep!  You can eat something other than eggs for breakfast!

How about some buttermilk pancakes, for instance?

I know, how is it possible?  Well, when you have three kids begging you for something other than eggs for the 21st day in a row, you get creative!

I searched last Saturday for a recipe to make everyone happy.  I could not find any recipes that suited our family, so I whipped up something very special!  Most of the Paleo or Keto pancake recipes are either flavored or only make a single serving in a skillet.  I wasn’t about to make a recipe 5 times to feed all of us, and they wanted plain old pancakes like Mom used to make.

How did they turn out?  Fabulous!  The children told me that they actually liked them better than the ones I used to make, and I have to admit, they were pretty darned good.

With the long weekend coming up, I thought this an apropos time to hopefully make some other children (or adults) very happy on a relaxing weekend.


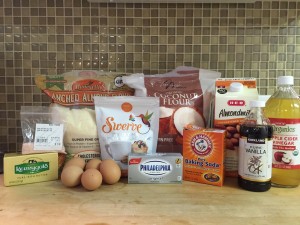
Your Ingredients:

IMG_0872

We have added several of our staple ingredients to our Amazon store, so you can click on the item and have it delivered to your door if you don’t already have it in your pantry.

Buttermilk Pancakes

Yield: 16 (Very Filling) Pancakes

1/2 Cup Coconut Flour

1/2 Cup Almond Flour

5 eggs

2/3 Cup Almond or Coconut Milk mixed with 3/4 tsp Apple Cider Vinegar

1 tsp Vanilla

1/2 tsp Baking Soda

1/4 Cup Swerve Granular

4 Tbsp Butter or Coconut Oil (Melted)

1/4 tsp Sea Salt

4 oz Cream Cheese (Softened)

Directions:

Preheat your griddle to 375 degrees.

1.  Combine your dry ingredients in a large mixing bowl: flours, soda, salt and Swerve.

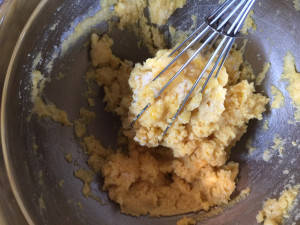
2.  Add your eggs, one at a time, and mix together to form a thick batter:

IMG_0862

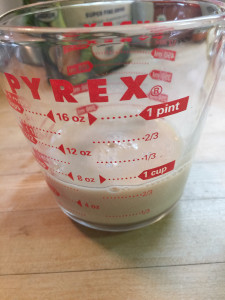
3.  Mix your Almond or Coconut Milk together with your Apple Cider Vinegar:

IMG_0863

4.  Pour this into your flour and egg mixture and mix.

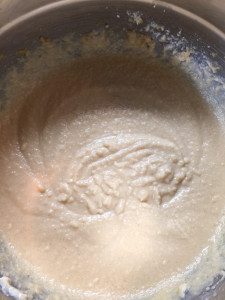
5.  Add your remaining ingredients, and mix well with a hand mixer.

IMG_0864

6. I usually do not have to grease my griddle, but if you prefer to do so, you can use this.

7. I used a 1/4 cup measuring cup to spoon my batter evenly onto the griddle.

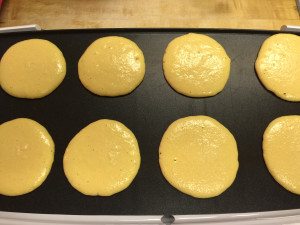
IMG_0865

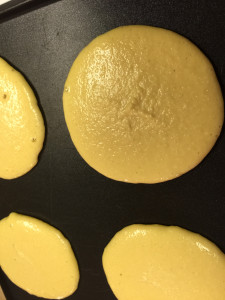
8. Just like regular pancakes, when they start to bubble, flip them over.

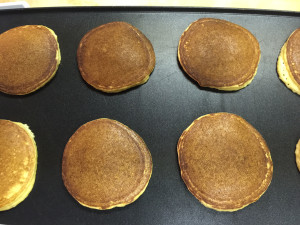
IMG_0866

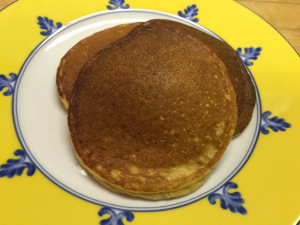
9. They should be a nice golden brown color when they are ready to eat!

IMG_0868

10. I just ate mine with butter, and they were plenty sweet with the added Swerve.  I will allow my children to eat a dab of honey, or pure maple syrup.  A better alternative is an all-natural sugar free syrup that you can buy here.
11. Enjoy!

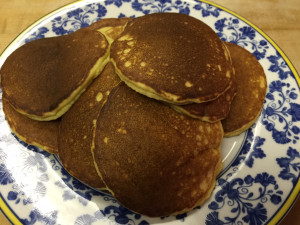
IMG_0869 IMG_0870 IMG_0871Just to give you an idea on portion, we each had three pancakes, and were stuffed!  With the coconut flour and eggs, they are very filling!  One batch fed 5 very hungry people!


Holy Guacamole!

Okay, so guacamole may not be holy, but it’s pretty close in my house.  Avocados are almost the perfect Keto food, and they are loaded with potassium, folate, and vitamin K!

Avocados are ALWAYS in our kitchen!  We eat them on our green salads, and they are excellent in a tomato and mozzarella salad as well.  Our favorite way to eat avocados though, is guacamole!

We eat guacamole on almost anything.  We use is on our eggs in the morning (any kind), salads at lunch, and burgers and fajitas for dinner.  We can’t get enough!

If you missed the post the other day on the cheese crackers, now is the time to scroll down.  This is one of my favorite tricks!  We love the cheese crackers to dip in the guacamole!

It is a super easy recipe to make too!

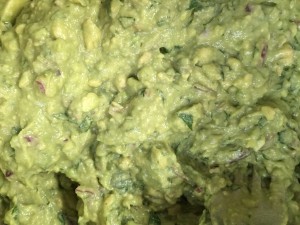
IMG_0856

Guacomole

3-4 large avocados

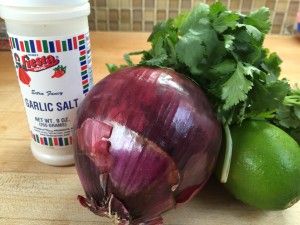
1/2 bunch cilantro

1/4 red onion

juice of 1 lemon

garlic salt to taste


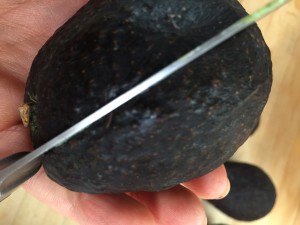
It took me many years to discover the best way to scoop an avocado.  Now that we eat them daily, I have the perfect tip for you.

IMG_0851

Slice the avocado lengthwise.

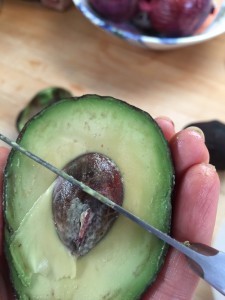
IMG_0852

Once open, chop down on the seed, twist and remove.

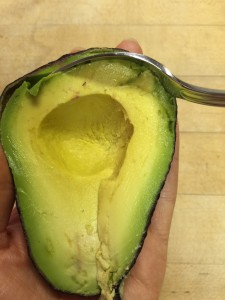
IMG_0859

Using a serving spoon, scoop the meat out of the skin.

Now you ready to get your ingredients together!

IMG_0854

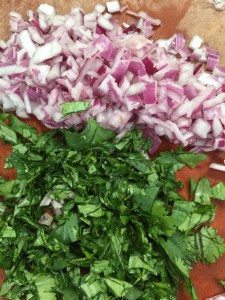
Chop your onion and cilantro finely.

IMG_0855

Using a lemon/lime juicer, squeeze all the juice out of your lime.

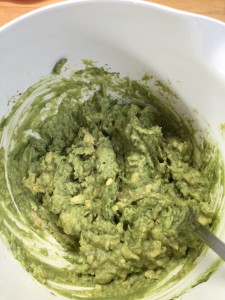
Mix everything together and sprinkle with garlic salt.  Taste, and add more if needed.

IMG_0853


YUM!!!!

IMG_0857

One Stop Keto Shop

Daily, we are asked about what we use or where we purchased something. Be it information or a cooking gadget, often times we refer to Amazon. Due to this, we decided to put some of our favorite items together and create:


Posted by Alex Falcone on Wed, Apr 17, 2013 at 2:58 PM

The Sweet Life Sugar Free Amazon Shop


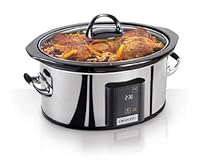
We want our store to be an excellent resource for books, vitamins, and basically everything else that doesn’t need to be refrigerated. We have books listed that vary from history, to science, some that border on beach reads, and of course, cookbooks. As of now, we have several items that you will find in our own kitchens and the kitchens of our Keto dreams (hello-programmable touchscreen crock pot.)

Crock-Pot Programmable Touchscreen Slow Cooker SCVT650-PS, 6.5-Quart, Silver
We will continue to add books, tools, pantry items, and other miscellaneous products to the store as we fall in love with them.

Please take a moment and click through the store. Every book and most products listed, we have read, used, or have come recommended to us from highly trusted sources. In the coming days, we will also be adding in supplements.
We will try to link ingredients and tools that can be found on Amazon directly in our posts, but we have a tab up and ready that will direct you straight to the store!
If you have questions or would like a suggestion please email or send us a message, and we will get back to you!

I Want Crackers!

That’s what I heard on Friday!  My kids wanted crackers, and honestly it sounded pretty good to me too.  What to do when you want a high-carb snack on a low-carb diet?  Get creative!

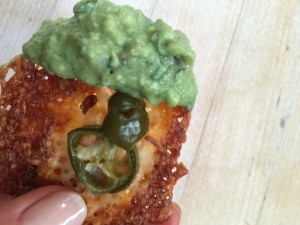
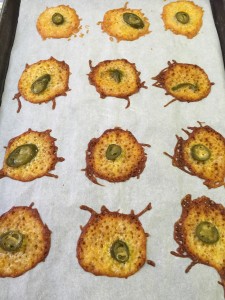
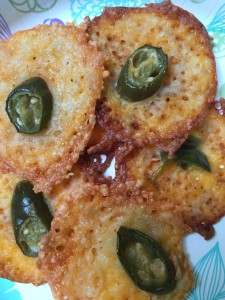
We were already planning on having fajitas, minus the tortilla, for dinner which meant guacamole was on the menu. What is better than plain old guacamole?  Guacamole with cheese!  What a way to Keto up guacamole – cheese, cheese, and more cheese!  And, maybe some jalapenos!

This time of year, with the end of school, planning summer vacations, packing for camps, attending recitals, baseball games, graduations, ceremonies, parties, and planning fundraisers, (Whew – makes me tired just typing about it!) we are all exhausted and out of time!  I promise this is easy, and look how delicious!!!!

IMG_0857


Cheese Crackers

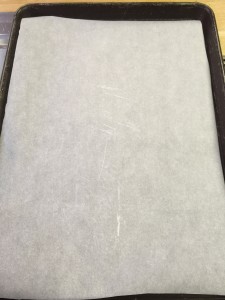
First line a cookie sheet with Parchment Paper – Very Important!

IMG_0845

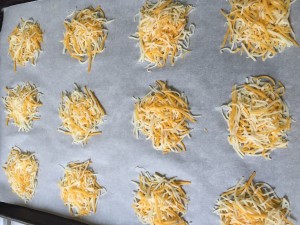
Start with shredded cheese.  Any kind will work – whether you buy it shredded or shred it finely yourself.  I used a Cheddar and Monterey Jack blend. Use your favorite!
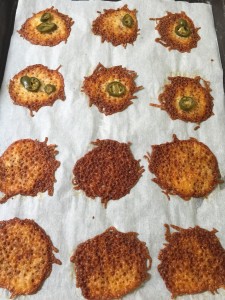
Make little circles of cheese and press down so it forms a “cheese pancake”.  Don’t make them too thick or they will not crisp.

IMG_0847

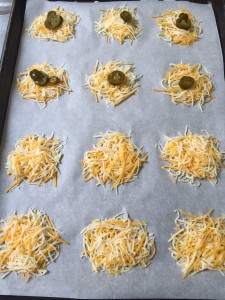
If you want a little spice, add a sliced jalapeño to the middle, and press into the cheese.

IMG_0848

That’s it!  Bake in the oven at 350 degrees for 10 minutes.

IMG_0846

IMG_0850


Allow the “crackers” to cool so they crisp nicely.  Then, enjoy your carb-free snack with your favorite dip or eat them plain!  I made two cookie sheets, and they were devoured before dinner!

IMG_0849


Don’t Forget to Drink Your Vitamins

This may not seem like the most likely post for mid-May in South Texas.

But, with the rainy weather, May being an impossibly busy month, and my recent cough due to sleep deprivation and too much stress, I grabbed from my stash of Bone Broth in the freezer to start this crazy work week off on the right foot.


So many more people are going the all-natural route in trying to head off the sickies, and one of the easiest and most comforting ways to do so is with a large cup of salted bone broth. I can tell you, this stuff is MAGIC in a cup.

https://cdn0.vox-cdn.com/uploads/chorus_asset/file/3358286/Bone-Broth.0.jpg

I got the idea in my head that I wanted to make broth right after getting back from Colorado last year and reading about this amazing stuff. I called around to several grass-fed ranchers to inquire about purchasing bones. You would have thought I was asking to buy a white unicorn!

Finally, I spoke with a simply lovely woman who informed me that she would be having a one-year-old calf butchered for her family in the next month and would happily sell me the bones. No one had ever asked them for bones before.

During this month, while I waited for my calf bones, I went to Whole Foods and purchased a bison femur bone (They did not have any beef bones in stock). So happy I made that first batch!  After that, we were completely hooked on broth.

Mrs. GrassFedCattleRancher called me back when the calf was ready, and we chatted for a while on the phone.  She was curious about what I was doing with the bones, and we set up a time for me to collect my stash.

That Saturday, we set off on the bone gathering pilgrimage.  When I got there, Mrs. GrassFedCattleRancher was working on her very first batch of Bone Broth. She told me after our conversation she decided to give it a whirl. When we chatted I mentioned the benefits that I had directly experienced, which included happier tummy, happier husband’s tummy, more energy, and improved skin. My skin looked like I had aged 25 years after 6 rounds of chemo.

Those bones made the best broth! After a few batches of broth, I wanted to make sure that we did not run out. I called Mrs. GrassFedCattleRancher and set up another pickup. This time her daughter would meet me in town. When I met her daughter, she literally thanked me. She told me her parents are totally amazed at what the broth has done for them. In fact ,her father, who had suffered from arthritis for decades is no longer taking his daily handful of Advil. He drinks bone broth every day, and believes it has completely changed him.

It was the best feeling to know that I had turned this couple onto bone broth, and that he was no longer putting a handful of Advil through his body every day!

Just type in “Benefits of Bone Broth” into Google and you will get:

About 469,000 results (0.27 seconds) 

Here is my super simple Bone Broth recipe:


Image result for bone broth


Bone Broth

Ingredients:

  • 3 to 5 pounds grass-fed beef bones (soup bones) and/or knuckle bone
  • ½ cup raw apple cider vinegar (ACV)
  • filtered water
  • 3 celery stalks,
  • 3 carrots, halved
  • 3 onions, quartered
  • Sachet of herbs (parsley, peppercorns, thyme, rosemary, Bay leaf, etc)

Method:

  1. Roast Bones at 400 for 30 minutes to 1 hour until fragrant
  2. In a large stock or crock pot place roasted bones, and pour in cool filtered water to cover,  Add your apple cider vinegar.  Do not heat yet.
  3. Allow mixture to rest for 30 minutes to an hour.  This will allow the vinegar to pull the nutrients from bones.
  4. Bring the pot to a boil, and add more water if needed
  5. Reduce to a low simmer, cover, and cook for 24-72 hours – just leave it going!
  6. With about four hours remaining, add the vegetables
  7. During the last 30 minutes of cooking, toss in the herb sachet
  8. Remove bones, veggie, and herb sachet (knock out any remaining marrow back into broth)
  9. Pour broth through a strainer or cheese cloth into a glass container

Drink with generous amounts of quality Himalayan or Celtic salt, or use in any recipe calling for broth, stock, or added water.

The broth can be consumed immediately and stored in the fridge up to 5 to 7 days.  You can also store in the freezer up to 6 months.  We like to freeze into ice cubes so we can pop them in a mug to reheat when needed.

When reheating, bring broth back up to boiling for one minute.  Enjoy!


How Can Keto Help You?

Happy Alive

As a follow up from Erin’s emotional post on her Cancer survival, I thought this article apropos to post.  Erin gives so much credit to her survival of Cancer and continued remission to the Ketogenic diet.  Erin also did traditional therapy, but the results were much faster because of Keto.  So fast, in fact, that her doctor asked her what she was doing in addition to traditional therapy!  We often wonder if Keto could have cured it all, but at 31, she needed to do everything humanly possible to get that disease as far away as possible – forever!  So, we are definitely not saying to avoid traditional therapy, but we are saying that you can help yourself move towards faster healing by eliminating sugar from your diet because sugar feeds Cancer!  As you will read in the article, a majority of Cancers have been proven to be metabolic diseases.  All are not simply genetic, or a case of bad luck, as so many of us have been told and believed for quite some time.

How are metabolic diseases treated?  Answer: Diet

If you have not already read our page entitled, “What is a Ketogenic Diet?” I encourage you to do so.  While we often speak to Cancer, the Ketogenic Diet can be used to treat many other diseases and illnesses, and help you live a stronger, healthier and more fulfilled life.  For instance, it reversed my pre-diabetic status, put my PolyCystic Ovarian Syndrome symptoms at bay, and alleviated every bit of lower back pain I had from an injury I sustained while training for a marathon several years ago when I ruptured a disk.

This article is excellent in explaining how great the Keto diet is for most Cancers, and why we don’t hear more about it (hint…$$$).

I also encourage you to do your own research or talk to your doctor about how this type of lifestyle might be able to help you with your own ailments or even just living a healthier lifestyle.  I will tell you; I have never felt better, been stronger, or had clearer skin in my entire life!  I just wish I had learned about it sooner than a year and a half ago.  I hope that it can help you too!  Let us know how we can help you!

Posted with Love,

Cindy

From examiner.com:

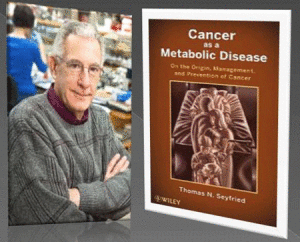
In an exclusive interview, Dr. Seyfried discussed why the ketogenic diet has not been embraced by the medical community to treat cancer despite its proven track record both clinically and anecdotally.

“The reason why the ketogenic diet is not being prescribed to treat cancer is purely economical,” said Dr. Seyfried, author of Cancer as a Metabolic Disease. “Cancer is big business. There are more people making a living off cancer than there are dying of it.”

http://www.examiner.com/article/low-carb-ketogenic-diet-beats-chemo-for-most-cancers-says-dr-thomas-seyfried

cancer-as-metabolic-disease

Thank you, Cancer

I learned that I am still cancer free today!


I endured that lovely PET/CT scan that I talked a little about in my last cancer post. The results are in and got the all clear. Ahhhhhhhh…

Door of the tiny room, guess what's radiating-me

Door of the tiny room, guess what’s radiating-me

Really?! Inside the tiny room, an O Magazine from 2011 and is the Christmas edition its either this or AARP. sheesh

Really?! Inside the tiny room, an O Magazine from 2011, the Christmas edition. It’s either this or an AARP mag.


I am still learning so many things about myself and about this disease. I have grown and learned so much in the last almost two years. This is why I have decided to tell cancer:

Thank you.

I have to say, you are one Hell of a teacher.


Here are a few things you have done for me:

Giving me the nerve to quit a job I hated.

Making me truly healthier than I ever have been before or even cared about being. (Yay Keto!)

Teaching me to appreciate my daughter’s shoes on the wrong feet. And how, no matter what I try, her hair is going to look like she is in the middle of a tornado.

To hug as much as possible.

That all birthdays are kinda a big deal.

Laughter can get you through pretty much anything.

To be okay with tears, both the happy and sad.

How great it is to have super short hair.

To try to never say again, “If it were me I would…” especially if I have never experienced what the person is going through.

How breast implants have their pros and cons.

For moving me to Colorado, and allowing me to experience a “real” winter complete with negative temperatures and regular snow.

Now knowing that I have the best family, both blood and chosen, on this planet.

Deepening my faith.

Solidifying the fact that through thick or thin, sickness and in health, richer or poorer, long curls or bald, my husband loves me.

This list could go for miles…


Today, I am more confident than I have ever been. I now know what it takes to get through something like cancer. More often than not, I have to rely on the fact that I decided to live, and if that meant certain things had to be done, then I had one choice: do them.


Anyway, while this post may sound all sunshiney and rainbows, I can definitively state, Cancer, is not. There have been buckets of tears, pleas to God, decisions made that can never be changed, time stolen, and countless scars added.


I think the largest sucker punch I ever received was when I was told my diagnosis; Breast Cancer. But then to hear stage 4, there are no words. I remember looking at the little girl that was sitting on the couch, and prayed that she would remember me. Somehow telling people I had cancer, often felt almost as hard as the treatment. I literally had to tell my dad that I had the same disease that took his mother.


But, I am still here to celebrate the light on the other side of that tunnel, and that is what I am choosing to do today.


Everything happens and is given to us for a reason. (Sorry for the cliche.) I honestly believe that what I have gone through was something placed in my path for a purpose. Today, I have no idea what that reason is or was, but hopefully one day I will.  There is no trial or person that crosses your path from whom you cannot learn. I guess cancer taught me that too…


lastchemo.jpg

Our selfie after my last round of chemo on Christmas Eve 2013


Thank you cancer for the lessons.  Just one last thing, you are not welcome to come back.

« Older Entries Recent Entries »